Cooking Tips · Ingredients

Nut and Seed Oils

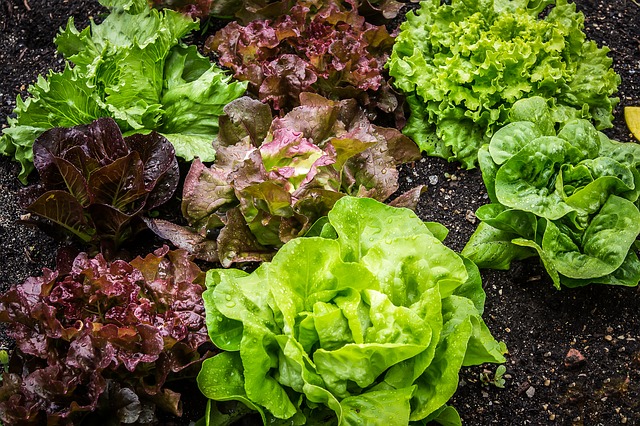
I am teaching a class on how to cook with all those wonderful summer berries – both sweet and savory dishes. One of the recipes is for a Strawberry & Mango Salad with a Champagne Vinaigrette. The latter is made with walnut oil. Walnut oil is only one of a myriad of nut & seed oils and I wonder how many of you use any of them. In this Cooking Tip, I will tell you about some of these delicious oils. I will discuss best uses for the different types as well as their respective smoke points. The lower the smoke point, the less appropriate it is for high heat cooking.

Nut and seed oils are used mostly for flavor. They are considered seasoning oils rather than cooking oils. Some can handle high heats; some cannot. If they are used in hot dishes, they are usually added at the last minute. Most nut and seed oils do not have a long shelf life and so should be purchased in small amounts. They need to be stored in a dark, cool place. Many should be refrigerated.

Walnut
This is a topaz colored oil with a rich/nutty flavor. The best walnut oil is said to be made from walnuts from the Périgord and Dordogne regions in France. As with most of these oils, it does not have a long shelf life and should be kept in a cool, dark place. Some recommend against putting it in the refrigerator as the cold could cause a deterioration in flavor. Not all agree with this, though.

It is wonderful in salad dressings (as in my recipe) but may be used in baking, especially if the item also contains walnuts. It is also nice with poultry, fish or veggies.

Smoke point
Unrefined – 320°F
Semi-refined – 400°F

Almond
This is oil is made from sweet almonds and is pale in color. It is primarily used in baking and confectionary. If heated gently with slivered almonds, it is great to serve with fish or green veggies.

Smoke point – 420°F

Hazelnut
This is a very richly flavored oil that is produced mainly in France. It is paired with very good vinegars for salad dressings or as a marinade for fish/poultry. Its delicate flavor is lost when heated but it can be whisked into a sauce at the very last minute. It can also be used in baked goods in combination with hazelnuts.

Smoke point – 430°F

Peanut
Although peanuts are actually a legume and not a nut, I will list it here. Since it is almost tasteless and usually has a high smoke point, it is good for more general use such as in salads, cooking and frying.

The cold pressed variety has a mild peanut flavor that is good with fruit-flavored vinegars for salad dressings. It also has a lower smoke point then refined peanut oil.

Smoke point
Unrefined — 320°F
Refined – 440-450°F

Pumpkin seed
This oil is either dark brown or green in color and has a pleasant flavor of toasted pumpkin seeds. It is popular in Austria, where most of it is produced. It is used as a last minute seasoning for steamed veggies or fish.

Smoke point — 320°F or less

Sesame oil
All sesame oils are aromatic and the most common are able to withstand high temperatures.

There are three varieties.

European sesame oil is cold-pressed and is light in color and nutty in flavor.

The Asian variety is made from toasted sesame seeds and is darker with a more pronounced flavor.

Middle Eastern sesame oil is lighter in flavor than Asian and has a deep golden color.

Smoke point
Unrefined — 350°F
Semi-refined – 450°F

Pistachio
This oil has a beautiful green color and is usually used in cookies, cake and ice cream.

Smoke point – 250°F

Pecan
Pecan oil is light and mild and is great in baked goods and in dressings, sauces and marinades.

Smoke point – 470°F

Macadamia nut
This oil is very light in color with a mild, buttery taste.

Smoke point – 390°F

I took a look at my regular supermarkets and, without resorting to online sources or specialty stores, I could easily find peanut, sesame, avocado and walnut oils. A couple of stores carried almond oil and occasionally macadamia and pumpkin oil. What can you find in your stores? Let me know.

Even though I could find these oils, not all of them were unrefined. Unrefined oils are less processed and thus, have a fuller flavor and, according to some, more of the healthy antioxidants we seek. However, this also means their smoke point is lower. The choice is up to you.

If you have never tried a nut oil, I encourage you to do so. They are a very nice addition to your culinary arsenal!

Cooking Tips · Ingredients · Techniques

Pesto — make it your own!

I was making sandwiches for lunch the other day and wanted something different. Off to the freezer I go where I found cubes of three kinds of frozen pesto – classic Genovese pesto, basil pesto with manchego cheese and sun-dried tomato pesto. Out came the latter, which I then mixed with grilled and chopped red onion & mayo. I proceeded with spreading that on some nice bread, topping with ham and grated Parrano cheese, brushing a bit of olive oil on the outside of the bread and finishing the sandwiches off on my stovetop grill. Very yummy if I do say so myself. That got me thinking that Pesto might be a good topic for a Cooking Tip.

Pesto is such a delicious sauce and requires no cooking. Classic pesto (aka Genovese pesto) is made from fresh basil, pine nuts, Parmesan cheese, garlic and olive oil. Traditionally, it is made in a mortar and pestle although modern cooks tend to use a food processor or blender. The different methods give different results. The mortar/pestle will give you a coarser pesto with a fresher basil flavor where as the food processor results in a finer texture with a less fresh (but still yummy) flavor.

There are many different recipes for classic pesto. Although they all have the same basic ingredients, they may use different ratios of ingredients. I encourage you to try different recipes until you find the one (or ones) you like. Techniques will vary, too. Some will have you put all the ingredients in the blender (or food processor) at once, blend and finish with seasoning with salt to taste. Others will have you blend all the solid ingredients to a paste and then stream in the olive oil to the desired consistency and ending with salt to taste. Others will have you hold off on the cheese, only adding it just before serving. Another method is to start by grinding the garlic and salt to a paste followed by the pine nuts and grinding again. Then, basil leaves are pounded into the mixture. Cheese is next and it is finished by drizzling in the olive oil as desired.

Some professionals recommend blanching the basil leaves before using to help keep the color as green as possible. The blanching supposedly deactivates the enzymes that cause the basil to turn brown. Testing by TheKitchn.com did show this to be true but there was a downside – the pesto made with blanched basil tasted less fresh with less basil flavor.

SeriousEats.com did a different type of testing. They made pesto with three variations. The first was made classically with fresh basil using a mortar/pestle. The second used fresh basil but made in a mini food processor. The third was also made in the mini processor but rather than fresh basil, they used basil that had been frozen and then defrosted. The theory for this latter technique was that freezing leads to cell rupture thereby releasing more flavor into the pesto. Their interpretation of the results was that the classical method produced the best pesto – very creamy with the brightest flavor. They thought the pesto made with the fresh basil in the mini processor was the worst – gritty texture with flavor that was too mild. The final batch – made with frozen basil and the mini processor – fell in the middle. It did have a nice creamy texture and improved flavor over batch #2. However, they still preferred the classic approach. They did conclude, though, that if you do not want to go the mortar/pestle route, at least throw the basil in the freezer before putting it in the processor.

Find your preferred technique and then mix up the ingredients. Use different herbs (cilantro, parsley, arugula, spinach, mint or a combination) or swap out the pine nuts for almonds, hazelnuts, pecans, pistachios or walnuts. You could also vary the cheese from Parmesan to another hard cheese such as pecorino, asiago or manchego. Add some citrus for a bit of zip.

How about that sun-dried tomato pesto I used in my sandwich? It does have some of the classic ingredients (basil, garlic, pine nuts, Parmesan, olive oil) but adds roasted red pepper, sun-dried tomatoes, fresh tomatoes, tomato paste and chili powder.

You may store your homemade pesto in the refrigerator. Just put it in the smallest container possible, pack it down to eliminate air pockets and either pour a thin layer of olive oil over it or put a piece of plastic wrap directly on the pesto before covering the container. It should keep in your refrigerator for up to a week. Or, do as I do. Spray an ice cube tray with nonstick spray, spoon the pesto into the compartments and freeze. Once frozen, you can remove from the ice cube tray and store either in a freezer bag or other freezer-safe container. You may lose some of the vibrant green color but I think that is a fair trade-off for always having homemade pesto at your fingertips.

Rarely does one make pesto as an end in itself. It is always an accompaniment to something else. The most common is as a pasta sauce, usually thinned out a bit with the pasta water. How about spreading it on a sandwich or on a pizza crust? Dollop it on your grilled chicken breast. It is classic served with potato gnocchi.

You will note that I did not give you any one recipe. That is because I think (unlike many culinary professionals) that there is not just one way to do things or one recipe that is the best. You need to find what is best for you. That depends on your taste, your kitchen equipment, your available time, your budget for ingredients as well as your interest in simple versus more complex techniques. Find what works for you and then branch out and experiment. Have fun and realize that there do not have to be so many hard and fast rules in cooking!

Cooking Tips · Ingredients

Mustard — Love it or Hate it?

Mustard is one of those ingredients of which I am not a fan. I use it in cooking but refrain but spreading it on a sandwich, a burger, etc. This Cooking Tip is for those of you who (like my husband) love mustard. Real mustard aficionados may want to visit the National Mustard Museum in Middleton, Wisconsin. It boasts having “more than 6,090 mustards from all 50 states and more than 70 countries.”

Mustard is made from ground mustard seeds that are mixed with liquid. Different types of mustard seeds yield different levels of spice. Yellow seeds are the mildest with brown and black having a higher spice level. The seeds on their own really have no heat; it is only when they are combined with liquid that the enzymes present in the seeds help to release the compounds that account for the heat of mustard. The more acidic the liquid, the slower this reaction occurs resulting in a longer-lasting heat. This is why mustards made with vinegar hold their heat whereas ones made with water lose their pungency more quickly. Even the temperature of the water affects the flavor. Hot water tends to deactivate the enzymes and break down some of the heat compounds. This is why the mildest mustard you can buy is that made from yellow seeds and abundant vinegar. On the other end of the heat scale is mustard made with brown or black seeds and cold water.

Here are a few of the mustard varieties that you may see on your supermarket shelves.

Yellow mustard – made from yellow mustard seeds, this variety is mild rather than spicy. It is what we think of when we grab for that American-style mustard. Its yellow color comes from the mustard seeds as well as the addition of turmeric. The liquid used is a mixture of vinegar and water. Although not very hot, its flavor still has a sharp note. It is a favorite for topping a burger or hotdog.

Brown mustard – made from the small and hotter brown mustard seeds and less vinegar than the yellow variety. It is more assertive and spicier as well as being more coarse (due to leaving the bran on the seeds). At times, other spices such as cinnamon, ginger and nutmeg are added. Because of its full flavor, it stands up well to meats such as pastrami, roast beef and sausages, earning it the name “Deli” mustard.

Dijon mustard – this variety was first made in 1865 in Dijon, France. It is made from the hotter brown mustard seeds and originally the liquid was “verjuice”, an acidic juice made from unripe grapes. Today, low acidity liquids such as white wine are used. Both the brown seeds and the lower acidity result in a strong and sharp flavor. Because of its smooth texture, it is a favorite for salad dressings or creamy sauces. It is considered a medium-hot mustard.

Whole-Grain mustard – also known as Coarse mustard. The seeds are only ground enough to make a paste yet leave a coarse texture with bits of mustard seeds. The different brands will have varying heat levels.

Honey mustard
– a mixture of honey and mustard, usually on a one-to-one ratio. The mustard is generally of the milder, yellow variety. Because its flavor is on the sweet side, it is often served as a dipping sauce.

Hot mustard – the high heat level comes from using brown or black seeds along with cold water. Chinese hot mustard is of this variety.

English mustard – this is really just a type of Hot mustard. The one we usually see is Coleman’s, which is made from a mixture of yellow and brown mustard seeds. By not using vinegar, the goal is for an increased heat level. However, since it uses both yellow and brown seeds, it is not quite as hot as Chinese mustard.

German mustard – these mustards cannot be put into one category. Rather, they range from sweet to spicy and from fine to coarse. Some also add other ingredients such as horseradish.

Beer mustard
– in this type of mustard, beer is the typical liquid although vinegar may be added. Since there is less acid, the heat level is significant. The flavor of the beer can vary from mild to strong depending on which beer is used. Similarly, Spirit mustards use spirits rather than beer although vinegar is typically also added. Whiskey and bourbon are common.

There are also many creative variations although they are certainly not as common on our supermarket shelves. These include mustards that use wines other than white wine, mustards flavored with horseradish, sriracha & balsamic vinegar. Other sweet mustards such as Pecan/Honey & Brown Sugar are also made.

Although mustards made with acidic liquids retain their punch longer than those made with water, all mustards will lose some of the pungency over time. Therefore, buy it in small quantities and store it in the refrigerator once opened.

If you do not think you like mustard, perhaps this guide will help you find a mustard you like. But, then again, if you are like me, none will make it onto my bratwurst!


Cooking Tips · Ingredients

40,000 Varieties of Rice

A while ago I wrote a short Cooking Tip about rice. In that Tip, I discussed the different varieties in terms of grain size. In this Tip, I would like to expand on what I wrote previously. According to SeriousEats.com, there are over 40,000 varieties of rice. I don’t know about you but I cannot imagine that. We will only cover a very small number of these types.

To recap on grain size, rice comes in short-, medium- and long-grain. Short grain means each kernel is only slightly longer than it is wide. Examples include sushi rice as well as packages just termed “short grain”. Medium-grain rice is about two times as long as it is wide. Examples include Arborio and Valencia. Long grain rice is three to four times longer than it is wide. Jasmine and Basmati are in this category.

Another point to understand is that rice contains two kinds of starches – amylose and amylopectin. Different varieties contain different ratios of these starches and that leads to a different result when cooked.

A higher proportion of amylopectin (as found in short and medium grain rice) means that the rice softens more completely and thickens sauces better. The grains have a greater tendency to cling together and make rice sticky when cooked. This makes them great for risotto, rice pudding or sticky rice.

If amylopectin is low and amylose high (as in long grain rice), each cooked rice grain is dry and fluffy and remains separate. This is a perfect type of rice to use in pilafs, fried rice or as a side dish.

Here is a list of just a few rice varieties that are available.

You might just read Long Grain rice on the package at your supermarket. It is probably what most people have in their pantries and can be bought in both white and brown.

Basmati rice is the “go to” rice in Indian and Middle Eastern cuisine. More than 70% of the world’s supply of this rice comes from India. It is very fragrant with a somewhat nutty flavor. Being a long-grain rice, it works great in pilafs or as a side dish for curries. It is available in both white and brown.

Jasmine rice is what you find served with Thai meals. It has a floral aroma with a slightly sweet flavor. Even though it is a long grain rice, it does become slightly sticky when cooked. You can find it in both white and brown varieties.

Arborio rice is best known as “risotto” rice although this is not the only rice that is used to make risotto. It is the most available in our supermarkets, though. Because it is high in amylopectin starch, when cooked correctly, it is chewy and creamy – making it ideal for risotto and rice puddings.

Carnaroli rice is another Italian rice that is perfect for risotto and rice puddings. It has a firmer texture and holds its shape better than Arborio.

Valencia/Bomba rice is a Spanish short grain rice with kernels that are almost spherical. It is the rice most commonly used in paella. As it is highly absorbent, it requires more water to cook than other varieties. Due to its high amylose starch content, it does not stick together.

Brown rice is a whole grain rice. It comes in short, medium and long grain varieties. It is processed by only removing the outer, inedible husk. As opposed to white rice, the germ and bran is left intact. This results in a denser texture with a nutty flavor and preferred by nutritionists because of its higher fiber and vitamin content.

Red rice is also known as Wehani if American-grown. Imported versions are called Himalayan, Bhutanese or Camargue rice and it takes its name from the red color. It is considered another whole grain rice and thus is touted for its higher nutritional content.

Black rice is sometimes labeled as Forbidden rice, Japonica or Emperor’s rice. It is very high in a certain antioxidant (the same one as found in eggplant and blueberries) and this is the reason for the black color. It turns a purple or lavender color when cooked. It is not only very flavorful but very high in nutritional value.

Glutinous rice (sticky rice, sweet rice) is very sticky when cooked due to the low amylose content. When ground, it is known as mochiko or sweet rice flour. Despite the name “glutinous”, this rice does not contain any gluten. Glutinous actually means “glue like”.

Sushi rice is a short grain Japanese rice. It is sticky in texture but not quite as much as glutinous/sticky rice. The rice is rinsed to remove the outer coating, boiled and then mixed with a vinegar mixture. In fact, the word sushi translates to “vingarized rice”.

Wild rice is not a rice. Rather, it is a seed of a grass that is native to North America. It takes much longer to cook and has a very chewy texture. It is another good source of nutrients.

You might see something called Parboiled or Converted rice. It has been treated with steam pressure before milling, which produces a tan grain that is firm & stays separate when cooked.

Instant rice has been partially or completely cooked and so, only takes only a few minutes to prepare. What you gain in convenience, though, you lose in taste and texture.

So many rice varieties to try. If all you eat is white rice, I encourage you to try some of the other types. You may be pleasantly surprised!

Cooking Tips · Ingredients

Are you into Buddha Bowls?

 A tasty Bulgogi Beef Bowl I recently made . A tasty Bulgogi Beef Bowl I recently made .

Have you noticed the popularity of so-called “Buddha Bowls” lately? Just what are they and why are they all the rage? This Cooking Tip will attempt to answer these questions.

Although “Buddha Bowl” is the most common term I see, they have also been called Grain Bowls, Hippie Bowls, Macro Bowls and other terms. They are basically very artfully arranged single-serving bowls of food. They are usually, but not exclusively, vegetarian.

There is no definite explanation for the term but according the authors of Buddha’s Diet: The Ancient Art of Losing Weight Without Losing Your Mind, it may have come from the way that Buddha ate. “Buddha woke up before dawn every morning and carried his bowl through the roads or paths wherever he was staying. Local people would place food in the bowl as a donation, and at the end he would eat whatever he had been given.”

The Urban Dictionary has a different idea. They define it as “a bowl which is packed so full that it has a rounded “belly” appearance on the top much like the belly of a buddha.”

No matter the origin of the name, they are generally considered healthy and they are composed of fresh and whole ingredients. There are certain elements that usually go into each bowl although the variations are only limited by your taste and imagination. Most bowls contain the following components: Whole Grains, Veggies, Protein, Dressing and Toppings.

Grains – Keep it interesting by choosing different grains, preferably whole grains. Try brown, black or red rice, farro, quinoa, bulgur, barely or millet. These can be made ahead and kept if the refrigerator for a few days.

Veggies – There are a plethora of veggies out there that you can add either raw or lightly cooked. Not only do the veggies add nutrients, they also lend beautiful color to the bowl. Choose from greens, carrots, cabbage, cucumber, bell peppers, tomatoes, broccoli, cauliflower or zucchini. Roasting the veggies adds another dimension that can be very nice. How you prepare them is up to you – they can be chopped, shredded or sliced.

Protein – Since many Buddha bowls are vegan or at least vegetarian, the protein is often tofu, tempeh, chickpeas, beans, lentils and so forth. However, feel free to add a lean animal protein such as chicken or fish. Some bowls even feature pork or beef.

Dressing – A wonderful mixture of liquid flavor is typically drizzled over the bowl to make it complete. These may be homemade or store-bought and can include a vinaigrette, hummus, guacamole or even salsa.

Toppings – Sprinkle seeds or nuts on top. Scatter tender, fresh herbs such as parsley or cilantro.

Your bowl should be not only visually attractive but full of flavor. Use different colors such as yellow, green, red, white and pink. Include a variety of textures so you have both soft and crunchy elements. Don’t cut everything in the same shape but have variety – cubes, sticks, grated, julienned, etc. Finally, balance the different flavor components of sweet, salty, acid, bitter & umami.

Although Buddha bowls have seen a definite uptick in popularity recently, the components are really nothing new. Just good, clean, healthy and flavorful food. What’s not to like about that?

Cooking Tips · Ingredients

Summer equals Salads!

Warmer weather is often an incentive to eat more salads. The word “salad” can mean a lot of things but it usually includes some sort of greens. Americans tend to equate lettuce with iceberg lettuce but, there are so many more varieties of lettuce and greens to liven up your salads. In this Cooking Tip, I would like to open your eyes to all there is out there. The following list is not all-encompassing as the Yuma, Arizona, County Cooperative Extension office claims there are more than 100 varieties of lettuce and salad greens. I will only discuss some of the most common greens.

Leaf lettuce – This type of lettuce comes in red & green. Rather than coming as a “head” of lettuce, the leaves all branch off of a single stalk. Both red and green leaf are mild in flavor and have tender leaves. It is often found in varieties termed spring lettuce, mesclun, etc. It is great for the base of many salads.

Romaine lettuce – This lettuce has elongated leaves with a thick white rib. Its leaves are sturdy but a bit more bitter. It provides more texture to your salads.

Iceberg lettuce – Although iceberg is looked down upon because it does not have as many nutrients as other types, it does provide a nice crunch. It also is less perishable and will last longer in your refrigerator than other lettuce.

Butterhead lettuce – Two types are Boston and Bibb. Boston is an extremely tender and soft lettuce and due to it flexible leaves that can be separated from the head, it is great for making lettuce cups. Bibb comes in smaller heads and has a sweeter taste.

Kale – Although not a “lettuce”, it is thought of as a nutrient-dense green. It does have a bitterness that is not to everyone’s taste.

Arugula – Known as “rocket” in Europe, it has dark green leaves usually with a long, spiky shape. It has a peppery bite to it. It can be used on its own but is often a great addition to other lettuce mixes. It is also used in sandwiches and as a pizza topping. Because of its peppery flavor, it goes well with tangy dressings.

Spinach – Another green that is full of nutrients that can be the sole green in a salad or mixed with other varieties.

Radicchio – Easily recognized by its reddish-purple color, it also goes by the name of “chicory”. It also tends towards bitterness but that can be tempered by grilling or roasting.

Endive – Also known as Belgian endive, these small leaves are a relative of radicchio and are crisp and slightly bitter. Due to their spoon-like shape, they are great for acting as a vessel for dips or fillings. Another popular preparation is to braise them.

Frisée – Other names include curly endive & curly chicory. These are also in the same family as radicchio and endive and are known by the very curly leaves that are tinged with yellow and green. It has a fairly potent flavor and so, often just a small amount will be added to lettuce blends.

Escarole – This is a type of endive that is mildly bitter. It holds up well to cooking, making it a great addition to soups and pastas.

Mâche – Also known as lamb’s lettuce or corn salad, it is a delicious and sweet green with soft green leaves. Its dark green leaves grow in a rosette pattern. This is one of my favorite greens to add to a salad.

Watercress – The name derives from its semi-aquatic growing nature and is classified as both a green and an herb. It is another green with a peppery flavor.

Mizuna – Also known as Japanese mustard greens, it has a mild, peppery taste. Some say it is like a less intense version of arugula.

For the best salad, try to buy whole heads of lettuce when you can. (Even better, grow your own.) The texture and flavor will be much better than pre-bagged items. They do need to be thoroughly washed before consuming. If you do buy bags of pre-washed greens, the question that always arises is if you need to wash them once you get them home. According to the FDA, prewashed greens can be consumed directly from the bag. They say that prewashed items probably have less bacteria (if any) than what is found on your kitchen counter or sink. Therefore, washing the prewashed greens is more likely to introduce bacteria into an already clean product. Another point made by a microbiologist is that any pathogens remaining on prewashed greens is not likely to be removed by your own washing of them. Here is a link to the FDA Guidelines. If you choose to wash the prewashed greens, make sure your counters/sinks are very clean and store the washed greens in the refrigerator.

For proper storage of crisp heads of lettuce such as iceberg and romaine, core the heads, wrap it in moist paper towels and refrigerate in a plastic bag that has been left slightly open. For leafy greens, including arugula & spinach, either store them in the original container or, if you have room, leave them in the salad spinner after washing and drying them & put the spinner in the refrigerator. More tender heads such as Boston lettuce with the root attached can be stored in the original plastic container or in a plastic bag left slightly open. If there is no root, wrap in moist paper towels and place in a plastic bag left slightly open.

TheKitchn.com tested three different methods of storing greens. The favorite in this test was to line a plastic storage container with paper towels, put the greens on top and cover with more paper towels followed by the lid before placing in the refrigerator.

If your lettuce has wilted, it means it has lost water. To refresh it, just soak it in plain ice water for about 30 minutes.

According to WebMD, eating a salad almost every day may be one of the healthiest eating habits we can adopt. It is also one of the simplest and, if you branch out with some of these less-frequently used greens, it can also be a very tasty one!

Cooking Tips · Ingredients

Cinnamon — Sweet or Spicy?

Cinnamon is one of those wonderful, warm spices that makes us think of fall. It is a spice, though, that I daresay most of us use year-round. In this Cooking Tip, I want to talk about the different types of cinnamon so you can choose what works best for you.

There are two main types of cinnamon – Cassia cinnamon and Ceylon cinnamon. They are from the bark of different trees (although the trees are related scientifically) and are very different products. The different trees result in different levels of the volatile oils, which is what impart the flavor. The amount of these oils can also vary with the age of the bark at the time of harvesting. Older trees contain more oils.

Cassia cinnamon is what most of us probably have in our pantries and see on most supermarket shelves. In the bark-form, it has a rougher texture, a darker color and is rolled into thicker sheets. It also has a more intense flavor, which is what makes it a favorite in the culinary world.

Cassia cinnamon can be further broken down into Indonesian, Chinese and Vietnamese/Saigon.

  • Indonesian – this is the sweetest and most mild among the three. This is also the most common in the US. It usually comes from the bark of trees that are under 10 years old. Another name is Korintje cinnamon.

  • Saigon – this is very fragrant and flavorful, more spicy than sweet. The trees from which it is harvested are often 20-25 years old.

  • Chinese – this has a strong, bitter flavor and is mainly used medicinally in China. In the US, it is mainly found in the form of oils used to flavor food in the manufacturing industry.

Ceylon cinnamon is often referred to as “True” cinnamon and is native to Ceylon/Sri Lanka. As compared to cassia, the bark sheets are thinner and finer in texture. Its flavor and aroma are very mild and delicate although proponents say its floral and citrus notes add more complexity to the flavor. It is more expensive and harder to find than cassia cinnamon. The trees are usually only 3-4 years old. Another interesting fact is that this is the type of cinnamon that is most used in Mexico where it is known as canela. (Asian dishes are more likely to use cassia cinnamon.)

So, there are definite differences but do they make a significant difference in what comes out of your kitchen? Cooks Illustrated did a taste test of eight cinnamons. Half of them were from Vietnam and the other half were Indonesian. While definite differences could be detected when the cinnamon was simply sprinkled on rice pudding, those differences went away when baked into cinnamon rolls or on pita chips.

Cooks Illustrated also did a different taste test comparing three Ceylon cinnamons with their favorite Indonesian product. Once again, they added them to rice pudding as well as baking them into cinnamon rolls. In this test, tasters could easily identify the Ceylon products as they were milder although they preferred the spicier Indonesian cinnamon.

Serious Eats also did tastings and produced the following recommendations.

  • Saigon cinnamon is best for most traditional Western dishes – cookies, cakes, pies, breads, etc. They found that the bolder flavor held its own against the fat/flour of these items. They also found that it paired well with other spices that are typically found in these recipes such as allspice, clove and nutmeg.

  • Ceylon cinnamon was best when there were not as many competing flavors. Their favorite uses were when used with chocolate, vanilla, dark liquors and citrus as well as in savory dishes.

One aspect with which you may or may not be concerned is the presence of a compound known as Coumarin. It is found in much higher levels in the cassia cinnamon as opposed to Ceylon cinnamon. Some feel it may have deleterious effects on your liver. Whereas this is probably more of a problem if you are taking cinnamon supplements, if you are concerned, consult your physician. Here is a link to a discussion of cinnamon and coumarin by the National Institutes of Health.

Just like any other spice, store your cinnamon in a cool, dark and dry place. It should last at least a year. If you take a sniff and don’t smell much, it is time for a new bottle. Some recommend grinding it fresh from cinnamon sticks. Of course, how fresh it will be depends on how fresh your sticks are. You may have no idea of this when buying in a supermarket. It is unusual but not impossible to find harvest dates on your cinnamon sticks. Cinnamon Hill was one such place. However, as of April 2022, they have closed their website. If you know of others, let me know. If you have read many of my Cooking Tips or attended my classes, you will know that I am a fan of Savory Spice Shop. (This is an affiliate link and I may earn a commission if you decide to purchase.) Next time I am in their shop, I will ask if they know the harvest dates of their cinnamon sticks. If you want to know their answer, just email me.

I encourage you to pick up some of these cinnamon varieties and do your own taste test. You may not find just one favorite and that is fine. Different cinnamons lend themselves to different preparations. Enjoy and have fun with cinnamon!

Cooking Tips · Ingredients

The Spicy Flavor of Pepper!

Apart from salt, pepper is probably one of the most commonly used spices in your kitchen. Today, there are multiple types available in the spice aisle. Do you just grab what is cheapest? Have you ever thought if there are differences between types and brands? In this Cooking Tip, I will try to give you some food for thought concerning pepper.

Peppercorns come from the Piper nigrum plant, a climbing vine that is native to India and Indonesia although grown in other tropical countries. Vietnam is one of the largest producers. If destined to become Black Pepper, the berries are picked when they are slightly under-ripe and allowed to dry until they are dark brown or black and shriveled. This type of pepper has the strongest flavor.

White Peppercorns have been allowed to fully ripen, the skin is removed and the berry is dried. White peppercorns have smoother skins, are light tan in color and milder in flavor. They are often used in sauces or foods where you do not want the dark specks or the bold spiciness of black pepper. Its flavor is a bit more earthy than black pepper.

Green Peppercorns are the soft, under-ripe berry and are often preserved in brine although you can find them in dried form. They have a fresher and less pungent flavor.

Pink Peppercorns are misnamed as they are not truly peppercorns. They are the dried fruit from the Brazilian pepper tree. They have a rosy color and, although still spicy, they also have flavor notes of herbs and citrus. Besides flavor, they add an element of color to the dish. Because this tree is a relative of the cashew tree, people with nut allergies should be cautious before consuming. The berries are too fragile to be put through a peppermill and, so should be crushed by hand.

Apart from the type of peppercorn, there are also differences depending on the origin of the plant. Just as with wine or tea, the variations in terroir and climate can make the flavor profile distinct despite being the same plant.

Among black peppercorns, one of the most sought-after is the Tellicherry peppercorn. They are grown in India, are larger in size and some feel they are superior in flavor. Recently, Cooks Illustrated did a taste test among black peppercorns – both Tellicherry and regular. They tested them by mixing with rice as well as using them in dishes such as steak au poivre, pepper-crusted beef tenderloin and ricotta/pepper crostini. In these dishes, it was hard to detect any flavor differences. It was a bit more evident in a simple egg salad although it was still subtle. Their conclusion – there was no clear preference among their tasters for the Tellicherry. Rather, they did find more differences among brands. Their three favorites among major brands of whole black peppercorns were Tone’s, Penzeys and McCormick.

Serious Eats also did a taste testing and rated their favorites in terms of type rather than brand. Their tastes preferred the following peppercorns: Lampong (Indonesia), Tellicherry, Brazilian and Vietnamese. They do stress, though, that taste preferences are very subjective. On a more objective level is the flavor profile, aromas and textures of these different peppercorns. Some may lend themselves to particular uses better than others. The main takeaway is that pepper is not pepper. There is a wide variety among flavor that you will only come to know by trying different kinds.

There is one piece of advice that most experts agree upon. No matter what type of pepper you buy, get whole peppercorns and grind them yourselves. Pre-ground pepper can be gritty and tough as well as significantly lacking in peppery flavor. The oils that are responsible for pepper’s heat and aroma start to dissipate shortly after cracking the peppercorn. Another consideration is that whole peppercorns, when stored correctly, will keep their flavor for a little over a year. As mentioned, ground pepper’s flavor starts to degrade shortly after grinding. Who knows how long that pepper in the shaker has been ground and sitting there?

This simple step of purchase a peppercorn grinder and whole peppercorns can make a world of difference in your dish’s flavor. Experiment with the different kinds and brands of pepper and have fun!

Cooking Tips · Techniques

How to succeed in the kitchen!

I read many different sources of culinary information from cookbooks to magazines to emails to blogs. I often find interesting and helpful items. I have seen a number of articles that lay out behaviors that can make or break your success in the kitchen. In this Cooking Tip, I have pulled the best of these for you. If you have taken any of my cooking classes, you will certainly recognize some of these suggestions and, I hope, have begun to incorporate them into your kitchen life. It may be difficult to break old habits and get into good routines, but I guarantee you it will make you a better and more efficient cook!

  1. Read the recipe all the way through before starting. This may seem self-evident but there are many people who do not do this. When reading the recipe, look at the ingredients AND the directions. Only then will you know such things as what you need to pick up at the store, what equipment you will need and the timing. If not, you may miss that Step #3 tells you to chill the mixture for two hours. If you are hoping to get this on the dinner table in under an hour, this is not going to work. Yes, you can skip those steps but do not expect the recipe to turn out as it was intended. There are usually very good reasons why a recipe calls for a particular ingredient, certain equipment and recommended timing. Only by trying to stick to these recommendations the first time you make a recipe will you know how it should turn out.

  2. If you want to double or halve the recipe, do the math up front and write it down. Not all recipes do well with doubling or halving. However, if you are going to do so, write down the adjusted measurements next to each and every ingredient. It is so easy to get partway through and forget to change the amount. I’ve been there! Savory recipes do much better with these alterations than baking ones. If you want to double a baking recipe, just make two separate ones. It usually turns out much better.

  3. Follow the recipe directions as closely as possible. If a recipe tells you to reduce a sauce to a certain consistency, don’t get impatient and stop before you get there. The flavors will not be the same. Note carefully how items are to be cut – chopped, sliced, diced, minced etc. Different cuts produce different results. Also, try to cut them uniformly. If your potato cubes or onion slices vary in size, they will not cook evenly. You do not want to end up with a dish where parts are underdone and others overdone. Not very appetizing!

  4. Be cautious about substituting ingredients. Not all substitutions work. If your recipe calls for white balsamic vinegar, do not assume you can substitute any white vinegar. In baking, not all sweeteners can be swapped for each other in equal amounts. Again, try to make the recipe as written the first time so you know what it should taste like. Then, if you want to try a substitution, you will have a reference point.

  5. Don’t substitute dried herbs for fresh in equal measure. Dried herbs are better for some applications whereas fresh are better for others. Try to use what the recipe recommends. If you do decide to substitute, be aware that it is not a 1:1 ratio. If using dried in place of fresh, use only about a third of what is specified for fresh.

  6. Try to avoid precut, preshredded, etc. Yes, these items are certainly convenient but often, what you gain in convenience, you lose in taste & texture. One of the most glaring examples is cheese. There is a reason that so many recipes call for “Freshly Grated” cheese. Yes, you can find it pre-grated in bags or, even worse, cans. The latter often do not behave as you might expect and a look at the ingredient list often tells the story. There are usually some “anti-caking” agents added such as “powdered cellulose”. Although some may disagree, the taste is often not as vibrant as freshly grated cheese. Another plus for buying a block of cheese and grating it yourself is that it is a better economical choice as you will get more for your money.

    The story is similar with precut veggies and fruit. First, they are much more expensive than the whole versions. Second, it has been shown that it increases your risk of food-borne illness. Thirdly, once a fruit or vegetable has been cut, the nutrients start to degrade.

As I have been writing this, I realize that there is so much more to say such as prepping your ingredients before commencing cooking, weighing ingredients (as opposed to using measuring cups), keeping your knives sharp, watching your ingredient temperature, using a trash bowl and on and on. However, I will stop here so this Tip does not become a Treatise!


Cooking Tips · Ingredients

Mirepoix, Sofrito & What?

Good cooking techniques transcend the type of cooking you want to do. However, when you get to ingredients, they vary between types of cuisines. Mirepoix, Sofrito and Cajun Trinity are examples of similar items that differ from cuisine to cuisine. In this Cooking Tip, I would like to explain these mixtures, their similarities and differences.

All three of these terms refer to the basis of so many savory dishes. The ingredients are mixtures of aromatic vegetables. These vegetables are diced and sautéed in some type of oil. This base is used in the completion of whatever dish you are cooking. They are meant to provide a subtle but pleasant background flavor as well as supporting and improving the flavor of the finished dish. In French cooking, it is called Mirepoix. Sofrito refers to a similar mixture in Italian, Spanish & Latin American cuisine. For Cajun cooking, it is called the Cajun Trinity, also known as the Holy Trinity.

France is the home of classical cooking techniques. Their classic Mirepoix is a mixture of onions, carrots & celery. The ratio is typically 2 parts onion, 1 part carrot and 1 part celery – by weight. A common variation is White Mirepoix where leeks and parsnips replace some of the onions and carrots. It is used to flavor dishes when you want a white color in the final dish. Other ingredients that are sometimes used are shallots, garlic, diced ham, tomatoes, mushrooms, peppers and ginger.

The classic Italian Sofrito actually starts as something called a Battuto and, once cooked, it is termed a Sofrito. Usually it is a combination of onions, celery, carrots, garlic and parsley although there are quite a few variations on this mixture. It also can include bell peppers or fennel as well as finely diced cured meats such as pancetta or prosciutto. There is no set ratio for the ingredients.

There are many regional variations on the Italian Sofrito including Puerto Rican, Cuban and Dominican. These variations often include ingredients that are specific to those areas.

The Cajun Trinity requires bell pepper, onion and celery. Although there is a difference of opinion on this, a good starting ratio is 2 parts onion, 1 part celery and 1 part green bell pepper. This particular mixture does not usually have as many variations as the other mixtures. Along with a dark roux, it becomes the base for Cajun and Creole dishes such as gumbo, jambalaya and étouffée.

Suppengrün is of German origin and is made of carrots, celery root and leeks. Variations include onions, parsnips and potatoes. There is no set ratio.

From Poland we get Włoszczyzna, similar to its German counterpart but often with cabbage as the primary ingredient.

No matter which version of this base you are using, be sure to cut the vegetables relatively uniform in size. The shorter the cooking time of the ultimate dish, the smaller size the pieces should be. For longer times, they can be cut into larger pieces.

To turn these vegetables into the respective base, heat the cooking fat (typically oil or butter) in a sturdy pan. Generally, the onions (or leeks) will be cooked in the fat first. What comes next depends on the particular mixture. If garlic is called for, add it next but cook carefully so it doesn’t brown or burn. Follow by adding the rest of the vegetables. Lastly, add the herbs.

Usually, only “sweating” the mixture is what you want. This would be done on a lower heat just until the vegetables are giving off some of their juices, softening in texture but not browning. If you are using this base in a dish such as a soup, stew or pasta sauce, feel free to slowly cook the vegetables until they are almost melted. If you wish to add them to something like a frittata or omelet, you may want to stop cooking before they lose all their texture. There are times when the mixture is cooked until it browns but I will leave that for another discussion.

The main take-away from this discussion is that slowly cooking these aromatic vegetables even if you do not follow the listed combinations can add a tremendous amount of flavor. This simple step can take your dish from good to great!