I was making sandwiches for lunch the other day and wanted something different. Off to the freezer I go where I found cubes of three kinds of frozen pesto – classic Genovese pesto, basil pesto with manchego cheese and sun-dried tomato pesto. Out came the latter, which I then mixed with grilled and chopped red onion & mayo. I proceeded with spreading that on some nice bread, topping with ham and grated Parrano cheese, brushing a bit of olive oil on the outside of the bread and finishing the sandwiches off on my stovetop grill. Very yummy if I do say so myself. That got me thinking that Pesto might be a good topic for a Cooking Tip.
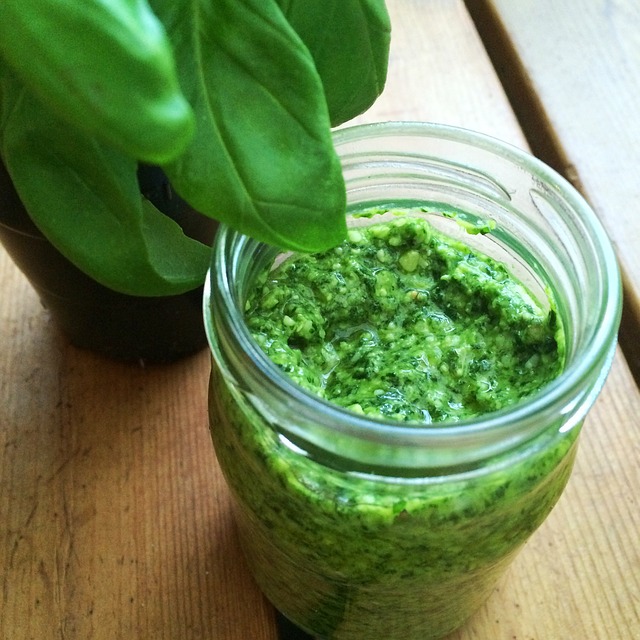
Pesto is such a delicious sauce and requires no cooking. Classic pesto (aka Genovese pesto) is made from fresh basil, pine nuts, Parmesan cheese, garlic and olive oil. Traditionally, it is made in a mortar and pestle although modern cooks tend to use a food processor or blender. The different methods give different results. The mortar/pestle will give you a coarser pesto with a fresher basil flavor where as the food processor results in a finer texture with a less fresh (but still yummy) flavor.
There are many different recipes for classic pesto. Although they all have the same basic ingredients, they may use different ratios of ingredients. I encourage you to try different recipes until you find the one (or ones) you like. Techniques will vary, too. Some will have you put all the ingredients in the blender (or food processor) at once, blend and finish with seasoning with salt to taste. Others will have you blend all the solid ingredients to a paste and then stream in the olive oil to the desired consistency and ending with salt to taste. Others will have you hold off on the cheese, only adding it just before serving. Another method is to start by grinding the garlic and salt to a paste followed by the pine nuts and grinding again. Then, basil leaves are pounded into the mixture. Cheese is next and it is finished by drizzling in the olive oil as desired.
Some professionals recommend blanching the basil leaves before using to help keep the color as green as possible. The blanching supposedly deactivates the enzymes that cause the basil to turn brown. Testing by TheKitchn.com did show this to be true but there was a downside – the pesto made with blanched basil tasted less fresh with less basil flavor.
SeriousEats.com did a different type of testing. They made pesto with three variations. The first was made classically with fresh basil using a mortar/pestle. The second used fresh basil but made in a mini food processor. The third was also made in the mini processor but rather than fresh basil, they used basil that had been frozen and then defrosted. The theory for this latter technique was that freezing leads to cell rupture thereby releasing more flavor into the pesto. Their interpretation of the results was that the classical method produced the best pesto – very creamy with the brightest flavor. They thought the pesto made with the fresh basil in the mini processor was the worst – gritty texture with flavor that was too mild. The final batch – made with frozen basil and the mini processor – fell in the middle. It did have a nice creamy texture and improved flavor over batch #2. However, they still preferred the classic approach. They did conclude, though, that if you do not want to go the mortar/pestle route, at least throw the basil in the freezer before putting it in the processor.
Find your preferred technique and then mix up the ingredients. Use different herbs (cilantro, parsley, arugula, spinach, mint or a combination) or swap out the pine nuts for almonds, hazelnuts, pecans, pistachios or walnuts. You could also vary the cheese from Parmesan to another hard cheese such as pecorino, asiago or manchego. Add some citrus for a bit of zip.
How about that sun-dried tomato pesto I used in my sandwich? It does have some of the classic ingredients (basil, garlic, pine nuts, Parmesan, olive oil) but adds roasted red pepper, sun-dried tomatoes, fresh tomatoes, tomato paste and chili powder.
You may store your homemade pesto in the refrigerator. Just put it in the smallest container possible, pack it down to eliminate air pockets and either pour a thin layer of olive oil over it or put a piece of plastic wrap directly on the pesto before covering the container. It should keep in your refrigerator for up to a week. Or, do as I do. Spray an ice cube tray with nonstick spray, spoon the pesto into the compartments and freeze. Once frozen, you can remove from the ice cube tray and store either in a freezer bag or other freezer-safe container. You may lose some of the vibrant green color but I think that is a fair trade-off for always having homemade pesto at your fingertips.
Rarely does one make pesto as an end in itself. It is always an accompaniment to something else. The most common is as a pasta sauce, usually thinned out a bit with the pasta water. How about spreading it on a sandwich or on a pizza crust? Dollop it on your grilled chicken breast. It is classic served with potato gnocchi.
You will note that I did not give you any one recipe. That is because I think (unlike many culinary professionals) that there is not just one way to do things or one recipe that is the best. You need to find what is best for you. That depends on your taste, your kitchen equipment, your available time, your budget for ingredients as well as your interest in simple versus more complex techniques. Find what works for you and then branch out and experiment. Have fun and realize that there do not have to be so many hard and fast rules in cooking!

One thought on “Pesto — make it your own!”
Comments are closed.