Cooking Tips · Techniques

Cook Without a Recipe — Part Two

This is the second in a series of Cooking Tips on how to Cook Without a Recipe. Part one talked about stocking your pantry, how to taste and how to cook grains without a recipe. This Part Two will delve into cooking proteins without a recipe.

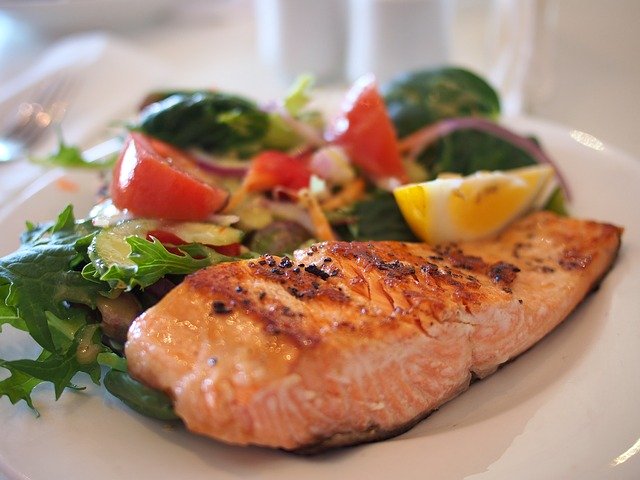
Unless you are a vegetarian or vegan, most people would like some animal protein served with their grain or veggies. Knowing some techniques will help you cook these proteins without a recipe. No matter what protein you are cooking, your goal is a piece of protein that is cooked properly but not over-cooked. As I have discussed before, there is no better way of achieving this than an instant-read thermometer. Knowing to what temperature to cook a piece of protein is important but if you do not want to memorize, by all means use a chart. Here is one (Temp Chart) produced by the FDA.

There are multiple cooking techniques for proteins and you should understand these to help you decide how you want to cook your piece of meat. If you want to cook stovetop, there is searing and sautéing. Searing uses a high heat with a bit of oil. It is preferable to coat your protein with oil rather than putting the oil in the pan. The meat is usually seasoned but there is no coating of any kind. Searing produces a brown coating on the meat with fond left in the pan – the basis of a sauce you can subsequently make.

With sautéing, you use a medium-high heat with oil put in the pan. The meat is usually cut into bite-sized pieces and often (though not always) dredged in flour or cornmeal. This is method that is great for meat that you are going to then add to a dish such as pasta, rice, a bowl meal and so forth.

Animal protein may also be cooked in the oven. This is a nice more hands-off method but you do not get the great browning and resulting fond. Because of this, you may start your meat on the stove with a quick sear and finish in the oven.

Another important concept to remember in cooking meat is that meat needs to rest after coming off the heat. The meat will continue to cook off heat for a few minutes before the temperature starts to drop. Ideally, you want your final resting temperature to be about 5° less than the maximum temperature. How long this takes depends on the size of the meat. For a chicken breast or a steak that is about 1½ inch thick, it will be about 10 minutes. For a very large piece of meat, it could need about 45 minutes. Resting also allows the liquid to stay within the meat rather than leaking out when you cut it, giving you a moister result.

One of the easiest ways to produce a flavorful meat dish without a recipe is to create a Pan Sauce. You need to remember some basic steps but then you can vary it to your heart’s content. Here are the basic steps.

  • Sear meat
  • Add aromatics
  • Deglaze
  • Add liquid & reduce
  • Finish with butter and adjust seasonings

Start by searing your meat and when done, remove to a plate and keep warm. Hopefully you will have some wonderful fond in the bottom of the pan, which represents flavor. You may pour off any excess oil that is in the pan but do not scrape out or clean the pan. Lower your heat to medium and add aromatics such as shallots, garlic, and/or spices. Cook until these are softened and aromatic. Now you want to deglaze the pan with a liquid. This allows you to scrape up the fond and incorporate it into the sauce. The most typical deglazing liquid would be wine or other alcohol. Continue to cook until the alcohol is almost totally cooked off. At this point, add a liquid such as stock and reduce it again. When it is reduced to a sauce consistency, take it off heat and add a pat of butter. This thickens the sauce and adds a wonderful richness to the pan sauce. Taste and season as necessary. You are aiming for a creamy, thick and opaque sauce. That’s it to a basic pan sauce.

Now, dress it up as you wish. What can you do? Add mushrooms along with the aromatics. Add a touch of mustard with the butter. You may add fresh herbs to complement the rest of your dish. A squeeze of lemon or lime juice will add brightness.

Another option is to make a Gastrique rather than a pan sauce. The definition of a gastrique is a sweet & sour sauce or a savory caramel sauce. Rather than being made in the meat cooking pan with the fond, it is made in a totally separate saucepan.

You start your gastrique by making a “caramel” sauce. Put ¼ cup of sugar and 3 Tbsp water in a pan over low to medium heat and cook until you have a caramel sauce. Now, add an acid in equal parts to the sugar. For example, add ¼ cup vinegar, fruit juice, wine, etc. Stand back as the sauce will bubble vigorously. It will also harden but continue to cook and it will return to a more liquid state. Add whatever flavors you want – herbs, ginger, caramelized shallots, fresh fruit/berries, citrus peels, chilis. Simmer to what is termed “nappé”, which merely means a consistency that will lightly coat the food. When done, serve with your choice of protein.

To get you started, here are a few ideas.

For a Cherry Sauce, try:

  • Apple cider vinegar
  • Champagne vinegar
  • Cherry liqueur
  • Dried cherries

For an Apricot Sauce, use:

  • Rice wine vinegar
  • Orange zest and juice
  • Ginger
  • Dried apricots

Another option to serve with your meat is a Salsa. It could be a tomato-based salsa but with meat & seafood, a fruit-based salsa can be wonderful. Use your favorite fruit or combination of fruit. Other great additions are red onion, shallots, chili paper, bell pepper and herbs. After combining everything, it helps to chill to allow the flavors to develop. Just remember to taste and adjust the seasonings before you serve it.

Your challenge this week is to grab your favorite protein, cook it and make either a pan sauce or salsa. Let me know what you make and what you think!

Cooking Tips · Techniques

Cooking Without a Recipe

As we continue our state of being home-bound and we continue to cook at home more than ever, I thought a Cooking Tip to help you practice Cooking Without A Recipe might be fun. I must admit that I am a recipe lover and normally use recipes as I am always testing different ones for use in future classes. However, when one of you booked a class with me to help her to be able to cook without always relying on a recipe (Thanks, Patty!), I thought it was time to organize my thoughts on this subject. If anyone else is interested in booking a similar class for when we can gather again, just let me know.

I will be breaking this topic up into three separate Cooking Tips. In Part One, I will discuss some basics of cooking/ingredients along with a discussion of cooking grains. Part Two will be cooking proteins and Part Three will be about vinaigrettes and pizza.

To be able to cook without a recipe, you need to have a well-stocked pantry. There are all sorts of lists that you can find online but here is one (Pantry essentials) that I put together that works for me. This list is generic in that it doesn’t contain an abundance of ethnic ingredients. If you tend to eat quite a bit of ethnic cuisine, you are going to want to add those sorts of ingredients to your pantry essentials list. Make it a list that works for you and your pantry. Then, try to keep these ingredients on hand as much as you can.

You also want to taste your dish throughout the cooking process, not just at the end. Because you are not using a recipe where the ingredients and amounts of those ingredients have been thoroughly tested to result in a well-balanced and tasty dish, you need to taste all the time. Only with tasting can you make necessary adjustments to get the flavor you want.

The next question then becomes is how to adjust. Generally, you want to adjust in the following order:

  • Salt
  • Acid
  • Balance sweetness, bitterness, fat & umami
  • Adjust the aromatics to give you the proper bite and texture

As you are tasting your dish and saying, “Hmm, it needs something”, the answer is usually salt. After that, try a little acid such as lemon/lime juice, vinegar, wine, etc. Still not right? Add a little sweetness such as sugar or honey. An ideal result would be a balance of all these flavors. Don’t forget texture. Add something to give it a bit of crunch. Cooking without a recipe gives you an ideal time to play around with these ingredients and flavors to see how they work and interact with each other.

Knowing how to cook multiple kinds of grains is very helpful to getting a meal on the table. Expand your view of grains. It is not only rice but is also farro, barley, quinoa, millet, couscous, wheat berries and more. And, with rice there are many kinds such as white, brown, long grain, medium grain, short grain, jasmine, basmati, arborio. For an earlier Cooking Tip all about rice, see this link.

Cooking all grains is basically the same – cooking them in boiling water until they are tender. The questions that we often have is what is the ratio of water to grain. Believe it or not, you can cook all grains by the pasta method. This is cooking the grain in abundant boiling, salted water until it is tender. Check frequently so you do not over-cook it. Drain, put the lid back on and let the grain steam for a just a few minutes. If you prefer to cook in a more standard way, there are tons of grain-to-water ratio charts online. Here is a link (Water to Grain Ratios) to just one.

You might say that anyone can cook grains, which is true. Learning to cook without a recipe, though, involves turning those grains into your own delicious dish. This can be done in a number of ways – none of which involve an actual recipe.

First, try cooking your grains not just in water but something more flavorful. Depending on what final flavor you want, it might be broth, orange juice, coconut water or jasmine tea. When you first try it, you may want to try part water and part other flavorful liquid. You could also add aromatics such as onion, garlic, bay leaves, citrus zest, etc. to your grain as it is cooking. Gently toasting the grain before adding your liquid is another trick.

Next would be add-ins to give flavor, color and texture to your grain. Fresh herbs are a wonderful idea. Dried fruit or nuts, cooked veggies, pesto, salsa and cheese are all other ideas for add-ins.

Maybe instead of a grain you want a starch such as potatoes. Potatoes on their own are wonderful and they can be baked, roasted or mashed – no recipe required. To make them your own, try adding other veggies such as parsnips, celery root, carrots, squash and so forth. Add-ins as we discussed with grains are another idea to enliven your potato dish.

So, get your pantry in order and let’s be creative. Keep your cookbooks closed. Don’t rely on the internet. See what sort of delightful grain dish you can come up with and let me know. Stay tuned for next week where I will help you cook that protein without a recipe.

Cooking Tips · Techniques

Don't fear cooking seafood!

Cooking seafood often instills fear in people. I can understand why. Good seafood is not inexpensive and over-cooking it is all too common. I do enjoy a good seafood dish but I am unhappy when it is dry and overdone. In this Cooking Tip, I want to help you turn out that perfect plate of seafood. This Tip will not cover all seafood, just some of the most popular. Nor am I going to discuss the topics of sustainability, environmental concerns or mercury content. I will leave that for you to research and make your own decisions. I am merely going to talk about cooking seafood. Some of the links below are affiliate links and I may earn a commission if you decide to purchase.

The fattiness or leanness of the fish species helps to determine proper cooking methods. Cooking methods are broken into moist cooking and dry cooking. Moist cooking methods include poaching, steaming, cooking en papillote and simmering. Dry cooking methods include baking, broiling, grilling and sautéing – either with or without cooking fat.

Fatty fish are especially well suited to cooking with dry heat. For example, baking or broiling are a good choice and these methods actually help to cut down on the oiliness of the fish. You can also use the dry heat method with the addition of fat. Just do not use so much that you cause the fish to be greasy. However, fatty fish can also be cooked with moist heat.

Lean fish are best cooked with moist heat as it helps to preserve the moistness of the fish. If you wish to use a dry cooking method, consider basting the fish in butter or oil. Or, the lean fish can be sautéed or fried with the use of oil.

If you are not sure about the fat content of the fish, ask at the fish counter. Briefly, fatty fish include salmon, mackerel and herring. Trout is considered to have a medium level of fat. Lean fish include orange roughy, bass, cod, flounder, haddock, Mahi-Mahi, grouper, snapper, tilapia and tuna.

The main problem I see with cooking fish is overcooking it. Most fish do not take very long to cook. An average recommended cooking time is 8-10 minutes per inch of thickness. Remember that there is going to be some carry-over cooking and, therefore, you can remove it from the heat when it is just slightly underdone. You can gauge this by visual changes. It is easy to see the color change with salmon. It is more difficult with white fish. You may need to use a paring knife and look inside. If the flesh is still translucent, it is still underdone. Perfectly cooked fish should be opaque but still flaky and moist. Overcooked fish is dry and falls apart easily.

The FDA states that fish with fins should be cooked to 145° or until the flesh is opaque and separates easily with a fork. Shrimp, lobster, crab, and scallops should be cooked until the flesh is pearly or white, and opaque.

Thermoworks recommends the following:

  • Salmon – 125°
  • Halibut – 130°
  • Lobster – 140°
  • Scallops – 130°
  • Shrimp — 120°

Cook’s Illustrated recommends:

  • 120° for wild salmon
  • 125° for farmed salmon
  • 135° for whitefish

Let me discuss a few particular types of fish.

Salmon – I covered salmon in detail in a prior Cooking Tip. Refer to that article for more information.

Scallops – Scallops are wonderful, sweet and delicate but can easily be turned rubbery and unappetizing by improper cooking.

The experts will tell you to always choose “dry” scallops (vs. “wet” scallops) at the store. Wet scallops (aka treated scallops) have been soaked in a liquid solution containing phosphates that is supposed to prolong their freshness. However, the scallops also absorb the water, which you end up paying for since you buy them by the pound. This water evaporates as they cook, which can lead to the following problems. First, the water that is released causes them to steam and it makes it more difficult to get that nice caramelized crust. As the water evaporates, you end up with smaller and tougher scallops. The phosphate may impart a slightly soapy flavor to the scallops. It is generally easy to discern treated scallops as they will usually appear very white in color.

“Dry” is the seafood industry term for natural or untreated scallops. They look more tan in color. They are preferred because they are easier to sear and get the desired caramelization, they taste sweet & natural and you are not paying for added water. That said, I think it is very hard to find dry scallops in your supermarket. To obtain these, you probably need to visit a quality seafood market or order online.

Whatever scallops you purchase, they should be cooked quickly over high heat. Pat the scallops dry. To prevent more moisture from exuding from the scallop, hold off on salting until just before they go in the pan. Leave space between them so they do not steam and cook very quickly over high heat. A typical large scallop only needs about 90 seconds per side. Allow them to rest for a few minutes before serving.

Shrimp is another very popular type of seafood. If not done before you buy them, you need to peel and devein the shrimp before cooking. They can be broiled in as little as 2-3 minutes. Boiling is another common method of cooking shrimp. For a 1 pound of shrimp, bring 4 cups water along with 1 teaspoon salt to a boil. Add shrimp and simmer, uncovered, 1 to 3 minutes or until shrimp turn opaque, stirring occasionally. Drain and rinse shrimp in a colander under cold running water.

You may also cook them on the stovetop by heating a skillet over medium-high. Add oil to hot skillet and then add the shrimp. Cook 3 to 6 minutes until shrimp are pink and opaque.

Seafood is something all of us should increase in our diet. It is also such a quick and easy ingredient to cook, making it perfect for a quick weeknight meal. Just watch it and don’t overcook it. If you do that, I am sure you will enjoy a seafood meal!

Cooking Tips · Techniques

Help in the Kitchen When You Need It!

As so many of us are trying to keep our distance from others and adapt to the new (albeit temporary) reality of working from home and having children off from school, I wanted to offer a bit of help in the kitchen. I am departing from the normal weekly Cooking Tip for this purpose.

First, I have written an article entitled “Great Tips to Improve Your Cooking.” You can find this free download on the Home Page of this website. It has tons of great tips to help you improve your cooking skills, produce great meals and have fun doing it.

To thank you for downloading it, I am offering $25 off a future cooking class. This can be done in the form of a gift card to be redeemed when we are all able to gather again. I can understand not wanting to meet in person right now. If anyone is interested in cooking instruction done via an alternate way such as telephone, email or even video, let me know and we can discuss how that might happen.

With the current situation, we all have an added incentive to cook at home. If you find yourself with a bit more time to cook, let me share an excellent recipe. This is from Cooking Light. It is a wonderfully flavorful and healthy dish called Mediterranean Chicken and Bulgur Skillet. It is a one-pan dish that is a meal in itself. It is also a great way to try bulgur if you have never tried it before. The dish does call for kale but I swapped this out for some fresh chard from my husband’s greenhouse garden. It was a quite yummy swap. It is easy to make, is filling, is healthy and is delicious. What more can you want? Let me know if you try it.

If you are indeed finding you have more time in the kitchen, you may want to make larger batches of meals that freeze well. I find this so helpful on those busy days when I have no time (or desire) to cook an evening meal. Why not try cooking or baking something you do not normally make? Perhaps some wonderful homemade bread. Maybe a special dessert when everyone is about to go stir crazy. Get the kids involved and make your own pasta or pizza dough.

There are so many ideas. Please let me know if I can help you during these trying times. Let’s all stay strong, help each other and maintain our faith. This will pass and the sun will shine on the other side!

Cooking Tips · Techniques

Buttercream – A Rich Delight

Buttercream – Just the word sounds rich, doesn’t it? Are you the type that licks the buttercream frosting off the cake because you think it is the best part? Or, is it too rich for you and you prefer the underlying cake? Whichever you are, how to make buttercream is an excellent skill to have and is the subject of this week’s Cooking Tip.

Buttercream is a type of frosting/icing that can be used as a filling, an icing or for decorating cakes or pastries. There are different types of buttercream that require different ingredients and techniques.

As the name indicates, butter is a major ingredient in buttercream. So, be sure to use a high quality butter. Unsalted butter is recommended to prevent your buttercream from tasting salty. The butter needs to be softened to incorporate properly. You should be able to press an indentation into the butter. According to Cooks Illustrated, softened butter sold be 65-67°F.

I like the way that Serious Eats categorizes buttercream. They put all buttercreams into two types.

  1. Beaten-butter method. This method has you adding some sort of sweet base into beaten butter. You start by beating softened butter until fluffy. Then, you add your base, which will differ according to which type you are making. (More details below) Finally, you mix in any flavorings you want. Examples include American, flour and German buttercream.

  2. Cubed -butter method. This is made by adding cubes of softened butter to a sweetened egg foam. These would be French, Italian and Swiss buttercreams.

The easiest and quickest type of buttercream is sometimes called Simple Buttercream or American Buttercream. It has three main ingredients: softened butter, powdered sugar and milk/cream. Some like to whip the butter before adding the powdered sugar and then add the cream. Others just cream the softened butter and powdered sugar together and then add milk/cream until the desired consistency is reached. The powdered sugar helps to thicken the mixture without the need for eggs. Flavorings such as vanilla may also be added. This is definitely the easiest buttercream but is also the sweetest. It is the firmest buttercream but the butter tends to melt in very warm environments. If you want to serve this outside on a warm day, this buttercream may not be your best choice.

Flour buttercream has a pudding base made of milk, sugar and flour. This is cooked but then cooled before being mixed into the whipped butter. It results in a buttercream this is less sweet and more stable in heat.

German buttercream uses a custard or pastry cream in place of the simple pudding as in the flour buttercream. Because the custard contains eggs, it will be more yellow than others. It tends to be softer than other buttercreams but you can use a thicker custard base to counteract this. It is another choice not well suited to warmer temperatures.

The buttercreams made by the cubed-butter method are also called European or meringue-based buttercream. Meringues are a topic in and of themselves and one on which I wrote an earlier Cooking Tip. There are three types of meringues – French, Swiss and Italian. peaks. For more detail, see this Cooking Tip. Each of these meringues can be used to create a different type of buttercream.

Swiss method – this starts by cooking egg whites and sugar over a hot water bath until the sugar has dissolved. This is whipped to peaks and then soft butter is beaten into the mixture until it is smooth. This method is quick and easy and yields a very light and fluffy buttercream. It is a very stable buttercream that can be used to ice a cake or pipe decorations.

French method – this is made by whipping whole eggs or egg yolks to a thick foam with a hot sugar syrup and then whipping in soft butter. As you are using eggs or yolks, it will yield a richer buttercream. Because of the egg yolks, this buttercream will be more yellow in color. It is a decadent buttercream but does not hold its shape very well, especially in warm environments.

Italian method – Similar to French with the substitution of egg whites for the whole eggs or egg yolks. Because there are no yolks, this buttercream will be whiter in color. It tends to hold up well in warm temperatures.

According to The Professional Pastry Chef, buttercream can be stored at room temperature for three to four days and in the refrigerator for up to two weeks. For longer storage, freezing is recommended. You will need to remove it from the refrigerator with enough time for it to soften before using it. To speed up the softening, you can break it into small pieces (as you would with cold butter) and place in a warm location. You may even warm these pieces in a bain marie, stirring vigorously until it is smooth and shiny. Continue to stir after removing from the heat as the bowl will remain warm and start to melt the buttercream on the sides of the bowl. Do your best to not overheat

Do you have a favorite buttercream? Or, does it depend on how much time you have or its intended usage?
Let me know.

Cooking Tips · Techniques

Sweet Petals

As Valentine’s Day approaches, many people think of flowers and candy. In just a day, I am doing a demonstration for Hudson Gardens (a private garden and event center) that combines the two. The class is called Sweet Petals and in this Cooking Tip, I thought I would share some of what I will be teaching.

Just how can you combine candy and flowers? The first thing you could do is to make candy with floral flavors. Two of the most common are lavender and rose. To impart these flavors to your candy, you could use either the actual dried flowers or an extract/flavoring. For example, let’s look at chocolate truffles. To make a truffle, you first make a ganache, which is the interior of the truffle. This is then coated in more chocolate, cocoa powder, or other items. A ganache is usually made by pouring hot cream over chopped chocolate and then mixing those together when melted. Prior to doing this, you can infuse either dried lavender or rose buds into the warm cream. This imparts the floral flavor to the cream, the flowers are strained out and the result is lovely floral-flavored truffles. You might finish the truffle by sprinkling lavender or rose buds on the finished truffle. This helps the consumer know the flavor of that truffle.

If you do not want to use real flowers, you can also use flavorings. Taylor & Colledge offers a lavender paste. Savory Spice offers a lavender extract. Wild Flower Hibiscus Co offers rose and other floral extracts. Use these sparingly, though, as floral flavors can be overwhelming.

If you do not care for floral flavors in your chocolate, how about chocolate in the shape of a flower? There are numerous ways you can do this. The easiest is to use a mold such as this daisy-shaped lollipop mold.

You can also just form the chocolate into flower forms. One of my favorite projects involves making petals by coating the bottom of plastic spoons with chocolate, allow them to set up, remove from the spoon and form them into the shape of a flower.

If you wish to use true chocolate, you are limited to one color – brown. If you want color, you can use white chocolate and add food coloring. Or, you can use Candy Melts such as made by Wilton or Make ‘n Mold, which come in numerous colors. The other difference between using real chocolate and another product is that real chocolate will need to be tempered whereas candy melts do not. Tempering is a process whereby the chocolate crystals are aligned in such a way that you get a product that is shiny, snaps when you break it, does not melt in your hand, and importantly for this purpose, easily pops out of the mold. There is a trade-off between the ease of candy melts and the wonderful taste of real chocolate.

Hard candy is another category that pairs well with flowers. Once again, you could flavor your hard candy with floral flavors or make it in the shape of a flower.

You can even place edible flowers inside your hard candy. If using edible flowers, you want to be totally sure that the flowers you use are in the edible category. Not all flowers are edible and the entire plant may not be edible. Know where they come from and beware of insecticides and fungicides. Avoid flowers from florists, garden centers, nurseries or from the roadside. Another consideration is pollen, which may be a concern for people who have hay fever, asthma or allergies. Some experts recommend against eating flowers that have been exposed to untreated animal manure in the prior 4 months.

Making hard candy is not difficult but does require some adjustments if you live at a high altitude. See a prior Cooking Tip for a discussion on this topic.

Other fun things you can do is to roll out gumdrops and form them into roses. Place them on top of your cupcakes for a wonderful presentation. You can even use Starbursts to do the same if you gently soften them in the microwave first.

If you want actual recipes or links to these projects, let me know.

Have a very happy Valentine’s Day!

Cooking Tips · Techniques

Cooking Resolutions

I am not much of a fan of New Year’s resolutions. I personally do not make them. Rather, I just continually strive to improve myself in all sorts of areas. However, I know many people find resolutions motivating. I thought to myself, if I wanted my readers to make any cooking-related resolutions, what would they be? That is the subject of this Cooking Tip – what you could do this next year that would improve your cooking.

  • Read the recipes – Be sure to take the time to read your recipe thoroughly.
    • Carefully look at the list of ingredients so you know what you have and what you need to buy. Also, look out for commas. For example, there is significant difference between “1 cup flour, sifted” and “1 cup sifted flour.” If you do not know the difference, email me and I will help you.
    • Read all the steps in the recipe all the way through. If possible, read it twice before starting your cooking. This will allow you to know how you should progress, what equipment you will need and if there are any surprises waiting for you – such as the step calling for you to “chill mixture for 2 hours”. If you do not know that, it can throw a serious wrench in your plans.
  • Look at the number of servings the recipe makes. If you need to decrease or increase, do the math for each ingredient and write the new amount right on the recipe. This will prevent you from starting out good by adjusting the first couple of ingredients and then forgetting to do the same for the rest – a real recipe ruiner.
  • Take mise en place seriously. Taking the time to gather your ingredients & equipment as well as measuring out those ingredients as well as prepping those that require some prep (such as chopping or slicing) may seem like a waste of time. However, in reality, it makes your cooking go smoother and helps to prevent errors.
  • Be careful about substituting ingredients. Some will work fine but others not so much. For example, if it calls for fresh herbs and you only have dried, you should not make a 1-1 substitution. Use only 1/3 to ½ the amount of dried herbs as fresh. Not every vinegar tastes the same and if you substitute whatever you have in your pantry for what it calls for in the recipe, do not expect it to necessarily work.
  • If you are a baker, seriously consider weighing your ingredients rather than measuring by volume. You will get much better and more consistent results.
  • Invest in a good instant-read thermometer. Not only will this help you to cook your meat to a more edible and safe result but it can also help with baking bread, making custard and it is essential to successful candy making.
  • Use the correct type of measuring cups. Use liquid cups for liquids and dry cups for dry ingredients. You may think that is silly but there is real research demonstrating the inaccuracy of measuring when using the wrong cup.
  • Date your spices. Get rid of outdated ones and replace them with fresh. If they do not smell like the spice they are, they won’t impart much flavor in your dish. Instead of buying large quantities of spices you do not use very regularly, buy smaller ones. This ensures the freshness of your spices and saves you money in the long run as you do not have to throw items away because they have gone stale.
  • Taste as you go. For the best results, taste your dish as you go, adjusting seasonings as needed. At the very least, taste before you serve it. Do you really want to serve a dish to family/friends that you have no idea what it tastes like? I didn’t think so!
  • Try something new whether it is just a new food, a new recipe, a new cuisine or something else. If you do not know where to start, book a class for what you want to learn and let’s have fun with it.
  • Finally, just cook more. It is so much healthier and less costly to cook at home. Learn to plan ahead, make freezer meals, challenge yourself to use whatever is in your refrigerator rather than throw it out. Learn how to Cook without a Recipe to help with this. I can teach you many tips and techniques to assist you.

Do you have any specific cooking resolutions?
Let me know. I would love to hear what you want to work on this next year.

Cooking Tips · Techniques

Enjoy your left-overs safely

Are you a lover or hater of leftovers? I’m definitely a lover – not only is the flavor of some dishes enhanced by a rest overnight in the refrigerator but it is great to have an easy & quick meal sitting there after a day of work. It makes life so much easier. One time that you will surely have left-overs is after a Holiday meal. You can do so much with those left-overs but you need to store them in the best and safest way. That is what I will be talking about in this tip.

Hot foods (including leftover turkey) should be packaged and refrigerated within 2 hours after serving. (For turkey, after you cut the meat off the bones, save the bones to make a great turkey broth.) The concern for bacterial growth is when food is left in the “danger zone” between the temperatures of 40° and 140° for more than 2 hours (reduce this to 1 hour if the ambient temperature is above 90°). That is why it is important to keep your food hot (at least 140°) or refrigerate it so the temperature drops to less than 40° within 2 hours. For cold foods, keep it under 40° at all times.

For large pieces of meat, it is best to cut it into smaller pieces to quicken cooling. For a dish such as soup, you will want to portion it into shallow containers to allow faster cooling. You can place these items directly into the refrigerator or if you want more rapid cooling, use an ice water bath.

All leftovers should be wrapped well in air-tight packaging. This helps keep bacteria out while retaining moisture and preventing your left-overs from picking up other odors from your refrigerator.

Most left-overs can be stored safely in the refrigerator for 3-4 days. Here is a chart from the USDA about recommended refrigerator times. For longer storage, freeze the packaged left-overs. Generally, these items can be frozen for 2-4 months. Although you can safely freeze them for a longer time, the food does tend to lose moisture and flavor. Here is another USDA link that talks more about freezing with more specific recommendations for time.

When thawing them, you still need to be aware of the danger zone. That is why it is not recommended to thaw items by sitting at room temperature. Rather, thaw them overnight in the refrigerator. For faster but still safe thawing, use either a cold-water bath (make sure the leftovers are in a leak-proof package) or the microwave. Not all foods need to be thawed before re-heating. You can go directly from frozen to hot either on the stovetop or in the microwave.

One important caveat – when re-heating leftovers, you want to take them up to 165° as measured with a food thermometer. Not only will this temperature assure safety as far as bacteria is concerned but it will also be safe to re-freeze the item, if necessary.

How do you like to use your left-overs? Email me with your favorite ideas and I will share them with others!

Cooking Tips · Techniques

Cookie Success

Do you love to make cookies for the holidays? Many of us do and we especially delight in the satisfied look on faces as they devour those cookies. Because we are embarking upon this cookie making time, I thought I would re-run a Cooking Tip on Cookie Success that I wrote earlier. I have added a few additional tips for you. Here it is!

Do you prefer your cookies chewier or crispier? Did you know that there are modifications you can make to your cookie recipes to get the result you prefer? This tip will outline some of those changes.

For those of you (including me) who prefer chewy cookies, try the following.

  1. Keep things cold. Chilling the dough will slow down spreading of the cookies. Chilling the baking sheet helps even more.
  2. After removing one baking sheet of cookies from the oven, do not immediately put more cookies on the hot sheet. Wait for it to cool thoroughly. You may want to run cold water over the baking sheet. If the baking sheet is still warm, the butter will melt faster resulting in spreading of the cookies and a thinner, crispier result.
  3. Use solid shortening. Since butter melts faster than solid shortening, cookies made with butter will spread more. If you really want the taste of the butter, try half butter and half shortening.
  4. Adjust your sugar. Use a larger proportion of brown sugar to white. Using dark brown sugar attracts more moisture from the air, thus resulting in a chewier cookie. Also, cookies made with honey will become soft as they stand after baking.
  5. Use yolks only or add one extra yolk. Egg whites are drying. If a recipe calls for two eggs, only use one egg plus one egg yolk.
  6. Use baking powder rather than baking soda. This gives a more acidic environment, which spreads less. Use 1 teaspoon per cup of flour.
  7. Watch your baking time carefully. Don’t over-bake and consider taking them out of the oven one or two minutes before the recommended time.

For crispy cookie fanatics, here are your tips.

  1. Use butter rather than shortening.
  2. Use a bit more liquid in the batter as this helps the cookies spread more.
  3. Substitute 1 tablespoon corn syrup for 1 tablespoon of the sugar.
  4. Replace the egg in the recipe with milk.
  5. Using baking soda rather than baking powder. Use ½ teaspoon baking soda per cup of flour.

Here are some more tips for all cookies.

  1. If possible, use light-colored baking sheets. This ensures more even cooking. Dark cookies sheets can also lead to over-baked bottoms.
  2. Baking sheets should be heavy and preferably, not non-stick.
  3. If your recipe calls for room temperature ingredients, make sure your ingredients are really at room temperature. There are scientific reasons for this but let’s just say it will give you superior results.
  4. If you have the time, let your dough rest before baking. It will improve the flavor and color of the cookies. Refrigerate the dough in an airtight container at least overnight and up to 3 days.
  5. If your cookies are browning too quickly, put a second baking sheet under the first while they are cooking.
  6. Cool your cookies on a wire rack, not directly on the counter or on a plate. There needs to be room for air to circulate around the cookies to prevent condensation and soggy bottoms.

There are more tips/techniques out there but, for now, try these tips for your favorite cookie recipe. If you are making chewy ones, save one for me!

Cooking Tips · Ingredients · Techniques

Flavoring Choices

Spices and flavors have been used for thousands of years all over the world. So much of our food would be pretty bland without these ingredients. In this Cooking Tip, I would like to explore this world of Flavors and Flavoring.

Did you know if you combine lemon, banana, raspberry and pineapple essences that you end up with strawberry? I sure didn’t know that but people who are educated and trained as Flavorists know this and so much more. These scientists have looked at items that bring us flavor such as fruits, vegetables, spices and leaves. Through their investigations, they have identified “flavoring substances” and how they work together to please our palates.

As the Flavor & Extract Manufacturers Association (FEMA) points out, there are hundreds of natural substances in a strawberry that lead to what we taste as strawberry flavor. Flavorists isolate these compounds to develop a strawberry flavor that we can add to our foods. They also design new flavor combinations that we love to try.

Do you look forward to those new Lay’s potato chip flavors each year? (The most recent offering – Grilled Cheese & Tomato Soup – was supposed to be on shelves October 21.) How do they do it? According to FEMA, “when a food company decides it wants to introduce a new product to consumers … they often contact flavorists at companies that specialize in creating flavors, and they ask them to create a flavor that meets their requirements and will be appealing to the consumer.”

If you look at an ingredient list on a product, you may see “natural flavor” or “artificial flavor”. We probably all prefer the term “natural” but they may not be that very different. FEMA’s definition is “Natural flavors are ingredients that come from natural sources such as a spice, fruit, or vegetable.  They can even come from herbs, barks, roots, or similar plant materials.  Natural flavors also come from meat, seafood, poultry, eggs, and dairy products.”

And, “artificial flavors are flavorings that don’t meet the definition of natural flavor. There isn’t much difference in the chemical compositions of natural and artificial flavorings.  What is different is the source.  For example, an artificial strawberry flavor may contain the same individual substances as a natural one, but the ingredients come from a source other than a strawberry.” Of course, companies must abide by the FDA’s rules, which are found here, if you are interested. Other countries have their own rules.

Many times, we home cooks use flavoring extracts in our cooking and baking. I am sure we all have extracts in our pantry but what are they? FEMA defines them as “a solution that contains essential components of a complex material.  A flavor extract is such a solution, but composed specifically of compounds that create flavors.”

The most commonly used in the USA is Vanilla. I have written another Cooking Tip on Vanilla and it can be found here. What other ones do you have in your pantry? Besides vanilla, I have almond, anise, banana, lemon, orange, peppermint, raspberry and spearmint. There are many more, of course. Just check out your favorite supermarket or online supplier.

One little tidbit I want to tell you is that you will often see “Mint” extract on the shelves. You may also see “Peppermint” and less commonly “Spearmint”. If it just says “Mint”, it is most likely a mixture of peppermint and spearmint. If you are using it to make those holiday baked treats, you probably want pure peppermint. Plain mint can be used but will give you a slightly different taste.

There is also something relatively new to our supermarket shelves and that is flavoring pastes. Once again, vanilla paste is the most common but there are others. They all usually have natural flavors but also often have sugar or corn syrup as well as some sort of thickener (Gum Tragacanth , Xantham Gum, Carrageenan). The company with the most varieties is Taylor & Colledge.

If you look at a bottle of any kind of extract, you will always see alcohol. That is because it is used in the distillation process. There are those that say because alcohol evaporates during baking, extracts are not the best forms of flavor for baked goods. Rather, they recommend saving your extracts for cold applications such as beverages or sorbet.

Nature’s Flavors recommends using “flavor concentrates” or “flavor emulsions” in baking. According to the company, these items are “extremely concentrated water soluble liquids containing no alcohol or sugar and are set in a Natural Gum Acacia Base.” They are made to withstand high temperatures, making them the preferred use in baking. I have not tried their products (they do look fun, though) and they are not the only producer in the market.

I suspect that most of us home cooks use these kinds of flavorings in the extract form. We have done that for years and I would think that practice will continue to be the main one we use. With this Cooking Tip, I hope you will see that there is more to flavoring than just extracts. Just have fun in adding flavor to your foods and let me know how it goes!