Cooking Tips · Techniques

Buttercream – A Rich Delight

Buttercream – Just the word sounds rich, doesn’t it? Are you the type that licks the buttercream frosting off the cake because you think it is the best part? Or, is it too rich for you and you prefer the underlying cake? Whichever you are, how to make buttercream is an excellent skill to have and is the subject of this week’s Cooking Tip.

Buttercream is a type of frosting/icing that can be used as a filling, an icing or for decorating cakes or pastries. There are different types of buttercream that require different ingredients and techniques.

As the name indicates, butter is a major ingredient in buttercream. So, be sure to use a high quality butter. Unsalted butter is recommended to prevent your buttercream from tasting salty. The butter needs to be softened to incorporate properly. You should be able to press an indentation into the butter. According to Cooks Illustrated, softened butter sold be 65-67°F.

I like the way that Serious Eats categorizes buttercream. They put all buttercreams into two types.

  1. Beaten-butter method. This method has you adding some sort of sweet base into beaten butter. You start by beating softened butter until fluffy. Then, you add your base, which will differ according to which type you are making. (More details below) Finally, you mix in any flavorings you want. Examples include American, flour and German buttercream.

  2. Cubed -butter method. This is made by adding cubes of softened butter to a sweetened egg foam. These would be French, Italian and Swiss buttercreams.

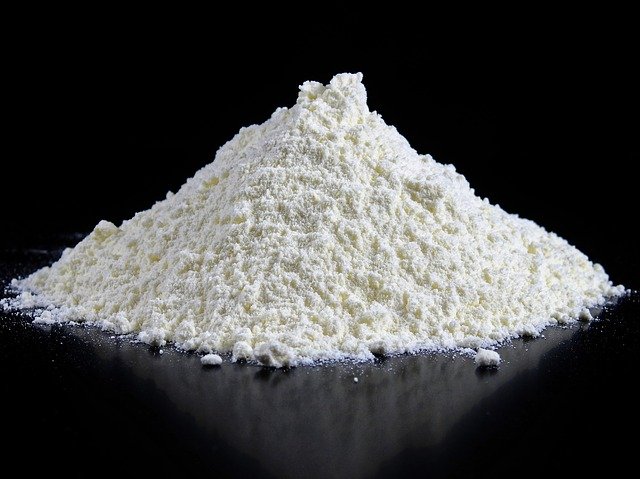
The easiest and quickest type of buttercream is sometimes called Simple Buttercream or American Buttercream. It has three main ingredients: softened butter, powdered sugar and milk/cream. Some like to whip the butter before adding the powdered sugar and then add the cream. Others just cream the softened butter and powdered sugar together and then add milk/cream until the desired consistency is reached. The powdered sugar helps to thicken the mixture without the need for eggs. Flavorings such as vanilla may also be added. This is definitely the easiest buttercream but is also the sweetest. It is the firmest buttercream but the butter tends to melt in very warm environments. If you want to serve this outside on a warm day, this buttercream may not be your best choice.

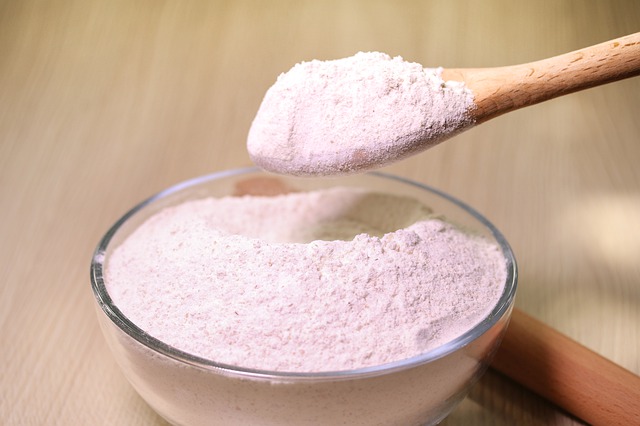
Flour buttercream has a pudding base made of milk, sugar and flour. This is cooked but then cooled before being mixed into the whipped butter. It results in a buttercream this is less sweet and more stable in heat.

German buttercream uses a custard or pastry cream in place of the simple pudding as in the flour buttercream. Because the custard contains eggs, it will be more yellow than others. It tends to be softer than other buttercreams but you can use a thicker custard base to counteract this. It is another choice not well suited to warmer temperatures.

The buttercreams made by the cubed-butter method are also called European or meringue-based buttercream. Meringues are a topic in and of themselves and one on which I wrote an earlier Cooking Tip. There are three types of meringues – French, Swiss and Italian. peaks. For more detail, see this Cooking Tip. Each of these meringues can be used to create a different type of buttercream.

Swiss method – this starts by cooking egg whites and sugar over a hot water bath until the sugar has dissolved. This is whipped to peaks and then soft butter is beaten into the mixture until it is smooth. This method is quick and easy and yields a very light and fluffy buttercream. It is a very stable buttercream that can be used to ice a cake or pipe decorations.

French method – this is made by whipping whole eggs or egg yolks to a thick foam with a hot sugar syrup and then whipping in soft butter. As you are using eggs or yolks, it will yield a richer buttercream. Because of the egg yolks, this buttercream will be more yellow in color. It is a decadent buttercream but does not hold its shape very well, especially in warm environments.

Italian method – Similar to French with the substitution of egg whites for the whole eggs or egg yolks. Because there are no yolks, this buttercream will be whiter in color. It tends to hold up well in warm temperatures.

According to The Professional Pastry Chef, buttercream can be stored at room temperature for three to four days and in the refrigerator for up to two weeks. For longer storage, freezing is recommended. You will need to remove it from the refrigerator with enough time for it to soften before using it. To speed up the softening, you can break it into small pieces (as you would with cold butter) and place in a warm location. You may even warm these pieces in a bain marie, stirring vigorously until it is smooth and shiny. Continue to stir after removing from the heat as the bowl will remain warm and start to melt the buttercream on the sides of the bowl. Do your best to not overheat

Do you have a favorite buttercream? Or, does it depend on how much time you have or its intended usage?
Let me know.

Cooking Tips · Ingredients

Umami Flavors

As we grew up, we learned about the different tastes: sweet, salty, sour and bitter. More recently, people have begun talking about another taste – umami. That is the subject of this Cooking Tip – what is umami and how do we get umami in our foods.

Umami is a savory taste. It is actually a Japanese term that roughly translates to “good flavor” or “good taste”. It has also been thought of as a full-bodied, meaty flavor.

Umami was first studied in 1907 by isolating a compound thought to be responsible for this savory flavor. It was later identified as monosodium glutamate, a sodium salt that produces a strong savory taste. For a discussion on MSG, see this Cooking Tip.

MSG has often been added to foods to boost the umami flavor in foods. However, there are many foods that inherently have this taste, specifically those that contain a high level of the amino acid glutamate. Although not totally comprehensive, here is a list of many such foods.

  • Meat has high levels of glutamate
  • Soy sauce (to be forwarded a Cooking Tip on soy sauce, email me.)
  • Tomatoes, including sun-dried tomatoes
  • Miso
  • Anchovies
  • Mushrooms
  • Potatoes
  • Cheese with the more aged and stronger having more umami. For example, an aged parmesan.
  • Seaweed
  • Worcestershire sauce
  • Fish sauce
  • Coconut aminos (see this Cooking Tip)
  • Tree nuts such as walnuts and almonds. These are especially helpful to adding umami to vegetarian meals.

We know what most of these items are but I would like to elaborate on just a few.

Worcestershire sauce – each manufacturer has its own recipe but a typical list of ingredients is fermented anchovies, onions, garlic, vinegar, molasses, tamarind paste, salt, sugar, and a seasoning mixture that often includes coriander, mustard seed & cloves. It adds an umami punch to marinades, meat dishes, soups/stews.

Miso is a Japanese fermented paste and is typically fermented soybeans, a grain, salt, and koji (a mold). It can be fermented from a few weeks to several years. The most common use of miso is in Japanese-style miso soup, but also adds its unique flavor to marinades, ramen, or vegetable and tofu dishes.

Anchovies are a fatty fish that are most often served cured. After removing the head and inner parts, they are coated in salt, pressed and held in a temperature-controlled environment. During this time, chemical reactions occur which lead to flavor development. Being high in glutamic acid, they are full of umami. They are essential to a traditional Caesar dressing and are often added to Mediterranean dishes, meat dishes and pizza sauces.

Fish sauce is one of those ingredients essential to Asian (especially Thai) dishes. It is made from fermented (at least 12 mos) fish, typically anchovies. The fish breaks down and the salty liquid that forms is collected and filtered before bottling. It is both a condiment and an ingredient. Again, it is full of glutamates that result in a rich, savory taste and a brininess that brings out depth and flavor in everything from dipping sauces and soups to stir-fries and marinades.

Many recipes will call for some of the umami rich ingredients. However, you may also want to experiment on your own. Add a bit of soy sauce to that pasta sauce. Chop some anchovies and throw them in your beef stew. How do you up ramp up umami in your dishes? Let me know.

Cooking Tips · Techniques

Sweet Petals

As Valentine’s Day approaches, many people think of flowers and candy. In just a day, I am doing a demonstration for Hudson Gardens (a private garden and event center) that combines the two. The class is called Sweet Petals and in this Cooking Tip, I thought I would share some of what I will be teaching.

Just how can you combine candy and flowers? The first thing you could do is to make candy with floral flavors. Two of the most common are lavender and rose. To impart these flavors to your candy, you could use either the actual dried flowers or an extract/flavoring. For example, let’s look at chocolate truffles. To make a truffle, you first make a ganache, which is the interior of the truffle. This is then coated in more chocolate, cocoa powder, or other items. A ganache is usually made by pouring hot cream over chopped chocolate and then mixing those together when melted. Prior to doing this, you can infuse either dried lavender or rose buds into the warm cream. This imparts the floral flavor to the cream, the flowers are strained out and the result is lovely floral-flavored truffles. You might finish the truffle by sprinkling lavender or rose buds on the finished truffle. This helps the consumer know the flavor of that truffle.

If you do not want to use real flowers, you can also use flavorings. Taylor & Colledge offers a lavender paste. Savory Spice offers a lavender extract. Wild Flower Hibiscus Co offers rose and other floral extracts. Use these sparingly, though, as floral flavors can be overwhelming.

If you do not care for floral flavors in your chocolate, how about chocolate in the shape of a flower? There are numerous ways you can do this. The easiest is to use a mold such as this daisy-shaped lollipop mold.

You can also just form the chocolate into flower forms. One of my favorite projects involves making petals by coating the bottom of plastic spoons with chocolate, allow them to set up, remove from the spoon and form them into the shape of a flower.

If you wish to use true chocolate, you are limited to one color – brown. If you want color, you can use white chocolate and add food coloring. Or, you can use Candy Melts such as made by Wilton or Make ‘n Mold, which come in numerous colors. The other difference between using real chocolate and another product is that real chocolate will need to be tempered whereas candy melts do not. Tempering is a process whereby the chocolate crystals are aligned in such a way that you get a product that is shiny, snaps when you break it, does not melt in your hand, and importantly for this purpose, easily pops out of the mold. There is a trade-off between the ease of candy melts and the wonderful taste of real chocolate.

Hard candy is another category that pairs well with flowers. Once again, you could flavor your hard candy with floral flavors or make it in the shape of a flower.

You can even place edible flowers inside your hard candy. If using edible flowers, you want to be totally sure that the flowers you use are in the edible category. Not all flowers are edible and the entire plant may not be edible. Know where they come from and beware of insecticides and fungicides. Avoid flowers from florists, garden centers, nurseries or from the roadside. Another consideration is pollen, which may be a concern for people who have hay fever, asthma or allergies. Some experts recommend against eating flowers that have been exposed to untreated animal manure in the prior 4 months.

Making hard candy is not difficult but does require some adjustments if you live at a high altitude. See a prior Cooking Tip for a discussion on this topic.

Other fun things you can do is to roll out gumdrops and form them into roses. Place them on top of your cupcakes for a wonderful presentation. You can even use Starbursts to do the same if you gently soften them in the microwave first.

If you want actual recipes or links to these projects, let me know.

Have a very happy Valentine’s Day!

Cooking Tips · Ingredients

Unbleached Cake Flour

Last week’s Cooking Tip was all about the differences between Bleached and Unbleached all-purpose flour. In this week’s Tip, I want to discuss the same topic but as it relates to cake flour.

Cake flour is a fine-textured flour made from soft wheat. It has a very low protein content, usually around 7-8% as opposed to 10-12% for all-purpose flour. There is also something called pastry flour. It also made from soft wheat but has a protein content just above that of cake flour – about 8-9%.

Since cakes are meant to be tender, you want to reduce the gluten content. This is the purpose of the low-protein cake flour. Almost all cake flours are bleached with chlorine & bromated. (For a review of this topic as it relates to AP flour, see last week’s Tip.) Cook’s Illustrated’s science editor explains that “this process damages the starch molecules and allows for greater absorption of moisture and fat by the flour, which in turn results in moister, more tender baked goods.”

Recently, though, some manufacturers have begun to offer unbleached cake flour. A major player in this market is King Arthur Flour. This product supposedly simulates this moisture attraction without any chemicals. There were two other companies offering unbleached cake flour: Hodgson Mill and Bob’s Red Mill. Since writing this, the former company was sold and I know longer see this product as available. The latter recently discontinued their unbleached cake flour. (They do continue to carry unbleached pastry flours and they recommend their Unbleached White Fine Pastry Flour as a substitute.) I will still mention it below as it was the flour that was tested by one expert. August 2024 update – Although the Bob’s Red Mill pastry flour is no longer on their website, it appears you can still purchase it from Amazon and a few other online outlets.

When Cook’s Illustrated tested the King Arthur product, they found it performed just as well as bleached cake flour. Stella Parks of Serious Eats had a differing viewpoint. In this article, she lists a number of advantages of bleached (chlorinated) cake flour. Note, though, that her testing was only with angel food cake.

She states that the bleached cake flour is not only whiter in color but is also “conditioned”. The chlorine slows the rate of starch gelatinization in flour, thus improving gas retention. This results in a higher rise. It also raises the temperature of protein denaturation, once again giving the cake more time to rise. Additionally, it lowers the pH of cake flour from an average of 5.9 to about 4.8. The lower pH inhibits browning, an aspect that is great for an angel food cake.

When testing the unbleached cake flour, she found that the batter soaked up excess moisture and set too quickly. This inhibited the rise of the cake. Again, the discussion was only about angel food’s cake.

The Cake Blog did a testing of 6 different flours in making a traditional (not angel food) cake. This tester had a very positive view of the unbleached cake flours. A short summary of the results is shown in the following chart.

Type of FlourHeight of cakeTextureColorFlavor
Unbleached AP flourShortestCoarseDeep ivoryWheaty
Unbleached pastry flourModerateMildly coarsePale ivoryMildly sweet
King Arthur unbleached cake flourMediumMed-fine crumbMediumMildly sweet
Bob’s Red Mill unbleached cake flourMedium-tallFine crumbPaleMildly sweet
Softasilk bleached cake flourTallestFine crumbPaleMildly sweet

I must add one caution for those of us at high altitude. Baking cakes at higher altitude can certainly be a challenge. I have written a Cooking Tip on this problem. Using cake flour with its lower protein content may hamper getting good results at altitude. Some experts recommend staying totally away from cake flour. Others will use a mixture of cake flour & AP flour. Some recommend using half & half while others recommend 1/3 cake flour and 2/3 AP flour.

What to make of all this? If you want a great angel food cake, I would probably recommend going with a good bleached cake flour. If not, give one of the unbleached cake flours a try. Let me know what you think.

Cooking Tips · Ingredients

Flour – Bleached or Unbleached?

Flour is one of those pantry stables that most of us could not live without. I wrote an earlier Cooking Tip on all the different kinds of flours we have available to us. If you did not receive it and wish to read it, email me and I will forward it to you. For this current Cooking Tip, I want to focus on the difference between Bleached and Unbleached all-purpose flour. Cake flour is a different product, which I will address in an upcoming Tip.

There are two aspects to the debate on these flours. First, there are health concerns related to the use of chemicals added to flour. This is something that I leave to you to decide for yourself. The other aspect is how the flours act in our kitchens. That is what I will be discussing.

According to Harold McGee in On Food & Cooking, “freshly milled flour makes a weak gluten, a slack dough and a dense loaf.” These properties improve as the flour ages. Doughs made with aged flour will have more elasticity and structure.

Besides the structural differences, freshly milled flour tends to be yellowish in color. The aging process helps to change the color to white. Flour can be aged naturally but it takes 1-2 months. As millers began to understand this natural process, they began to use bleaching agents to chemically whiten the flour.

Some of the bleaching agents are banned in other countries. Although there may be limits on amounts, in the US, the FDA allows the use of many such chemicals. For a list, see this link.

The bleaching process does compromise some of the flour’s nutrients and results in a lower protein content, but these are often added back to the flour.

Another fact of which to be aware is that unbleached flour may also be treated with chemicals, usually potassium bromate, but it is treated with far less chemicals than bleached flour.

Bromated flour is flour which has been enriched with potassium bromate, a maturing agent which promotes gluten development in doughs. It is often used in bread production as it is said to make the bread stronger, more elastic and with bigger rises. It also bleaches the flour slightly. It is often used in low protein flours, which do not develop sufficient gluten. Some commercial bakers use this type of flour because it yields dependable results, and it makes a stronger, more elastic dough which can stand up to commercial baking tools. Ascorbic acid has replaced potassium bromate as a food additive in a number of areas as there is some concern that potassium bromate is a potential carcinogen. It has been banned in some countries and in California, the presence of potassium bromate requires a warning under Proposition 65. That regulation mandates warnings about the presence of chemicals that have been shown to cause cancer, birth defects or reproductive harm. The FDA lists it as an approved optional ingredient in bread.

In terms of how the flours act in our kitchen, the bleaching process produces a whiter and finer ground flour, which leads to baked goods that are softer in texture and brighter in color. Although not required, it is often recommended for cookies, pie crusts, quick breads, muffins & pancakes. Unbleached flour will have an off-white color and will not be as fine in texture. It is recommended when you want more structure such as yeast breads and pastries.

According to Cook’s Illustrated, “In baking tests, bleached flour was criticized for tasting flat or having ‘off’ flavors (texturally, the flours behaved the same). These characteristics, however, were much harder to detect in recipes with a high proportion of ingredients other than flour, such as cornbread or oatmeal cookies.” They did not find a discernable taste difference in savory applications such as thickening a sauce.

Cooking Light quoted Sharon Davis, of the Home Baking Association staff, “The difference between bleached and unbleached flour is basically indiscernible to the home baker. The bleaching process helps commercial bakers with consistency. Spread, texture, volume, and quality of grain must be exact each and every time but for the home baker, the only thing bleach has to offer is a whiter bread or cookie. “

They also did a testing among a panel of Cooking Light food editors and test kitchen professionals by testing four different recipes in a side-by-side comparison using bleached and unbleached flour. They tested sugar cookies, vanilla pound cake, buttermilk biscuits and brioche. The testers were unanimous in concluding that substituting unbleached flour did not compromise the result. In some cases, the tasters actually preferred the result with unbleached flour. They detected a slightly nutty, earthier flavor in the buttermilk biscuits made with unbleached flour as well as a slightly fluffier texture. They concluded that for the home baker, “bleached flour merely offers visual appeal – a whiter, brighter flour that only sometimes translates in the final baking product.”

In today’s stores, you can easily find unbleached flours. For some companies such as King Arthur Flour and Bob’s Red Mill, unbleached is the standard. King Arthur states that none of their flours contain any bleach, bromate, or artificial preservatives. Bob’s Red Mill says that their white flours are not bromated or bleached. Their white flour does contain malted barley flour, an ingredient they say has the same effect as bromating without adding chemicals. It does add a little extra sugar, which they say produces a stronger gluten reaction. Although King Arthur does not mention this, a look at the ingredient list shows that they also add malted barley flour. Bob’s Red Mill organic flour does not contain malted barley flour but King Arthur’s organic flour still lists this as an ingredient.

I tend to use King Arthur’s All Purpose flour and have not had a problem with it. What about you? What do you use? Have you noticed a difference in bleached vs unbleached flour? Why do you choose one over the other?

Let me know and as always —- Happy Baking!

Cooking Tips · Ingredients

Stocks and Broths — Is there really a difference?

A staple in our pantries is some sort of stock, usually chicken, but there is also beef, seafood and vegetarian. If you are a bit more ambitious, that stock may be in your freezer rather than your pantry as you made it yourself (Hurray for you!) Or, is what you have broth rather than stock? Or, are they the same thing? That is the subject of this Cooking Tip. Let’s demystify these terms although I will warn you that manufacturers often use these different terms willy nilly.

After perusing definitions found in culinary reference sources, I would summarize the difference as follows.

  • Stock – This is a flavorful liquid made from simmering bones and aromatics with little or no seasoning. As discussed below, stocks are usually simmered anywhere between 30 minutes and 24 hours. It is meant to be used for making sauces, soups, gravies, etc. It is at that stage that seasoning is used, as needed in the final dish.
  • Broth – This is also a flavorful liquid but is made from simmering meat (may also have a few bones) and aromatics. Broths are usually seasoned and have a more pronounced flavor as they are based on meat rather than bones. Because of the lack of bones, there is an absence of gelatin resulting in much less body than stocks. Broths are usually simmered a much shorter time than stocks, under 2 hours. They are intended to be served as is and are, therefore, seasoned to taste.

These definitions obviously work for a meat-based stock/broth. With a vegetarian version, there is less of a distinction other than the seasoning and the end purpose – consuming on its own or as an ingredient in another dish.

Stocks may also be classified as white or brown – depending on whether or not the bones/aromatics are roasted before making the stock.

  • White stock is made from raw or blanched bones and aromatics.
  • Brown stock calls for roasting the ingredients, which results in darker flavor and color of the stock.

Another discussion is around whether you make/freeze homemade stock or use store-bought. As I write this, I am making a chicken stock from all the bones I have accumulated from holiday cooking and even before that. However, I try to always have store-bought in my pantry because when I run out of homemade, it is not something I can quickly make. Having a good quality store-bought stock in your pantry is a good idea.

If you want to try to make homemade stock, it is not difficult. It just takes some time, some babysitting the mixture and remembering a few key items. First, put your bones in a stock pot and cover with cool water by no more than 2 inches. Slowly bring it up to a very mild simmer. The faster it comes to a boil and the more vigorous it boils, the more impurities are brought out, which can be deleterious both to flavor and clarity. The water should be at a bare simmer. The French call it “frémir”, which means “to tremble”. There should just be an occasional bubble bursting to the surface – no more. Adjust your heat to keep it at this level.

A second key is that you should periodically skim any fat or impurities off the top of the mixture. This will help in achieving a clear liquid.

Most stock recipes have you add a mirepoix (if you do not recall what that is, see this Tip I wrote earlier.) This should be added only in the last hour of cooking.

Continue to simmer for the appropriate amount of time, tasting as you go. Stock can be made from any type of bone: chicken, beef, fish. It can even be shrimp shells. The method mainly differs in how long it is simmered. I was taught the following in culinary school although you may find slight variations from other sources.

  • Vegetable & Seafood stock – 30 minutes-1 hour
  • Chicken stock – 4-6 hours
  • Duck stock – 6-8 hours
  • Lamb/Pork stock – 8-12 hours
  • Beef/Veal stock – 18-24 hours

When finished, be sure to strain thoroughly either through a chinois or a cheesecloth-lined colander. For food safety reasons, cool quickly to under 40°F. Apportion into small containers and freeze for future use.

For those good store-bought stocks, I perused numerous tasting tests. Some, unfortunately, were from quite a few years ago. As companies do change their recipes, some of the older taste tests may not still be valid. As with anything, different testers rated differently. So, I will try to summarize for you as best I can.

Before I do that, though, I want to make you aware of one concern with many store-bought stocks. They tend to very high in sodium. As I mentioned above, home-made stocks are generally not seasoned to allow you to get the seasoning just right in the finished dish. If you are using a store-bought stock, you need to be very careful about adding any salt as it starts out with a significant amount just in the stock.

There are reduced sodium stocks readily available. I encourage you to taste them to see if that might suit your purposes just fine. Overall, I have seen the sodium content for 8 ounces vary from a low of 20 mg to a high of 860 mg. That is a difference that will certainly affect your final dish.

One other caveat on the ratings. They only test well-known national brands. They do not test store brands, including Costco or Sam’s Club. Those are ones you may want to taste test on your own.

Among the highest rated store-bought stocks are:

  • Swanson’s Stocks – both regular and less sodium varieties
  • Progresso Reduced Sodium Chicken Broth
  • Trader Joe’s Organic Low-Sodium Chicken Broth
  • Kitchen Basics Natural Chicken Stock

Among those rated as “OK in a pinch” are:

  • Imagine Free-Range Low Sodium Chicken Broth

Some were rated as very mediocre at best:

  • Simply Balanced Low-Sodium Chicken Broth
  • Whole Foods 365 Organic Chicken Broth

A couple were consistently rated poor:

  • Pacific Organic Free Range Low Sodium Chicken Broth
  • College Inn Chicken Broth

I suspect all of us have some stock in our kitchen but I wonder how many of you have homemade stock. Let me know if you do. Whether it is home-made or store-bought, it is an essential item. Use it not only to make soups but also to add more flavor to your sauces. You may also want to cook your rice/grains in stock rather than water – or a mixture of both. Have fun with your stocks – or broths!

Cooking Tips · Ingredients

Almonds – a great ingredient for cooking or baking

Welcome to a new year of cooking and baking and eating! This month I will be teaching a class on Spanish Tapas (if that sounds fun, contact me for more info.) The people who have engaged me wanted at least one sweet bite. I will be making a Spanish Flourless Almond Cookie. This particular recipe called for using blanched, slivered almonds and grinding them (with other ingredients) in your food processor.  I wondered why they did not just call for almond flour or almond meal. As I thought about this, I decided a discussion of almonds would make a great Cooking Tip to start out this new year.

California is the home to about 80% of the almonds produced globally. Those orchards grow about 50 different varieties although according to the Almond Board of California, 95% of the production is limited to only 12 varieties. When you buy almonds, the package will most likely not list the variety of almond. What the consumer will be looking for is the following:

  • Whole almonds – almonds in their whole state
  • Sliced almonds – almonds that have been thinly sliced before packaging
  • Slivered almonds – almonds that have been cut into “slivers”
  • Natural almonds – almonds that still have their skins intact
  • Blanched almonds – almonds that have had their skins removed
  • Almond flour
  • Almond meal

It may be different in your supermarket but where I normally shop, the whole almonds are always “natural” or “raw”, not blanched. This is also true for sliced almonds whereas slivered are more likely to be blanched. Of course, if you shop online, you will be able to find each of the kinds of almonds in raw or blanched.

Which kind you use will depend on what your recipe calls for. Do you want the almonds whole or in pieces? You can easily chop whole almonds into pieces but it would be much for difficult to get the thin slices or slivered shapes in your home kitchen.

Do you want the color and texture of the almond skin? If so, go with raw almonds. If not, you need blanched almonds. In my area, if I want blanched almonds, I have two choices. One, I can buy slivered almonds, which are normally blanched. Or, I can buy raw almonds and remove their skins myself. To do this, place the almonds in a bowl. Pour in boiling water to cover the almonds. Let the almonds sit for no longer than 1 minute to preserve their crispness. Drain the almonds and rinse under cold water. Pat the almonds dry. Pinch one end of the almonds and they will slip out of their skin. One note, be sure your almonds have not been roasted or this process will not easily work.

Let’s turn now to ground almond products. In the stores, you will most likely find either or both almond flour or almond meal. Labeling of these products is not regulated but almond four is typically made from blanched nuts, while almond meal is most often ground from skin-on nuts. Also, flour is typically ground finer than meal. It is not always straightforward, though, as the store brand at my supermarket labels this product as “Almond Meal Flour”. So, which is it? The description says it is made from blanched almonds and is ground finely. I would think this would be more similar to almond flour rather than meal.

These products are somewhat pricey. At my store they range from $7 to $10 per pound. As with many items, you can make your own. If you want the light color of blanched almonds, you will either have to buy these or go through the process described above to remove the skins. After this process, though, you will want them very dry before grinding. To do this, preheat the oven to 350°. Spread them out on a baking sheet and carefully roast in the oven until they are quite dry, probably about 10 to 15 minutes. You may even turn off the oven and let them sit there all night to dry out even more. When the almonds are toasted and quite dry, it is time to grind them.

Most frequently, instructions will recommend a food processor. If you do this, do not fill the bowl more than half-full. Pulse them rather than turn the processor on fully. You do not want to end up with almond butter. This method works fine but the resulting product will not be as fine as almond flour you buy. It will be more on the side of almond meal. Feel free to use a sieve to remove the large pieces, which may be pulsed again.

Others say that the food processor does not work as well as other methods to get a fine, airy product.  Some recommend a nut grater, which looks similar to a hand-cranked cheese grater. After feeding the nuts into the hopper and cranking the handle, a fine-textured nut flour is produced. Since I would suspect most of us do not own one of these, a cheese grater may be used. Use the smallest blade with cold, but not frozen, almonds. Still others recommend either a spice grinder or a blender over the food processor.

Besides the limitation of home equipment, there may be another reason why your home-ground almond flour is not as fine and silky as that you purchase. According to some sources, the commercial almond meal undergoes removal of oils, also called de-fatted. This is not a step we can do in our home kitchens. This is not universal, though. I contacted Bob’s Red Mill, and they responded that they do not defat their almonds.

Almonds have a long shelf life if stored correctly. They should be place in an airtight container and stored in a cool, dry place. Other storage tips include avoiding exposure to strong aromas or direct sunlight. For longer term storage, the freezer may be used. Be especially careful with your blanched almonds or ground products.

Enjoy a new year of cooking and baking. I’m sure almonds, in whatever form, will be a part of those endeavors!

Cooking Tips · Techniques

Cooking Resolutions

I am not much of a fan of New Year’s resolutions. I personally do not make them. Rather, I just continually strive to improve myself in all sorts of areas. However, I know many people find resolutions motivating. I thought to myself, if I wanted my readers to make any cooking-related resolutions, what would they be? That is the subject of this Cooking Tip – what you could do this next year that would improve your cooking.

  • Read the recipes – Be sure to take the time to read your recipe thoroughly.
    • Carefully look at the list of ingredients so you know what you have and what you need to buy. Also, look out for commas. For example, there is significant difference between “1 cup flour, sifted” and “1 cup sifted flour.” If you do not know the difference, email me and I will help you.
    • Read all the steps in the recipe all the way through. If possible, read it twice before starting your cooking. This will allow you to know how you should progress, what equipment you will need and if there are any surprises waiting for you – such as the step calling for you to “chill mixture for 2 hours”. If you do not know that, it can throw a serious wrench in your plans.
  • Look at the number of servings the recipe makes. If you need to decrease or increase, do the math for each ingredient and write the new amount right on the recipe. This will prevent you from starting out good by adjusting the first couple of ingredients and then forgetting to do the same for the rest – a real recipe ruiner.
  • Take mise en place seriously. Taking the time to gather your ingredients & equipment as well as measuring out those ingredients as well as prepping those that require some prep (such as chopping or slicing) may seem like a waste of time. However, in reality, it makes your cooking go smoother and helps to prevent errors.
  • Be careful about substituting ingredients. Some will work fine but others not so much. For example, if it calls for fresh herbs and you only have dried, you should not make a 1-1 substitution. Use only 1/3 to ½ the amount of dried herbs as fresh. Not every vinegar tastes the same and if you substitute whatever you have in your pantry for what it calls for in the recipe, do not expect it to necessarily work.
  • If you are a baker, seriously consider weighing your ingredients rather than measuring by volume. You will get much better and more consistent results.
  • Invest in a good instant-read thermometer. Not only will this help you to cook your meat to a more edible and safe result but it can also help with baking bread, making custard and it is essential to successful candy making.
  • Use the correct type of measuring cups. Use liquid cups for liquids and dry cups for dry ingredients. You may think that is silly but there is real research demonstrating the inaccuracy of measuring when using the wrong cup.
  • Date your spices. Get rid of outdated ones and replace them with fresh. If they do not smell like the spice they are, they won’t impart much flavor in your dish. Instead of buying large quantities of spices you do not use very regularly, buy smaller ones. This ensures the freshness of your spices and saves you money in the long run as you do not have to throw items away because they have gone stale.
  • Taste as you go. For the best results, taste your dish as you go, adjusting seasonings as needed. At the very least, taste before you serve it. Do you really want to serve a dish to family/friends that you have no idea what it tastes like? I didn’t think so!
  • Try something new whether it is just a new food, a new recipe, a new cuisine or something else. If you do not know where to start, book a class for what you want to learn and let’s have fun with it.
  • Finally, just cook more. It is so much healthier and less costly to cook at home. Learn to plan ahead, make freezer meals, challenge yourself to use whatever is in your refrigerator rather than throw it out. Learn how to Cook without a Recipe to help with this. I can teach you many tips and techniques to assist you.

Do you have any specific cooking resolutions?
Let me know. I would love to hear what you want to work on this next year.

Cooking Tips · Ingredients

Cosmic Crisp — A New Apple in Town

There is a new apple in town — the Cosmic Crisp — and I wanted to let everyone know about this apple that has just arrived in our supermarkets.

Cosmic Crisp Apple – photo courtesy of Proprietary Variety Management

After 20 years of study and research by Washington State University, the Cosmic Crisp apple is being launched. it is a cross between an Enterprise and Honeycrisp. The “Cosmic” part of the name comes from the white “lenticels” all over the outside and the “Crisp” hearkens back to one of its parents — the Honeycrisp.

The developers describe its texture as very firm and crisp. They claim it has naturally high levels of acidity and sugar, making it an exceptional eating apple. They say this characteristic allows cooks to reduce the sugar in recipes using this apple. The high acidity also means it is slow to brown.

I just purchased some and I must say both my husband and I really enjoyed them. They are, indeed, a crisp apple and had a delightful flavor. So many apples today seem to lack much flavor. This is not true for the Cosmic Crisp.

They are not to everyone’s liking, though. One of my wonderful readers shared that they were not going to be a favorite of hers. (Thank you, Jana, for sharing with us!) What about you? I urge you to give them a try and tell me what you think. I would absolutely love to hear from you with your opinion on this new breed of apple. Email me with your thoughts.

Cooking Tips

Great cookbooks for gifts or for yourself!

Last week I mentioned some ideas for great stocking stuffers. This week I want to mention some cookbooks to consider either as gifts or for yourself. Perhaps print this Cooking Tip with the ones you would like circled in red and leave it in a conspicuous place.

The first two books are for those cooks who love to understand the science behind successful dishes. They do have recipes in them but the real worth of these books is the discussions of ingredients and techniques behind those recipes.

The first one is The Food Lab by J. Kenji López-Alt. This book was published in 2015 and soon won the James Beard Award for General Cooking and the IACP (International Association of Culinary Professionals) Cookbook of the Year award. The author takes all those culinary “rules” and puts them to the test to see if they hold up to reality. When is the best time to salt your steak before cooking? What is the best method for obtaining easy-to-peel hard boiled eggs? The writing is entertaining and it is a wonderful resource to have on your bookshelf.

A similar book is Cookwise by Shirley Corriher. Being a biochemist by trade, the author delves into all aspects of cooking and helps the reader to understand why things happen. She then pairs those scientific discussions with recipes that demonstrate what she is teaching. This is one of the first cookbooks I bought when I started getting interested in cooking. The original volume was published in 1997 but is still a great resource. In 2008, she published Bakewise: The Hows & Whys of Successful Baking. Although I do not have this book, I can only imagine it would also be a worthwhile volume.

The next two books are pure culinary reference books – no recipes – and are for those cooks who are very serious about not just cooking but truly understanding the world of food. First is On Food & Cooking: The Science & Lore of the Kitchen by Harold McGee. It was first published in 1984 and updated in 2004. It was one of the books that I was required to have in culinary school. According to its description, it is a “compendium of basic information about ingredients, cooking methods, and the pleasures of eating.”

A dictionary of sorts is The New Food Lover’s Companion by Rob and Sharon Tyler Herbst. The latest edition is 2013 and is a great book to grab when you run across a term or an ingredient with which you are not familiar. The authors also published The Deluxe Food Lover’s Companion in 2015. It is a larger book both in size and content including information on more ethnic ingredients, food labels, ingredient substitutions and safe cooking temperatures.

Do you ever want to just throw ingredients together to make a dish without a recipe? This can be done but not all flavors complement each other. That is where The Flavor Bible Karen Page and Andrew Dornenburg comes to the rescue. Published in 2008, the jacket describes this book as “your guide to hundreds of ingredients along with the herbs, spices and other seasonings that will allow you to coax the greatest possible flavor and pleasure from them.”

A little gem of a book is Food FAQs: Substitutions, Yields & Equivalents by Linda Resnik and Dee Brock. I consult this book every single week. The authors have painstakingly compiled lists and charts that answer questions such as “how much juice in an average-sized lemon”, “how many onions are required to make one cup of chopped onions” and “what can I substitute for a quince?” I cannot more highly recommend this book.

Enough of reference books, what about actual cookbooks? Here are just a few that I use and love. If you are a fan of southwestern cooking, Bobby Flay’s Mesa Grill Cookbook. After having eaten at The Mesa Grill in Las Vegas and absolutely loving our lunch, my husband bought this for me last Christmas. It is a very pretty cookbook but is also filled with delightful dishes page after page. Everything I have made from this has been wonderful. Last night, I made “New Mexican Rubbed Pork Tenderloin with Bourbon-Ancho Sauce”. It is not a cookbook for those of you who want quick and easy. Although his recipes are not difficult, they do require quite a few ingredients and often consist of multiple components. The effort is worth it but you should be aware of this before purchasing this book.

If you love to bake, Bake from Scratch (a culinary website as well as a magazine) has published three volumes entitled Bake from Scratch: Artisan Recipes for the Home Baker by Brian Hart Hoffman. All kinds of baking are included from bread to cakes to pies to pastries and more.

An interesting little volume that answers the question of whether it is better to buy an item at the store or to make it yourself is Make the Bread, Buy the Butter by Jennifer Reese. This book was a gift from my husband’s brother and his wife. After extensive testing, the author tells the reader when it is worth the effort to make something homemade and when it is better to just buy it. She bases her recommendation on the cost, the effort and the end result.

There are so many great cookbooks out there that it is impossible to compile a list. These are just some that I use on a regular basis and can personally recommend to you.

Happy Reading – and Cooking!