Cooking Tips · Ingredients

Stocks and Broths — Is there really a difference?

A staple in our pantries is some sort of stock, usually chicken, but there is also beef, seafood and vegetarian. If you are a bit more ambitious, that stock may be in your freezer rather than your pantry as you made it yourself (Hurray for you!) Or, is what you have broth rather than stock? Or, are they the same thing? That is the subject of this Cooking Tip. Let’s demystify these terms although I will warn you that manufacturers often use these different terms willy nilly.

After perusing definitions found in culinary reference sources, I would summarize the difference as follows.

  • Stock – This is a flavorful liquid made from simmering bones and aromatics with little or no seasoning. As discussed below, stocks are usually simmered anywhere between 30 minutes and 24 hours. It is meant to be used for making sauces, soups, gravies, etc. It is at that stage that seasoning is used, as needed in the final dish.
  • Broth – This is also a flavorful liquid but is made from simmering meat (may also have a few bones) and aromatics. Broths are usually seasoned and have a more pronounced flavor as they are based on meat rather than bones. Because of the lack of bones, there is an absence of gelatin resulting in much less body than stocks. Broths are usually simmered a much shorter time than stocks, under 2 hours. They are intended to be served as is and are, therefore, seasoned to taste.

These definitions obviously work for a meat-based stock/broth. With a vegetarian version, there is less of a distinction other than the seasoning and the end purpose – consuming on its own or as an ingredient in another dish.

Stocks may also be classified as white or brown – depending on whether or not the bones/aromatics are roasted before making the stock.

  • White stock is made from raw or blanched bones and aromatics.
  • Brown stock calls for roasting the ingredients, which results in darker flavor and color of the stock.

Another discussion is around whether you make/freeze homemade stock or use store-bought. As I write this, I am making a chicken stock from all the bones I have accumulated from holiday cooking and even before that. However, I try to always have store-bought in my pantry because when I run out of homemade, it is not something I can quickly make. Having a good quality store-bought stock in your pantry is a good idea.

If you want to try to make homemade stock, it is not difficult. It just takes some time, some babysitting the mixture and remembering a few key items. First, put your bones in a stock pot and cover with cool water by no more than 2 inches. Slowly bring it up to a very mild simmer. The faster it comes to a boil and the more vigorous it boils, the more impurities are brought out, which can be deleterious both to flavor and clarity. The water should be at a bare simmer. The French call it “frémir”, which means “to tremble”. There should just be an occasional bubble bursting to the surface – no more. Adjust your heat to keep it at this level.

A second key is that you should periodically skim any fat or impurities off the top of the mixture. This will help in achieving a clear liquid.

Most stock recipes have you add a mirepoix (if you do not recall what that is, see this Tip I wrote earlier.) This should be added only in the last hour of cooking.

Continue to simmer for the appropriate amount of time, tasting as you go. Stock can be made from any type of bone: chicken, beef, fish. It can even be shrimp shells. The method mainly differs in how long it is simmered. I was taught the following in culinary school although you may find slight variations from other sources.

  • Vegetable & Seafood stock – 30 minutes-1 hour
  • Chicken stock – 4-6 hours
  • Duck stock – 6-8 hours
  • Lamb/Pork stock – 8-12 hours
  • Beef/Veal stock – 18-24 hours

When finished, be sure to strain thoroughly either through a chinois or a cheesecloth-lined colander. For food safety reasons, cool quickly to under 40°F. Apportion into small containers and freeze for future use.

For those good store-bought stocks, I perused numerous tasting tests. Some, unfortunately, were from quite a few years ago. As companies do change their recipes, some of the older taste tests may not still be valid. As with anything, different testers rated differently. So, I will try to summarize for you as best I can.

Before I do that, though, I want to make you aware of one concern with many store-bought stocks. They tend to very high in sodium. As I mentioned above, home-made stocks are generally not seasoned to allow you to get the seasoning just right in the finished dish. If you are using a store-bought stock, you need to be very careful about adding any salt as it starts out with a significant amount just in the stock.

There are reduced sodium stocks readily available. I encourage you to taste them to see if that might suit your purposes just fine. Overall, I have seen the sodium content for 8 ounces vary from a low of 20 mg to a high of 860 mg. That is a difference that will certainly affect your final dish.

One other caveat on the ratings. They only test well-known national brands. They do not test store brands, including Costco or Sam’s Club. Those are ones you may want to taste test on your own.

Among the highest rated store-bought stocks are:

  • Swanson’s Stocks – both regular and less sodium varieties
  • Progresso Reduced Sodium Chicken Broth
  • Trader Joe’s Organic Low-Sodium Chicken Broth
  • Kitchen Basics Natural Chicken Stock

Among those rated as “OK in a pinch” are:

  • Imagine Free-Range Low Sodium Chicken Broth

Some were rated as very mediocre at best:

  • Simply Balanced Low-Sodium Chicken Broth
  • Whole Foods 365 Organic Chicken Broth

A couple were consistently rated poor:

  • Pacific Organic Free Range Low Sodium Chicken Broth
  • College Inn Chicken Broth

I suspect all of us have some stock in our kitchen but I wonder how many of you have homemade stock. Let me know if you do. Whether it is home-made or store-bought, it is an essential item. Use it not only to make soups but also to add more flavor to your sauces. You may also want to cook your rice/grains in stock rather than water – or a mixture of both. Have fun with your stocks – or broths!

Cooking Tips · Ingredients

Almonds – a great ingredient for cooking or baking

Welcome to a new year of cooking and baking and eating! This month I will be teaching a class on Spanish Tapas (if that sounds fun, contact me for more info.) The people who have engaged me wanted at least one sweet bite. I will be making a Spanish Flourless Almond Cookie. This particular recipe called for using blanched, slivered almonds and grinding them (with other ingredients) in your food processor.  I wondered why they did not just call for almond flour or almond meal. As I thought about this, I decided a discussion of almonds would make a great Cooking Tip to start out this new year.

California is the home to about 80% of the almonds produced globally. Those orchards grow about 50 different varieties although according to the Almond Board of California, 95% of the production is limited to only 12 varieties. When you buy almonds, the package will most likely not list the variety of almond. What the consumer will be looking for is the following:

  • Whole almonds – almonds in their whole state
  • Sliced almonds – almonds that have been thinly sliced before packaging
  • Slivered almonds – almonds that have been cut into “slivers”
  • Natural almonds – almonds that still have their skins intact
  • Blanched almonds – almonds that have had their skins removed
  • Almond flour
  • Almond meal

It may be different in your supermarket but where I normally shop, the whole almonds are always “natural” or “raw”, not blanched. This is also true for sliced almonds whereas slivered are more likely to be blanched. Of course, if you shop online, you will be able to find each of the kinds of almonds in raw or blanched.

Which kind you use will depend on what your recipe calls for. Do you want the almonds whole or in pieces? You can easily chop whole almonds into pieces but it would be much for difficult to get the thin slices or slivered shapes in your home kitchen.

Do you want the color and texture of the almond skin? If so, go with raw almonds. If not, you need blanched almonds. In my area, if I want blanched almonds, I have two choices. One, I can buy slivered almonds, which are normally blanched. Or, I can buy raw almonds and remove their skins myself. To do this, place the almonds in a bowl. Pour in boiling water to cover the almonds. Let the almonds sit for no longer than 1 minute to preserve their crispness. Drain the almonds and rinse under cold water. Pat the almonds dry. Pinch one end of the almonds and they will slip out of their skin. One note, be sure your almonds have not been roasted or this process will not easily work.

Let’s turn now to ground almond products. In the stores, you will most likely find either or both almond flour or almond meal. Labeling of these products is not regulated but almond four is typically made from blanched nuts, while almond meal is most often ground from skin-on nuts. Also, flour is typically ground finer than meal. It is not always straightforward, though, as the store brand at my supermarket labels this product as “Almond Meal Flour”. So, which is it? The description says it is made from blanched almonds and is ground finely. I would think this would be more similar to almond flour rather than meal.

These products are somewhat pricey. At my store they range from $7 to $10 per pound. As with many items, you can make your own. If you want the light color of blanched almonds, you will either have to buy these or go through the process described above to remove the skins. After this process, though, you will want them very dry before grinding. To do this, preheat the oven to 350°. Spread them out on a baking sheet and carefully roast in the oven until they are quite dry, probably about 10 to 15 minutes. You may even turn off the oven and let them sit there all night to dry out even more. When the almonds are toasted and quite dry, it is time to grind them.

Most frequently, instructions will recommend a food processor. If you do this, do not fill the bowl more than half-full. Pulse them rather than turn the processor on fully. You do not want to end up with almond butter. This method works fine but the resulting product will not be as fine as almond flour you buy. It will be more on the side of almond meal. Feel free to use a sieve to remove the large pieces, which may be pulsed again.

Others say that the food processor does not work as well as other methods to get a fine, airy product.  Some recommend a nut grater, which looks similar to a hand-cranked cheese grater. After feeding the nuts into the hopper and cranking the handle, a fine-textured nut flour is produced. Since I would suspect most of us do not own one of these, a cheese grater may be used. Use the smallest blade with cold, but not frozen, almonds. Still others recommend either a spice grinder or a blender over the food processor.

Besides the limitation of home equipment, there may be another reason why your home-ground almond flour is not as fine and silky as that you purchase. According to some sources, the commercial almond meal undergoes removal of oils, also called de-fatted. This is not a step we can do in our home kitchens. This is not universal, though. I contacted Bob’s Red Mill, and they responded that they do not defat their almonds.

Almonds have a long shelf life if stored correctly. They should be place in an airtight container and stored in a cool, dry place. Other storage tips include avoiding exposure to strong aromas or direct sunlight. For longer term storage, the freezer may be used. Be especially careful with your blanched almonds or ground products.

Enjoy a new year of cooking and baking. I’m sure almonds, in whatever form, will be a part of those endeavors!

Cooking Tips · Ingredients

Cosmic Crisp — A New Apple in Town

There is a new apple in town — the Cosmic Crisp — and I wanted to let everyone know about this apple that has just arrived in our supermarkets.

Cosmic Crisp Apple – photo courtesy of Proprietary Variety Management

After 20 years of study and research by Washington State University, the Cosmic Crisp apple is being launched. it is a cross between an Enterprise and Honeycrisp. The “Cosmic” part of the name comes from the white “lenticels” all over the outside and the “Crisp” hearkens back to one of its parents — the Honeycrisp.

The developers describe its texture as very firm and crisp. They claim it has naturally high levels of acidity and sugar, making it an exceptional eating apple. They say this characteristic allows cooks to reduce the sugar in recipes using this apple. The high acidity also means it is slow to brown.

I just purchased some and I must say both my husband and I really enjoyed them. They are, indeed, a crisp apple and had a delightful flavor. So many apples today seem to lack much flavor. This is not true for the Cosmic Crisp.

They are not to everyone’s liking, though. One of my wonderful readers shared that they were not going to be a favorite of hers. (Thank you, Jana, for sharing with us!) What about you? I urge you to give them a try and tell me what you think. I would absolutely love to hear from you with your opinion on this new breed of apple. Email me with your thoughts.

Cooking Tips · Ingredients

A Myriad of Potatoes

What is your favorite Thanksgiving side dish? For many of us, it has to be mashed potatoes. There are more and more potato varieties in our store that I thought it would be a good time to write a Cooking Tip about potatoes. Afterall, potatoes are the most consumed vegetable in the US and, worldwide it is the fourth largest food crop.

According to Potatoes USA, potatoes were first cultivated around 8,000 BC to 5,000 BC by the Inca Indians in Peru. In the 1500s, Spanish Conquistadors conquered Peru, discovered the flavors of the potato, and took them to Europe. According to the same source, “potatoes arrived in the Colonies in 1621 when the Governor of Bermuda, Nathaniel Butler, sent two large cedar chests containing potatoes and other vegetables to Governor Francis Wyatt of Virginia at Jamestown.”

There are at least 200 varieties of potatoes although all of these can be put into the following categories: russet, yellow, red, white, blue/purple, fingerling and petite.

Another way to categorize is by texture – waxy or floury. Floury potatoes have more starch concentrated in the cells. These cells swell and separate when cooked resulting in a dry, fluffy texture. Waxy potatoes have cells that tend to stick together when cooked giving them a more dense and moist texture. Because of this difference, certain types are better suited to some uses than others. Others are in-between waxy and floury and tend to be more all-purpose. Let’s discuss these different types.

Russet – these potatoes are medium- to large-sized, oblong in shape and brown in color with whitish flesh. They are said to have a mild earthy flavor with a medium sugar content. They are a floury potato making them ideal for baking and frying resulting in a crispy exterior and a lighter, fluffy interior. They make wonderful mashed potatoes since light and fluffy is what we want in that dish. Particular varieties include Burbank, Norkotah, Ranger, Goldrush and Centennial.

Yellow – these can be very small to fairly large in size. They can be either oblong or round in shape. The skin is lighter in color in varying shades of yellow. Sugar content is medium and they are slightly waxy. When cooked, they produce a very creamy texture with a slightly sweet and buttery flavor. Great uses include baking, roasting or mashing. Names you may see include Yukon Gold, Yellow Finn, Agata, Santina and Bintje.

Red – these potatoes are usually small to medium with a rounded to slightly oblong shape. They have smooth, red skin and white flesh. This is a waxy potato with a slightly sweet flavor and a medium sugar content. The waxy texture allows the potato to stay firm throughout the cooking process. This, along with the attractive red color, means that they are great in salads, soups and stews. As a side dish, they are better boiled or roasted but can be mashed. Varieties include Chieftain, Norland, Red La Soda, Pontiac and Ruby.

White – these are small to medium in size with a round to long shape, very delicate white or tan skin and a white flesh. They have a medium starch content with a low sugar content. They can be used in a variety of ways including mashing, grilling or in salads. Names include White Rose, Cascade, Superior, Kennebec and Cobbler.

Purple/Blue – these potatoes are on the smaller to medium size with an oblong shape. The smaller oblong ones are called fingerlings. Their skins are a very pretty purple or blue with flesh that can range from white to pink to purple with shades in-between. The flavor is called earthy or nutty with a low sugar content. The flesh is moist but firm resulting in a potato that holds it shape, making it great in salads while adding a delightful color. To preserve this pretty color, they are best prepared in the microwave although you can also steam or bake them. Varieties are Purple Peruvian, Purple Majesty and Adirondack Blue.

Fingerlings – as the name suggests, these potatoes are finger-shaped. The skin color varies: red, orange, purple or white. The flesh also ranges from red to purple to yellow or white. They will often have colored veins throughout the flesh. Texture is firm and waxy. Flavor is buttery and nutty. Sugar content is medium. Pan-frying and roasting are great preparation techniques for these potatoes but they can also make an interesting potato salad. They are various varieties but they will usually just be called “Fingerlings” at the store.

Petite – these potatoes are named due to their size. The color of the skin and flesh will reflect the larger-sized varieties as will the shape, texture and sugar content. Flavor is said to be concentrated in the small size. They are great in salads and make nice roast potatoes.

Proper storage is important for the longevity of the potatoes as they continue to metabolize after harvest. Store them in a place where the temperature is about 45°-50° F and the humidity is high. Do not refrigerate. Minimize exposure to light and try to keep them in a well-ventilated place.

I started this Cooking Tip by mentioning mashed potatoes. Let me end by helping you make the perfect dish of mashed potatoes. First, start by choosing the right potato. Classically, this is the Russet but Golden Yukons go a great job, too. Scrub the potatoes. You can peel either before or after cooking them. There are those who feel that cooking them with the skin on leads to better flavor. Some even advocate not peeling at all because they like the flavor/texture of the skins in the final dish. I’m sure we have all been told that most of the nutrients are in the skin. According to the Idaho Potato Commission, the skin does contain about half of the fiber in a potato but more than half of the nutrients are in the flesh. If you score the skin around the middle of the potato, you can just pinch off the skin after cooking. Here’s a video on how to do that.

Put your potatoes (peeled or not, cubed or not) in a pot and cover with cold water. This way they cook more evenly. If you drop them in boiling water, the outside can cook before the interior. Make sure you add salt to the water so that it will penetrate the potato and add flavor that you really cannot get by just salting afterwards. Simmer for 20-30 minutes, until tender. Drain and return to the pot. Put the pot back over low heat to dry the potatoes. Now, mash the potatoes. I prefer using a ricer but if you wish a more rustic dish, use a hand masher. Mixers and food processors can be used but are not recommended as they often lead to gummy results.

I always add a bit of butter to my mashed potatoes. I soften or melt it first so it mixes in easily and I do not over-mix them. Many people add warm dairy (so it doesn’t cool the potatoes) such as milk or cream but for every-day mashed potatoes, I save some of the cooking water and use that to thin out my potatoes. It not only makes them creamy but also adds salt. So, be sure to taste before adding any additional salt. Other additions are up to you – parmesan cheese, herbs, garlic – whatever your heart desires.

Happy Thanksgiving. I am very thankful for all of you and that you take the time to read about my favorite topic – Food! Please let me know if there is anything specific you wish I would discuss.

Cooking Tips · Ingredients · Techniques

Flavoring Choices

Spices and flavors have been used for thousands of years all over the world. So much of our food would be pretty bland without these ingredients. In this Cooking Tip, I would like to explore this world of Flavors and Flavoring.

Did you know if you combine lemon, banana, raspberry and pineapple essences that you end up with strawberry? I sure didn’t know that but people who are educated and trained as Flavorists know this and so much more. These scientists have looked at items that bring us flavor such as fruits, vegetables, spices and leaves. Through their investigations, they have identified “flavoring substances” and how they work together to please our palates.

As the Flavor & Extract Manufacturers Association (FEMA) points out, there are hundreds of natural substances in a strawberry that lead to what we taste as strawberry flavor. Flavorists isolate these compounds to develop a strawberry flavor that we can add to our foods. They also design new flavor combinations that we love to try.

Do you look forward to those new Lay’s potato chip flavors each year? (The most recent offering – Grilled Cheese & Tomato Soup – was supposed to be on shelves October 21.) How do they do it? According to FEMA, “when a food company decides it wants to introduce a new product to consumers … they often contact flavorists at companies that specialize in creating flavors, and they ask them to create a flavor that meets their requirements and will be appealing to the consumer.”

If you look at an ingredient list on a product, you may see “natural flavor” or “artificial flavor”. We probably all prefer the term “natural” but they may not be that very different. FEMA’s definition is “Natural flavors are ingredients that come from natural sources such as a spice, fruit, or vegetable.  They can even come from herbs, barks, roots, or similar plant materials.  Natural flavors also come from meat, seafood, poultry, eggs, and dairy products.”

And, “artificial flavors are flavorings that don’t meet the definition of natural flavor. There isn’t much difference in the chemical compositions of natural and artificial flavorings.  What is different is the source.  For example, an artificial strawberry flavor may contain the same individual substances as a natural one, but the ingredients come from a source other than a strawberry.” Of course, companies must abide by the FDA’s rules, which are found here, if you are interested. Other countries have their own rules.

Many times, we home cooks use flavoring extracts in our cooking and baking. I am sure we all have extracts in our pantry but what are they? FEMA defines them as “a solution that contains essential components of a complex material.  A flavor extract is such a solution, but composed specifically of compounds that create flavors.”

The most commonly used in the USA is Vanilla. I have written another Cooking Tip on Vanilla and it can be found here. What other ones do you have in your pantry? Besides vanilla, I have almond, anise, banana, lemon, orange, peppermint, raspberry and spearmint. There are many more, of course. Just check out your favorite supermarket or online supplier.

One little tidbit I want to tell you is that you will often see “Mint” extract on the shelves. You may also see “Peppermint” and less commonly “Spearmint”. If it just says “Mint”, it is most likely a mixture of peppermint and spearmint. If you are using it to make those holiday baked treats, you probably want pure peppermint. Plain mint can be used but will give you a slightly different taste.

There is also something relatively new to our supermarket shelves and that is flavoring pastes. Once again, vanilla paste is the most common but there are others. They all usually have natural flavors but also often have sugar or corn syrup as well as some sort of thickener (Gum Tragacanth , Xantham Gum, Carrageenan). The company with the most varieties is Taylor & Colledge.

If you look at a bottle of any kind of extract, you will always see alcohol. That is because it is used in the distillation process. There are those that say because alcohol evaporates during baking, extracts are not the best forms of flavor for baked goods. Rather, they recommend saving your extracts for cold applications such as beverages or sorbet.

Nature’s Flavors recommends using “flavor concentrates” or “flavor emulsions” in baking. According to the company, these items are “extremely concentrated water soluble liquids containing no alcohol or sugar and are set in a Natural Gum Acacia Base.” They are made to withstand high temperatures, making them the preferred use in baking. I have not tried their products (they do look fun, though) and they are not the only producer in the market.

I suspect that most of us home cooks use these kinds of flavorings in the extract form. We have done that for years and I would think that practice will continue to be the main one we use. With this Cooking Tip, I hope you will see that there is more to flavoring than just extracts. Just have fun in adding flavor to your foods and let me know how it goes!

Cooking Tips · Ingredients · Techniques

A Great Foundation for your Pie

In last week’s Cooking Tip about apples, I mentioned the foundation for any good pie is a great pie crust. Do you make your own or do you use Pillsbury? Making a pie crust is so incredibly easy. In fact, I made four different pie crusts today in only about an hour. They are now chilling in the refrigerator waiting to be topped and turned into beautiful pies. Although pre-bought crusts may be fine in a pinch, I encourage you to start making your own. They freeze beautifully and you will always be ready for pie. There are really two parts to making a great pie crust – your ingredients and your technique. In this week’s Cooking Tip, we will discuss the ingredients. The technique will come next week.

The ingredients that go into most pie crusts are minimal – flour, fat and water. Some will also have a bit of sugar, eggs, dairy (such as sour cream or cream cheese) or even nut flours. Let’s address these one by one.

Flour – most of us are going to use all-purpose flour for our pie crusts. I recommend mastering the technique with this flour before branching out as other flours will act differently.

Fat – the main fats used in pie crusts are butter and/or shortening. Lard used to be a stand-by but, today it is hard to get good quality lard. This is a subject for another Cooking Tip. For now, let’s stick with butter and shortening.

The main advantage of butter is flavor. It will give you a flaky crust since as the water in butter converts to steam, it puffs up the crust. The downside is that because butter has a low melting point, it is hard to maintain a nice crimp to your pie crust.

Shortening has a higher melting point allowing it to stay in solid form longer. Therefore, the crimp has a chance to set before it melts. There are those that think that this higher melting point also leads to a flakier crust than butter. It does lack, though, the wonderful flavor of butter.

This contrast is what leads to the recommendation of using both butter and shortening. They claim that using a ratio of 3:2 butter to shortening gives you the best of both worlds.

Personally, I think there is nothing better than an all-butter crust. Yes, the crimp does slump but you can try to somewhat prevent this by proper chilling of the dough, discussed in next week’s Tip. What about you? What is your favorite?

Water – all pie doughs need some sort of liquid to pull everything together. It is usually, although not always, in the form of water. Occasionally the liquid will be provided by another ingredient such as eggs, sour cream or other dairy. One point that is very important is that in order to keep our fat in the dough solid as long as possible, the water should be very cold.

There is a debate about how much water to add to the dry ingredients. Because water leads to the development of gluten, some say to add your water gradually just until you have a cohesive dough. They caution that too much water will result in a tougher crust due to the increased gluten. Others say that gluten is not necessarily a bad thing as it helps your dough to be stronger and less prone to tearing as you roll it out. I will discuss this more in next week’s Tip on the proper techniques of making pie dough.

This balance of too much/not enough water is what leads some experts to recommend adding vodka or any 80-proof spirit for part of the water. There is no discernable alcohol taste but they claim it is easier to roll out. The reasoning is that although gluten forms with the water, it does not with alcohol. They recommend mixing ¼ cup of water with the same amount of vodka and using this mixture in your pie dough. A tender but very easy to roll out dough is the result. I must say that I have not noticed this is much of an advantage when I have tried it.  Have you tried it?

What about the old recommendation of adding vinegar or lemon juice to your pie dough? The sources that recommend this say it reduces gluten development. However, when put to scientific tests, it has been found that slightly acidic doughs actually have more gluten. To get the desired tenderizing effect, you would have to use about ¼ cup, which would give your dough a very sour taste.  So, this is one “old wives’ tale” that we can put to rest.

For basic pie dough, called Pâte Brisée (translated broken paste or dough), the only ingredients are flour, fat and water. An easy to remember ratio is 3:2:1 – 3 parts flour, 2 parts fat and 1 part water where 1 part is 4 ounces. Another recommendation is 2 parts flour to 2 parts fat with 1 part water. As I mentioned above, I use all butter as my fat but you could also do a mixture of butter and shortening. This type of pie crust can be used for any application.

There may be times when you want a sweeter dough, called Pâte Sucré (sugar paste/dough). Although recipes vary, the one I like to use contains flour, fat, sugar and eggs. The latter is what provides the liquid. Any sweet pie or tart filling works great with this dough. A delicious example is a Lemon Tart.

A third version is Pâte Sablé (sand paste). In this type of dough, you use a nut flour in addition to your AP flour. Other ingredients are sugar, butter and eggs. This is the only pie dough of these three where the ingredients are better at room temperature as they will be creamed together in a mixer. This dough can be made into cookies or used in other sweet pastry applications.

Now that you have the necessary ingredients, stay tuned for next week’s Tip on technique. Although ingredients are important, it is really the technique that will make or break your pie crust. It sure is getting delicious around here, isn’t it?  See you next week!

Cooking Tips · Ingredients

It’s Apple Pie Time!

We are right in the middle of apple harvest time according to the Colorado Produce Calendar. I must say that a good apple pie is hard to beat this time of the year. With so many different varieties of apples out there, though, which one do you pick? One of my local supermarkets lists eight different varieties for sale while another one has over twenty! How’s a cook to choose? That is the subject of this week’s Cooking Tip.

Before I get to apples, I want to mention that the foundation of a great pie is a delicious, flaky and tender crust. I am teaching a class on how to make different pie crusts in a few days. If you aren’t able to make it to that class, I can come to your house and teach a “Pie Making” class at your convenience. See my website for more information.

Apples3

When picking an apple to put in your cart, it should be firm with tight, unbroken skins. As many varieties have naturally dull surfaces, do not be afraid of those that do not have the very shiny finish that you often see in the supermarkets. Choose apples without bruises that feel firm and heavy. The fragrance of an apple is a good indicator of freshness and quality.

That is the easy part – more difficult is what variety of apple you should use. I wish I could tell you that there were only certain apples that were suited for certain purposes. That is not true although different “experts” will give you their recommendations. What I have done for you is to consult nine different sources and made a chart of which apples each of these separate sources recommend. If you want the entire chart, email me. What I will do here is to give you a list of the apples that seemed to be favorites with at least four of these sites.

Before I do that, I want to mention one recommendation that you read over and over. That is to use a combination of different apples in your pie. Some apples are considered “Sweet & Firm” while others are considered “Tart & Soft”. Therefore, they will react differently in the pie dish. Many chefs feel you can get the best of both worlds by combining apples from these two different categories. Choose one to provide more texture and another to amp up the flavor. Not all agree, though. Serious Eats states when you do this, you “end up with a pie that’s got nice firm chunks of apple interspersed with brown apple mush.” The choice is up to you. Think of all the great experimenting you can do!

The firm/sweet apples are those that tend to hold their shape better. The soft/tart varieties will cook down to a mushier filling. Here is list of some of those.

FIRM/SWEET

SOFT/TART

Ambrosia Belle de Boskoop
Cortland Bramley
Elstar Cox’s Orange Pippin
Gala Granny Smith
Golden Delicious Gravenstein
Golden Russet Jonathan
Jonagold Macintosh
Liberty Newton Pippin
Pink Lady Northern Spy
Prima
Spartan

Now, here are the apples that seem to please a majority of the sites I consulted if you are making apple pie. Fortunately, most of these are easily found in your supermarket or farmer’s market.

  • Braeburn
  • Golden Delicious
  • Granny Smith
  • Honeycrisp
  • Jonagold

Now that you have picked your apples and brought them home, how can you prolong their freshness? Apple experts recommend:

  • Refrigerate them – apples ripen 6-10 times faster on the counter than in the fridge. Some recommend putting them in a plastic bag before refrigerating. The best temperature is between 30-32°F. The rate at which apples lose flavor and juiciness is proportional to the temperature at which they are stored.
  • Separate apples – wrap each apple in sheets of paper, which prevents one apple going bad and then ripening the rest of them.
  • Picking apples – some are better for longer storage than others. Best keepers are McIntosh, Fuji, Rome and Granny Smith. Apples harvested later in the season are better keepers.
  • Avoid apples with bruises, cuts or soft spots.

We also all know that apples turn brown when cut. This is due to a chemical reaction that occurs when an enzyme is released when the apple is cut and then reacts with oxygen. We probably all have our favorite solution for this. They work either by blocking the oxygen, reversing this chemical reaction, changing the pH of the environment or stopping the reaction by altering the temperature. Here are a few of the suggested actions:

  • Acidulated water – Toss the apples in a bit of water to which an acid has been added, typically lemon juice or cider vinegar.
  • Honey water – Add 2 tablespoons honey to 1 cup water and pour over apple slices. This can keep your apples white for more than 24 hours. Even a 30-second submersion can prevent browning for up to 8 hours.
  • Saltwater solution – Add ½ teaspoon kosher salt to 1 cup water. Add apples and soak for 10 minutes. Drain and store until ready for use. Rinse salt off with tap water just before serving.
  • Plain water – Submerge apples in plain water using a paper towel on top to keep them under the water and away from the oxygen in the air. Or, put the apples and water in a zipper-lock bag with the air pressed out. Do not soak for more than about 15 minutes to avoid altering the texture.
  • Plastic wrap – Wrap cut apples in plastic wrap to keep the oxygen away.
  • Carbonated drinks – Submerge apples in a carbonated beverage such as lemon-lime soda, ginger ale or seltzer for 3-5 minutes. Drain and rinse before use.

There is one final thought I want to leave you with. Have any of you thought, like I do, that fruit just doesn’t taste as good as it used to? I think this all the time. How many times have you bitten into an apple just to find its flavor is bland?  According to Eat The Seasons, “The apples sold in supermarkets are varieties developed for good disease resistance or storage properties, often at the expense of flavor. As author Elspeth Huxley wrote: ‘You cannot sell a blemished apple in the supermarket, but you can sell a tasteless one provided it is shiny, smooth, even, uniform and bright.’ For more interesting and flavorsome varieties, look out for growers’ stalls in farmers’ markets or visit a pick your own orchard.”

When visiting a fruit stand in California, we were told the same thing about strawberries. He told us that what people want to buy are the large, red strawberries. Although they may look pretty, they are often so tasteless whereas the small, less-desired berries are more likely chock-full of flavor. If we would all be more discerning consumers, maybe this would eventually change. In the meantime, I feel fortunate that my husband loves to grow his own fruit and vegetables!

Cooking Tips · Ingredients

The age-old question — what is the difference between sweet potatoes and yams?

Sweet potato D's Harvest
My husband’s 2018 harvest of Beauregard sweet potatoes

We had some dear friends visiting with us recently and they had a suggestion for a Cooking Tip. I figured if they had an interest in this topic that some of you would also. So, for this week’s Cooking Tip is the age-old question – what is the difference between sweet potatoes and yams?

Before I discuss that question, I have an interesting tidbit I ran across during my research. Is it more proper to write “Sweet Potato” (two words) or “Sweetpotato” (one word)? I have always thought it should be two words. However, the International Potato Center writes it as one word to differentiate it from true potatoes. The North Carolina Sweetpotato Commission agrees and would like us all to adopt the one word spelling. (My spell checker does not agree, though!) I will use both spellings in the rest of this tip.

Despite the name, sweet potatoes are not related to the potato. Whereas potatoes are tubers, sweet potatoes are actually a root of a vine in the morning glory family. They are said to originate from either Central or South America. They are grown abundantly in the US, particularly in southern states. Since 1971, North Carolina has been the #1 sweet potato producing state in the United States.

There are many different varieties of sweet potatoes. Here is a link to chart listing almost 125 varieties. I suspect you will only find two or three different varieties in your supermarket. There are different ways to classify them but I find the following the most helpful. It classifies sweet potatoes grown in the US into two major types although there are different varieties among each type.

  1. Firm sweet potatoes – These have golden skin and pale flesh that remains firm when cooked. They were actually the first to be produced in the US and in our stores, they are commonly called sweet potatoes.
  2. Soft sweet potatoes – These have coppery skin and orange flesh that becomes creamy and fluffy when cooked. When this variety became available, stores needed to differentiate them from the firm variety. At that time, African slaves thought they were similar to yams that they had known in their home country and began calling them by that word. This was then picked up and even today they are commonly called yams. Some of my research indicated that the USDA requires stores to add “sweet potato” to the label if they use the word “yam.”

Although they are available year-round, their peak growing season is from fall through early winter. When picking one out, choose one with a smooth skin, firm ends and no soft spots. Avoid storing sweet potatoes in the refrigerator, which will produce a hard center and unpleasant taste. Rather, store them in a cool, dry, well ventilated container. For best results, store them in a basement or root cellar away from strong heat sources.

Yams are a totally different and unrelated tuber. They are related to the lily family. To understand the differences, refer to this chart I adapted from the North Carolina Sweetpotato Commission.


Sweetpotato

Yam

Taste Sweetpotatoes are almost always sweeter than yams. Starchier and more potato-like, usually not very sweet.
Appearance In the U.S. the majority of Sweetpotatoes sold are one of four appearances:

  • Rose color skin with orange flesh
  • Pale copper/tan skin with white flesh
  • Red skin, dry white flesh
  • Purple skin and flesh

All are more slender in appearance than a potato and have tapered ends; however each of these does have a different flavor profile.

Varies considerably. Some yams are the size and shape of small potatoes; others can grow up to 1.5m (5ft) in length and weigh over 100lbs (70kg).Skins may be dark brown or light pink; insides white, yellow, purple, or pink.

What most of us probably think of as a typical sweet potato whether it is made into delightful fries or on your Thanksgiving table in a casserole is what the stores call yams – although as I mentioned, they should be called yams/sweet potatoes. What the store calls just sweet potato is probably not going to be what you want for a traditional sweet potato dish. Are you confused, yet? Don’t be – choose more by color of the skin and even the flesh if you can rather than the name.

Since 2006, a purple sweet potato has become available. The three main types in the US are:

  • Stokes Purple® sweet potatoes – These originated in the US and have purple-tinted skin with a very purple flesh that intensifies when cooked. They are a bit drier and denser than orange sweet potatoes. They are very high in anthocyanins, the antioxidant that gives it the purple color.
  • Okinawan sweet potatoes – These are said to originate from South America but then migrated to the Philippines, China and Japan. Their name comes from the fact when they made it to Japan, they were first grown on Okinawa, a Japanese island. They can also be found in Hawaii and are at times called Hawaiian sweet potatoes. They have beige skin and a lighter lavender flesh, which turns blueish purple when cooked. They are said to have a delicate, slightly sweet taste with a creamy and starch texture.
  • Ube – This is not really a sweet potato but a purple yam. It is a staple in the Philippines and is often used in Asian desserts. It has brown, bark-like skin with flesh that ranges from white with purple specks to lilac. Although it is said to have a sweet and nutty flavor, my husband and I never did develop a taste for it during our time in the Philippines.

Friedas.com has a fun video demonstrating the differences between these three.

I love sweet potatoes any way you cook them. Or, should I say I love yam/sweet potatoes since I strongly prefer the orange-fleshed variety. I have never tried purple sweet potatoes although as I mentioned, I have partaken of Ube – not something I wish to repeat. How about you? Have you tried them? Let me know.

The image shown at the top of this post is my husband’s harvest of Beauregard sweet potatoes from 2018. All I have to say is — DELICIOUS!

Cooking Tips · Ingredients

Butter — which kind to use

Butter1
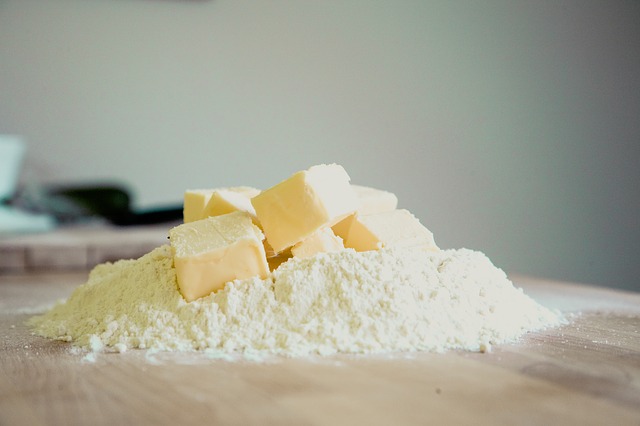
Butter is a wonderful and tasty ingredient although I know it gets a bad rap for health reasons. We use it in all types of baking as well as savory applications. In this Cooking Tip, I would like to discuss whether the type of butter you choose makes a difference to your end result.

One of the main choices you will have to make when purchasing butter is whether to get salted butter or unsalted (sometimes called sweet) butter. Most chefs and food resources will tell you that you should only use unsalted butter in your cooking and baking. These are the reasons:

  • You want to control how much salt goes into your item. Since all salted butters contain different amounts of salt, it is better to go with unsalted butter and then add your own salt as desired.
  • Salt is used as a preservative and extends shelf life. In theory, then, unsalted butter (which has a shorter shelf life) should be fresher.
  • Unsalted butter has a lower water content, something that you want in baked goods. Excess water can interfere with gluten development – a concern for some baked goods. When Cooks Illustrated did side-by-side comparisons of brownies and biscuits made with the same brand of butter – one salted and unsalted – they found that those made with salted butter were a little mushy.
  • Salt can mask butter’s delicate flavor. This is a detriment where butter is the star ingredient such as in buttercream frostings, butter cookies and certain sauces such as beurre blanc.

There are times that salted butter may be preferred. It is great for spreading on bread, adding to your veggies or just when you are not concerned about the amount of salt in your dish. There are also certain recipes that have been developed using salted butter.

Does the brand of butter matter? Perhaps. Cooks Illustrated did a tasting of seven different supermarket brands of unsalted butters. They tasted the butters plain, in pound cake and in sugar cookies. Although there were definite flavor differences, they would not hesitate to recommend any of them for your use. Their ultimate winner was Challenge unsalted butter. I tend to use Land O Lakes. I especially like their half-sticks as I only need to take out a small amount at a time and leave the rest protected in the freezer.

For salted butters, Cooks Illustrated preferred Lurpak, a butter from Denmark. TheKitchn.com preferred President whereas Epicurious preferred Cabot Natural Creamery butter. I like Kerrygold as well as Kroger’s Private Selection Salted French Butter. So, what do you like? Let me know.

Some butters are termed “cultured”. In the culturing process, the cream is fermented before churning leading to that more complex flavors. This may be great for spreading on your bread but probably not so good for baking.

Another difference you will see is European-style butters (aka premium butters). They are touted for having a higher fat content than regular butters although this difference is small. Many think European-style butters are better for baking but this is a personal preference. Because of their higher fat and lower water content, King Arthur Flour cautions that if “used in a recipe not calling for it specifically, European-style butter can create a greasy, sometimes drier result than grade AA butter.”

People often wonder if they can substitute salted butter for unsalted and vice versa. As always, I strongly recommend going with whatever type is called for in your recipe, especially if it is a baked good. The usual question is if you can use salted butter when unsalted is called for. The answer is a qualified “yes” but be aware that you may want to decrease the other salt in your recipe. Try decreasing the salt by ¼ teaspoon per stick of butter.

If, by chance, your recipe calls for salted butter and all you have is unsalted, you may need to add salt. It can be difficult to know how much to add as brands vary in their salt content. Challenge recommends adding ¼ teaspoon for every stick of Challenge unsalted butter. Other brands do not always tell you what they recommend for their brand but Challenge’s suggestion is a good place to start.

Butter is a perishable food item and, therefore, should be stored properly. Most butter manufacturers recommend storing butter in the refrigerator. The American Butter Institute has a slightly different take. They say you may leave your butter at room temperature but there are cautions. First, since salted butter is less likely to go bad, if you want to leave your butter out, this is the kind to go for. If you have unsalted butter, refrigerate.

The FDA states that “traditional butter and margarine have had a long history of safety without time/temperature control.” (Time/temp control is a recommendation that tells us that foods can be dangerous to eat if not kept at the correct temperature for the correct amount of time.) When they say “traditional” butter, it means butter with at least 80% milk fat. Much more caution must be taken with products with lower fat, higher water and lower salt levels. It also presumes that the product is pasteurized.

Butter will eventually spoil. State Food Safety states “For best quality, keep butter in a covered dish and use it within 10 days. You can also refrigerate or freeze butter to extend its shelf life.” Keep butter in its original wrapping when refrigerated. For longer storage, you can freeze it. An additional wrapping of foil will help to preserve its freshness.

I must admit that I love butter for all sorts of uses. An all-butter pie crust is delicious and flaky. Adding a small pat of butter to your pan sauce gives it a wonderful silky texture and fuller taste. Yes, we may need to watch how much we eat but I could never eliminate it totally. Could you?

Cooking Tips · Ingredients

Should you try Coconut Aminos?

I was teaching a Thai cooking class for a bridal shower recently. (Thank you, Diane for booking it! If anyone is interested in booking a fun and yummy cooking party, email me for more information.) We were discussing some of the typical Thai ingredients such as fish sauce, soy sauce, tamarind, etc. Someone asked what I thought of Coconut Aminos. This is an ingredient that although I knew about, I had never used. I decided it was time to learn a bit more about it and Voilà, this Cooking Tip!

Sushi with soy sauceAminos are liquid amino acids. Recall from your high school chemistry/biology classes that amino acids are the building blocks for protein. In recent years, consuming liquid amino acids has become somewhat of a health trend. There are two types: one is soy-based and one is coconut-based. Both forms contain all or almost all of the essential amino acids. This Tip will concentrate on the coconut version.

Coconut aminos is derived from the nectar (or sap) of the coconut palm blossom. It has added salt and undergoes a natural fermentation.

Proponents of coconut aminos claim the following:

  1. If you have a soy or gluten intolerance, coconut aminos could be for you as it is both soy- and gluten-free. (Be aware that non coconut-based liquid aminos are not soy-free.)
  2. These products are lower in sodium than soy sauce. Regular soy sauce is very high in sodium. There is lower sodium soy sauce but that is still higher in sodium than coconut aminos. Be sure to check the label, though, as the different brands of coconut aminos in my local market varied from 200 to 600 mg of sodium per 1 tablespoon. In comparison, my favorite soy sauce has 920 mg/tablespoon and a lower sodium variety has 575 mg. Soy-based liquid aminos may have as much sodium as regular soy sauce. (I wrote another Cooking Tip on how to tell a good soy sauce from an inferior one. If you wish to read it, let me know and I will send it to you.)
  3. Coconut aminos are free of MSG (monosodium glutamate). Some people may have unpleasant reactions to MSG. (  Here is a link to another Tip I wrote about MSG. Be aware that liquid aminos made from soy may contain MSG. I do not want to get too far in the weeds but some scientists say that coconut aminos does contain glutamate, a byproduct of the natural fermentation process. These scientists say that the glutamate in fermented coconut aminos is better tolerated in sensitive individuals. An exception is Braggs, as it is not fermented. However, Braggs coconut aminos is a bit different than the typical coconut aminos in that not only is it non-fermented, it also has added apple cider vinegar.
  4. If you are concerned about GMO ingredients, coconut aminos are made from coconut tree sap, something which is not genetically modified. In contrast, many soybeans are. As always, check the label to ensure it is non-GMO.
  5. It is approved for the Paleo diet.
  6. May will tout other health benefits but be wary of these claims. There is really no true scientific evidence for anything other than the above.

How should you use it? While coconut aminos will add an umami punch to your dishes/sauces, it is not a perfect substitute for soy sauce. Although it is still savory, it will also add a touch of sweetness. If you do not like coconut, do not worry about coconut aminos. It really has no coconut taste. It will also be thinner in consistency.

Are there any downsides to using Coconut Aminos?

  • Some say it is too sweet and is not as savory as soy sauce.
  • Although it is lower in sodium than soy sauce, it is still not a low-sodium product. As always, read the label and follow your doctor’s advice for your sodium intake.
  • It is also much more expensive than soy sauce. Whereas a good soy sauce may be as little as $.25 per ounce, coconut aminos are usually upwards of twice that.

One last comment – If you are just looking for a gluten-free alternative to soy sauce, consider Tamari. Although it is made without wheat, it is still soy-based and has a high sodium content.

Have you tried Coconut Aminos? If so, let me know what you thought. I am going to try it in the near future. If you are interested in my impressions, just email me.