Cooking Tips · Ingredients

Yogurt — Not just for Snacking

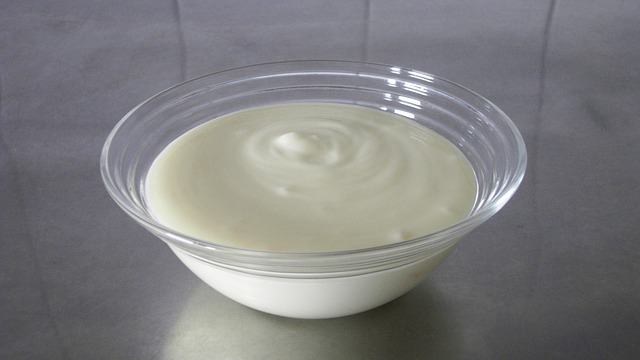
You might think yogurt is just for snacking but in this Cooking Tip, I want to show you how to use it in baking and/or cooking. My husband used to make his own yogurt and I loved it as I always had some nice & thick unflavored yogurt on hand to use whenever I wanted it. Sadly, he has moved on to other things and his yogurt maker now sits lonely on the shelf.

Yogurt is produced by inoculating milk with a bacterial strain that starts fermentation. This thickens the milk and gives it a sour flavor. The milk can be anywhere between skim and whole. Yogurt has become so popular that plain, unflavored yogurt is just a small minority of the yogurt offered in the store. Flavored yogurts are the mainstay in the dairy aisle. You will also find Greek and non-Greek yogurt as well as non-dairy options.

When it comes to using it as an ingredient, stick to plain, unflavored yogurt. Unless your recipe calls for something different, opt for full-fat yogurt. If you can’t find it, try 2%. If possible, stay away from non-fat as you won’t get the same creaminess. This is especially true if you are trying to substitute yogurt for a different dairy product. For example, if you are making a sauce that calls for heavy cream and you try to replace it with a low- or non-fat yogurt, it might result in a mess of a sauce. The fat content is necessary to coat the proteins in the cream. If you have less fat, there is less coating of the proteins and when heated, the proteins will join together and coagulate – not a pretty sight!

Similarly, if you are trying to thicken your sauce by the reduction method, low fat products are not recommended. Once again, there is not enough fat to coat the proteins and prevent coagulation. One work-around that is recommended is to add a bit of starch to replace some of the fat. For example, adding a bit of cornstarch to your low-fat dairy and the rest of the ingredients for your sauce. Or, just use a higher fat yogurt.

How can you use yogurt in your cooking? Here are a few ideas.

  • Sauces – adding a touch of yogurt to your pan sauce can add richness.
  • Toppings – top your bowl of chili or soup with a dollop. Do this just before serving.
  • Marinades – the enzymes in yogurt help break down proteins, which tenderizes meat and fish.
  • Mayonnaise – use yogurt instead of mayo in your chicken salad or creamy dressings.
  • Buttermilk – yogurt can be used in place of buttermilk. For every cup of buttermilk, mix 2/3 cup of yogurt with 1/3 cup of milk.
  • Sour cream – yogurt, especially Greek, can be substituted for sour cream. Cooks Illustrated cautions that with high heat preparations, the yogurt might break due to the lower fat content as compared to sour cream.

Here are a few tips for using yogurt in your recipes:

  • If adding to a hot mixture, temper it. Add a few tablespoons of the hot mixture into the yogurt first. This warms the yogurt and helps to prevent separation. Then you can stir that back into your hot mixture.
  • Stir/fold the yogurt in gently to help maintain a nice texture.
  • Add the yogurt in the final stages of cooking to maintain its thickness.
  • If your yogurt-based salad dressing or dip is not thick enough, a rest in the refrigerator for an hour should help.

If a recipe calls for Greek-style yogurt and all you have is regular yogurt, don’t despair. Put your regular yogurt into a fine-mesh strainer lined with a paper towel or coffee filter and place over a bowl. Cover with plastic wrap and allow to drain as long as you can, preferably overnight. You will be left with delightfully thick yogurt but you will also be left with the liquid that is drained off – the whey. Don’t throw that away as you can use it in your baking.

According to King Arthur Flour, whey can be used in place of water in yeast bread recipes as the yeast likes the acidity of the whey. It can also be used as a substitute for buttermilk. Since whey is thinner, they recommend to reduce the amount by about 20% to 25%, compared to the buttermilk. If the amount of buttermilk is less than ½ cup, don’t bother with the reduction. Use the same amount of whey as buttermilk.

If you want to use yogurt in your recipes for baked goods, realize that Greek yogurt is going to have less moisture than regular yogurt. Therefore, to ensure your baked goods such as muffins do not come out dry, you need to add a bit of water. If your recipe calls for 1 cup liquid, use 2/3 cup Greek yogurt and 1/3 cup water.

For a more complete chart for how to substitute yogurt for different dairy ingredients, see this chart produced by 100DaysofRealFood.com in conjunction with Stonyfield yogurts.

Do you like to use yogurt in your cooking and baking? Let me know how you use it and any advice you have for others. The next time you walk by the yogurt aisle, not only grab some for snacking but grab some also for cooking/baking. Have fun!

Cooking Tips · Ingredients

Chili Peppers — Heat or Flavor?

Have you noticed how everything today seems to be flavored with hot peppers? Each producer wants to outdo the other with how hot they can make their product. I must admit that I have a fondness for flavored potato chips. (Don’t tell anyone!) It used to be that you could get all sorts of interesting flavors. Today (sadly to me) it is all about being flavored with chilis and other ingredients that add hotness. This has certainly brought certain chili peppers into the everyday language of consumers and is the subject of this Cooking Tip.

The first thing to address is the word itself. Is it Chile, Chili or Chilli? It is often a matter of location. In American English, the preferred spelling is “chili” and it refers not only to the peppers but also to the delightful stew-like dish we all make. “Chilli” is the preferred spelling in British English whereas “chile” is the predominant spelling in Spanish-speaking countries.

Another interesting distinction is when you are referring to the ground powder. “Chili powder” generally means it is a mix of dried, ground chile peppers along with other spices. “Chile powder” should be solely dried chili peppers.

I do not know about you but I’m sure I vary how I spell the word without thinking about which is proper. In fact, I may alternate spellings within this Cooking Tip. If it is important to you, though, you now have the somewhat authoritative word on this subject.

I am much more interested in the different types of chili peppers, their heat level and their culinary uses.

The active ingredient in chili peppers is capsaicin. That amount that a plant contains depends on the genetic makeup of that plant but also on growing conditions and its ripeness. Higher temperatures and drought increase production of capsaicin. The amount of capsaicin increases until it begins to ripen when it starts to decline. It is maximum about the time that green fruit begins to change color.

Since those are items that you cannot control, what can you do to modulate the heat level in the dish you are making? Here are four factors that you can control.

  1. The variety of chili you use – if you want less heat, you can choose a chili that is known to have less capsaicin.
  2. The amount of chili you use – this is obvious but the more chili you use, the more capsaicin you will have in your dish.
  3. The presence or absence of the parts of the chili that contain the capsaicin – if you carefully remove the seeds and the membranes, you can decrease the amount of capsaicin you are left with.
  4. The length of time that the chili is in contact with the other ingredients – the longer the time, the hotter the dish.

Is there anything you can do to reduce the burn once you have ingested the capsaicin? Everyone has their own remedies but these are recommended although they are temporary measures.

  1. Ingest some dairy (not plant based). Dairy contains a protein that helps to break the bonds between the receptors in our mouths and the capsaicin and washes it away, like a detergent.
  2. Put something rough/solid into your mouth, such as a cracker or rice. The roughness distracts the nerves with a different type of signal.
  3. Take a spoonful of sugar. The sugar molecules bond well with the capsaicin.
  4. Wait it out. The pain caused by the capsaicin generally dissipates within 15 minutes.

Choosing which chilis are hotter depends on knowing a bit about the Scoville scale, which is a rating of pungency/heat level. The higher the pepper is on the scale, the hotter the pepper. The scale goes from zero for bell peppers to 15 million for pure capsaicin. A chili known as the Carolina Reaper was certified as the world’s hottest chili pepper by the Guinness World Records in 2017 at 2.2 million units. However, other peppers known as Dragon’s Breath (2.48 million units) and Pepper X (3.18 million units) claim they are hotter although their claims have not been certified. There are many charts you can find that list the ratings for different peppers but I like this compact one for easy use.

Which are the best peppers to have for your cooking? The following is far from a complete list of peppers but they are the ones that you are most likely to see in the supermarket. They are listed in order of heat level from lowest to highest.

Bell Peppers

These are zero on the Scoville chart, making them a great choice if you just want flavor without heat. These are part of the Cajun trinity (similar to mirepoix in French cooking) and are the base for Creole cooking. They add flavor, crunch and color (green, yellow, red, purple) when served raw on a salad or as part of a veggie tray. They are a great shape/size for making stuffed peppers. Roasting them adds some smokiness. One of my favorite pizza sauces is just puréed roasted red bell peppers.

Anaheim Pepper

This long pepper is also known as a California green chile or a New Mexican chile. The peppers originated in New Mexico, where they are still grown in different versions. They arrived in the city of Anaheim in southern California in 1894 and began to be grown commercially and thereby gaining its name. If grown in the Hatch region of New Mexico, it is known as a Hatch Chili Pepper. This pepper starts out green and turns red when mature. The Scoville rating is from 500-2500. They are very popular in salsas and southwestern dishes.

Poblano Peppers

This pepper is low on the Scoville scale (1000-2000 units) and is used greatly in southwestern cuisines. In dried form, they are called Ancho Chilis. They are fairly large in size and dark green in color until they fully ripen when they turn red. At that point, their hotness level increases. Green poblanos are very flavorful without burning. Think of chili relleno.

One caution about looking for poblano peppers in the store. Many stores mislabel them as Pasilla. In reality, pasilla peppers are the dried form of the Chilaca chile. I am really not sure as they look nothing alike although some say it is because the pasilla pepper looks similar to the dried poblano, the ancho chili.

Jalapeño Peppers

Other than bell peppers, this must be the most known and commonly used chili pepper in the US. It carries a Scoville rating of 3,500 to 8,000 units. We normally see it in its green form but it will turn red when it takes on a slightly fruity flavor. When dried, a jalapeño is called a chipotle. Jalapeños are used in many dishes but are most commonly used in salsas and sauces.

Fresno Pepper

Similar in appearance to a jalapeno, it is higher on the Scoville scale at 2500-10,000 units. In addition to the increased heat level, it also has more fruitiness than the jalapeno. Also like the jalapeno, they are great in salsas and hot sauces.

Serrano Pepper

Serranos are only a couple of inches long, with a tapered end. They are usually found in our stores in a green state but when ripe, they are red or yellowish-orange. It is a very spicy pepper rating between 6,000 and 23,000 on the Scoville scale. It is also said that the smaller the pepper, the hotter it is. These are used where you want a bit more heat, especially in Mexican and Thai cooking.

Cayenne Pepper

This little chili is slender and tapered. In our stores, you are more likely to find it in its dried, ground form—known as ground red pepper or just cayenne pepper. It is often also found in spice mixtures such as some chili powders. It is spicy with a rating of between 30,000 and 50,000 units. Use sparingly in any dish you want a bit of heat.

Thai Pepper

Thai peppers are spicy chili peppers with a wide range of heat – from 50,000 – 100,000. Although in our stores we will probably just see something called “Thai chili peppers”, there are many different varieties. What they all have in common is that they are small in size but high in heat.

Habañero Pepper

Having become popular in recent years, this pepper is now easier to find in the stores. It should be used with care, though, as it rates between 150,000 to 350,000. It is small and bulbous and has a fruity flavor underneath the heat. They are often used to make hot sauces.

As I mentioned, there are so many different chili peppers that it impossible to mention all of them in this Cooking Tip. Being able to recognize the above, where they fit on the heat level and how to use them will help you to harness the power and flavor of Chili Peppers!

Cooking Tips · Ingredients

Fresh Herbs – A Cook’s Best Friend

It’s that time of the year when many of us cooks get excited because we can have all sorts of fresh herbs growing in our garden that we can snip and use in so many ways. Nowadays, you can buy fresh herbs of many varieties year round but it is so nice to have a personal garden with beautiful and flavorful herbs growing. Right now, our herb garden is growing tarragon, chives, sage, rosemary, basil, thyme, oregano, chamomile, mint, borage & parsley. In this Cooking Tip, I would like to talk about how to get the best out of these fresh herbs.

Why use fresh herbs? They can take a plain dish to an extraordinary dish. They can add flavor, color & even just a tiny bit of texture. There are no absolute rules for using fresh herbs but there are some recommendations that will help you use them to their best potential.

If you do grow your own, cut them in the morning after the dew has dried. It is at that time that they are the most aromatic and flavorful. Prepare them as your recipe indicates. It is good to use either a sharp knife or kitchen scissors to cut the herbs to prevent excessive cell wall breakage.

For more robust herbs such as rosemary, oregano & thyme, you can add them at any point in the cooking. They do well in longer cooking dishes such as stews. For the more delicate herbs such as basil, parsley and chives, add them at the very end of the cooking process to preserve their color, flavor & aroma.

For most herbs, you are just going to use the leaves. However, for some herbs such as cilantro and parsley, the stems contain quite a bit of flavor and are tender enough that they can be chopped up with the leaves.

Here are some recommendations for using specific herbs. For a fairly complete chart of when/how to use various herbs, see this link.

Basil

  • Varieties – the most common in our herb gardens is Italian basil, which is used in making Genovese Pesto. Other varieties are Thai basil, cinnamon basil, lemon basil and purple basil.
  • Flavor – sweet, floral & slightly peppery.
  • Typical uses — Tomato dishes/sauces, light pasta dishes, summer veggies.

Chives

  • This herb is in the onion family.
  • Flavor – an herbal, green taste with onion overtones.
  • Typical uses – egg dishes, potato dishes or as a pretty garnish on many savory plates.

Cilantro

  • This herb is also known as coriander leaf. There are some people who claim it tastes “soapy”, something that is related to that person’s genetic makeup.
  • Flavor – it adds a bright and citrusy zing to dishes.
  • Typical uses – Latin American and Asian cooking.

Dill

  • Flavor – this is a tangy & grassy herb.
  • Typical uses – it is ideal for poultry or seafood & pairs great with lemon & yogurt.

Marjoram

  • Flavor – has a grassy but slightly sweet flavor.
  • Typical uses – it works well in soups, risottos and dressings & pairs well with chicken, fish and tofu.

Mint

  • Varieties – most common are spearmint and peppermint but you might also want to check out chocolate, pineapple, apple and mojito mint. One of my favorites sold by my local nursery is Candy Peppermint. It tastes just like its name.
  • Flavor – adds a refreshing & cooling flavor.
  • Typical uses – most commonly used in sweet dishes but, can also be used in savory dishes. It is wonderful with fresh fruit or in summer beverages.

Oregano

  • Varieties – there is a Greek and Mexican oregano.
  • Flavor – the Greek variety is pungent and peppery. The Mexican variety has a stronger, more earthy flavor with a citrus note.
  • Typical uses – the Green variety is classically used in Italian sauces and dressings. The Mexican oregano pairs well with southwestern dishes.

Parsley

  • Varieties – along with basil, this is one of the most used and enjoyed herb. In stores, you often find only curly parsley but you should try to find (or grow) Italian flat-leaf parsley as it is more flavorful.
  • Flavor – is mild and subtle while adding freshness.
  • Typical uses – often used as a garnish on many dishes, especially poultry and seafood but is also used in making stock. Try it with pasta, eggs, potatoes or lemony dishes. It is also a very prominent ingredient in tabbouleh.

Rosemary

  • Flavor – this is a robust and sturdy herb that has an almost pungent flavor.
  • Typical uses – great with heartier dishes such as lamb, pork or roasted vegetables.

Sage

  • Flavor – this is a woodsy –flavored herb that is fairly distinctive.
  • Typical uses – does great in stuffings, soups, risottos and really shines in a brown butter sauce. It also pairs well with game meats, poultry & root vegetables.

Tarragon

  • Flavor – this is a very aromatic herb with a peppery and licorice-like flavor.
  • Typical uses – often used in egg dishes, salad dressings and as a garnish.

Thyme

  • Varieties – this is a classic herb in French cooking with leaves that are very aromatic. There is both a common thyme as well as lemon thyme.
  • Flavor – spicy with notes of cloves & mint. The lemon variety adds a citrus note.
  • Typical uses – it can be used in so many ways including meat dishes, soups, stews & sauces. It can also be added to breads and desserts.

Although I am mostly talking about fresh herbs in this Tip, I have just a bit to say about dried herbs. Fresh herbs give just that – freshness – to a dish. When an herb is dried, it loses that freshness and has a more concentrated flavor that can be very different than its fresh counterpart. When substituting one for the other, use only ⅓ to ½ as much of the dried form as the fresh herb.

Those delicate herbs such as basil, parsley and chives tend to taste better fresh Tougher herbs such as rosemary, oregano and thyme can do very well in either fresh or dried forms.

Fresh herbs are a cook’s best friend and can add so much to a dish. Whether you grow your own or not, they should be a part of your culinary arsenal!

Cooking Tips · Ingredients

Unusual Vegetables

I have written a fair amount about fresh produce in prior Cooking Tips. Now, I would like to talk to you about what some people might call “Unusual” vegetables. They are only unusual in that many people either do not know what they are or have never tasted them before. In this Cooking Tip, I hope to encourage you to seek them out and give them a try.

Fennel

This is a crunchy veggie with a refreshing and complex flavor. Because it is often mislabeled “sweet anise”, many people shy away expecting it to taste like licorice. However, the flavor is sweeter and more delicate than anise and when cooked, becomes even lighter. Fennel is not anise. They are unrelated plants. One large difference is that the entire fennel plant is edible but only the seeds of the anise plant are edible.

There are two types of fennel. The one I am discussing is called “Florence Fennel” or “Finocchio”. It is cultivated in the Mediterranean, and has a broad, bulbous base with wispy fronds. (Fennel pollen is the golden powder taken from blooming fennel flowers.)

The other kind of fennel is common fennel. This is where we get fennel seeds. The plant does not have a bulb. Rather, the stems and greenery are used just as with the Florence variety and is considered more of an herb rather than a veggie.

To prepare it, cut off the stalks and trim a thin slice from the base of the bulb. Halve it from top to bottom, through the root end. Cut out and discard the triangular piece of core in each half. Peel off and discard any outer, wilted layers. Now, you may cut each half in half again and then slice crosswise. You may also use a mandoline to get very thin, shaved slices. The fronds may be chopped and sprinkled as a garnish. It may be eaten raw or cooked.

Fennel is freshest from late fall to early spring. Look for firm, tightly packed bulbs with fresh, unwilted fronds. Avoid any with bruises or brown spots. After purchasing, it can be refrigerated in a plastic bag for up to 5 days

Kohlrabi

This is a version of the basic cabbage plant in which the main stem swells to several inches in diameter. It is a member of the turnip family. In fact, the name comes from the German for “cabbage turnip”.

There are two varieties: Green & Purple. The green version has a pale green bulb and green leaves with light green veining whereas the purple has a purple root, stems and purple veining on green leaves. Both varieties have a creamy white flesh. One source says its flavor is reminiscent of a “sassy-sweet blend of mild broccoli and celery root”.

Both the bulb-like stem and the greens are edible. Young kohlrabi are tender enough to eat raw or cooked briefly. The leaves or stems are also edible and can be used in sautés and stir-fries. The leaves are said to have a flavor similar to collard greens. Kohlrabi is most often sold without leaves. If the leaves are still attached, separate the bulb from the leaves. The bulb should be peeled and sliced prior to being consumed. The smaller bulbs won’t need to be peeled, while the larger bulbs tend to have less flavor, with a thicker, chewy peel.

It can be sliced or shredded and tossed in your salad in its raw form, where it will add a fresh, crisp texture with a sweet yet mild peppery bite similar to a radish. It can also be roasted, stir fried or added to a soup or stew. The greens may be cooked just as you would kale, turnip, or beet greens with just a quick sauté.

To prepare it, cut off the stems and any leaves. Cut it in half down through its center and slice into quarters. Use the tip of your knife to cut at an angle through the core and discard it. Using a sharp vegetable peeler, peel off any tough skin. At this point, slice off the top and then slice the quarters into your desired size. For thinner slices, a mandoline may be used.

Choose a kohlrabi that is heavy for its size but no wider than 3 inches. The green leaves should be firm and deeply colored. Avoid soft spots with yellowing leaves. When stored properly in the crisper drawer of the refrigerator, kohlrabi can last for weeks. The leaves can be refrigerated for up to 4 days.

Rutabaga

Rutabagas are also known as Swedes and they are a root vegetable that’s related to both the cabbage and the turnip. Some people confuse rutabagas with turnips. They are related, but rutabagas are generally larger, have a more yellowish flesh and are more mild tasting. They are also denser than turnips and will require a longer cooking time.

Due to being related to both turnips and cabbage, they share flavor characteristics. They can have the peppery, bitter bite of turnips but can also be creamy and sweet if roasted.

Cooking them is easy. They can be cooked until tender and then added to mashed potatoes. They may also be roasted or pureed into a soup.

It is recommended to choose smaller roots (under 5 inches in diameter) to ensure they’re tender. Avoid cracks, bruises, soft spots, or wrinkles. Rutabagas are freshest in the late fall and winter. They may be white or yellow.

As many rutabagas are sold waxed, be sure to scrub the outside before peeling it. Then, just cut into your desired shape.

Pick out rutabagas that are firm, smooth and heavy for their size. They can be refrigerated in a plastic bag for 2 weeks.

Parsnip

Although parsnips look like carrots and are related to them, they are a different root vegetable. They can be eaten raw although they are usually cooked.

Some chefs recommend only giving them a thorough scrubbing rather than peeling as they say most of the flavor is right below the skin. The larger ones have a woody core. I like to cut this out although Cooks Illustrated finds this to be unnecessary if you are going to puree them rather than another application such as roasting. Popular ways of using parsnips include mashing, baking, broiling or pureeing them into a soup.

They are at their peak from fall through early spring. They accumulate more starch than carrots but then they convert it to sugar when exposed to cold temps. This results in the winter roots being sweeter than autumn roots.

Look for ones that are small to medium in size with an ivory color and a firm texture. Avoid any that are soft, shriveled or blemished.

Experts say you can store them in the refrigerator for up to 3 weeks although I find they don’t last quite that long.

Celery root

Also known as celeriac, this is another root vegetable that has a crisp & firm texture. Its roots project from a knobby surface that requires deep peeling.

It tastes somewhat like celery because it has similar aromatic compounds as celery but the flavor sweetens with cooking. It can be grated or cut into fine matchsticks and added to a salad but it really shines when made into a mash (either on its own or in combination with other veggies), baked or roasted.

Choose small, firm ones with a minimum of knobs. They are not the easiest to peel and you may find that a knife works better than a veggie peeler.

It can be refrigerated in a plastic bag for 7-10 days

There are other even more unusual vegetables. These, though, are ones that you can probably find in your grocery store. If you haven’t tried them, I encourage you to do so. You may just find a new favorite veggie!

Cooking Tips · Ingredients

Dried vs. Canned Beans – Is there really a difference?

Last week’s Cooking Tip was all about peas, a type of legume. Beans are another legume that most of us consume. This Cooking Tip will discuss the differences between dried and canned beans and how to cook them.

Beans can be categorized differently but one of the major categories is Dried vs Canned. Which do you use? Does it make a difference? Canned beans actually are dried beans but they have already been cooked. Therefore, you can use them without soaking or simmering them for hours. These are certainly more convenient but, as with most convenience foods, there is a downside. The canned beans sit in a brine in the can, which can draw out starches & proteins, leading to an alteration in texture and flavor.

Do you need to soak dried beans? This is usually recommended for dried beans as it softens them and decreases the cooking time. It is also thought that some of the elements that lead to gastrointestinal symptoms are leached out during the soaking. Serious Eats found that smaller beans with thin skins such as black beans actually do better without soaking. They did a testing with black beans by cooking them three ways. (Note that this test was only done with black beans and does not translate to all dried beans.)

  • Soaked in water overnight and then cooked in the soaking water.
  • Soaked, drained, rinsed and cooked in fresh water.
  • Cooked without any soaking.

Their results showed the following:

  • Time – un-soaked black beans only took an additional 20 minutes to cook.
  • Color – the darkest beans were those that were not soaked or were cooked in the soaking water.
  • Flavor – soaked and rinsed beans were the least flavorful. The other two methods yielded similar flavor. Another interesting finding is that if you add aromatics to the cooking beans, the most flavorful result was the un-soaked beans.
  • Texture – not much difference here but the beans that were un-soaked or those that were cooked in the soaking water were creamier due to the fact that you are not rinsing away the starch.

If you are cooking larger and thicker-skin dried beans, soaking is recommended. The age and quality of the bean are other factors as the lower quality they are and the older they are, the more they will need a soak. Since this is very difficult to assess when you are buying dried beans, it is probably smart to err on the side of soaking. Of course, the longer they sit in your pantry, the more they dry out and the more they will need soaking.

Should you salt the cooking water for dried beans? Serious Eats recommends salting, saying that the sodium helps to release magnesium & calcium from the beans. These elements give beans their rigidity and decreasing that leads to softer and creamier beans. They recommend that you season your soaking liquid with one tablespoon of kosher salt per quart of water. Drain and rinse the beans before cooking in lightly salted water. Cooks Illustrated agrees with this advice.

The procedure for cooking dried beans begins with sorting through the bag of beans and discarding any that are off-color or damaged as well as any stones you may find. Rinse them to remove any dust or dirt. Unless you are using black beans or you know you have very fresh beans, opt for soaking. Cover the beans with water. Since the beans will double (or more) in size, use enough water so they will stay submerged as they plump out. Add salt as discussed above. Allow to stand at room temperature for four to eight hours. If more than eight hours, refrigerate them. However, do not soak more than 24 hours. Drain and cook.

To cook, cover with fresh water and season with salt. Add flavorful aromatics such as onion, carrot, celery, garlic, leeks, fennel and herbs. Bring to a boil and then reduce heat to obtain a gentle simmer. More vigorous boiling can lead to disintegration of the beans. As you are cooking, skim off any foam that develops. It is difficult to recommend a definite cooking time. It is better to just test the beans periodically until they are tender without any firmness or graininess. When done, remove from the heat and allow them to cool in the water. If they are close to being over-done, put the pot in an ice bath and allow to cool.

One caveat about cooking dried beans at altitude. Because of the lowered boiling point at altitude, cooking beans will take longer than suggested in most recipes.

Some experts recommend adding a small amount of baking soda to speed up the cooking process. Do not use more than 1/8 teaspoon per pound of beans to prevent an off-flavor from developing.

There is a quick-soak method that some recommend. It is to cover the beans with salted water, bring to a boil, remove from the heat and allow to stand one hour before draining and cooking. This does shorten the overall time but it also results in decreased nutrient levels.

There are other methods such as using a pressure cooker, a slow cooker or your oven. Those that promote the oven method claim it is second only to the pressure cooker in quickness of cooking, it cooks the most evenly and is the least likely to burst the beans. Some say that soaking is not required with oven cooking but others still recommend it with larger and older beans as they do cook faster and more evenly. After draining the beans, put them in a large oven-safe pot with enough room for the expansion of the beans. Add seasoning and aromatics and cover with water by at least an inch. Bring to boil on the stove. Bake in a pre-heated 325° F oven for 75 minutes and check for doneness. Continue cooking until done, once again realizing that it may taker longer at altitude. The Kitchn cautions that with red kidney beans or white cannellini beans you should boil on the stove for 15 minutes to ensure toxins that are present in raw/undercooked beans are eliminated. Still others advocate a cooler oven (250°) and cooking for a longer time, 6-8 hours.

With a pressure cooker (something I do not own), it is said that presoaking is not necessary but if you do not soak, you are more likely to end up with beans that have split open. Here is a great source for using your pressure cooker (or Instant Pot) with a chart for cooking times. It even includes recommendations for altitude adjustments.

For a slow cooker, the same pros/cons of presoaking your beans apply. Drain and put the beans in your slow cooker and place aromatics on top. Cover with water by two inches. Add salt and stir to dissolve. Cover and cook on low for 6-8 hours (remember altitude may lengthen this). Start checking after about 5 hours and then every 30 minutes until done. Some people will cook on high, which results in the beans being done in less time. Sources do not recommend using the slow cooker for kidney beans due to the toxin issue. Here is a link to a source discussing this issue of Red Kidney Bean poisoning.

Cooking canned beans takes much less time. Be sure to drain and rinse them as they are in a very starchy and salty liquid. They should be cooked for at least 30 minutes to allow them to absorb the flavors of the recipe.

What if your recipe calls for dried beans but you only have canned beans? You need to know how to covert from one to the other. Cooks Illustrated recommends using 58 ozs of canned beans for every pound of dried beans.

Serious Eats tested a number of different types of beans and created the following chart.

Type of BeanWeight DriedEquivalent Cooked
Cannellini1 pound2 lb. 8 oz. (6.5 cups)
Chickpeas1 pound3 lb. 4 oz. (7 cups)
Red Kidney1 pound2 lb. 7 oz. (6.5 cups)
Pinto1 pound2 lb. 5 oz. (6.5 cups)
Black1 pound2 lb. 5 oz. (7 cups)
Black-Eyed Peas1 pound2 lb. 13 oz. (6.5 cups)

What’s your favorite way to use beans – baked beans, hummus, soups, stews? Whichever it is, I trust this Cooking Tip will help you on the way to success!

Cooking Tips · Ingredients

Peas in a Pod

I was making a delightful pea salad the other day that contained three types of peas along with arugula. I also added some of my husband’s micro pea greens, which made it even better. With spring coming and the memory of this salad, I thought the subject of peas might make an interesting Cooking Tip.

A pea pod is actually a fruit and the peas inside are seeds. Some of the pods are edible, while others aren’t due to the fibrous and tough nature. There are three types of peas that you are most likely to find in your supermarket: English peas, sugar snap peas and snow peas.

When you say peas, most people will think of English or garden peas. These are the ones we find in the freezer section. Supermarkets rarely carry the whole, fresh pods as customers really do not want to shell them. They would rather have someone else do that for them. They must be shelled as the pods are too tough to digest.

If you are a gardener, there are many varieties (or cultivars) of garden peas that you can plant. In the store, though, the particular variety will not be listed.

Snow peas are also known as Chinese pea pods. They are flat and the pods are edible. The seeds inside are not allowed to plump out before harvesting. They can be eaten raw or briefly cooked. Just as with garden peas, there are a number of cultivars that can be grown.

Sugar snap peas are a cross between English peas and snow peas. Once you remove the strings, the entire pod is edible either raw or after blanching. The pods are sweeter and rounder than snow pea pods

Another word you will see on some packages of peas is “petite” or in the French, petit pois. As the name implies, they are smaller but they are also more tender and sweeter in flavor. This is my preferred variety.

In my local supermarket right now, I can buy fresh snow peas and fresh sugar snap peas. The only garden peas to be found are frozen. This is not a bad thing, though, as frozen vegetables are picked at the height of ripeness and quickly frozen to preserve their flavor and nutrient level. I think frozen vegetables are a great item to keep on hand and are not necessarily inferior to fresh varieties, especially out of season.

Peas are very easy to prepare. They can be boiled, steamed, stir fried, or microwaved. They can be added to foods such as salads, omelets, quiches and savory pies. They only require a brief cooking time and can even be eaten raw. Try not to over-cook them. One exception might be if you are making the very British dish – Mushy Peas. Although you can make mushy peas from garden peas, they are traditionally made from a variety called marrowfat peas, a large, starchy and mature pea that is left to dry outside in the field.

Are you a lover or hater of peas? If the latter, could it be you have only had inferior and over-cooked peas? I encourage to try some wonderful and tasty peas cooked to perfection. They are one of my favorite side dishes and are especially nice when the different varieties are combined in the same dish. Spring is coming. Enjoy the produce!

Cooking Tips · Ingredients

Microgreens – Tasty, Colorful & Packed with Nutrition

As many of you know, my husband has a full-time job but is also a part-time gentleman farmer. He keeps chickens and bees as well as growing fruit trees, berry bushes and all sorts of vegetables. He has a greenhouse, which keeps us in fresh greens for much of the winter. He has recently become interested in growing Microgreens and I thought that would make a good Cooking Tip topic.

Many of you have probably heard of baby greens, especially baby spinach. Baby greens are small versions of fully mature plants that are picked before they are fully grown.

My husband’s micro pea greens

Microgreens are similar but are cut even younger in their growing lives. They are the first, tiny shoots of herbs, lettuces and other greens. They are usually grown in soil and require sunlight. They are harvested between 7 & 14 days after germination and are under 3 inches tall. Because of their small form, the flavor is said to be more intense than the mature greens.

Microgreens are different than sprouts as the latter are obtained by sprouting seeds in water to achieve germination. They are harvested within 2-3 days. As you may have heard in the news, sprouts do carry a higher risk of bacterial contamination that can cause illness. This concern has not been found with microgreens although caution is recommended depending on how the greens are grown, harvested and stored. Be sure to wash them thoroughly before consuming.

It is said that all the nutrients that you would find in the mature plant are packed into the microgreen version. That makes it possible to amp up the nutritional value of your salads (or other dishes) by adding just a small amount of these greens. Therefore, they are said to be nutrient-dense. One caveat is that the nutrient content can vary widely depending on where the microgreens are grown, when they are harvested and the kind of soil used.

The U.S. Department of Agriculture and the University of Maryland conducted a scientific analysis of nutrients in microgreens. The results were published in the Journal of Agricultural and Food Chemistry and were summarized in The Salt in 2012.

According to the study, “The researchers looked at four groups of vitamins and other phytochemicals – including vitamin C, vitamin E, and beta carotene — in 25 varieties of microgreens. They found that leaves from almost all of the microgreens had four to six times more nutrients than the mature leaves of the same plant. But there was variation among them – red cabbage was highest in vitamin C, for instance, while the green daikon radish microgreens had the most vitamin E.”

Some caution, though, that the amount nutrients can vary depending on how and where it is grown, handled and harvested. Not only are additional studies needed to evaluate the effect of these agricultural practices on nutrient retention but also to compare microgreens to their mature counterpart. Finally, according to the Agricultural Research Service, “no known study has been conducted to evaluate whether consumption reduces cardiovascular disease risk factors.”

In a 2018 issue of The Journal of Agricultural and Food Chemistry, the authors state that not only are they easy to grow but, “microgreens are environmentally friendly and serve as excellent sources of various nutrients.” They conclude that, “based on existing literature, microgreens appeared to be excellent low-caloric sources of nutrients and bioactive components. Based on their chemical compositions, we propose that these nutrient-rich plants may provide health-promoting effects related to abilities to prevent the development of the vast array of inflammatory-related chronic diseases.”

They do end with stating that more studies need to be done “to fully realize the value of microgreens in human health.”

Here is just one list of popular microgreens.

AmaranthArugula
BasilBeets
BroccoliCabbage
CarrotsCelery
ChardChia
ChivesCilantro
DillFennel
Garden cressKale
MintMizuna
Mustard greensParsley
RadishRadish
SunflowerWatercress

Microgreens do have a very short shelf life, only a few days. They are not always readily available in grocery stores but they are easy to grow – even without a greenhouse.

There are many ways to include microgreens in your diet. We throw them on our salads but you can also add them to sandwiches and wraps as well as blended into smoothies. Add them to omelets or sprinkle them on pizza.

Whether you toss them on your salad for color, for taste or for nutrition, microgreens are a great addition!

Cooking Tips · Ingredients

Umami Flavors

As we grew up, we learned about the different tastes: sweet, salty, sour and bitter. More recently, people have begun talking about another taste – umami. That is the subject of this Cooking Tip – what is umami and how do we get umami in our foods.

Umami is a savory taste. It is actually a Japanese term that roughly translates to “good flavor” or “good taste”. It has also been thought of as a full-bodied, meaty flavor.

Umami was first studied in 1907 by isolating a compound thought to be responsible for this savory flavor. It was later identified as monosodium glutamate, a sodium salt that produces a strong savory taste. For a discussion on MSG, see this Cooking Tip.

MSG has often been added to foods to boost the umami flavor in foods. However, there are many foods that inherently have this taste, specifically those that contain a high level of the amino acid glutamate. Although not totally comprehensive, here is a list of many such foods.

  • Meat has high levels of glutamate
  • Soy sauce (to be forwarded a Cooking Tip on soy sauce, email me.)
  • Tomatoes, including sun-dried tomatoes
  • Miso
  • Anchovies
  • Mushrooms
  • Potatoes
  • Cheese with the more aged and stronger having more umami. For example, an aged parmesan.
  • Seaweed
  • Worcestershire sauce
  • Fish sauce
  • Coconut aminos (see this Cooking Tip)
  • Tree nuts such as walnuts and almonds. These are especially helpful to adding umami to vegetarian meals.

We know what most of these items are but I would like to elaborate on just a few.

Worcestershire sauce – each manufacturer has its own recipe but a typical list of ingredients is fermented anchovies, onions, garlic, vinegar, molasses, tamarind paste, salt, sugar, and a seasoning mixture that often includes coriander, mustard seed & cloves. It adds an umami punch to marinades, meat dishes, soups/stews.

Miso is a Japanese fermented paste and is typically fermented soybeans, a grain, salt, and koji (a mold). It can be fermented from a few weeks to several years. The most common use of miso is in Japanese-style miso soup, but also adds its unique flavor to marinades, ramen, or vegetable and tofu dishes.

Anchovies are a fatty fish that are most often served cured. After removing the head and inner parts, they are coated in salt, pressed and held in a temperature-controlled environment. During this time, chemical reactions occur which lead to flavor development. Being high in glutamic acid, they are full of umami. They are essential to a traditional Caesar dressing and are often added to Mediterranean dishes, meat dishes and pizza sauces.

Fish sauce is one of those ingredients essential to Asian (especially Thai) dishes. It is made from fermented (at least 12 mos) fish, typically anchovies. The fish breaks down and the salty liquid that forms is collected and filtered before bottling. It is both a condiment and an ingredient. Again, it is full of glutamates that result in a rich, savory taste and a brininess that brings out depth and flavor in everything from dipping sauces and soups to stir-fries and marinades.

Many recipes will call for some of the umami rich ingredients. However, you may also want to experiment on your own. Add a bit of soy sauce to that pasta sauce. Chop some anchovies and throw them in your beef stew. How do you up ramp up umami in your dishes? Let me know.

Cooking Tips · Ingredients

Unbleached Cake Flour

Last week’s Cooking Tip was all about the differences between Bleached and Unbleached all-purpose flour. In this week’s Tip, I want to discuss the same topic but as it relates to cake flour.

Cake flour is a fine-textured flour made from soft wheat. It has a very low protein content, usually around 7-8% as opposed to 10-12% for all-purpose flour. There is also something called pastry flour. It also made from soft wheat but has a protein content just above that of cake flour – about 8-9%.

Since cakes are meant to be tender, you want to reduce the gluten content. This is the purpose of the low-protein cake flour. Almost all cake flours are bleached with chlorine & bromated. (For a review of this topic as it relates to AP flour, see last week’s Tip.) Cook’s Illustrated’s science editor explains that “this process damages the starch molecules and allows for greater absorption of moisture and fat by the flour, which in turn results in moister, more tender baked goods.”

Recently, though, some manufacturers have begun to offer unbleached cake flour. A major player in this market is King Arthur Flour. This product supposedly simulates this moisture attraction without any chemicals. There were two other companies offering unbleached cake flour: Hodgson Mill and Bob’s Red Mill. Since writing this, the former company was sold and I know longer see this product as available. The latter recently discontinued their unbleached cake flour. (They do continue to carry unbleached pastry flours and they recommend their Unbleached White Fine Pastry Flour as a substitute.) I will still mention it below as it was the flour that was tested by one expert. August 2024 update – Although the Bob’s Red Mill pastry flour is no longer on their website, it appears you can still purchase it from Amazon and a few other online outlets.

When Cook’s Illustrated tested the King Arthur product, they found it performed just as well as bleached cake flour. Stella Parks of Serious Eats had a differing viewpoint. In this article, she lists a number of advantages of bleached (chlorinated) cake flour. Note, though, that her testing was only with angel food cake.

She states that the bleached cake flour is not only whiter in color but is also “conditioned”. The chlorine slows the rate of starch gelatinization in flour, thus improving gas retention. This results in a higher rise. It also raises the temperature of protein denaturation, once again giving the cake more time to rise. Additionally, it lowers the pH of cake flour from an average of 5.9 to about 4.8. The lower pH inhibits browning, an aspect that is great for an angel food cake.

When testing the unbleached cake flour, she found that the batter soaked up excess moisture and set too quickly. This inhibited the rise of the cake. Again, the discussion was only about angel food’s cake.

The Cake Blog did a testing of 6 different flours in making a traditional (not angel food) cake. This tester had a very positive view of the unbleached cake flours. A short summary of the results is shown in the following chart.

Type of FlourHeight of cakeTextureColorFlavor
Unbleached AP flourShortestCoarseDeep ivoryWheaty
Unbleached pastry flourModerateMildly coarsePale ivoryMildly sweet
King Arthur unbleached cake flourMediumMed-fine crumbMediumMildly sweet
Bob’s Red Mill unbleached cake flourMedium-tallFine crumbPaleMildly sweet
Softasilk bleached cake flourTallestFine crumbPaleMildly sweet

I must add one caution for those of us at high altitude. Baking cakes at higher altitude can certainly be a challenge. I have written a Cooking Tip on this problem. Using cake flour with its lower protein content may hamper getting good results at altitude. Some experts recommend staying totally away from cake flour. Others will use a mixture of cake flour & AP flour. Some recommend using half & half while others recommend 1/3 cake flour and 2/3 AP flour.

What to make of all this? If you want a great angel food cake, I would probably recommend going with a good bleached cake flour. If not, give one of the unbleached cake flours a try. Let me know what you think.

Cooking Tips · Ingredients

Flour – Bleached or Unbleached?

Flour is one of those pantry stables that most of us could not live without. I wrote an earlier Cooking Tip on all the different kinds of flours we have available to us. If you did not receive it and wish to read it, email me and I will forward it to you. For this current Cooking Tip, I want to focus on the difference between Bleached and Unbleached all-purpose flour. Cake flour is a different product, which I will address in an upcoming Tip.

There are two aspects to the debate on these flours. First, there are health concerns related to the use of chemicals added to flour. This is something that I leave to you to decide for yourself. The other aspect is how the flours act in our kitchens. That is what I will be discussing.

According to Harold McGee in On Food & Cooking, “freshly milled flour makes a weak gluten, a slack dough and a dense loaf.” These properties improve as the flour ages. Doughs made with aged flour will have more elasticity and structure.

Besides the structural differences, freshly milled flour tends to be yellowish in color. The aging process helps to change the color to white. Flour can be aged naturally but it takes 1-2 months. As millers began to understand this natural process, they began to use bleaching agents to chemically whiten the flour.

Some of the bleaching agents are banned in other countries. Although there may be limits on amounts, in the US, the FDA allows the use of many such chemicals. For a list, see this link.

The bleaching process does compromise some of the flour’s nutrients and results in a lower protein content, but these are often added back to the flour.

Another fact of which to be aware is that unbleached flour may also be treated with chemicals, usually potassium bromate, but it is treated with far less chemicals than bleached flour.

Bromated flour is flour which has been enriched with potassium bromate, a maturing agent which promotes gluten development in doughs. It is often used in bread production as it is said to make the bread stronger, more elastic and with bigger rises. It also bleaches the flour slightly. It is often used in low protein flours, which do not develop sufficient gluten. Some commercial bakers use this type of flour because it yields dependable results, and it makes a stronger, more elastic dough which can stand up to commercial baking tools. Ascorbic acid has replaced potassium bromate as a food additive in a number of areas as there is some concern that potassium bromate is a potential carcinogen. It has been banned in some countries and in California, the presence of potassium bromate requires a warning under Proposition 65. That regulation mandates warnings about the presence of chemicals that have been shown to cause cancer, birth defects or reproductive harm. The FDA lists it as an approved optional ingredient in bread.

In terms of how the flours act in our kitchen, the bleaching process produces a whiter and finer ground flour, which leads to baked goods that are softer in texture and brighter in color. Although not required, it is often recommended for cookies, pie crusts, quick breads, muffins & pancakes. Unbleached flour will have an off-white color and will not be as fine in texture. It is recommended when you want more structure such as yeast breads and pastries.

According to Cook’s Illustrated, “In baking tests, bleached flour was criticized for tasting flat or having ‘off’ flavors (texturally, the flours behaved the same). These characteristics, however, were much harder to detect in recipes with a high proportion of ingredients other than flour, such as cornbread or oatmeal cookies.” They did not find a discernable taste difference in savory applications such as thickening a sauce.

Cooking Light quoted Sharon Davis, of the Home Baking Association staff, “The difference between bleached and unbleached flour is basically indiscernible to the home baker. The bleaching process helps commercial bakers with consistency. Spread, texture, volume, and quality of grain must be exact each and every time but for the home baker, the only thing bleach has to offer is a whiter bread or cookie. “

They also did a testing among a panel of Cooking Light food editors and test kitchen professionals by testing four different recipes in a side-by-side comparison using bleached and unbleached flour. They tested sugar cookies, vanilla pound cake, buttermilk biscuits and brioche. The testers were unanimous in concluding that substituting unbleached flour did not compromise the result. In some cases, the tasters actually preferred the result with unbleached flour. They detected a slightly nutty, earthier flavor in the buttermilk biscuits made with unbleached flour as well as a slightly fluffier texture. They concluded that for the home baker, “bleached flour merely offers visual appeal – a whiter, brighter flour that only sometimes translates in the final baking product.”

In today’s stores, you can easily find unbleached flours. For some companies such as King Arthur Flour and Bob’s Red Mill, unbleached is the standard. King Arthur states that none of their flours contain any bleach, bromate, or artificial preservatives. Bob’s Red Mill says that their white flours are not bromated or bleached. Their white flour does contain malted barley flour, an ingredient they say has the same effect as bromating without adding chemicals. It does add a little extra sugar, which they say produces a stronger gluten reaction. Although King Arthur does not mention this, a look at the ingredient list shows that they also add malted barley flour. Bob’s Red Mill organic flour does not contain malted barley flour but King Arthur’s organic flour still lists this as an ingredient.

I tend to use King Arthur’s All Purpose flour and have not had a problem with it. What about you? What do you use? Have you noticed a difference in bleached vs unbleached flour? Why do you choose one over the other?

Let me know and as always —- Happy Baking!