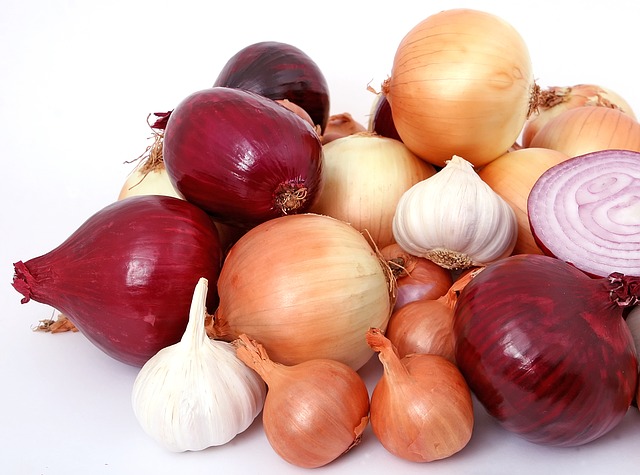
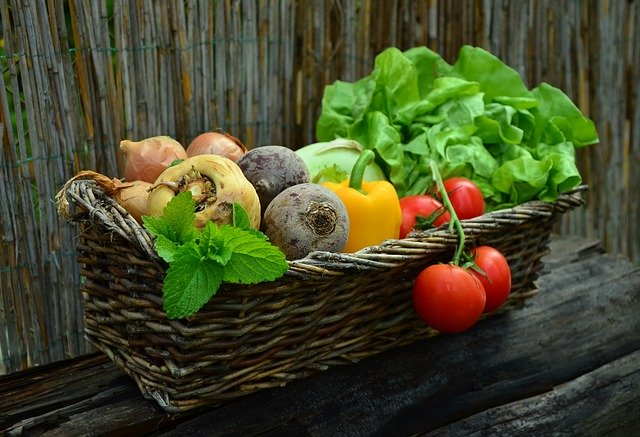
Does it seem that when you go to the store to buy produce for a recipe, everything is super-sized? If your recipe calls for one onion, how much onion is that? If your recipe calls for one small onion, what do you do when nothing in the onion bin seems small? In this Cooking Tip, I want to take a closer look at produce sizes and how to navigate your recipes.
If you have read many of my prior Cooking Tips, you will know that I strongly advocate weighing ingredients (preferably in metric) when baking. With non-baking recipes, weighing is not nearly as important. However, what do you do when faced with the above questions? As a prelude to this post, you may also wish to look at these related posts.
I do not have the time to discuss every item of produce, but I will look at three that commonly lead to questions about amounts. That would be onions, garlic, and citrus.
An over-arching principle is that how much of these items you use in your recipe may vary from cook to cook. Some of you may like more onions or garlic than others. As long as you like how your recipe turns out and one flavor is not overpowering the others, you do not have to be precise in how much you use. The other, but probably most important, tip is to taste your dish as you go along. If you are going to use more of one of these items than the recipe calls for, do not add it all at once. Instead, start with less and let your palate guide you on how much to add.
Another caution is that if the recipe calls for one cup of chopped onion, that can vary from cook to cook. If I were to chop an onion to measure a cup but then weigh it on a scale, and another person were to do the same, they would likely weigh different amounts depending on how small the onion is cut and how much it is packed into the cup. Therefore, even if your recipe calls for a volume measurement, it will not be exact.
Even understanding the above cautions, some want a bit more guidance. The rest of this Tip is for those readers. Besides discussing each item of produce, I also list some prior Cooking Tips for more information.
Sometimes a recipe will just call for “one onion,” and other times, it may specify “one medium (or small or large) onion.” How much should you start with?
If a recipe does not specify what size of onion, assume it is a medium onion. If all you can buy at the store are very large onions (as I usually see), you will need to use less than the entire onion.
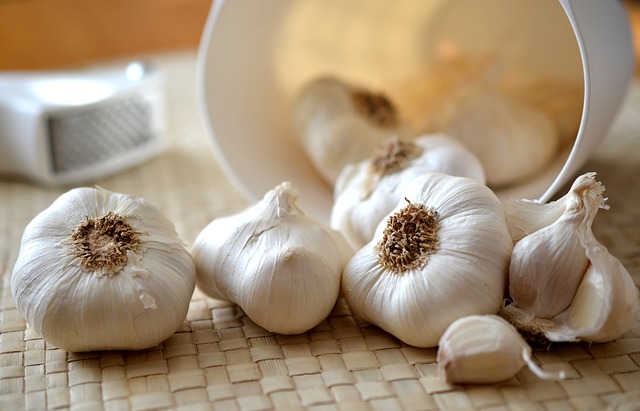
A head of garlic is what you buy fresh in the store, and one head contains many cloves that may be of different sizes. Rarely does a recipe call for a head of garlic. One exception is when the recipe calls for roasting a head and then squeezing the contents out for subsequent use.
One medium head of garlic typically weighs two ounces before preparation. It will contain 10-15 individual cloves or enough to produce about six tablespoons of minced garlic.
Most recipes will call for a number of cloves, but do not typically specify the size of the clove. Therefore, just as with onion, if the recipe calls for one clove, assume they mean a medium-sized clove.
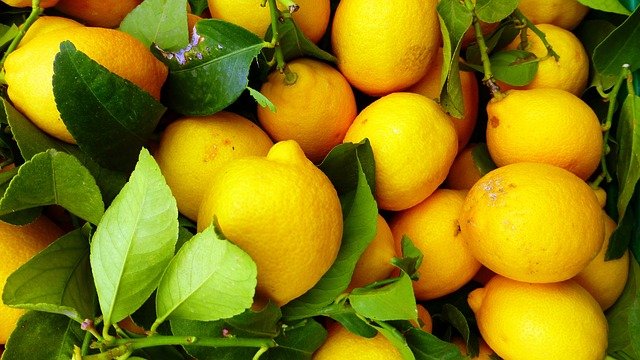
With citrus fruit, not only will different fruits yield different amounts of juice despite being about the same physical size, but the amount that fruit will yield will vary depending on how well you juice them. An electric juicer will almost always give you more than a manual juicer.
Size
Weight
Juice Yield
Zest Yield
1 medium lemon
4 ounces
3 tablespoons
2-3 teaspoons
1 medium lime
2½ -3 ounces
1-3 tablespoons
½-1 teaspoon
I also want to draw your attention to a small reference book about this subject. I use it frequently. It is Food FAQsby Linda Resnick and Dee Brock. To quote the authors:
“After years of researching, testing, weighing, chopping, pureeing and measuring, we’ve compiled this handy volume with hundreds of substitutions, yields and equivalents that can help you buy exactly what you need and make-do with what you already have.”
I just want to remind you that the above discussion deals with these ingredients being used in savory cooking. If you are a baker, please consider using a kitchen scale. Outside of baking, you have much more leeway to adjust amounts depending on your palate. The amounts I gave you should help you in the grocery store when deciding how much of an item to buy, and will help you with a starting point.
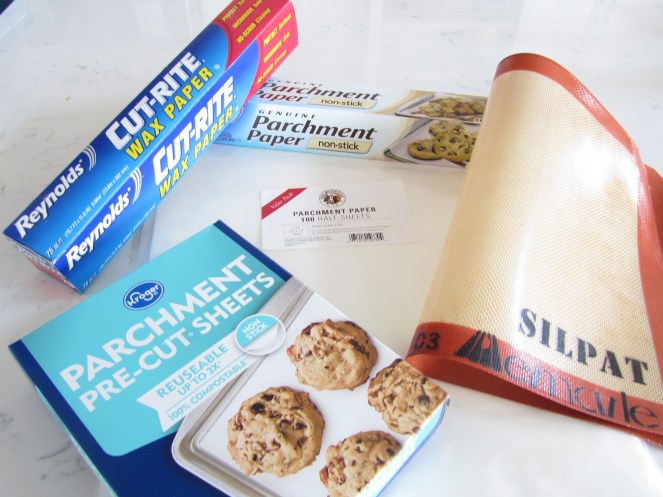
I have a drawer in my kitchen that contains plastic wrap, wax paper, aluminum foil, plastic storage bags and beeswax food wraps. I also have parchment paper, although that is stored in another drawer. Most of you probably have a similar collection of these items. Do you need them all? Read on in this Cooking Tip to understand the differences and the best uses of each. One related item that I am not going to cover is silicone. I have written about this before, and I refer you to this prior Cooking Tip.
Parchment Paper
This is a paper that has been treated with silicone, and it can be bleached or unbleached.
Due to the silicone, the paper is nonstick, heat-resistant, and water-resistant.
It can be used both in the oven and the microwave.
It is a very versatile product. Although most cooks probably use it to line baking pans before adding cookies, batter, or dough, it has many other uses. It can be used for layering between food items and covering your work space when you do messy things (rolling out dough, working with chocolate and candy, etc.). Many chefs roll it into a parchment cornet for piping purposes. It can be bent into a funnel. It may also be used for cooking “en papillote,” a method of cooking food items (often chicken or fish) wrapped tightly in parchment and baked.
Parchment paper can be reused as long as it is not too greasy or dirty.
It cannot be recycled, but it can be composted.
It comes in different forms. It is often sold in a roll similar to foil or plastic wrap. It can also be found in flat sheets, which are more convenient but also more expensive. You can even find cooking bags made of parchment.
You can certainly buy parchment in regular stores. The most common type is a box containing a roll of parchment. The downside of rolls is that it can be hard to get the paper to stay flat on your pan. It is becoming more common to find sheets in stores, although they are often folded. Whereas it is easier to stay flat, the creases can cause ridges or indentations in the baked item. You can buy flat sheets of parchment, which most chefs prefer. The brand often at the top of the rankings is King Arthur Parchment Paper sheets. The downside of this great product is the price, and it must be ordered online.
Photo from Reynolds
Wax paper
This is a paper that has been coated with a thin layer of wax.
Wax paper is moisture-resistant and non-stick. It is not, however, heat resistant. When exposed to heat, the wax can melt and the paper can catch on fire.
While it has many of the same uses as parchment paper, baking with it is not one of them.
Although it is not oven-safe, it can be used in the microwave.
Wax paper is less expensive than parchment.
It is not recyclable. Nor can it be composted.
Aluminum foil
Photo from Reynolds
As the name implies, this is a very thin piece of aluminum.
It has many uses in the kitchen, including lining baking dishes, steaming food, keeping food warm, and wrapping food before freezing.
It is not nonstick. That is why many recipes will have you spray the foil with food spray before using it. Reynolds does make a non-stick version that does not have to be sprayed.
If it is clean, it can be recycled if your provider allows it.
America’s Test Kitchen found that all foil brands were equivalent in performance. They did, though, find differences in the boxes. Boxes that were sturdy and had metal serrations were preferred. They also found that boxes with a secure closure helped to prevent cutting oneself on the cutter part.
Makers of aluminum foil warn against using foil when cooking with highly acidic foods such as citrus, vinegar, or tomatoes. They warn that the metal might leach into the food.
You will often see regular and heavy-duty foil in the store. The latter is slightly thicker and often wider. America’s Test Kitchen put it to the test to see if this more expensive foil was worth the price. They found that it was a bit more resistant to tearing and was better for enclosing items such as wood chips that might poke through, but not significantly so. There was no difference for basic tasks such as lining a baking sheet or making a sling for baked goods. They found that a double layer of regular foil was actually stronger than a single layer of heavy-duty foil.
Many people wonder why there is a shiny side and a dull side. This is solely due to the manufacturing process. Either side can be put next to the food as there are no performance differences.
Freezer Paper
Photo from Reynolds
This type of kitchen paper is coated with plastic on one side.
It is more durable than wax paper and is better for freezing foods.
Freezer paper is more moisture-resistant than wax paper.
It is not safe for use in either the microwave or oven.
Plastic wrap
Photo from Amazon
Plastic wrap can be used to store food as well as to freeze food.
It is also useful for tasks such as pounding meat, making logs of cookie dough or compound butter, and covering bowls of food.
It is not recommended for use in the microwave.
Higher-rated plastic wrap is better at clinging to dishes. It is also thicker and wider, and it is easier to tear.
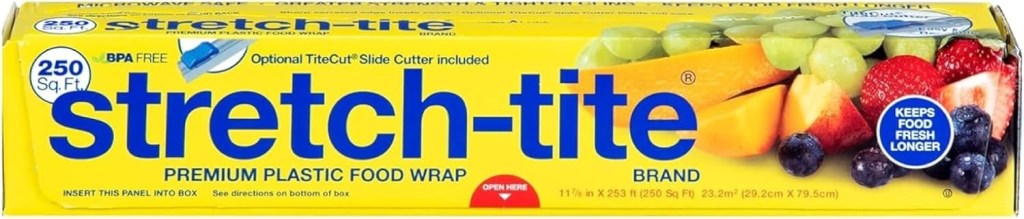
The highest-rated plastic wraps are Freeze-Tite Clear High Cling Freezer Wrap and Stretch-Tite Premium Plastic Food Wrap.
For many people, plastic wrap is a necessary evil. Many people want to cut down on their use of plastic, and also find tearing off a piece from the roll to be a frustrating exercise. Today, one can find the typical box of plastic wrap with a row of teeth and boxes with a slide cutter. Many find the latter to be much easier to use.
America’s Test Kitchen prefers placing the rolls of plastic in a separate dispenser. These boxes are designed to stay on the counter better, which frees up your hand from having to hold the box. They felt these dispensers were much better than the boxes with built-in cutters. There was a difference in quality. Their recommended brand was Stretch-Tite Wrap’n Snap 7500 Dispenser. The downside of this item is that it is harder to store as it is almost 5 inches high.
Photo from Abeego
Reusable food wraps Reusable food wraps are sheets of cotton or hemp cloth dipped in a layer of beeswax or soy wax. Although many recommend these for environmental reasons, there are pros and cons.
Pros
They are reusable and can last up to a year with proper care.
After they have run their course, they can be cut up and composted.
They are easy to clean with a bit of soap/water.
They can do a good job of keeping food fresh if they completely cover the food in an air-tight manner.
They are attractive.
Cons
They do lose their clinging ability over time.
The wraps can melt if left in the sun.
They cannot be washed in very hot water. Most makers recommend using cool water and dish soap.
They can only be used to wrap cold and room-temperature foods. They should not be used for hot items. Nor are they recommended for freezer use.
They are not meant for raw meat.
They are expensive.
They can leave a residue on your hands and dishes as you use the wraps. The residue will wear off, but it takes some work to get it all off. This problem decreases as you use the wraps more.
Over time, the coating can wear down, allowing water into the fabric. This could lead to mold development unless you keep the wraps clean and dry.
They can stain.
They can absorb smells.
Some brands are too stiff to wrap tightly. The softer ones work better.
If you are interested in trying food wraps, look for ones that are clingy and easy to mold. In testing, a couple of brands at the top of the list were Abeego Food Wraps and Akeeko Food Wraps.
What is in your food storage drawer? Do you have an assortment as I do? Or, are you more of a minimalist? I would like to tell you that you only need one of the above products. Depending on what you do in your kitchen, only one item will not be practical. I trust this discussion will help you decide what you need and can live without.
What dairy products do you usually have in your refrigerator? I almost always have skim milk and heavy cream. Many recipes call for some sort of dairy. If you do not have the specific type called for, can you substitute? The fat content of the dairy product is what is most important. This Cooking Tip will delve into the types of dairy products and why the fat content makes a difference.
The main component of milk is water. Cow’s milk is 87% water & 13% milk solids. Some believe that whole milk is diluted down to make lower fat milk. Rather, what is done is that all the cream is skimmed off and then it is put back in to make the desired fat percentage.
If you pour a glass of fat-free milk, you expect that there would be zero fat in that cup and you would be correct. However, beyond that, it is not so straight forward. All milk and many other dairy products will be labeled with a percent fat content. That percent is based on the amount of milk fat in the product by weight.
Both the FDA and the IDFA (International Dairy Foods Association) lists the required fat content for the different labels of these products. Here is the terminology along with the fat content.
Dairy Product
Fat Content by Percentage
Whole milk
3.25-3.5% milk fat (Many people will just call this 4% fat.)
Reduced Fat or 2% milk
2% milk fat
Low Fat or 1% milk
1% milk fat
Fat-Free or Skim milk
0% milk fat
Half & Half
10.5-18% milk fat
Light Cream
18-30% milk fat
Light Whipping Cream
30-36%
Heavy Cream
A minimum of 36% milk fat
Heavy Whipping Cream
36-40% (Some will say this is the same as heavy cream, but the fat percentage is slightly higher.)
Sour Cream, regular
A minimum of 18%
Yogurt
3.25-8.25% milk fat
Crème Fraiche
About 30%
Some recipes that contain a dairy product will also specify which specific kind in terms of fat content. Others do not. Whether or not the recipe is that specific, you should know that not all dairy products are interchangeable in cooking and baking.
Whipping Whereas you can whip light whipping cream, heavy cream, and heavy whipping cream, you will not be able to whip something with a lower fat content. Most will say that you need at least 35% milk fat to be able to whip it.
Hot Preparations Using low fat dairy in cooked (hot) dishes is where many people go wrong. The higher the fat content, the better it will work in hot dishes. If you do not have a high enough fat content, the dairy will separate and curdle.
Heavy cream – This can easily be heated, boiled, and even reduced without the cream breaking or separating. However, adding high acid ingredients such as citrus, wine, and tomatoes might cause some slight curdling. As the fat percentage decreases, the tendency to separate and curdle with heat increases.
Milk – Since the highest fat content in milk is about 4%, use with caution in high heat applications. When you do wish to use milk, try to use whole milk. Adding flour or cornstarch helps stabilize and prevent curdling. As an example, roux-based dishes are usually fine to incorporate dairy into.
Sour cream – As this product has a relatively low fat percentage, it should not be boiled. When using, add it towards the end of the cooking process on low heat.
Yogurt – Since even full fat yogurt is relatively low in fat, treat it as sour cream.
Crème Fraiche – Because of the higher high-fat content, it can tolerate high heat. It makes a wonderful (although more expensive) substitute for sour cream in cooked applications.
Cold Applications Because you do not run the risk of curdling with heat, using dairy products in cold preparations is easier. However, realize that richness and texture may suffer as the fat percentage decreases.
Comparison Testing America’s Test Kitchen ran a couple of taste tests comparing higher to lower fat dairy in different dishes.
In one, they compared using half & half to whole milk in vanilla pudding, mashed potatoes and shortcakes. According to them, the differences were most obvious in the potatoes. The batch made with half/half was much creamier, had a smoother texture, and a more buttery flavor. Flavor differences in the vanilla pudding were minimal but the one made with milk had a looser texture. They found almost no difference in the shortbread. They concluded that substitution was probably fine in baked goods. However, when creaminess is important, stick to the higher fat dairy.
Their second comparison tested whole milk, 1% milk and skim milk in pancakes, a yellow layer cake and chocolate pudding. Each of the recipes originally called for whole milk. With pancakes, most of the tasters could not tell any difference. The yellow cake was a different story in that using skim milk led to a dry and tough cake. The one made with whole milk was moist and tender. Using 1% milk was closer to whole. With the chocolate pudding, skim milk produced a pudding that was less rich and creamy as compared to whole & 1%, with whole giving the best mouthfeel. The higher fat milks also gave the pudding more chocolate flavor.
If you are making a recipe that doesn’t specify a type of dairy product in terms of fat content, you will probably get better results using one with a higher fat content.
Substitutions If you, like me, only have skim milk and heavy cream in your refrigerator, what do you do when your recipe calls for something else? Do you need to run to the store? Not always. If you need half & half, can you just use half skim milk and half cream? Not really. There is a bit more math involved.
Cook’s Illustrated has done the math and produced a great chart to help with this. I have this chart printed out and taped inside a cupboard for easy reference.
What the recipe specifies
What to use instead
1 cup whole milk
⅝ cup skim milk + ⅜ cup half & half ⅔ cup 1% milk + ⅓ cup half & half ¾ cup 2% milk + ¼ cup half and half ⅞ cup skim milk + ⅛ cup heavy cream
1 cup half and half
¾ cup whole milk + ¼ cup heavy cream ⅔ cup skim or low-fat milk + ⅓ cup heavy cream
1 cup heavy cream
1 cup evaporated milk can be used in soups and sauces but not for whipping or in baking
I hope this Tip helps you when you are wondering what dairy to use in a recipe or you are wondering why a certain dish didn’t turn out. Dairy is a very important and wonderful ingredient to use in our kitchens. Just be sure you are using these products properly.
Cutting boards are in all of our kitchens. Many of us probably never give them much thought. As I have been in many home kitchens teaching cooking, it is clear that many buy their cutting boards based on appearance and not functionality. That, along with a nudge from one of my readers, has led to this Cooking Tip on cutting boards.
Before turning to actual cutting board brands, let’s look at what you want and do not want in a cutting board and the different types of boards.
Picking out a board Budget This is often the primary concern for many of us. Some high-quality wooden boards can cost hundreds of dollars. Plastic ones can be under $20. You need to balance cost with durability and useability.
Size
Cutting boards come in various sizes and no one size is better. The correct size for you will depend on the size of your work area, your storage area, and how you use the board.
You will need a larger board if you like to cut multiple ingredients and keep them all on the board. If you cut one or two items at a time, a smaller board may be fine.
A larger board will be better if you carve large pieces of meat.
Another aspect of size is the thickness of the board. A thicker board will better resist warping and splitting and be more stable on the counter. However, it will be heavier to move around. It also adds more height, which could be a problem for shorter people.
Features
Many boards have extra features that may be nice, although not absolutely necessary.
Non-slip grips – These are great to keep your board from moving around as you cut on it. If your board does not have these grips, you may stabilize your board by putting something non-slip underneath it. I use a grippy type shelf liner that I can wash when necessary. Others will use a wet kitchen towel.
Liquid-catching trenches – These are nice if you cut items that cause juice to drain out. Rather than running onto your counter, it will run into these trenches or grooves so that you can dispose of it more cleanly.
Reversible – This gives you double surfaces if that is important to you. The boards with the non-slip grips may not be reversible.
Handles – These make it easier to take in/out of your storage area or move around the kitchen.
Textured surface – Aside from keeping the board from slipping on your countertop, some like to prevent the food they are chopping from moving too much about the board. A textured surface helps with that.
Cleaning Since cutting boards can be a source of food-borne illness, you want to keep them scrupulously clean. More about cleaning your cutting board can be found below.
Material The main materials used for cutting boards are wood and plastic. They both have advantages and disadvantages.
Wood
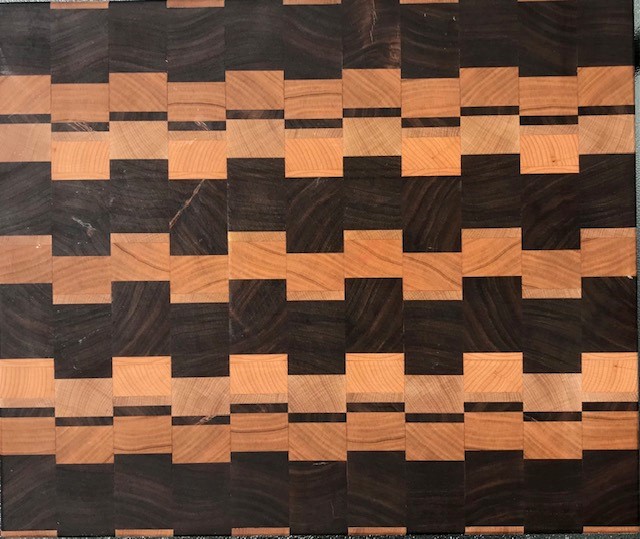
My beautiful multi-wood end-grain board
A quality wooden cutting board will be more expensive than a plastic one.
They are aesthetically pleasing and can also be used as a charcuterie or serving board.
Most believe that wooden boards are easier on knives because they do not dull the blade as quickly as cutting on a harder surface.
Not everyone adheres to the belief that wooden boards are easier on your knives. Test cooks from America’s Test Kitchen use their cutting boards multiple hours each day and have found that there is not much of a difference to their knives between wood and plastic boards. They also used robots to simulate long-term use and found both kinds of boards dulled knives at the same rate.
Wooden boards can be either “end-grain” or “edge-grain.” End-grain This board style is made of many different blocks of wood glued together so that the grain runs from top to bottom in a vertical direction.
Pros Most experts feel that end-grain boards are softer and, therefore, easier on your knives. This is because the fibers run vertically, and your blade slices between them. Daniel Gritzer, Editorial Director for Serious Eats, uses this analogy:
“You can’t see this because the fibers are practically microscopic, but if you could zoom in, it’d look like a knife sliding between brush bristles, which close back up as soon as the knife is lifted away. This does less damage to the blade over time.”
This is compared to an edge-grain, which is compared to slicing into a bunch of spaghetti lined up lengthwise. They are also less prone to marks from your knives.
Cons More expensive. More prone to warping and even splitting between the blocks of wood. They can also dry out faster and require more frequent oiling.
Edge-grain This is also known as long-grain and is when the grain runs horizontally from one edge to another.
Pros Less expensive There are fewer seams in the board and, therefore, fewer weak points that could cause the board to split.
Cons Harder on knives. They are more prone to gashes and gouges. Wooden boards take more maintenance. Many say that the care of the board is more important than what type of construction is used. See below for care advice.
Wood types – Different types of wood can be used in cutting boards.
Maple, walnut and cherry are sturdy but still soft and, thus, gentler on knives.
Maple is more affordable than some other woods.
Bamboo, teak and acacia have higher amounts of naturally occurring silica, which can dull knives faster.
In a test of different types of wooden cutting boards, Serious Eats found that most wooden boards, no matter the wood, did not significantly dull a knife even after 200 strokes.
Plastic is easier to clean in that most are dishwasher-safe.
They are less expensive than wood.
Plastic tends to be easier to store.
Plastic boards are lighter in weight. This may make them easier to handle but also makes them more prone to slippage on your counter.
They can get grooves from knife use, which can lead to bacterial growth.
They often come in fun colors.
Another type of plastic board is known as a flexible cutting mat. These are lightweight; some can even be rolled to funnel food into a bowl or cookware.
They are easy to clean and dishwasher safe.
Many mats are double-sided.
Since they are so lightweight, they are prone to moving around as you use them. Some will have a textured side to minimize this. Others must be placed on top of a grip mat or wet towel to stabilize them. Slick foods (halved onions, raw chicken) can slide on the mats, especially perfectly smooth ones. Those that have patterns and textures in them lessen this.
Glass/ceramic
Everyone agrees that you should never use this type of cutting board. Although they can be very pretty, they will destroy your knives.
They are also so smooth that your knife can slide around and be more difficult to control, leading to more sloppy cuts as well as being dangerous.
They are fragile, and there is a risk of breakage if they are dropped.
Wood composites These can also damage knives.
Safety There are two safety aspects: avoiding cross-contamination leading to food-borne illness and safety while using the board.
To minimize cross-contamination, use one board for meats and another for non-meat items. Proper cleaning is also mandatory. See below for cleaning advice.
There is disagreement on whether wooden or plastic is less prone to contamination. Some say that wooden boards offer natural antimicrobial protection. They argue that the bacteria do not like the wooden surface and will die if any remain after cleaning. Others argue that the non-porous surface of plastic boards keeps any juices containing microbes from penetrating the board. Plastic boards, however, can develop grooves and depressions from repetitive knife use, giving an inroad to the microbes. Furthermore, plastic boards can be sanitized in the dishwasher, where the cleaning process will likely kill all the bacteria. Even though there is no definitive answer as to which is the most sanitary type of cutting board, properly cleaning after each use is vital to preventing contamination.
Cook’s Illustrated had a lab analyze several boards, all of which had been colonized with salmonella, followed by either washing in hot, soapy water or spraying with a bleach solution or undiluted vinegar. All methods were equally effective at reducing bacteria. There was no difference between wood, plastic, bamboo or composite boards.
For safety, the heavier boards are more stable. Lighter boards need a non-slip surface. It can be built into the board or you can place a grip mat or wet kitchen towel underneath.
Cleaning Cutting Boards Wooden
Only hand wash with dish soap (preferably unscented), warm water and a soft sponge. Pay attention to any crevices. Some recommend washing both sides (even if you only used one side) to prevent uneven drying, which could lead to warping.
Immediately & thoroughly dry with a towel to reduce warping, splitting, and mildew development.
Some recommend using kosher salt and half of a lemon to gently scrub the board to remove odors and use baking soda to remove stains. I would recommend checking the directions from the maker of the board for their advice.
Wooden boards should be regularly conditioned by applying food-grade mineral oil or a conditioner for wooden boards. This helps to prevent the board from drying out.
Plastic
Scrub a plastic board with dish soap and hot water.
Many plastic boards are dishwasher safe, although some may specify top-rack only. Also, frequent use of the dishwasher can shorten the board’s lifespan.
It is highly recommended that you scrape off any meat remnants before placing in the dishwasher so the hot water doesn’t “cook” them into the board.
America’s Test Kitchen recommends spraying the board with a vegetable food spray before cutting foods likely to leave a stain, such as beets. When you finish cutting, remove the food to a bowl and wipe down the board.
For stains, use a paste made from one teaspoon of baking soda, one teaspoon of salt and one teaspoon of water.
Brands I perused multiple of my favorite rating sites to see which boards were more highly recommended. As is typical, different opinions abound. However, certain boards did rise to the top of many lists.
Wooden
John Boos – They are an American company located in Illinois. Depending on the size and thickness, the type of wood, the type of construction, and the addition of special features, these can run anywhere from about $50 to over $1000.
Jones – This is another American company located in Pennsylvania. Although their website was not functioning well when I was checking prices, it appears that they will be somewhat less than John Boos.
Boardsmith – A family-owned business in Texas, their boards range from about $150 to $800.
What do you really need? As noted above, that depends on your budget and your needs. I do agree with the advice given by Serious Eats. They recommend one large wooden cutting board in addition to two different-sized plastic cutting boards, a larger one for those messy jobs that can be put in the dishwasher and a smaller one for quick tasks. I will add that one or two flexible mats are also nice.
I have collected a few cutting boards over the years, but the ones most used are a wooden one, a large plastic one and a flexible mat. My most recent addition is a gorgeous wooden board that was a gift from some very dear friends. The husband made the one you see in the photo above. It is not only beautiful, but is a joy upon which to cut. I hope you find the perfect collection of cutting boards for you and your kitchen!
I love frozen produce. I not only use it in my own kitchen, but I also use it frequently in my cooking classes. Some people might be surprised that I do not exclusively use fresh produce. However, frozen produce is an excellent substitute for fresh produce in many applications. This Cooking Tip will explain the benefits of frozen produce and how best to use it.
Pros of Frozen Produce
It is often more affordable than fresh produce, especially when the fresh produce is not in season.
It is more convenient than fresh produce. You just have to open your freezer to find the item, and it is usually prepped for you by washing, peeling, and chopping. Another convenience factor is that the frozen produce does not need to be thawed before being cooked for most purposes.
The produce that is meant to be frozen is picked at peak ripeness. Fresh produce tends to be picked before maximal ripeness to make it easier to store and transport. Riper produce not only tastes better, but it also has a superior nutritional profile (see below).
Frozen produce lasts longer than fresh produce. Fresh produce might only last 1-2 weeks, whereas frozen produce can last in the freezer for several months. This reduces food waste.
Frozen produce is available year-round. We all know and probably try to eat what is in season. You are doing just that when eating frozen produce. Even though it might not be blueberry season where you live, the frozen blueberries were picked when those blueberries were in season.
There might be a change in texture as compared to fresh produce.
Many frozen veggies contain additives such as seasonings. At times, when I look at the frozen veg aisle, it is hard to find a package that doesn’t have a sauce or seasonings added to it. This can add fat, sugar and calories. So, be sure to check the ingredient list for these additives.
Nutrient level
Some worry that frozen produce loses nutrients during the freezing process. This has not been borne out with actual studies.
A study published in the Journal of Food Composition and Analysis in 2017 was a two-year study that looked at specific nutrients in selected fresh and frozen fruits and vegetables. They also studied “fresh-stored,” which was intended to mimic typical consumer storage patterns of produce following purchase – noted as five days of refrigeration. Their conclusion was:
In the majority of comparisons between nutrients within the categories of fresh, frozen, and “fresh-stored”, the findings showed no significant differences in assessed vitamin contents. In the cases of significant differences, frozen produce outperformed “fresh-stored” more frequently than “fresh-stored” outperformed frozen. When considering the refrigerated storage to which consumers may expose their fresh produce prior to consumption, the findings of this study do not support the common belief of consumers that fresh food has significantly greater nutritional value than its frozen counterpart.
The FDA has also added frozen produce to those items that may be labeled as healthy. See this Fact Sheet.
Frozen produce is picked and frozen at the height of its ripeness. This means it is also at the height of its nutrient level. Fresh produce is often picked before it is ripe. This means it has fewer nutrients and tends to lose nutrients over its life span from actual picking to using the produce in your kitchen.
How to use frozen produce
Sauteing
Steaming
Microwaving
Roasting
Use in soups and stews
Smoothies
Sorbets
Sauces
Fruit cobblers
Are you a lover of shopping in the frozen produce aisle like I am? If not, check it out the next time you visit your supermarket. A wonder of delicious and nutritious items abound there.
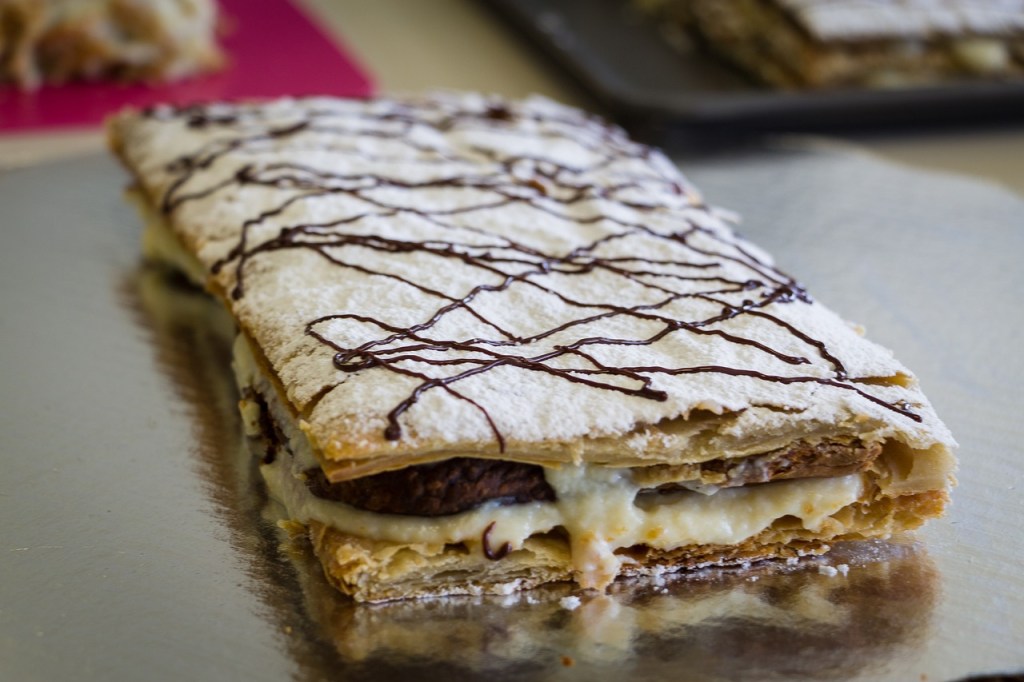
Puff pastry is a delicious type of pastry dough that can be used to create all kinds of wonderful creations. It can be used in both sweet and savory applications. It is composed of layers upon layers of butter and dough. As it bakes, it puffs up, resulting in light and flaky bites of yumminess. I have written a prior Cooking Tip on how to make classic puff pastry. It is not difficult, but it does require some planning and time. I encourage you to give it a try if you have never made your own puff pastry. If you are craving this pastry but do not have quite enough time, consider making Quick Puff Pastry. In this Cooking Tip, I will show you what it is and how it is made.
Although classic and quick puff pastry are made with the same ingredients, they differ in how they are combined and rolled out. As you will read in my Puff Pastry Tip, classic puff pastry begins with a mixture of flour, water, and a small amount of butter. This is combined in a mixer bowl. This is called the detrempe. Separately, a large amount of butter is formed into a butter block. The butter blocked is encased inside the rolled-out detrempe. This is then rolled numerous times in specific ways to create the puff pastry. As the butter and dough must stay cold, the rolling process needs to be interrupted by resting times in the refrigerator. This is where most of the time comes in.
With quick puff pastry (also known as rough puff pastry), everything is mixed together and then rolled out. Europeans are known to call this American Puff Pastry as the method is similar to that of making pie doughs. It can be completed in about two hours.
Ingredients
For optimal results, use a kitchen scale to weigh the ingredients instead of using a cup measure.
Flour – Most of us will just use all-purpose flour, but some recipes may use bread flour.
Butter – Since this is what gives puff pastry its delectable flavor, use high-quality butter with a high-fat content. Some recommend a minimum of 82% fat. As with almost all baking, choose an unsalted butter.
Salt – Salt adds flavor but can also slow down gluten development, which helps with the rolling process.
Vinegar – Many recipes add a touch of vinegar, again to retard gluten development. Whether this is true or not is a matter of debate.
Water – The water is what brings all the ingredients together into a dough. Some experts will warn against using water with too much chlorine in it. They recommend using either bottled or filtered water or allowing the chlorinated tap water to sit in the refrigerator overnight to allow the chlorine to evaporate. I am not sure this is necessary for puff pastry. First, many sources indicate that most tap water does not have a sufficiently high chlorine concentration to affect your dough. Second, one of the main effects that chlorine has is by inhibiting the yeast. Puff pastry dough does not contain yeast (although other laminated doughs do.)
A final comment about the ingredients is that the butter and water should be very cold. When making puff pastry, you want to avoid having your butter start to melt. It should remain very firm, only melting when placed in the oven.
Method
Dissolve the salt in the water.
Place flour in a bowl and add the cold, cubed butter. Cut the butter in quickly to prevent it from melting. You want to see chunks of butter all covered in flour.
Make a well in the bottom of the bowl and pour in the water. Mix just until the mixture forms a dough that stays together. At this point, you still want to see pieces of butter.
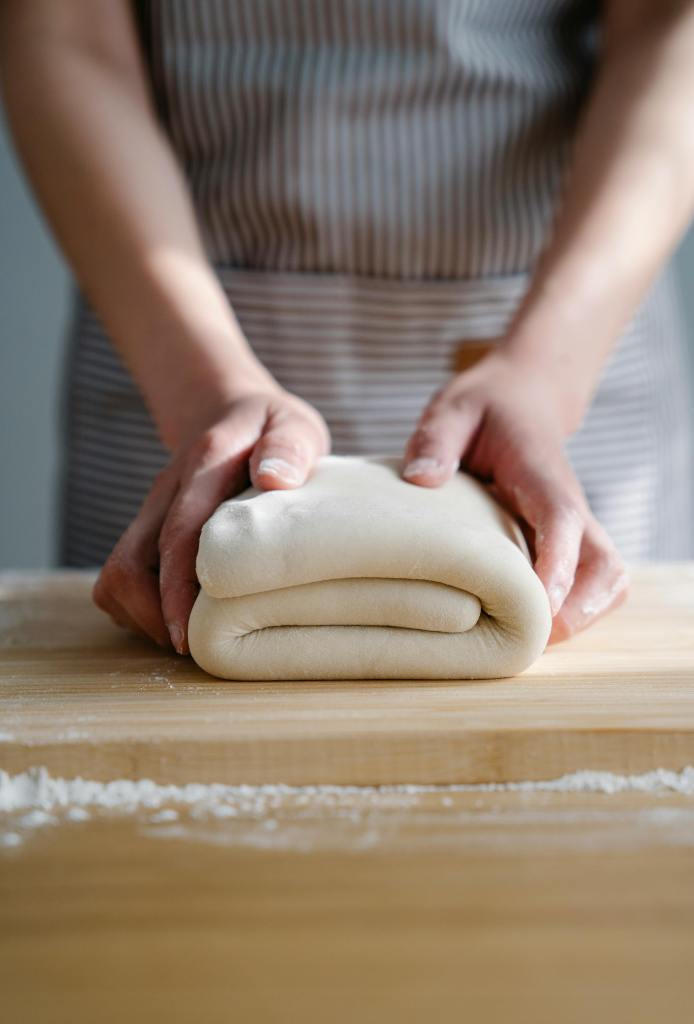
Transfer to a floured work surface, gently knead into a ball and then press into a five-inch rectangle. You may also do this with a rolling pin. If it feels too soft or starts to warm up, refrigerate for a while. After forming the rectangle, chill it for at least 15 minutes.
Begin the rolling and folding process. Each time, the dough will be rolled out into a long rectangle. Follow the dimensions indicated in your recipe.
The folding may vary by recipe, but it will typically involve a series of single and/or double turns. Between each rolling and folding, the dough should be wrapped in plastic and refrigerated for 15-30 minutes.
Single fold (sometimes called an envelope fold) – Bring one short end up from the bottom to one-third from the top and then bring the top edge over.
Double fold – Bring each short end of the dough into the middle, leaving a small space between the ends. Then, fold the dough in half.
In the beginning of the rolling and folding process, your dough will look very rough but will smooth out as you complete this process.
Refrigerate the finished pastry before using it in any application.
Between rolling and folding the dough, use a pastry brush to brush off any residual flour.
After folding and when ready to roll again, always ensure the seam is placed vertically and on the same side for each roll. This will help to ensure an even result.
Result How does the finished quick puff pastry compare to classic puff pastry? It is very close and much better than store-bought. Since there are fewer layers, it will not rise as high but is perfectly acceptable for applications that don’t require much height.
Have you ever made your own puff pastry? It is truly a satisfying endeavor and yields a wonderfully delicious product. If doing it the classic way is too daunting, try this quick puff pastry technique. What will you turn your puff pastry into? Whatever you do with it, it is bound to be yummy!
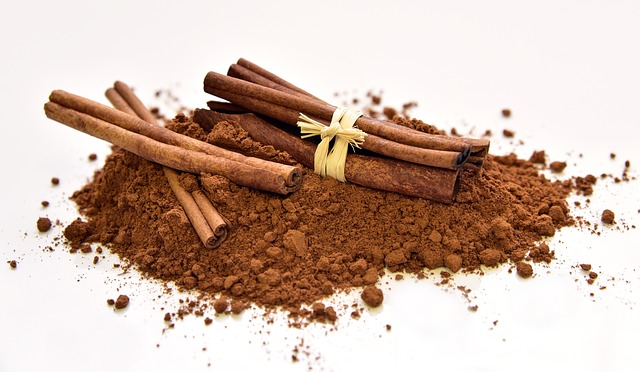
In last week’s Cooking Tip on Hot Cross Buns, I mentioned that many caution against using much cinnamon in the dough as it can inhibit rising. In this short Cooking Tip, I investigate whether this is true.
As opposed to other Culinary Myths, it isn’t easy to get a definitive answer to the question of whether cinnamon can inhibit yeast.
This premise comes from the fact that the flavor chemical in cinnamon, cinnamaldehyde, has been shown to have antifungal properties. Since yeast is a type of fungus, adding cinnamon to the dough could inhibit the yeast from doing its job.
King Arthur Flour cautions that cinnamon can inhibit yeast activity. However, they state that the effect would be minimal if you use no more than one teaspoon per 3 cups of flour.
One sourdough expert finds that adding cinnamon at shaping is the best way to incorporate it into your sourdough bread, hopefully minimizing any adverse effects on the fermentation process.
This belief about cinnamon and yeast is why you do not see the addition of cinnamon to the actual dough when making cinnamon rolls. Rather, it is generally added as a swirl or a filling.
There are scientific in-vitro (in the lab) studies that have demonstrated an adverse effect of cinnamon (and other spices) on yeast. How this translates to your kitchen and using cinnamon in yeasted dough is not totally clear. Much of what we read is just based on anecdotal evidence.
What have you found? Have you experienced a failure with a yeasted dough that included cinnamon as an ingredient? Let us know!
Most of us are beginning to see glimmers of Spring. Part of Spring is Easter, which is a time filled with favorite Easter foods. One of those foods that many people enjoy only during this time is Hot Cross Buns. This Cooking Tip is dedicated to explaining the history of this beloved bread item along with advice on how to make the best batch possible.
Any history source that discusses hot cross buns will mention this childhood nursery rhyme that street sellers sang out in the 19th century.
Hot cross buns! Hot cross buns! One a penny, two a penny—Hot cross buns! If you have no daughters, Pray give them to your sons, But if you have none of these little elves, Then you must eat them all yourselves.
Once a year, the sellers would start hawking these sweet and spiced soft buns with a cross-scored into the dough. Later, the cross was added using a flour paste or icing.
Photo by StockCake
Although there is much debate about the origins and their historical context, it is generally believed that the cross has always held a religious significance and eventually became associated with Good Friday. English Heritage notes that in a 1733 edition of Poor Robin’s Almanac, a writer said:
Good Friday comes this Month, the old woman runs. With one or two a Penny hot cross Bunns.
Even today, some will associate the hot cross bun with the communion wafer. The spices represent those used in Christ’s burial, and the cross is a reference to the crucifixion.
Enough of history! How do you make a delicious hot cross bun?
Ingredients The ingredients are very simple. Although you might see some variation among recipes, you will generally have the following ingredients:
Flour
Butter
Milk
Eggs
Yeast
Sugar
Spices
Making the dough
Hot cross buns are meant to be light and fluffy. Achieving this requires taking care not to either under- or over-knead the dough, as well as not using too much flour.
When combining the ingredients, do not add all the flour at once. Hold back a bit of the flour and add it only if needed. Too much flour can make the buns dense and hard.
Most people will use a stand mixer to make the dough, but it can also be done by hand.
Knead into a soft, smooth, and sticky dough. You can use the dough hook on a stand mixer or knead by hand, although the latter will take much longer. Additionally, it is easy to over-knead when using a stand mixer. If your hot cross buns turn out hard, it may be because you over-kneaded them.
You do want a sticky dough as this will result in softer and moister buns. If the dough is difficult to work with due to its stickiness, try putting a bit of oil on your hands rather than using flour.
Adding fruit
Some recipes will instruct you to simply add the dried fruit as it is.
Others recommend soaking the fruit in warm water, apple juice or your preferred spirit. This softens and plumps up the dried fruit. If you do this, allow the mixture to cool before adding the fruit to the dough.
Another point of contention is when to add the fruit. There are three methods.
Add fruit along with the rest of the ingredients.
Add the fruit only after achieving a soft dough. Since the dough should be sticky, oil your hands and knead the fruit into the dough right in the bowl.
Add the fruit after the first rise. If you find it hard to incorporate the fruit at this time, try stretching the risen dough into a rectangle. Sprinkle the fruit pieces over the dough, roll into a log and fold in half. Continue with a few more folds until the fruit looks evenly distributed. Those who recommend this think that the fruit can inhibit gluten development during the kneading process.
The classic fruit used is currants or sultanas. Others use raisins, dried cranberries or diced, dried apricots.
Spices
Warm spices are typically used. For example, allspice, nutmeg, cloves, mixed spice and/or cinnamon. Some chefs feel that cinnamon can inhibit the rising of the dough. So, use the cinnamon lightly.
Rising
For the best and fluffiest result, the dough should rise twice. The first rise happens after you have kneaded the dough.
The second rise is after you have formed the dough balls and before placing them in the oven.
Portioning & shaping dough balls
You will achieve a more aesthetically pleasing result if your dough balls are as uniform in size as possible.
Some people prefer to portion them out using a muffin scoop, ensuring a consistent amount of dough in each scoop.
For the best result, weigh the dough balls.
Take each portion and form it into a ball. Take some time to make nice spheres and tuck the seams underneath.
Forming the cross
The simplest method is to just cut a cross into the risen balls before baking. Where you cut the cross, it will appear paler after baking.
Flour paste – an older method involves making a flour paste from water and flour. This is then piped onto the buns before they are baked. Some will cut the cross into the dough first as it gives a guide for applying the flour paste. You may need a bit of trial and error to get the right consistency for the flour paste. If it is too thin, it will spread as it bakes and lose its cross-shape. If it is too thick, you cannot pipe it easily.
Bo Friberg, author of The Professional Pastry Chef likes to use pastry cream instead of a flour paste. Now, I think that sounds incredibly yummy!
Others like to make an icing from powdered sugar, milk and vanilla. This is piped onto the baked and cooled buns. Once again, some will cut the cross into the unbaked buns to provide a guide for the icing.
Baking
Be sure not to over-bake the buns, as they will dry out and lose their light and fluffy texture
Many like to apply a glaze as soon as the buns come out of the oven to give them a shiny appearance.
A common glaze is made by heating apricot jam and a small amount of water and then brushing it on baked buns.
Storage These are one of those baked items that you want to eat sooner rather than later. You can freeze them for longer storage. To do this, bake the buns and allow them to cool. Place them in an airtight container and store them in the freezer. To serve, allow to come to room temperature and then warm in a low oven.
Are Hot Cross Buns a tradition for you? Do you have any secrets to share? I must say they are not something that I make each Easter, but after writing this Tip, I am eager to grab my yeast and get started!
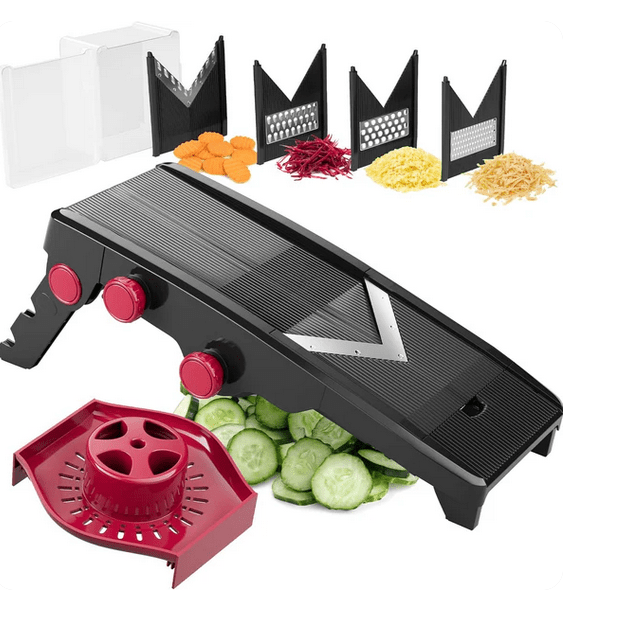
A mandoline is one of those kitchen tools that is not absolutely necessary in your kitchen. However, it is the best tool for specific tasks and, therefore, may be something worth considering. What they are, how to select one, and how to use them safely are topics covered in this Cooking Tip.
What is a mandoline?
A mandoline is a manual machine for slicing fruits and vegetables.
The user holds the food with one hand and slides it down the length of the mandoline and across the blade.
Some models only produce thin slices, while others have blades that enable you to make julienne or waffle cuts.
It can generally slice items more precisely, evenly, consistently and quickly than with a chef’s knife.
It can not only speed up the preparation of produce but can also produce paper-thin slices that are even in thickness.
It can also produce very thinly shredded cabbage for your coleslaw.
What to look for in a mandoline. Sharp Blades According to everyone, the most crucial aspect of a good mandoline is that it should have very sharp blades. Duller blades make it more difficult to push the food through. Users then compensate by putting more pressure as they push the food, making it more likely that they might slip and cut themselves. Some brands have blades that can be removed for sharpening. For more inexpensive models, the entire unit will need to be replaced.
Type of Blade There are three basic models: French, Japanese, and V-shape. The French style has a straight blade that is perpendicular to the sides of the mandoline. Japanese models typically feature a blade placed at an angle. The final style has a V-shaped blade.
One is not always better than the other, as each has its advantages and disadvantages. Some users prefer the straight blades as they feel it is easier to push food through. With the V-blade, it can be harder to push the food through, necessitating more force. It can also be more challenging to cut even slices with the V-shaped blades. However, V-blades are better suited for larger items, while the angled blades are more suitable for smaller foods.
Some mandolines also come with additional blades that allow you to julienne items or make waffle cuts.
Varying Thicknesses Better mandolines possess the ability to cut in a wide range of thicknesses, so you can slice from very thin to thicker and do so evenly. Most mandolines will have preset thickness levels, although some will have an infinite control. When using those, however, there is no setting that tells you the exact measurement you are cutting. It is more of a trial-and-error experience to achieve the desired thickness.
A wide, rigid platform The platform of the mandoline should be large enough to accommodate larger foods, such as potatoes unless you plan to use it only on smaller produce. You also want a platform that is stable and will not sag as you slice.
Rubber feet or stand These keep the mandoline from moving around as you slice. A more stable mandoline is a safer one.
Handheld vs Kickstand Some mandolines are called Handheld. They are made to rest atop a bowl, or you can hold them at an angle on a countertop. They are thinner and lighter, taking up less storage space. However, cutting horizontally over a bowl is more difficult.
Kickstand models feature a built-in stand that holds them upright on the counter, typically with an adjustable angle, making it easier to perform the repetitive motion required for using a mandoline.
Handguards Mandolines have a reputation for being dangerous, and they can be unless you are informed and careful. As you are moving the food back and forth across very sharp blades, it is easy to slip and cut yourself. That is why the use of a Handguard is highly recommended. This guard is positioned between your hand and the food, providing protection from the blades. Most mandolines will come with a guard, although not all are the most effective. With some, it is challenging to keep the food solidly on the guard. Additionally, some are considered wasteful because they do not allow you to cut all the food down to the very last piece. However, as many will tell you, a bit of waste is preferable to a severe cut and a trip to the emergency room.
Cut-Resistant Gloves These are not a part of the mandoline but are something you should seriously consider getting. Although it is not recommended to slice food without the handguard, using these gloves should be mandatory if you do. Even if you are using the guard, the glove can give you extra protection. Realize that they are not totally puncture resistant, and they do wear out after about a year.
Dos & Don’ts
Pay attention and do not get distracted. It is the same when you are using a knife. I recall the only times I have cut myself with my chef’s knife was when I looked away as I was chopping.
Only use mandolines with sharp blades. Just as with knives, dull mandolines are more dangerous.
Work on a flat, dry surface to prevent the mandoline from slipping.
Cut foods in half, especially round items such as potatoes or apples. This gives you a flat surface that moves against the blade.
Don’t cut too quickly. You will have more control when you cut slower.
Position the food towards the side of the mandoline as the platform is less likely to flex. Not only will it be safer, but you will also get more evenly sliced pieces.
Clear food from underneath the mandoline as you work. That way, it won’t obstruct the food that you are slicing.
At times, some food may become stuck on the blade. Do not force it through the blade, as you might slip and cause injury. Instead, use the handle of a wooden spoon (or similar tool) to knock the food back off the blade.
Just as with your knives, do not place them in the dishwasher. Handwashing helps to maintain their edge.
If you have decided to buy a mandoline, which one should you choose? Are some superior to others? Yes, but it depends on who you ask. Many excellent sites have reviewed mandolines and listed their recommendations. The problem with these lists is one person’s favorite is a no-go on another person’s list. I will attempt to provide some generalizations by consolidating these reviews.
There are certain brands that rise to the top of the reviews. However, there are often different models within those brands. These different models might have different blades, different ability to adjust, different handguards, etc. If you are reading a review, pay attention to which model was tested. I will list the different models for each company as I discuss the pros and cons of those devices. Prices listed are as of March 2025.
Photo courtesy of Amazon
Benriner – This is one of the companies that consistently appears at the top of reviews by many culinary professionals, and it can be found in many professional kitchens. The model generally preferred is the Super Benriner Mandoline Slicer.
Cost – $60-$80
Pros
Extremely sharp – this is the main characteristic that users like, although one review noted that it was not as sharp as they expected right out of the box.
Wide range of thicknesses. The updated model features a dial that is significantly easier to use than the one on the older model. Although the range of thicknesses is very good, there is no measurement to tell you the exact thickness.
Easy to set up, use, clean and store.
Cons
One con that is mentioned is the lack of a handguard. This is not accurate as it does come with a handguard. An older model’s guard was deemed ineffective, but an updated version comes with a significantly improved guard. Not only is it easier to use, but there is very little food waste.
Models – these mostly vary in size.
Benriner Super Slicer
Benriner Vegetable Slicer
Benriner Japanese Slicer
Photo courtesy of Oxo
OXO – This company is well-known for its kitchen tools and gadgets. Its mandolines receive mixed reviews but are generally well-liked. Most of the reviews were based on the V-Blade model.
Cost – see below with list of models.
Pros
Easy to use (Chef’s 2.0)
Many different thicknesses that are easy to set using a dial. (Chef’s 2.0)
Comfortable handle (Handheld)
Good handguard (All models)
A see-through slicing plane that allows you to view what you have sliced. (Handheld)
Cons
Some say it is not as sharp as other brands.
Bulkier to store. (Chef’s 2.0 & V-Blade)
The julienne blades only come in 2 preset widths and thicknesses. (Chef’s 2.0)
Jumps between settings were too large.
Thinnest settings didn’t work well. (Chef’s 2.0)
Only has a straight blade. (Handheld)
Doesn’t work well with soft items. (Handheld)
Food can get stuck on the blade. (Chef’s 2.0)
Models
V-Blade Mandoline Slicer – $45
Chef’s Mandoline Slicer 2.0 – $100
Steel Chef’s Mandoline 2.0 – $115
Handheld Mandoline Slicer – $20
Large Adjustable Mandoline Slicer – $30
Simple Mandoline Slicer – $50
Kyocera
Photo courtesy of Kyocera
Cost – see below with list of models.
Pros
Very sharp. (Soft Grip Ceramic)
Soft, ergonomic handle. (Soft Grip Ceramic)
Compact, lightweight. (Soft Grip Ceramic)
Easy to store. (Soft Grip Ceramic)
Easy to use. (Soft Grip Ceramic)
Inexpensive (Soft Grip Ceramic)
Cons
Too small to accommodate large produce. (Soft Grip Ceramic)
Microplane – This company is well-known for its excellent zesters. Their only mandoline is the Adjustable V-Blade Mandoline Vegetable Slicer.
Photo courtesy of Mircroplane
Cost – $40
Pro
Cuts thin slices well.
Compact.
Easy to store.
Has a nonslip foot.
Cons
Julienne blade easily dislodges from the back of the mandoline when slicing using the V-blade
Blade tore food and food can get stuck on the blade.
Duller than others.
Doesn’t slice well at thicker settings.
Too small for larger produce.
Photo courtesy of Dash
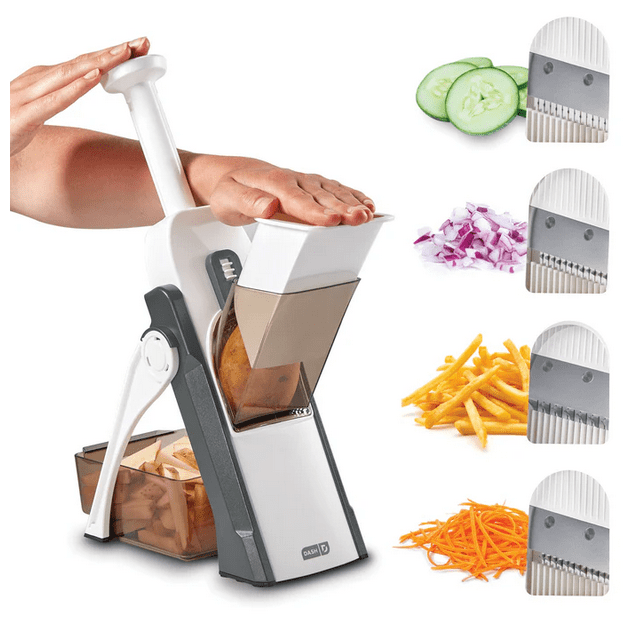
Dash Safe Slice Mandoline I mention this mandoline because it is unique. Although there are different models of all the above mandolines, they all share the same basic shape. This one is a vertical unit that sits on your countertop. It has a chute into which you feed the food while pumping the unit up and down.
Cost – $30-$40
Pros
Definitely the safest, as your hand does not get near the blade.
Cons
Limited utility as the items you want to cut must fit into a chute.
Must trim larger items.
Bulky.
Several other brands were evaluated, but none received a high rating. Do you have a mandoline, and do you use it? Is it one of the above units, or is it something not mentioned? A mandoline is a nice addition to your kitchen, provided you have the space, although it is not a necessary piece of kitchen equipment.
Are you ready for a dessert challenge? Do you have some good baking and pastry skills? If so, you may want to delve into the world of entremets. This Cooking Tip is not meant to be an in-depth tutorial on how to make an entremet. Instead, it will give you an overview of what they are, the individual components, and how they are assembled and decorated. This should give you an idea about whether you wish to attempt one of these impressive desserts.
Imagine slicing into a stunning cake with a glossy finish only to see multiple layers of different textures, colors and flavors. That is an entremet.
In old French, the word entremet meant “between courses,” and it referred to little bites served between dishes. Later, it came to mean sweet treats served at the end of the meal. Today, it refers to multi-layer desserts containing a myriad of other elements of various flavors and textures. I like the words of one expert who advises that we should think of this dessert as a collection of separate recipes that you make individually rather than as one overall recipe.
At the bottom of this cake is a light but sturdy short layer of sponge cake. Another standard component is a mousse filling. The mousse surrounds all the other internal layers and serves as the body of the cake. Those internal layers are what are called inserts. They might be a gelatin layer, a cream layer, a fruity layer (a coulis or a compote), a praline or something else. These layers add creaminess, nuttiness, fruitiness or richness.
The cake is then enrobed in a glaze or coating that is usually very smooth, glossy and reflective, sometimes called a mirror glaze. It might be the color of chocolate or other colors. The finishing touch and what draws one’s eyes to the entremets are decorations on the top and sides of the cake, such as chocolate shapes, tuiles, flowers, caramelized nuts, meringue shards and more.
Apart from the sponge cake layer, no baking is involved. Rather, all the individual parts are made, and then the entremets are assembled. Each cake element is created in individual rings or molds before being assembled into layers. These individual elements are then placed in another mold to build the cake. The mousse layer is used to surround these “inserts”, thus forming the body of the dessert. Finally, the mirror glaze or coating is applied to the exterior. All of this assembling requires plenty of time in the freezer. Your home freezer is fine, but professionals often use a blast freezer.
To prepare an entremet properly, you will need certain equipment.
Silicone molds and cake rings – These are used to define the body and shape of the cake. Whereas cake rings will give you a classic cylindrical shape, silicone molds come in many more shapes.
Stand mixer – This is used to make the different individual elements. Although you may use a hand mixer, a stand mixer will make your life easier.
Hand/immersion blender – This is used to emulsify mixtures such as ganache, cremeux (crème anglaise emulsified with chocolate) and mirror glazes.
Other hand tools – You will want items such as whisks and spatulas (regular and offset), a thermometer, piping bags/tips, and a food scale.
Baking sheets – These are used to bake the elements as well as holding them as they are placed in the refrigerator or freezer.
You should expect that it will take two to three days to make these desserts. Much of that time is the chilling time. You can make more than one entremet during this time if you have enough refrigerator and freezer space. Because these items take quite a bit of time, many prefer making these in larger batches rather than a one-off.
Storage If you do decide to scale up your recipe, realize that not only the completed cake but the individual components can be frozen for up to a month as long as they are tightly wrapped.
Does an entremet sound like something you want to try? If so, do your research and plan carefully. If you have never made one before, use a tested recipe. After you get a feel for the ingredients and techniques, then you can consider branching out from the recipe.