Cooking Tips · Techniques

Culinary Myths Part 1

I was chatting with a friend of mine the other day talking about a cookbook. I told her that one of my pet peeves about some cookbooks is that they perpetuate culinary myths. She encouraged me to write a Cooking Tip on this and so, Elisa, this series is dedicated to you.

Culinary myths are directions and guidance that have been passed down from chef to cook to all of us without anyone questioning them and no one really testing them to see if they are true or not. Many will not harm your cooking but they are often unnecessary and time-wasting steps. Some of the myths that have related to a particular topic, I have addressed before in those particular Tips. In this series of Tips, I put them in one place. This Tip will relate to myths that concern meat.

Bring your meat to room temperature before cooking

Even very well-respected chefs will tell you this. In fact, I was recently reviewing a very interesting technique-oriented cookbook that had been published only three years ago that emphasized this. These sources will tell you if you do not let your meat set out of the refrigerator and come to room temperature, it will cook unevenly. I was taught this and always believed it until recently.

In one of my favorite books, The Food Lab by J. Kenji López-Alt, he actually puts this directive to a test. As he notes, it is true that your meat will cook more evenly if it is at room temperature before going in the pan. However, allowing it to sit on your counter for a half-hour won’t get it to room temperature.

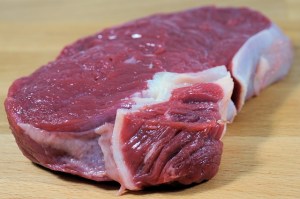
To test this, López-Alt cut a refrigerated 15-ounce New York strip steak in half. He put one half on the counter and the other went back into refrigerator. When it came out of the refrigerator, the steak’s internal temperature was 38°F with his kitchen’s room temperature registering at 70°F. He then proceeded to take temperature readings every ten minutes.

Most chefs will recommend a “setting” time of 20 minutes. At that time, the steak’s reading was 39.8°F. After 1 hour and 50 minutes, the steak was only up to 49.6°F. He called it quits after two hours. Proceeding to cook the two steaks side by side, he found they came up to their final cooking temperature at nearly the same time. They also showed the same relative evenness of cooking as well as searing the same.

The author of AmazingRibs.com did a similar test with similar results. The upshot is that this is an unnecessary and time-wasting step. There are better ways to get the result you want such as making sure your meat is dry before searing it and salting it and allowing it to rest uncovered in the refrigerator for at least a few hours or overnight. See next myth for that discussion.

Don’t salt your steak until after it is cooked

Many will tell you that you should not salt your steak until after it is cooked to prevent drying it out and ending up with a tough piece of meat. It turns out that this one is very wrong.

Once again, The Food Lab shows how salting your meat far ahead will lead to a much tastier and moister result. It is true that when you salt a piece of meat, it will begin to draw out moisture. To get a good sear, you will then have to blot the meat dry, taking most of the salt with you. If, however, you leave it setting for at least 45 minutes (or for better results, overnight), the “brine” that has accumulated on the outside will be reabsorbed, leaving the meat’s surface dry and carrying the seasoning inside the meat.

According to Samin Nosrat in Salt, Fat, Acid, Heat, salting ahead of time gives the salt plenty of time to diffuse evenly throughout the meat. Also, she states the salt will dissolve the protein strands into a gel, allowing them to absorb and retain water better as they cook. She recommends seasoning the meat the day before cooking or at least in the morning or afternoon.

This recommendation, according to López-Alt, does not extend to burgers. He cautions that those should be salted just before cooking. Although not without significant criticism, here is his testing and reasoning. If you read through the comments, you will find disagreement. On the other hand, Cooks Illustrated agrees with López-Alt. One last proponent of only salting just before cooking is found in this experiment by GenuineIdeas.com.

You should wash your chicken before cooking

This has been one bit of advice passed down through the generations as it was thought to decrease the chance of food-borne illnesses. Even Julia Child recommended this. However, it is not true and may even increase the chances of spreading bacteria.

According to a 2019 study by the USDA, washing poultry can easily spread bacteria to other surfaces and foods. The study showed that of the study participants who washed their raw poultry, 60% had bacteria in their sink afterwards and 14% still had bacteria in their sinks after they attempted to clean the sink. A full 26% of participants transferred bacteria from that raw poultry to their salad lettuce. However, of those that did not wash their raw poultry, 31% still managed to get bacteria from the raw poultry onto their salad lettuce. That speaks to the need for thorough handwashing and sanitizing of surfaces that come into contact with raw poultry.

Their recommendations were threefold:

  • Prepare uncooked foods before dealing with the poultry.
  • Thoroughly clean and sanitize any surface that has potentially touched or been contaminated with poultry juices.
  • Cook the meat to the proper temperature as this will kill any concerning organisms.

Searing meat will seal in juices

This myth comes from the theory that the crust that is formed from searing will help the meat to retain moisture. However, this crusty barrier is not waterproof or even water-resistant. The best advice is to cook your steak gently and finish with a high heat sear. It will cook more evenly and produce a juicy and flavorful result. That final sear, though, is not for searing in juices but for producing a flavorful crust. If anything helps to “seal” in juices, it is allowing your meat to rest after cooking before cutting into it.

Bone-in steak is more flavorful

I hear this one commonly. It is one of the reasons we are told to buy bone-in meat. The Food Lab put this one to the test by cooking identical pieces of meat – one was bone-in, one had the bone removed but tied back on and the third had the bone removed but when tied back on, he put a layer of foil between the bone and the meat, presumably to prevent any supposed flavor transfer. They all tasted identical. That being said, there are other reasons you may want to buy bone-in meat but those are for another Tip.

Do not flip your meat very much, preferably only once

People who have tested this have found that multiple flipping actually causes the meat to cook much faster and more evenly. This includes López-Alt but is also echoed by Harold McGee in On Food and Cooking. In the latter, he states that if you really want grill marks, only flip once or twice. But, if texture and moistness are more important, flip every minute. As he explains, neither side has the time to absorb or release large amounts of heat, meaning the meat will cook faster and the outer layers will be less overdone. When a food editor from the Los Angeles Times tried this method, he found that indeed the meat cooked more quickly, more evenly, and also developed a nice brown crust. In addition, he found the “one-flip” rib-eyes seemed to curl during cooking whereas the one flipped more frequently came off the grill flat.

Well, that is enough of the meat-related culinary myths. Stay tuned for more myths in Part 2.

Cooking Tips · Techniques

What Not to Do in the Kitchen

Over the last three years of writing these Cooking Tips, I have strived to provide you with valuable information that will help improve your cooking and baking. I have written about ingredients and techniques that I thought you would find interesting and helpful. In this Cooking Tip, instead of telling you what to do, I want to write about what NOT to do if you want to be successful in the kitchen. The following are sure-fire ways to have problems. It is far from an all-inclusive list but it is a good start.

Not reading your recipes
Not reading your recipe means you don’t realize that you do not have essential ingredients on hand. It also means you do not realize that there is a 2-hour resting period involved when you need to have dinner on the table in 30 minutes. You may even put all of one ingredient in at a particular point when the recipe told you to divide it and use that ingredient at two different points. Not carefully reading your recipe can easily lead to failure.

Not marking up your recipe if you are halving or doubling it.
If you decide to make only half of a recipe, it is so easy to start out by halving the first couple of ingredients and then forgetting to do the same for the rest. Not marking up your recipe with those altered amounts can throw off the balance of the ingredients and lead to an inedible dish.

Not tasting as you cook
If you do not taste the dish until it is on the table, you have no way to improve it. If you don’t taste it as you go along, you won’t realize what is missing and how to improve the flavor and texture. A good cook tastes the food as the cooking process proceeds so they know the final taste will please those who will be eating it.

Not using fresh herbs
Although there are times that dried herbs can be substituted for fresh herbs, there are also those times when fresh herbs are preferable. Even if you can safely substitute, it is never a 1:1 substitution. Use only ⅓ to ½ of dried herbs as you would fresh.

Not making sure your spices are fresh
Spices do not last forever, especially if they are not stored correctly. Spices that are old have no or minimal taste. If they don’t smell of much, they won’t taste of much. And, they won’t do your dish any favors. Not ensuring your spices are fresh will lead to lack-luster dishes.

Not using salt appropriately
Salt has a greater impact on flavor than any other ingredient. It not only has its own taste but it enhances the flavor of other ingredients. It can minimize bitterness and balance sweetness. Although over-salting can ruin a dish, the bigger problem most of us make is under-salting. Absent a doctor’s advice for limiting salt, not using salt appropriately leads to blandness.

Not using the right pan and not using it correctly
If you are making roasted vegetables and you don’t put them in a preheated pan that is large enough, they will steam and never develop that crisp, caramelized goodness. If you try to sear your piece of meat in a nonstick pan, you won’t get the tasty browning nor develop the fond necessary for a wonderful pan sauce. If you do not preheat the pan properly, the meat will never sear properly. If you heat that nonstick pan to try to achieve this, you risk ruining the pan and releasing toxic chemicals. If you don’t pay attention to the size/type of pan called for, the results may be very suboptimal.

You don’t splurge for great ingredients at least part of the time
Your dishes will only be as tasty as the ingredients are, especially if those ingredients are a major part of the dish. The fewer ingredients there are in a dish, the better they should be. If you use just “OK” ingredients, your final dish will be just “OK”.

These are just a few of “What Not to Do” to ensure success in the kitchen. Do you have a favorite lesson that you have learned? Let me know.

I hope these tips help to make your upcoming year of cooking very successful!

Cooking Tips · Techniques

Classic Italian Lasagna Bolognese

Do you have a favorite lasagna recipe? I know I do. However, I suspect my recipe is similar to many of yours in that it is an Americanized version of lasagna. Traditional Italian Lasagna Bolognese is a bit different than what most of us make. I decided to make that for our New Year Eve’s dinner and as part of that, share with you in this Cooking Tip.

Take a look at your favorite lasagna recipe. Does it call for ricotta, mozzarella, parmesan and maybe eggs? Mine uses all of that except the eggs. Classic Italian Lasagna Bolognese is made only of layers of pasta, a slow cooked meat/tomato sauce, a béchamel sauce and a sprinkling of parmesan. Let’s talk, in turn, about each of these components.

As with most Italian food, it is very regional. The following discussion is about lasagna from the Emilia-Romagna region. Other regions will have different styles of lasagna.

Pasta – the pasta is in the form of lasagna sheets. Although not required, fresh pasta is a great addition to the lasagna and classically, it is a spinach pasta. Making fresh pasta is very satisfying and not very difficult. If you have never done it, consider booking a class with me to learn how to do it. If that is not something you want to do, you can buy a good quality dried pasta.

Bolognese sauce – this is a hearty, slow-cooked meat and tomato sauce. There are many recipes that claim to be the “authentic” recipe. In reality, although there are many similarities among all these recipes, there are also differences. In my research, I looked at 12 recipes. I then made a chart of the ingredients so I could easily see how they compared. None of them were exactly the same. Let me break them down into 4 categories.

  • Meat – many recipes used a combination of ground beef and pork while others used solely beef. Occasionally, ground veal was added. About half also called for pancetta.
  • Vegetables – a base of finely chopped onions, celery and carrots was pretty standard. All but one recipe called for these veggies. Some listed garlic as an ingredient but most did not.
  • Tomato product – different chefs had very particular ideas about which type of tomato product should be used but it varied from whole tomatoes to crushed tomatoes to tomato passata to puree. About one-third of the recipes also added tomato paste.
  • Liquid – the liquids ranged from wine to broth to milk. Some added all three while others only called for wine and milk. Still others only used the liquid that was in the tomato product.

Béchamel sauce — this is one of the “mother sauces” that all cooks should master. Béchamel is a simple white sauce made from milk thickened with a white roux (a mixture of butter & flour). This is what gives the lasagna its creamy element instead of all the cheese.

Cheese – ricotta is not to be found in any of the traditional recipes. The cheese of choice is parmesan and is usually just on the top layer. A few recipes will also add mozzarella but these recipes are a minority.

Once you have all the above components, you can assemble your lasagna. Most sources recommend getting as many layers as you can, even up to eight layers. Start by coating your lasagna pan with butter. On the bottom spread a small amount of béchamel and a spoonful of Bolognese. Follow with a layer of noodles, Bolognese sauce and more béchamel. Repeat these layers until your pan is full alternating the direction of the noodles each layer. The top layer should be béchamel. Some chefs will sprinkle parmesan on each layer while others will just do it on the top of the lasagna.

Although you can go from start to finish in one long day, you can also make things ahead of time. The Bolognese sauce actually benefits from being made 2-3 days ahead and letting it sit in the refrigerator to meld all the flavors. After it is cooked and cooled, it may also be frozen up to 3 months. Since this is the component that takes the longest, this also helps with time management. I made mine 2 days prior to the day I wanted to serve the lasagna.

Both the pasta and the béchamel sauce can be made a day ahead but since they do not take an enormous amount of time, I made mine the same day of serving. If you choose to make the sauces ahead of time, reheat them before using taking care not to boil the béchamel.

You may also assemble the entire dish ahead of time and refrigerate for up to 2 days. If you do this, some recommend letting it sit at room temperature for a couple of hours before baking while others will say it is fine to go right from the refrigerator to the oven. Another option is to freeze it unbaked for up to a month. Let sit in the refrigerator overnight before baking.

Baking is usually done with the pan covered but taking the foil off for the last 20 minutes so that it will brown nicely.

It was definitely a labor of love as the time involved in making this classic Lasagna Bolognese was more than my regular lasagna. I must say, though, that it was worth it.

Cooking Tips · Techniques

Cooking Basics — Mother Sauces II

In last week’s Cooking Tip, we started our discussion of Mother Sauces by explaining a roux as well as the two white sauces known as béchamel and velouté. In this Cooking Tip, I will be finishing with the other three mother sauces.

Espagnole – this is a basic brown sauce made by enhancing a brown stock (usually made from roasted beef/veal bones) with browned mirepoix and tomato puree and thickening it with a brown roux. Espagnole is rarely used by itself because of its strength in taste.

It is often further refined to produce a very rich and flavorful sauce called demi-glace. This is a mixture of half espagnole and half brown stock, which is then reduced by half.

Other types of brown sauces include jus liés, pan sauces and reduction sauces. Jus liés are made by reducing brown stocks and thickening with a starch slurry. Pan sauces and reduction sauces are produced as part of the roasting or sauteing cooking process. The sauces can be thickened with roux, starch slurries or just simple reduction.

This brown sauce is often paired with meat dishes like roast lamb or as the base of a beef bourguignon. Variations include:

  • Sauce Robert (Dijon mustard & onion)
  • Sauce Madiera (mushrooms, shallots)
  • Grand Veneur (red currant jam or other dark berry & cream).

Hollandaise – this classic sauce is an emulsion of eggs, butter & acid.

The recommended ratio of egg to butter varies from 1 yolk for every 2-3 ounces of butter to 3 yolks to ½ cup butter. If you have concerns about the eggs, you can use pasteurized eggs. Alternatively, if you use a method where you gently cook the egg yolks in a bain marie, you can get them to a safe temperature. The acid is traditionally either a vinegar reduction or lemon juice and is included for flavor and the effect it has on the yolk. It also provides the water necessary for an emulsion.

Since the largest part is butter, the success of failure of the sauce depends not just on technique but on the quality of the butter.

A typical hollandaise recipe might be the following.

  1. If wanting to use a vinegar reduction, cook white wine, white wine vinegar and minced shallots over moderate heat until nearly dry. Cool and then add a small amount of water. This is your reduction.
  2. Add egg yolks to the reduction and place bowl over simmering water, whisking until thickened and warm (145°F).
  3. When the yolks have increased in size by 2-3 times and fall in ribbons, remove from the simmering water.
  4. Gradually whisk in warm butter, adding in a thin stream and whisking constantly. As you do this, the sauce will thicken.
  5. Season to taste with salt, pepper, cayenne and/or lemon juice.

If the sauce becomes too thick, add a small amount of water or lemon juice. If the sauce starts to break, add a small amount of cold water and whisk until it is smooth again. Another alternative is to cook another yolk as before and then gradually whisk it into the broken sauce.

A blender may also be used to make hollandaise. If you do this method and you are not heating your egg yolks, you may want to use pasteurized eggs.

There are many Hollandaise derivatives but they usually start with a Béarnaise sauce.

  • Béarnaise – hollandaise plus tarragon
  • Foyot – béarnaise + glace de viande (meat stock reduced to a syrup)
  • Choron – hollandaise plus tomato
  • Sauce Escoffier is made by combining choron, foyot and béarnaise
  • Sauce Maltese – this uses a blood orange reduction and hollandaise

Common uses are for eggs benedict or as an asparagus dipping sauce.

Tomato sauce – this is a generic term for any sauced based mainly on tomatoes. The tomatoes might be raw or cooked anywhere from a few minutes to a few hours. The cooking fat might be oil or rendered bacon fat. Some sauces will be puréed until smooth and others will be chunkier.

It might be made with canned or fresh tomatoes. (For a discussion of the different types of canned tomato products, see this Cooking Tip. As with the white sauces, it is often started with a mirepoix for flavoring. Others might just use onions and garlic. A meaty flavor is often imparted by using ham or pork bones.

Tomato sauce was actually a new world import but the French adapted it by adding a roux and herbs to produce a more refined sauce. The Italians produced a rustic, tomato-forward sauce with many regional differences. As with the Italians, most of us do not use a roux to thicken it but rather just reduce it with simmering to get the texture we want.

That brings us to the end of the classic Mother Sauces. Having a working knowledge of these sauces will help you immensely improve your cooking. For a discussion of a few other sauces, see this Cooking Tip.

Cooking Tips · Techniques

Cooking Basics — Mother Sauces I

A couple of weeks ago I wrote about a subject for those of you who really want to improve your baking – weighing your ingredients. In this Cooking Tip, I want to discuss something that will elevate your cooking skills. All good cooks should have a working knowledge of sauces and how to make them. That starts by understanding what is called “Mother Sauces”. Of course, there is much more to sauces than just these mother sauces, but it is a good place to start.

Sauces can be categorized in different ways but one of the most classic is the French system. It was first laid out by Antonin Carême (1783-1833) in The Art of French Cooking in the 19th Century, although he only listed four sauces. Later, Auguste Escoffier in Guide Culinaire (1902) added a fifth. Modern culinary education has refined this list to what you will read about below.

Before we get into the different sauces, let me discuss “roux” as it is essential for most of these sauces. A roux is a mixture of flour and fat that, after being cooked over heat, is used to thicken liquids. There are three types that differ by cooking time and resulting color.

  • White roux – it is barely colored, chalky or very light beige
  • Blond roux – this is golden in color with a slight nutty aroma
  • Brown/Dark roux – this roux is deep brown with a pronounced nutty aroma

The Professional Chef by The Culinary Institute of America defines a basic roux as 6 parts flour to 4 parts fat, by weight. However, most sources recommend a 1:1 ratio of flour to fat.

The procedure is to melt the fat (usually butter) in a saucepan without browning it. The flour is whisked into the melted fat to form a paste. This is then cooked to eliminate the raw flour taste and aroma. The Professional Chef also notes that it inactivates an enzyme that can interfere with flour’s thickening ability. How long you cook it will depend on which of the above rouxs you want and what your recipe requires. The length of cooking does affect the thickening ability of the roux. The longer you cook it, some of the starch in the flour breaks down resulting in less thickening power.

Liquid is then added in a thin, steady stream (or a couple of tablespoons at a time), whisking all the time to achieve a homogenous consistency. Adding it slowly or in small increments will produce a much smoother sauce. If you do get clumps, whisk vigorously or use an immersion blender to smooth it out. As the sauce is then brought to a simmer, it will start to thicken. The heat should be reduced as you continue to stir until the sauce coats the back of a spoon (nappé stage). At this point, season with salt and pepper and any other desired seasoning.

One ounce of roux will thicken one cup of liquid to the nappé stage. You may adjust the amount of roux based on how thick you want the finished product.

Now on to the five Mother Sauces. Two of these are white sauces, one is brown, one is tomato-based and the final is egg-based. In this Cooking Tip, we will learn about the white sauces – béchamel and velouté. We will look at the others in a subsequent Cooking Tip.

  • Béchamel – this is a white sauce made by using a white or blond roux and milk. If using a blonde roux, the resulting sauce will be more golden in color.

    You start by making the roux, as explained above. After adding the milk and combining it, The Professional Chef recommends to carefully simmer it for about 30 to 60 minutes to ensure the raw flavor is cooked off. Most sources (including myself) do not cook it nearly that long. Be sure to stir periodically getting into the corners to make sure the milk does not scorch. For a refined product, strain after cooking. It can be used immediately or stored in the refrigerator for a couple of days. Gently reheat before serving.

    Sometimes aromatics such as a mirepoix, mushroom trimmings, bouquet garni or a sachet d’épices will be used for flavor.

    A béchamel sauce is important for making macaroni and cheese, souffles and a traditional Lasagna Bolognese. It can also be a base for other sauces and you can add your choice of seasonings to complement your dish. Add cheese for a Mornay sauce. A Soubise sauce has the addition of pureed onions. Spread it on bread when making a Croque Monsieur. An Aurora sauce adds tomato puree to the basic béchamel sauce.

  • Velouté – another white sauce that uses a white or blond roux but rather than the liquid being milk, it is a light stock such as chicken, fish or vegetable.

    The technique is the same as with a béchamel sauce although there is less concern of scorching since you are not using a dairy product. Aromatics may also be used as with a béchamel sauce.

    This is the sauce we use to make gravy or a pot pie. If finished with cream, butter, and lemon juice, it is known as Sauce Suprême. Allemande sauce is velouté thickened with egg yolks, heavy cream, and seasoned with lemon juice whereas Normande sauce is a chicken or fish velouté thickened with heavy cream, butter, and egg yolk. The latter is primarily served with seafood.

I suspect that most of you have made these two white sauces whether you knew the names or not. They are something you can whip up easily without a recipe and enhance the flavor of what you are serving. Look for next week’s Cooking Tip as we delve into the other three mother sauces.

Cooking Tips · Ingredients

Maple Syrup — a great sweetener

I do not know too many people who don’t just love the flavor of real maple syrup. Yes, we often pour it over our pancakes, waffles or French toast but it can be used in many more ways in the kitchen. In this Cooking Tip, let’s explore what maple syrup is and how to use it.

Maple syrup is made from the sap from certain species of maple trees. The three major species of maples are the sugar maple, red maple and the silver maple with the sugar variety being the main tree. Vermont is the leading producer in the nation although it is also produced in other states.

It takes about 30 to 40 years for a sugar maple to reach the required size for tapping. According to NYS Maple, the trees produce and store starch from May through August. As the thaws begin and the snow melts, starch turns into sugar (sucrose). The sap starts to run at the time of thawing but before the leaf buds open. Although sources vary, an average tap can produce from 5 to 20 gallons of sap.

Maple sap, however, is not the same as maple syrup. The sap is a clear and slightly sweet liquid with a consistency close to water. Maple syrup is produced by boiling the maple sap and thus concentrating it into maple syrup. According to experts, it takes about 40 parts of sap to make 1 part syrup. Another way to think about it is that it takes about 10 gallons of sap to produce one quart of syrup. This should give you an idea about why maple syrup is relatively expensive.

When I first started buying and using maple syrup in the kitchen, I always grabbed Grade B rather than Grade A. It wasn’t an inferior syrup (all the grades had similar quality) but was darker in color and had a deeper flavor, which was great for cooking and baking. At that time, there were three grades: A (light), B (dark), and C (very dark, and only sold commercially).

Then, in 2014 Vermont introduced a new grading system which was adopted by the USDA in 2015. Many people like it better but I personally think it became a bit more confusing for the consumer.

The USDA regulations use both color and flavor in the grading of maple syrup. There are now four grades although some states and Canada may use slightly different terminology. According to the USDA, this is how the grades break down.

Grade A Light Amber – this used to be called “Fancy”. It is a light golden color with a mild and delicate maple flavor. It is usually made earlier in the season when the weather is colder. Some say this is the best grade for making maple candy and maple cream.

Grade A Medium Amber – formerly called “Grade A Medium Amber” or “Grade A Dark Amber”, this is a bit darker with more maple flavor. It is the most popular grade of table syrup and is usually made after the sugaring season begins to warm, about mid-season.

Grade A Dark Amber – older names include “Grade A Dark Amber” or “Grade B”; it is darker yet, with a stronger maple flavor. It is usually made later in the season as the days get longer and warmer.

Grade B – this might also be called “Grade C” and used to be called “Grade A Very Dark”. It is sometimes called “Cooking Syrup” or “Processing Grade” and is made late in the season. It is very dark, with a very strong maple flavor, as well as some caramel flavor. Many people use this for table syrup, but because of its strong flavor, it is often used for cooking, baking and flavoring in special foods.

Besides pouring it on the aforementioned pancakes, how else can maple syrup be used in the kitchen? Here are just a few ideas.

  • Candy – caramels (my personal favorite), hard candy, fudge
  • Baking – breads, cookies, fruit crisps, custards, pies, blondies
  • Savory cooking – glaze for salmon or chicken, candied bacon, veggies such as brussels sprouts, carrots and sweet potatoes, BBQ sauce, sauces for pork
  • Vinaigrettes

If you have a recipe that uses a different sweetener and you want to try to swap in maple syrup, here are some items to consider.

Most sources tell you to substitute ¾ cup maple syrup for 1 cup of white sugar in baked goods while reducing other liquids in the recipe by about 3 tablespoons. However, King Arthur Baking advises to replace it 1 to 1 but do recommend decreasing other liquids by 3 to 4 tablespoons per 1 cup substitution. If there is no liquid called for in the recipe, they suggest adding about 1 tablespoon of additional flour for every ¼ cup of maple syrup used. They also caution to make sure the maple syrup is at room temperature as cold syrup may cause the other ingredients to clump, especially if baking with butter.

Just as with honey, excess browning may occur. With honey, the recommendation is to reduce the oven temperature by 75°F. With maple syrup, the risk of browning is not as great and you can probably get by with a reduction of 25°F.

Substituting maple for other liquid sweeteners is also possible. However, as honey, molasses and corn syrup are thicker than maple syrup, the recommendation is to start by trying ¾ cup maple syrup plus ¼ cup of white sugar for every 1 cup of the other liquid sweetener.

Another great product to try is granulated maple sugar which is made from continuing the concentration step until a dry, granulated product is achieved. It can be substituted for white sugar one-to-one.

I am not even going to mention “pancake syrup”. Why? Look at this list of ingredients: “High fructose corn syrup, corn syrup, water, salt, cellulosegum, caramel color, natural and artificial flavors, sodium hexametaphosphate,sorbic acid and sodium benzoate (preservatives).” Now, look at the ingredient list for pure maple syrup: “Pure Maple Syrup”. Which do you want to eat? Which do you want to feed your family?

Maple syrup – the last thing I have to say is YUM! Do you agree or not?

Cooking Tips · Techniques

Weighing Ingredients for Successful Baking

I have written before about weighing ingredients rather than measuring them in terms of cups, tablespoons, etc. This is much more important for baking rather than savory cooking and even more so if you live at high altitude where baking has so many challenges. I have written a prior Cooking Tip on measuring/weighing ingredients but in this one, I would like to expand on it.

If you really want to improve your baking in 2021, I hope to convince you to invest in a good kitchen scale and start weighing your ingredients rather than baking. Here is a link to a great video from The Institute of Culinary Education that demonstrates weighing vs volume measuring better than I can explain it. Not only does the instructor show you visible differences in amounts of ingredients depending on how they are measured but he also shows how it can change the end result of the baked good. Here is a written article about the same thing from the King Arthur Blog.

In the video, he also discusses what I call the “comma” effect. If you have ever taken one of my classes, I teach that when reading a recipe, you need to take notice of commas in the ingredient list. For example, “1 cup pecans, chopped” is different than “1 cup chopped pecans”. In the first listing, you measure the cup and then chop the pecans. In the latter, you chop the pecans and then measure to get your cup. Because more chopped pecans can fit into a cup than whole, those will be different measurements. How finely you chop them will also add to the variation. However, if the recipe stated “3½ ounces” of pecans, it doesn’t matter if you chop them before or afterwards as 3½ ounces of whole pecans will be the same as 3½ ounces of chopped pecans. To get even more accuracy, measure in grams rather than ounces. Almost all good kitchen scales will measure in both grams and ounces.

If you are not already weighing your ingredients and you want to start to do so, there a couple of hurdles to overcome. First is that you need a good kitchen scale.

Cooks Illustrated tested different scales in 2016 and updated their testing in early 2020. They recommend the Oxo Good Grips scale. It retails for about $50. If you do not want to spend that much, they also recommended an Amazon Basics model that costs just over $10. Serious Eats also recommends the Oxo but their less expensive choice was by Escali

.

The more difficult hurdle is that most recipes from American sources do not list ingredients in weights. One alternative is to choose sources that do use weights. Some examples are:

What if you see a recipe that you want to try but it is only in volume measurements? Can you convert it to weights? Yes and No. If your recipe calls for 1 cup flour, how many ounces/grams is that? Depending on what source you consult, it can vary from 120 grams (4.2 ounces) to 145 grams (5.1 ounces). That is almost an ounce difference. You may not think that is very much, but in can make a real difference in the outcome. You may find similar variations with weights of other ingredients.

You can try by using the average but it may or may not work. If it doesn’t, you may need to make some changes and try again.

If it is a recipe you have made before and you are pretty sure it will come out correctly, measure with your cups as you would normally do. However before adding the ingredients to the bowl, weigh them and write this down on your recipe. If, indeed, your recipe turns out well, you have made a successful conversion and every time in the future you make that recipe, use the weight measurements to ensure continued success.

You could also use those conversions to try new recipes. Using your notes on your successful recipe, convert the volume measurements to weight in your new recipe. If the result is what you want, great. If not, make small changes by weight until you get it right keeping notes as you go.

Do you measure by volume or weight? I hope this year that more and more of you will do the latter. There are just so many advantages to doing so and very few disadvantages.

Here’s to a great baking year!

Cooking Tips · Techniques

Are you part of the Instant Pot fan club?

One cooking appliance that I have never felt a need to purchase is an Instant Pot. I saw no reason for it and did not want to take up any more precious space in my pantry. One of my husband’s colleagues recently gave us one as she said she did not need it. So, I have begun to delve into the world of the Instant Pot and decided to devote this Cooking Tip to this subject.

At its most basic, the Instant Pot is an electric pressure cooker although it can also be used for other functions such as slow cooking, yogurt making, rice cooker and even sautéing food. The actual programs that are available will depend on the model of the Instant Pot.

Any pressure cooker works by creating high pressure inside the cooker. This allows the boiling point of water to increase above normal. Therefore, you are cooking the food at higher temperatures than you can achieve on the stovetop and thus, the food cooks faster. As the pressure pushes water into the food, it not only helps to speed up the cooking process but also keeps food very moist.

One point about cooking food faster. Yes, that is correct but the cooking time does not usually include the time it takes for the Instant Pot to fully pressurize. The cooking time begins after that happens. You need to add anywhere from 5 to 20 minutes to the overall time to account for this pressurization step. There is also the time to depressurize to consider. If doing a natural (rather than quick) depressurization, add another 10-15 minutes.

If you live at high altitude as I do, you realize that cooking and baking sometimes takes adjustments. For prior Cooking Tips, see these links.

Since pressure cooking increases the temperature that you can achieve within the pressure cooker, you might think that altitude adjustments would not need to be made. However, this is not true. The general recommendation is to increase the cooking time by 5% for every 1000 feet over 2000 feet. For example, I live at 6000 feet, which is 4000 feet above 2000 feet. So, 4 X 5% means I should increase the cooking time by 20%. There are charts that you can find. Here is one from A Mindfull Mom.

So, why use an Instant Pot? It is said to cook foods up to 70% faster than a conventional cooking method. Because of that, I find it most useful for cooking items that do take a significant amount of time such as tough cuts of meat, beans or whole grains. If you are cooking something that would cook in under 20 minutes stovetop, there is really no reason to use the Instant Pot.

There are also things that you should not cook in an Instant Pot. Let me address just a few. Because the Instant Pot cooks by using steam, anything you want crispy such as breaded meats will not get crispy but will rather be soggy. Delicate cuts of meat are better stovetop where you can cook to a recommended internal temperature as well as achieving the surface caramelization. Similarly, burgers are not good in the Instant Pot as they will taste “boiled” and not have that nice crispy exterior.

Dairy and creamy sauces bring their own problems to the Instant Pot. Curdling is a real risk. The pressure valve can easily get clogged from the dairy, leading to problems with sealing and pressurization. So, any dairy product should be either cooked conventionally or added at the end of the cooking time by using the Sauté function or just the residual heat of the Instant Pot,

Another advantage is that it is pretty much “hands off” during the cooking time so you can do other tasks.

Because the Instant Pot is so popular, there are a myriad of online sources that will help you to get the most out of it. There are also cookbooks galore; a search of just my library showed 90 results. You may also try converting your stovetop recipe to one for Instant Pot. Here is another chart that will help you with that.

I have just started experimenting with this appliance and am not totally sure about it as of yet. That may change as I use it more. What about you? Do you have one? What do you love to cook in it? Let me know.

Cooking Tips · Ingredients

Bacon, pancetta & other cured pork products

Even though we do not eat it on a regular basis, I always have bacon in my freezer. Not only do we love the taste and how versatile it can be in cooking, my husband makes his own bacon. So, our freezer always has a nice supply.

Bacon is something that is called a “cured pork product”. Curing is a method of preserving meat by removing moisture. The process makes it less hospitable for pathogens. It starts with salt, which is often mixed with nitrites and/or nitrates. These are used to ensure that the bacteria that produces the toxin responsible for botulism cannot grow. They also speed up the curing process, are what give the meat the pinkish color and add to flavor and texture. Curing also often involves smoking. Cured meat products may be cooked as in luncheon meats or uncooked as in bacon.

Bacon

In the US, bacon is a cured, lightly smoked pork belly. (In other countries, what they call “bacon” is made from other cuts of meat.) US bacon has a decent fat content but less salt than other cured pork products. Bacon can be cured in either a wet or a dry brine. The brine contains salt, sugar (honey, molasses, brown sugar, maple syrup, etc.) and a spice mixture. Nitrite is usually added either as a synthesized product (here is one example) or naturally occurring nitrates/nitrites derived from celery powder. Bacon is also smoked after the curing process.

Pancetta

We often refer to pancetta as “Italian bacon” but it is different. Similarly to bacon, it is made from the pork belly but is more heavily cured and has a higher salt content. It is usually not smoked but is seasoned with a mixture of garlic, black pepper, juniper berries and thyme. There is one form of pancetta that is smoked – pancetta affumicata. However, it still differs from bacon in its higher salt content and more curing.

There are two forms of pancetta – arrotolata and tesa. The former comes rolled into a log while tesa comes in a slab form, similar to bacon. Some experts recommend against buying the pre-sliced pancetta, which is often what we find in our supermarkets. They say they are usually of a lower quality and are less flavorful than pancetta that has not been pre-portioned. Of course, if that is all your stores carry, it is probably better than trying to substitute.

Prosciutto

This product comes from the hind leg of the pig with a curing process that lasts from a few months to a few years. This is one of the products that is typically eaten without cooking.

Prosciutto (made from the back leg of the pig) or dry cured ham comes in two different styles:  prosciutto cotto (cooked) or prosciutto crudo (uncooked). The former is bright pink and has a lighter flavor than the uncooked product. Although uncooked, crudo is cured and safe to eat as is. It is redder in color and more intensely flavored.

Salt Pork

This cut comes from the lower portion of the pork belly and is usually almost all fat with only a small layer of lean protein. This product is more heavily salted than bacon.

Guanciale

This word comes from the Italian guancia, meaning cheek. As the name implies, it comes from the pig jowl. This product will probably only be found in specialty butcher shops. It is often flavored with black pepper and herbs. However, the meat itself tastes different than the cuts from the belly. It is an extremely fatty product and is what gives the product its unique flavor. These unique characteristics mean it is very difficult to find an adequate substitute.

Lardo

This is made from the fat on the back of the pig (fatback). It is salt-cured and seasoned with herbs. This product is pure cured pork fat.

Substituting

When you are thinking about substituting these products for each other, there are some differences that should be considered.

  • Fat content
    Whereas bacon and pancetta are similar in fat content, guanciale has considerably more fat. Salt pork is almost all fat while lardo is 100% fat.
  • Smoking
    Bacon is a smoked product where as pancetta and guanciale are not.
  • Salt content
    If you do not take this into consideration, you could ruin your dish with too much salt. Pancetta, due to the curing process, will have a higher salt content than bacon. Prosciutto has an even higher salt content.

Nitrites/Nitrates

Although the discussion of the safety of nitrites/nitrates is outside the scope of this Cooking Tip, I will just mention a few items for consideration.

The cancer warning from many years ago has not stood up to the test of time and scientific sources do note that there are health benefits to these chemicals. Most of the nitrites/nitrates we eat are from natural sources – mostly vegetables such as lettuce, celery, and carrots. There is a debate, though, whether the synthetically derived compounds are worse for us than the natural ones. I will leave that debate to you to investigate.

If you are a cured meat lover, you may want to try to make your own as my husband does with bacon. I, for one, am not interested in that skill as there are plenty of great products in the market. Do you have a favorite? Let me know.

Cooking Tips · Ingredients

Eggnog — Love it or Hate it?

Where do you fall on the scale concerning eggnog? Do you love it or hate it or are you in the middle? I am not a huge fan but I was making some White Chocolate Eggnog Truffles and I must say that flavor did well in that preparation. In this Cooking Tip, let’s delve into eggnog and what it really is.

According to The New Food Lover’s Companion, authentic eggnog is “a homogenous blend of milk or cream, beaten eggs, sugar, nutmeg and usually a liquor.”

Proponents of fresh eggnog over store-bought claim the flavor and thick texture are superior in fresh and that those characteristics come from real eggs. The FDA defines eggnog as “a milk product consisting of a mixture of milk or milk products of at least 6.0 percent butterfat, at least 1.0 percent egg yolk solids, sweetener, and flavoring. Emulsifier and not over 0.5 percent stabilizer may be added.” That is not a lot of egg in the store-bought version. Since eggs can be expensive, companies will use the least they can to get the product they want. There are also thickeners added such as carrageenan, guar gum, and locust bean gum.

Also, a great homemade eggnog is foamy from the beaten eggs, something you won’t get with a commercial product. By law, the store-bought products must be pasteurized, which changes the flavor and texture. Finally, commercial versions are generally sweeter than homemade.

If you want to try homemade eggnog but are wary of the raw eggs, you can buy pasteurized eggs or cook the eggnog.

Some sources looked a little closer into this issue. As we all know, the FDA warns against consuming products with uncooked, unpasteurized eggs. According to a story on Chowhound, the writers say that the alcohol that is classic in eggnog will kill harmful bacteria. The recipe sited in this article contained more than 20% alcohol.

Serious Eats also looked at this issue. They quote a laboratory study showed that eggnog containing at least 20% alcohol will be sterile after 24 hours.

Recipes will differ in types of dairy used – milk, cream or a mixture. Some recipes call for using just egg yolks whereas others will start with the yolks, beat the egg whites separately and fold them in at the end. Others will add whipped cream to finish. Some have alcohol and some do not although without the alcohol, there is more of a concern for consuming raw eggs.

Nutmeg is classic but some recipes may add other flavorings such as cinnamon and vanilla. I even saw an interesting recipe from Jamie Oliver for chocolate eggnog with cardamon and cloves.

There is something called “aged eggnog”. According to the above referenced story on Chowhound, as eggnog ages, chemical reactions occur causing a blending of flavors. Other effects are that the color becomes more golden and the texture thickens. They say that the longer it ages, the mellower it becomes.

In the Serious Eats discussion, they did a taste test with three samples (one aged, two not aged), the un-aged eggnog was unanimously preferred. They felt that the aged product was stronger, even medicinal, in flavor. If you read this article through, you will see that there is a great difference of opinion on which is best. As with many things, taste is very personal.

So, are you a fan of eggnog or not? Do you buy it or make your own?

Let me know your thoughts!