One of my favorite types of cake to make is a Cake Roll. What it is and how to successfully make it is the subject of this Cooking Tip.
If you wish to delve into more detail about making cakes in general, I suggest looking at these other Cooking Tips.
For this Cooking Tip, let’s narrow our focus to Cake Rolls, also known as Roll Cakes. You might have heard other names, such as Swiss Roll or Roulade. No matter its name, in its simplest form, a Cake Roll is a light cake that has been rolled and filled with jam or other filling and often dusted with powdered sugar.
The type of cake is a sponge cake. They have a light and airy texture that is achieved by folding whipped egg whites into a batter made of beaten yolks and sugar. This lightness helps you to be able to roll it without it breaking.
You do not have to be limited to the rolled shape. That same cake batter and baking method will leave you with a blank canvas to turn into other shapes and delightful creations. More on that below.
Let’s start with some general Cake Making Tips that will help you no matter what kind of cake you are making.
- Baking cakes, especially if you live at a high altitude, is not a time to fly by the seat of your pants. It is, rather, a time to follow the recipe exactly. The only variations would be those you make at high altitudes.
- Buy a food scale and weigh the ingredients. It is more accurate than cup measures and will yield better results.
- Pay attention to temperatures called for in the recipe. If it specifies room-temperature ingredients, you will only get the desired result if you heed that advice.
- Butter should be unsalted unless otherwise specified. If all you have is salted butter, reduce the salt in the recipe by ¼ tsp for each 4 ounces of butter. If you do much baking, try to always have unsalted butter on hand. It keeps wonderfully in the freezer, and you will not have to make adjustments.
- Use the appropriate pan sizes. Some adjustments can be made, but using the size called for is best.
- Try not to use dark-colored pans as they will not give you the desired result of a golden, moist, tender cake.
- Most recipes will call for greasing the cake pans. Even better is to grease the pan, line it with parchment, and grease again. For bundt-style cakes, grease the pan thoroughly and sprinkle lightly with flour or use a flour-based pan spray. See this Cooking Tip for more information about these sprays.
- Allow enough time to preheat your oven thoroughly. Using an oven thermometer to check its accuracy is also a good idea.

Now, let’s focus on Cake Rolls in particular.
Ingredients
- Most cake rolls only contain eggs, sugar and flour.
- Most cake roll recipes will have you beat the yolks and whites separately.
- Eggs separate more easily when cold but whip up better at room temperature. So, take eggs out of the refrigerator, separate but then allow them to come to room temperature before proceeding with the recipe.
Baking the Cake
- Follow the recipe carefully in terms of the order of adding ingredients.
- The type of pan you will be using is a baking sheet. Some companies will label them as a Jelly Roll pan.
- Prepare your pan carefully by lining it with parchment paper, then spraying it with a non-stick spray. Careful attention to this will help keep your beautiful cake from sticking to the pan.
- Spread cake batter evenly in the pan. Using an off-set spatula will help you get it level.
- Do not overbake. Press lightly on the top of the cake. If it springs back, it is done.
- Do not bake until the cake is brown, as this will cause it to dry out and become brittle.
Rolling the cake – three methods
One important tip that applies to all these methods is to roll the cake while still warm to minimize cracking.
- Rolling Method 1
- Place a non-lint tea towel on a cooling rack and sprinkle generously with powdered sugar to prevent sticking.
- Remove cake from oven. Gently run a knife around the cake to loosen the edges.
- Turn the cake onto the prepared towel and rack.
- Remove pan and parchment.
- Sprinkle the surface with powdered sugar.
- Place another tea towel on top of powdered sugar.
- Place another rack on top of the towel.
- Grab the entire stack (from rack to rack) and turn it over.
- Roll the cake while still warm, rolling the towel inside the cake.
- Cool on rack for at least 30 minutes.
- Unroll and fill as desired.
- Reroll cake around filling.
- Rolling Method 2
- Remove cake from oven and loosen edges.
- Sprinkle the surface with sugar.
- Place parchment on top of the cake, followed by a towel that has been slightly dampened with a spray bottle of water.
- Cover the stack with another baking sheet. Flip over.
- Allow to rest for 3-5 minutes.
- Remove baking sheet.
- Slightly moisten parchment with a spray bottle of water and wait about 1 minute before removing it from the cake.
- Your cake should be warm but not hot for the rolling step.
- Roll with the damp towel and parchment inside.
- Allow to cool.
- Unroll and fill as desired.
- Reroll cake around filling.
- Rolling Method 3
- Lay a tea towel on the counter and sprinkle generously with powdered sugar.
- Remove cake from oven and invert onto towel.
- Remove parchment.
- Roll the cake up with towel inside.
- Allow to cool.
- Unroll and fill as desired.
- Reroll cake around filling.
Filling the cake
- Choose a filling that is spreadable and not runny.
- Leave a quarter inch around the edge without filling.
- Do not add too much filling, as it will make rolling difficult and squeeze out the edges.
Non-Rolled cakes
You may branch out and assemble in a non-rolled form using this same wonderful type of cake. Let’s look at two ideas.
Stacked cake

- After removing the cake from the oven onto a cooling rack, run the tip of a small knife around the edges to loosen it.
- Allow to cool for about 15 minutes.
- Sift powdered sugar over the surface and cover with a tea towel, followed by a second rack.
- Flip the racks, remove the pan and parchment.
- Allow to cool completely.
- Cut your cooled cake into four rectangles. You may wish to carefully trim away about ¼ inch of the edges for a clean look.
- Stack the rectangles on top of each other with your preferred filling between the layers.
- You may top the cake with powdered sugar or even apply a chocolate glaze.
Wrapped cake
- After removing the cake from the oven onto a cooling rack, run the tip of a small knife around the edges to loosen it.
- Sift powdered sugar over the cake.
- Cut the cake into five equal rectangles.
- Cover one rectangle with a tea towel or paper towel separately.
- Cover the other four rectangles with a different towel.
- Place another cooling rack on top and flip.
- Remove pan and parchment.
- Take the one rectangle that is covered separately and roll it up.
- Place on a rack and allow to cool.
- Allow other rectangles to cool in their flat state.
- Unroll the cooled rectangle and remove the towel.
- Cut the non-curled edge at an angle to create a beveled edge.
- Do the same on both ends of the flat rectangles.
- Spread filling on rectangles.
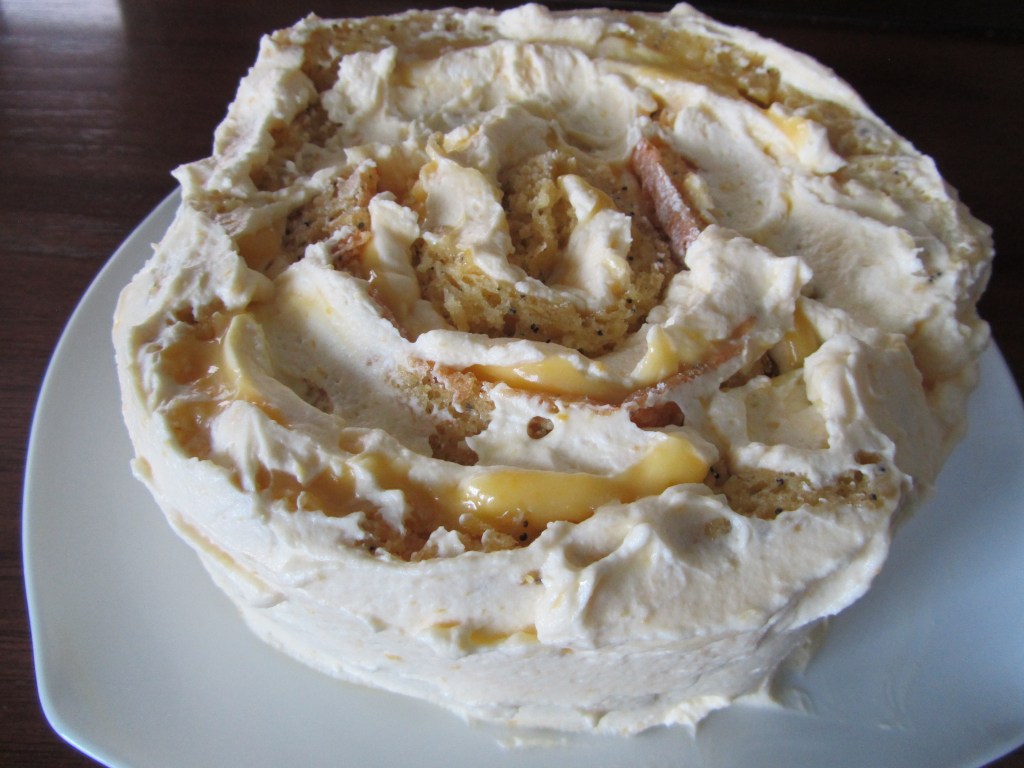
- Re-roll the one curled rectangle and set it on your plate upright with the cut side up.
- Take a second strip and wrap around this first layer, using the beveled edges to nestle within each other. Place this second strip so that one edge aligns with the edge of the first strip. Continue with other rectangles, gently pressing the layers together as you proceed.
- Spread more filling on the outside of the cake to give the appearance of a frosted cake.
- This type of cake needs a few hours to set up before cutting so the layers stay together.
I hope you give Cake Rolls a try. They may look difficult but are not if you follow the above tips.
Happy Baking!