Cooking Tips · Techniques

Make-ahead pies – help to destress the holidays.

As we are speeding towards the holidays, last week’s Cooking Tip was about freezing food in general. In this Cooking Tip, I want to concentrate on an item that will be on almost all our holiday tables – Holiday Pies.

As I mentioned in the last Cooking Tip, you may not have freezer space for whole pies. If you do, the questions are: what sorts of pie freeze well, are there any that you shouldn’t freeze and should you bake before freezing?

America’s Test Kitchen tested several different pies in different states. Although the following are their findings, most pie experts agree with them. When there are other options, I will discuss them.

Image by Elias Astudillo from Pixabay

Fruit pies

  • Freeze unbaked. They found that if baked before freezing, the pie crusts tended to be soggy when thawed. The filling did not taste as vibrant as it would have if baked and never frozen. On the other hand, pies that had been frozen unbaked were found to be indistinguishable from freshly baked pies.
  • They recommend freezing the pie until solid before wrapping it in plastic wrap as it leads to less damage to the crust.
  • Their technique:
    • Assemble the pie.
    • Do not apply an egg wash or sugar.
    • Freeze, uncovered, until firm.
    • Wrap in a double layer of plastic wrap and then in foil. Return to freezer.
    • Write the recipe’s original instructions on a label and affix it to the outside.
    • Freeze no longer than two months.
  • To bake a frozen fruit pie:
    • Do not thaw.
    • Brush crust with egg wash and sugar sprinkles, if desired.
    • Bake at the specified temperature, but increase the time by 10-15 minutes.
    • If the crust starts to brown too much, cover it with a pie shield.

Pumpkin pie

  • Although some chefs say you can successfully freeze pumpkin pies, most sources (including America’s Test Kitchen) caution against freezing these pies. The custard filling turns out grainy and wet and it very likely will have a soggy crust.
  • They found the same results whether frozen baked or unbaked.
  • The science of this has to do with the egg proteins unraveling and forming a gel that holds water. Since there is a lot of water in the dairy and pumpkin, this leads to ice crystals and unpleasant results. They recommend finding a recipe that does not use eggs if you want to freeze your pumpkin (or other custard or cream) pies.
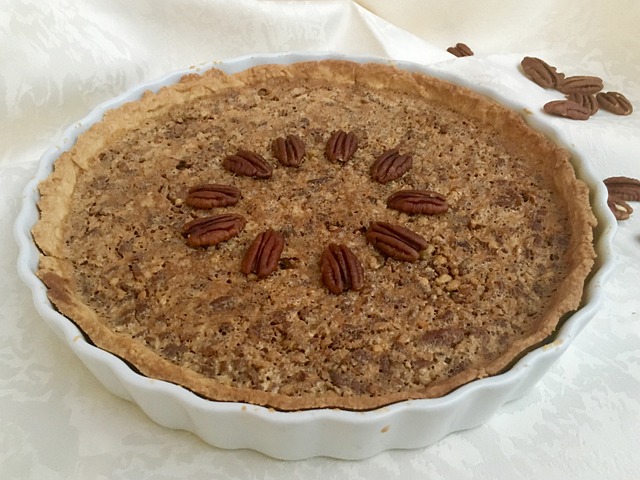
Image by Juliane Lutz from Pixabay

Pecan pie

  • America’s Test Kitchen found that pecan pies froze well, either baked or unbaked. Even though there are eggs, there is very little water, as in pumpkin pies, minimizing the problems one finds when freezing pumpkin pies.
  • Their technique:
    • Unbaked
      • Pour filling into a pre-baked shell, cool and wrap as above.
      • To bake, do not thaw, but increase baking time by about 30 minutes.
    • Baked
      • Cool and wrap as above.
      • To serve, unwrap and thaw on the counter, which could take up to 3 hours. You may also allow it to thaw in the refrigerator overnight.
  • Freeze for up to 2 months.

Freezing pie filling

  • Another option for fruit pies is to make and freeze your filling. Later, thaw it overnight in the refrigerator and continue with making your pie.
  • Michigan State University Extension recommends the following technique.
    • Add ½ tablespoon of cornstarch or 1-2 tablespoons of flour to the filling.
    • Line your pie pan with foil, pour in the filling and freeze in the pan.
    • Once firm, remove from pan, wrap and return to the freezer.
  • They also recommend adding the same amount of cornstarch or flour to fruit pies that you are going to freeze unbaked.
  • An additional dusting of cornstarch on the pastry before adding the filling helps decrease sogginess.

Freezing pie crusts

A third option is to make and freeze the crust. There are three ways.

  • Make and portion your pie pastry.
    • Form into disks and wrap securely.
    • When it is time to make a pie, allow the crust to thaw, roll out and continue with making your pie.
  • Roll out your pie crust and freeze either baked or unbaked.
    • Unbaked crusts will last in the freezer for about 2-3 months.
    • Baked crusts last about 4-6 months.
  • For unbaked crusts, do not thaw. Bake them directly out of the freezer.
  • Thaw a baked crust by allowing it to stand at room temperature or heat in a 350°F oven for about 5 minutes.

Baking frozen pies

  • As mentioned above, do not thaw your frozen pies before baking.
  • You will need extra baking time. Most sources recommend adding anywhere between 15 and 30 minutes. However, it may take more or less. Watch your pie and bake until the filling is bubbling.

With these make-ahead tips for your holiday pies, you can minimize the stress of getting that holiday dinner on the table.

Cooking Tips · Techniques

Your freezer – a friend for the holidays!

Image by K-H. Leuders from Pixabay

As I write this, it is only the middle of September. Blink your eyes, though, and the holidays will be right around the corner. Have you ever thought about utilizing your freezer, if you have space, to make the holidays less stressful? That is the subject of this and subsequent Cooking Tips. I will first address general advice about freezing food. This will be followed with more specific advice on freezing some of those items that are going to be on our holiday table.

The first step in this strategy is to know how to safely freeze food as well as what you can freeze.

Freezer Advice

  • Freezer space is often limited. Therefore, the more items you can freeze in a bag that can lie flat, the more you will be able to stash in your freezer.
  • Opt for bags designed for freezing as they protect the food better.
  • No matter what freezer container you use, it should be as airtight as possible. Another advantage of bags is that getting all the air out of them is easier. The air causes freezer burn, which leads to moisture loss, thus harming flavor and texture.
  • Portion the food in quantities that you will need. That may be in individual portions or the size you want to thaw for your family’s dinner.
  • Label the containers with the identity of the contents, the date and any specific reheating instructions you might need.
  • For the best quality, the food should be frozen as quickly as possible. This prevents large ice crystals from forming, which can seriously damage the quality of the food when thawed. The FDA recommends not to stack packages to be frozen but to spread them out in a single layer. Once frozen, stack them to maximize the freezer space.

How to thaw – there are four basic methods.

  • Thaw overnight in the refrigerator. This method takes the most time but gives you the best results. A rule of thumb is to allow one day of thawing time for every 5 pounds of weight.
  • Thaw by cooking. This works well for small pieces of food, including ground or chopped meat. Be aware that the cooking process will take longer to cook.
  • Thaw in the microwave. This is not a great method for large food items, such as whole chickens. It does work well for smaller items. One risk of this method is that you can accidentally cook, not just thaw, the food item.
  • Thaw in Cold Water. This method takes about 20 to 30 minutes per pound of food. You must use waterproof packaging such as an airtight bag and change the water every 30 minutes.
  • Prevent pathogen growth. Freezing food does not kill pathogens; it just inactivates them. As the food thaws and warms, the pathogens can start multiplying. This is the reason you are cautioned against thawing food at room temperature.

Refreezing food

One question that frequently arises is whether you can refreeze food after it has been thawed. According to the FDA, you may refreeze previously cooked foods that have been thawed in the refrigerator, but you should do it within 3-4 days. Although it is generally safe, refreezing can lead to deteriorated quality due to moisture loss during thawing. For food safety, do not refreeze any foods left outside the refrigerator longer than 2 hours or 1 hour in temperatures above 90 °F.

Freezer storage time

Freezing will keep food safe almost indefinitely, although there are recommended storage times for the best quality. Here is a chart from the FDA for reference.

ItemMonths
Bacon and Sausage1 to 2
Casseroles2 to 3
Egg whites or egg substitutes12
Frozen Dinners and Entrees3 to 4
Gravy, meat or poultry2 to 3
Ham, Hotdogs and Lunchmeats1 to 2
Meat, uncooked roasts4 to 12
Meat, uncooked steaks or chops4 to 12
Meat, uncooked ground3 to 4
Meat, cooked2 to 3
Poultry, uncooked whole12
Poultry, uncooked parts9
Poultry, uncooked giblets3 to 4
Poultry, cooked4
Soups and Stews2 to 3
Wild game, uncooked8 to 12

The FDA also recommends smelling the food after thawing and discarding any food that smells off. If only the appearance is affected, consider using the item in soups or stews.

What foods can you freeze?

The FDA tells us that we can safely freeze any food except for whole eggs or canned foods. However, just because you can doesn’t mean you should. Certain foods do not freeze well in terms of palatability. One source had an excellent idea. Walk down the frozen food aisle to see what foods are there. That will give you a great starting point on what will do well frozen.

Rather than list foods that do well in the freezer, it might be better to talk about those that don’t.

  • Cream-based sauces – these tend to break and become grainy when they thaw.
  • Mayonnaise and mayo-based foods – mayonnaise is an emulsion that will separate when frozen.
  • Hard-boiled eggs – freezing leads to tough egg whites that become watery when thawed.
  • Salads and slaws – produce with a high water content (lettuces, cucumbers, oranges, etc.) becomes mushy when thawed.
  • Custardy desserts – although these can be frozen, they become grainy and watery upon thawing.
  • Dairy products – dairy-based foods like yogurts and soft cheeses can have an unpleasant texture after freezing.

So, how does this help you with your holiday planning? Start by asking yourself what you usually serve for the holidays. Those items that will freeze should be made ahead to save you time later. Here are some ideas.

Pies

You may not have space to freeze whole pies but you can make and freeze the pie dough. Or, instead of making a regular-sized pie, how about making mini pies or tarts and freezing them? More on freezing pies in the next Cooking Tip.

Bread

Many types of bread and rolls freeze very well. Or, you can freeze the unbaked dough balls and bake them when you need them. Stay tuned for a Cooking Tip just on this topic.

Cakes

You may not want to freeze an entire cake but how about making “cake rolls” such as a pumpkin roll and freezing it. That takes up less space and they do beautifully in the freezer.

Meals

Think about meals to serve your family when you are too busy to cook. Your freezer will look different than mine, but I always have containers of chili and/or soups and cornbread to take out for a quick meal. I also have packages of sausage and peppers, but you could have lasagna or similar dishes. I usually have pizza dough stored away. I try to use up the last of the summer produce by turning it into something that will make my life easier in the coming weeks. If you have basil, make some pesto, freeze in ice cube trays and then put in a freezer bag for a touch of summer during the cold winter. Excess tomatoes can easily be turned into tomato sauce for later use in pasta or on pizza.

Spending a little time thinking about what you can make ahead and freeze is one way to make the holidays more enjoyable.

Cooking Tips · Ingredients · Techniques

Creole & Cajun cooking – aren’t they the same thing?

I will soon be teaching a class on New Orleans cuisine. When you think of food from this area, what types of food come to mind? For many of you, I suspect you would say Cajun and Creole. Just what is the difference in these terms, if anything? That is the subject of this Cooking Tip.

To understand the difference between Cajun and Creole food, we need to look at the history of the people. The history lesson will be a bit of a summary rather than an in-depth look.

Creole

Creole means “native to the colony” and is said to have come from the European colonization of Louisiana. France claimed this land in the 1600s and gave it to Spain in the 1700s. During this time, the term “Creole” was applied to children born in North America, no matter their descent. The term became more important after the Louisiana Purchase in 1803 as it distinguished those living there from new arrivals.

People who claim this heritage come from all sorts of backgrounds. They were in this area before the Louisiana Purchase and tried to maintain their languages, culture, food and faith. Most scholars say the term refers to birthplace, not a race.

Cajun

This is derived from the word “Acadian”. They were French colonists who settled in the Canadian provinces (Nova Scotia and New Brunswick) in the 1600s. The settlers named the region “Acadia,” and they were known as “Acadians.” When the British threatened to expel the Acadians unless they pledged allegiance to the King of England during the 1700s, they refused. As they were removed, they moved southward to Louisiana.

These people were poor and lived rural lives. Their language was a unique dialect of French that differed from those who had arrived in this area from France. This kept them somewhat isolated, and they were treated as inferior people.

These terms – Creole and Cajun – also came to describe cuisines. Although they share similarities, there are also differences. One of the most significant differences people will always note is that Creole cuisine uses tomatoes, and proper Cajun food does not.

Creole Food

This type of food was born in the kitchens of aristocrats, with slave cooks mixing their cooking techniques and ingredients with those preferred by the European colonists. The people of this area could afford imported ingredients as well as dairy. This led to richer and more elegant dishes. In summary, Creole food can be described in the following ways.

  • More refined
  • The roux is based on butter and flour
  • Uses more tomatoes, shrimp, oysters and crab
  • Seasoning is more spice-based (as opposed to herb-based)
  • City cooking with influences from Spain, Africa, Germany, Italy and the West Indies combined with native ingredients.

Cajun Food

Image by Elaine from Pixabay

The food was borne of very frugal practices, such as using every part of the animal that could be used. From these butchered animals, they made tasso (a type of heavily seasoned pork or beef), andouille sausage (a spicy pork sausage) and boudin (a sausage made from pork, rice, various vegetables & seasonings). Rice was also prominent as it was one of the most abundant crops in Louisiana, and crawfish was eaten due to the water sources.

Here is a summary of Cajun food.

  • More rustic, home-cooking rich with local ingredients
  • The roux is based on oil or lard and flour
  • Very well-seasoned food with an emphasis on herbs
  • Contains more pork and crawfish
  • Country food

While there are these differences, there are also some similarities.

  • Holy Trinity – both cuisines use this version of the French mirepoix as the base of many dishes. Rather than the traditional mixture of onions, celery and carrots, the Holy Trinity uses green peppers, onions and celery.
  • Spice – many people associate these cuisines with spicy food. Although they can be spicy, they are better described as very flavorful.
  • Roux – because of the French influences, both Creole and Cajun cuisines use rouxs in their dishes although as noted above, Creole is more likely to use butter and Cajun tends towards lard or oil.
  • Rice – this grain is prominent in both cuisines.

As opposed to many countries, it is hard to say that the US has a particular type of cuisine. Rather, it has many regional cuisines. Cajun and Creole are one of these and now you know the difference!

Cooking Tips · Techniques

Braising – Learn how to be successful!

As the cooler weather approaches, what and how we cook often also changes. We gravitate towards heartier dishes and are willing to cook dishes that take a bit more time. One of the cooking skills for this type of cooking is Braising. This Cooking Tip will explain what it is and how to put it to use in your kitchen. Although braising is not limited to meat, it is the most common food item to be braised and is the one I will discuss.

According to Harold McGee in On Food and Cooking, the word braise is said to come from 18th-century French. It comes from a word for “coal” and refers to putting coals under and atop the cooking pot.

Braising is the act of slowly cooking a piece of meat in a moist environment. To add a bit more detail, the meat is browned in fat and then cooked in a small amount of liquid in a covered pan over low heat for a long time. This long slow cooking develops flavor and tenderizes the food.

Even though you do not need a recipe to produce a delicious braised meat dish, most of us will probably turn to a recipe. The problem is that most of these recipes include instructions that do not stand up to the science of making a proper braise. I will explain below and will incorporate wisdom from both Harold McGee (On Food and Cooking) and J. Kenji López-Alt (The Food Lab).

First, what cuts of meat are best for braising? The good thing is that the best cuts of meat are also the least expensive. You want to select fatty, tougher cuts of meat. Just a few examples are:

  • Chuck
  • Brisket
  • Pork shoulder
  • Boston butt
  • Lamb shoulder/shanks

I will list the basic steps to braising and will follow with the elaboration of those steps.

  1. Brown the meat.
  2. Add and cook aromatics.
  3. Add liquid and seasonings.
  4. Cook in a covered pot until done and the meat is very tender.
  5. Use the remaining liquid to make a sauce.

Browning the meat

  • Start by removing excess fat, silver-skin, etc. from the meat. Season with salt and pepper.
  • Keep the meat as intact as possible so there are fewer surfaces through which juices can escape. If you must cut the meat to fit into your pot, cut it into as large of pieces as possible.
  • Heat oil in a heavy pot until hot.
  • Add meat and sear each side just until brown. You want to get a nice sear while at the same time minimizing the warming of the interior of the meat.
  • Some chefs like to lightly dredge the food in flour that will later develop body in the sauce. Most, though, will do this later by other methods.
  • Once browned, remove meat from the pan.

Start building flavor by adding aromatics

  • Start with something from the onion family such as leeks, shallots, onions and/or garlic.
  • Many chefs start with a classic mirepoix of carrots, celery and onion.
  • The moisture that will be released from the vegetables will help to deglaze the pan and incorporate the flavorful fond into the liquid.
  • Other possibilities include items such as:
    • Additional vegetables (butternut squash, carrots, parsnips, celery, fennel, mushrooms, turnips, rutabaga)
    • Herbs
    • Fruit
    • Spices
  • Some recipes call for adding tomatoes, which are an acidic ingredient that helps to break down the food.
  • J. Kenji López-Alt likes to add umami with anchovies, Marmite, Worcestershire sauce or soy sauce.

Add liquid

  • Start by deglazing the pan with wine, vinegar, beer, stock or water.
  • Add additional liquid of your choice. Common liquids are:
    • Broth
    • Juice – apple, cranberry, tomato
    • Combination of broth and dry wine or water
  • The liquid should cover the meat by ⅓ to ½. The meat should only be partially covered, not submerged.
  • Bring liquid to a simmer, taste and adjust seasoning.
  • Return meat to pan.

Cook mixture until done

This is the step where recipes can mislead you and give you an inferior result. The variables are the use of a lid, the cooking temperature and the cooking method.

Meats with significant amounts of tough connective tissue must be cooked to a minimum of 160-180°F to allow the collagen to dissolve. However, muscle fibers begin to lose their juices at 140-150°F. So, it can be a challenge to keep these tough meats juicy. The key is to cook slowly at or just above the temperature to dissolve the collagen. This minimizes the drying out of the meat.

Lid – Most recipes will tell you to tightly cover your pot. The truth is that you should leave the lid slightly cracked. This helps with temperature regulation. If the pot is completely sealed, the liquid gets too hot. A tightly sealed pot will allow the liquid to get to a boiling point, which you do not want as it will dry out the meat. By leaving the lid slightly ajar, the temperature of the liquid will stay around 185°F. This lower temperature allows the collagen in the meat to slowly break down while still maintaining moisture within the meat. Hotter liquid also leads to overcooking the outer part of the meat before the entire cut is done.

Cooking temperature

Once again, many recipes will give you bad advice. They will recommend an oven temperature of 300-350°F. This is much too hot to be able to keep the liquid well below the boil and around 180°F. Experts who understand this will recommend setting your oven much lower.

Here is Harold McGee’s method.

  • Start the pot with the meat and liquid in a cold oven. Let the lid sit slightly ajar to allow some evaporation. Set the oven to 200°F. This should allow the contents to rise to about 120°F over two hours.
  • Raise the oven temperature to 250°F so that the contents warm from 120°F to 180°F.
  • After an hour, check the meat every half-hour. Stop cooking when the meat is easily penetrated with a fork.

Here is J. Kenji López-Alt’s method.

  • Preheat oven to 275°F
  • Return meat to the pot and put on a lid slightly cracked.
  • Cook until meat is tender.

Cooking method

  • Many will tell you that you can cook a braise either stovetop or in the oven. This is true but for superior results, opt for the oven.
  • The difference is that:
    • The stovetop maintains a constant heat output.
    • An oven maintains a constant temperature.
  • Cooking stovetop means that although the mixture is barely simmering when you start cooking, it will probably creep up to a boil as the heat applied to the pot from the burner is constant (unless it is monitored and adjusted.)
  • In the oven, the temperature of the food stays the same. Also, the heat surrounds the pot rather than just coming from the bottom.
  • No matter which method you use, you should check periodically to ensure the liquid has not evaporated.

Finishing steps

  • Allow the meat to cool in the liquid. This results in reabsorption of some of the liquid, giving you a juicier result.
  • It also makes the meat easier to slice.
  • After removing the meat, the liquid should be turned into a delicious sauce. There are different ways to do this.
    • Some will recommend reducing the liquid to a sauce consistency by boiling.
    • Others will recommend thickening by using a roux, beurre manié or starch slurry.
    • Another method is pureeing the mirepoix and then returning it to the sauce.
  • Always finish by tasting and adjusting the seasonings.

The classic example of a braise is the all-American Pot Roast. However, this is not your only option. By following the above steps, you do not even need a recipe. If you are using a recipe, please adjust it in the above ways to ensure the best result.

Happy Braising!

Cooking Tips · Ingredients · Techniques

Fresh Fruit – How to Prevent Disappointment

Image by Sven Hilker from Pixabay

One of my favorite food groups is fruit. Not just any fruit, though. It needs to be flavorful, sweet and ripe fruit. It can certainly be a challenge to find that in our supermarkets in today’s world. If you have had the privilege of tasting ripe fruit just picked off the tree, you know what I mean. So much of the fruit in our supermarkets is tasteless and mediocre. You pay good money to purchase this fruit, take it home, and then you are met with disappointment. Although you cannot do anything about the selection of fruit in the markets, you can try to pick the best of the lot. That is the subject of this Cooking Tip.

It goes without saying that you are going to get the best fruit when it is in season. We are somewhat spoiled as we can get almost any fruit at any time of the year. Just because it is for sale, though, does not mean you should purchase it. It will certainly taste better and be a better value when it is in season. That will vary based on where you live. Here is a calendar of in-season produce for Colorado. If you live elsewhere, check with your local department of agriculture for a similar calendar for where you live.

It is also good to know which fruits continue to ripen after they are picked and which do not. Here is a chart from the University of Nebraska extension office. Some fruits, such as pears, are meant to be picked unripe and then ripen afterward. However, the best-tasting fruits will always be those that are ripe when picked. For example, even though a peach can continue to ripen on your counter, it will not taste nearly as good as if it ripened on the tree.

Here are some General Tips for picking ripe fruit. We will look at a few specific fruits below.

  • Weight – ripe fruit tends to feel heavy as compared to its size. If the fruit feels light, it is either unripe or perhaps over-ripe.
  • Pressure – pressing gently on the fruit should yield some give although there are exceptions as discussed below.
  • Aroma – ripe fruit should be fragrant but not overpowering.
  • Color – Light green color on fruit is usually an indicator that it is not ripe.

Avocados

  • The skin should be dark and firm without soft spots. Bright green is an indicator that it is not ripe and very dark green tending towards black means it is overripe. You want one that is a darker shade of green but not black.
  • Avocados ripen first at the stem end. Therefore, gently press on the larger rounded end to see if it gives, which is an indication of ripeness.
  • Pluck off the stem and look at the color. You want to see a nice green color, not yellow.

Berries

  • The color should be bright without bruising or mold.
  • They should be plump and firm.
  • They should have a sweet and fruity aroma.

Cantaloupes

  • The color does not change too much as it ripens although unripe ones may have a slight green tint to them.
  • The best way to tell ripeness is the aroma. If it smells slightly sweet, it is most likely ripe. However, if it is a strong sweet aroma, it could be over-ripe.
  • Pick one that is heavier than the others.

Figs

  • As figs ripen, they will turn darker in color. Depending on the variety, it might be brown or purple. Some figs, though, remain greenish as they ripen. So, you cannot rely on color alone.
  • Ripe figs are heavy for their size.
  • A ripe fig will be slightly soft to the touch.
  • The shelf life of figs is very short. Therefore, enjoy them while you can!

Lemons

  • Choose the heaviest you can.
  • They should be fairly firm but not hard.
  • If you gently scratch the skin, it should smell like lemon.

Limes

  • As a lime ripens, it turns from dark green to a lighter color and almost yellowish.
  • It should have a lime aroma when scratched.
  • It should give slightly when pressed.

Mangos

  • Mangoes come in a variety of colors making color an unreliable indicator of ripeness.
  • A ripe mango will give slightly when pressed.
  • It should also have a slightly fruity aroma at the stem end.

Peaches

  • A ripe peach should have no green around the stem. They should be yellow-orange with some red. White peaches should be off-white with a few areas of red blush.
  • Although peaches will continue to ripen some after picking, they do not ripen well and do not compare to those ripened on the tree. Peaches with a green tint may not fully ripen.
  • Choose peaches with fuzzy skins that are firm but yield to gentle pressure.
  • They should smell like peaches.

Pears

  • Pears do not change color much as they ripen although some varieties will go from green to yellow.
  • Ripe pears can feel as firm as unripe ones. However, if you press the stem and it is firmly adhered to the pear, do not buy it. You want one that has a little give.
  • Ripe pears will give off a mild pear aroma. If the aroma is very strong, it will most likely be over-ripe.

Pineapples

  • The leaves should look fresh and dark green. Avoid dry-looking leaves.
  • Avoid pineapples with soft or dark spots.
  • Pineapples change from green to yellow as they ripen.
  • It should be heavy for its size.
  • A ripe pineapple will have a sweet aroma at the stem end.

Watermelon

  • As this melon grows, part of it sits on the ground and develops a yellowish patch, which is a good indicator of ripeness. Unripe ones will have a white spot or no spot at all.
  • If the melon is not too large to hold in one hand, pick it up and knock on the side of it. A ripe watermelon will sound and feel somewhat hollow.

Even with all these tips, I am sure you will have experiences like I have had. You are yearning for a delightful peach or a sweet cantaloupe. As you feel and look at the fruit available, you do not find any that appear or smell like they might be ripe. I do not know what you do but I walk away. I would rather not waste my money on unripe fruit that tastes of nothing.

I have been known to buy canned or bottled fruit or, depending on what I want to do with the fruit, frozen. The fruit that goes into those items is generally much riper and tastier than what you often find in the produce section. You do, though, need to be careful about the sugar content, including added sugar, of canned and bottled items. If the item says “no sugar added”, it will still most likely be packed in fruit juice. Many also will add an artificial sweetener to the product. Read the nutritional facts label before purchasing.

So, yes, buying fruit in the supermarket or even at farmer’s markets can be a disappointing experience. But, when you find those ripe gems, it is a great day!

Cooking Tips · Techniques

Pizza – is homemade worth it?

Image by zuzana gazdikova from Pixabay

When you eat pizza, do you go to a pizzeria? Do you order delivery? Do you buy it from the frozen section of your local grocery store? Or, do you make your own at home totally from scratch? I presume most of you do one of the three former methods but I hope this Cooking Tip will encourage you to become a homemade pizza maker. There are things you can do ahead of time so that having a pizza night is a very doable task.

Everyone argues over the best style of pizza. I am not going to try to go over every style but I am going to mention four of the most common.

Neapolitan style

  • This is said to be the original pizza dating back to the 18th century in Naples, Italy. It is a thin crust pizza that is made with what is called a lean dough. That is a dough that is made only with flour (usually high protein), water, salt and yeast. If it has any sugar or oil, they are only present in very small amounts.
  • Classically, it undergoes a long fermentation, which allows time for the starches to break down into sugars, the yeast will create flavors and the gluten will develop.
  • The result should be a thin and crispy crust with a soft and chewy interior. The crust is not stiff and you may need a fork/knife to eat it.
  • Purists will tell you it must be baked in a wood burning oven between 800-1000°F and it cooks in only ~90 seconds.
  • The traditional toppings are simple – tomatoes, mozzarella, basil, oregano and olive oil.

New York style

  • A classic description of New York style pizza is that the slices are foldable with a crispy outer crust.
  • This dough is thicker than Neapolitan but it is still considered to be a thin crust.
  • It is cooked in a slightly cooler oven than Neapolitan.
  • Besides the basic ingredients, the dough typically also contains oil and sugar. The oil coats the flour, which limits gluten development and results in a more tender crust.
  • The sugar helps the crust to brown more evenly at the lower oven temperatures.
  • It also takes longer to bake.

Sicilian style

  • This style has a thick and crunchy crust with a soft and moderately chewy dough.
  • The dough is baked in a rectangular or square baking tray coated in olive oil. This causes the bottom to fry and you end up with an ultra-crispy and flavorful bottom.
  • The dough has a higher percentage of water than other doughs, making it easier to stretch.

Chicago style

  • Although there are other styles in Chicago, this term usually refers to deep dish pizza.
  • It is a thick crust with raised edges.
  • The ingredients are typically layered on in “reverse” order. Mozzarella is put on the bottom followed by meat, veggies and crushed tomatoes.
  • Since there is a larger quantity of dough and ingredients, it will take about 30 minutes to bake.

If you wish to make pizza at home, the first thing you need to do is to make the dough. Everyone probably has their favorite recipe. My husband and I enjoy a thin crust pizza and I tried many different doughs until we found one that we liked. Here is the one I use. I will say up front that this recipe does not follow some of the following steps. Although I may be sacrificing flavor, it allows me to make it relatively quickly. I make the full recipe, use one of the pizza balls for dinner and freeze the remaining three so all I have to do the next time I want to make pizza is to take one of the balls out of the freezer to defrost before continuing with the rest of the pizza.

Here are some tips for you to consider that I gathered from pizza experts.

  1. Use a scale to ensure proper measurement of the flour. It will lead to a better and more consistent dough.
  2. Baker’s percentages – if you are very serious about making pizza dough, this is a skill you may wish to investigate. With this technique, every ingredient is represented by its proportion by weight to the flour in a recipe. For example, if a pizza dough recipe calls for 60% water (also known as 60% hydration), 2% salt, and 0.5% yeast, that means that for every 1,000 grams of flour, you’d add 600 grams of water, 20 grams of salt, and 5 grams of yeast. Not only is this more accurate but it allows you to scale up and down easily.
  3. Choose the right flour – since this is the main ingredient in pizza dough, the kind you choose can make a big difference. Most of us will just use all purpose flour and that will work fine. If you want a crust that is chewier with bubbles, you may want to choose a flour with a higher protein content such as bread flour.
  4. Kneading – this is what develops gluten. A food processor does an excellent job of kneading pizza dough. That is the method utilized in my preferred recipe.
  5. Cold fermentation – allowing your dough to sit in the refrigerator after mixing leads to superior flavor. Let it sit for 1-3 days, take it out to rise at room temperature and continue with your recipe.
  6. Shaping – pizza enthusiasts will proclaim that doughs should only be shaped by hand. However, do not let anyone shame you for using a rolling pin. One thing to remember is that the gluten that has developed in the dough will have the natural tendency to shrink back as you are trying to shape it. If that happens, just step back, cover your dough, allow it to rest for a few minutes and then return to shaping it. The relaxation of the gluten during that resting time will make the final shaping much easier.
  7. Bake hot – this leads to better oven-spring, which is when the dough will be expanding and forming holes. Preheat your oven as hot as it will go. Most will recommend putting your stone/steel in the oven when you turn it on and preheating for an hour to ensure superior heat. There is also the option of pizza ovens, which have become more common today for home cooks.
  8. Baking steel or stones – for the best pizza crust, use either a baking steel or stone. If most of us have either of these, it is probably a stone. That is what I use and I find I get great results. Pizza aficionados have become to prefer baking steels as they have a higher heat capacity and conductivity. This will give you the crispiest result you can get in a home oven.
  9. Toppings – this is a matter of personal preference but in general, the adage that less is more is true with great pizza.

There is so much more to making pizza and there are a myriad of books and websites devoted to just this topic. However, rather than make it complicated, I want to encourage you to just make your own pizza in your own kitchen. If you like the result, that is what is most important. If you are disappointed, let me know and I will try to help you. If you want to become an expert, then seek out some of these other sources and have fun!

Cooking Tips · Techniques

Cupcake Liners – Does it matter which you choose?

Image by unicorn_owner from Pixabay

I was recently teaching a class on how to cook/bake with alcohol. One of the recipes was for Raspberry Spiked Cupcakes. When I had tested the recipe in my home kitchen, I used regular paper cupcake liners. In the teaching kitchen, there were only foil liners available. The cupcakes were wonderful but did seem to bake a bit differently. Although the reason was probably the oven, I wondered if the type of liners made a difference. I decided to do some research and that is the focus of this Cooking Tip.

The first question to be asked is if you even need cupcake liners. No, you don’t need to use them but there are certainly a lot of advantages to cupcake liners.

  • They add a decorative touch to your cupcakes. One caveat – light colored cupcakes show off the liner best. Dark (such as chocolate) cupcakes tend to bleed through the liner, making it less attractive. You could try using two liners rather than one to end up with a prettier liner.
  • They make for easier cleanup.
  • Cupcakes that have been baked in a liner stay fresher and moister for longer.
  • Liners protect your cupcake batter from being in direct contact with the hot pan, thus there is less risk of burning.
  • They result in more evenly and uniformly shaped cupcakes.

There are different types of cupcake liners with the main three being paper, foil and silicone.

Paper liners

These are the ones that you see most frequently and will cost the least. If you want patterns, you will want to pick paper liners as you can find colors/patterns to fit almost any occasion.

Look for good quality ones as inferior liners are more likely to stick to your cupcake. Also, if you can, choose liners that say they are nonstick. Unfortunately, not all brands will state this.

Foil liners

Foil liners are packed with a paper liner in between to prevent them sticking together. You should remove that paper liner. According to Reynolds, that paper liner is the same as their pastel liners. Therefore, you can set it aside and use it when you want to use paper liners. I did not investigate other companies and so, do not know if the paper liners are the same for other brands.

The foil liners are meant to be baked without a cupcake pan. Rather, just put them on a baking sheet. They might spread a bit, though. So, if you want perfectly shaped and sized cupcakes, you may want to place them in the cupcake pan.

I wondered if the foil affected the baking process but my research showed this was not the case.

Silicone cupcake cups

These are not only reusable but can also stand on their own rather than needing a cupcake pan. Silicone is very nonstick as well as being very heat tolerant. They are also dishwasher safe.

Some feel that cupcakes baked in silicone, though, do not spread or rise as well, resulting in smaller cupcakes.

Some people complain that cupcake liners stick to the cupcakes. Here are some of the probable reasons for this.

  • Insufficient cooling. Allow them to cool in the pan for about 5 minutes but then remove them and finish cooling on a rack.
  • Quality – the cheaper the liners, the more likely they will stick. So, try to buy better quality ones and look for ones that state they are nonstick.
  • The recipe – some cupcakes stick more than others. Those that are higher in sugar, lower in fat and/or very delicate in texture might stick more.
  • Not spraying the liners. Most manufacturers will state that you do not need to spray the liners. However, most cupcake bakers like the added insurance of a spray. Just be sure you only give a quick light spritz as to not make it too greasy.
  • Moisture – one cupcake expert recommends putting a baking pan filled with water on the bottom rack as she says the added moisture helps to prevent the liner sticking to the cupcake.

This same chef has a trick for cupcakes that are being stubborn and not allowing you to get the liners off neatly. She places them upside down on a microwave-safe plate, covers them with a damp paper towel and microwaves them for 15 seconds.

The liners are only one aspect of wonderful cupcakes. See this prior Tip on a discussion of cupcakes versus muffins. And, if you live at altitude, review this Tip on adjustments you may need to make to ensure a successful result.

Happy Baking!

Cooking Tips · Techniques

Kitchen sponges – a help or a hazard?

Image by Tomek from Pixabay

Do you use sponges in your kitchen? I certainly do. They are inexpensive and are effective. Most of us probably also know that they can harbor germs. They are perfect incubators for microbes, some of which could make us sick. What we can do about this is the subject of this Cooking Tip.

The National Sanitation Foundation (NSF) has been in existence since 1944, and they say they are “dedicated to improving human and planet health.” As part of this, they develop public health standards and they test, audit and certify products and services. A 2011 NSF study found 77% of sponges and dish cloths in US homes contained coliform bacteria, 86% had yeast and mold, and 18% were contaminated with Staph bacteria.

Experts tell us to microwave the sponge, boil it or send it through a dishwasher cycle. Other recommendations include soaking in a vinegar or bleach solution. A 2017 study in Scientific Reports should cause us all to re-think that.

This study said that “sanitation by boiling or microwave treatment has been shown to significantly reduce the bacterial load of kitchen sponges and can therefore be regarded as a reasonable hygiene measure.” However, the study also demonstrated that regularly sanitized sponges did not contain less bacteria than uncleaned ones. Moreover, the above cleaning methods even increased the presence of two bacteria. Their recommendation is to replace your kitchen sponges on a weekly basis and, although saying more studies need to be done, they say “prolonged application of sanitation measures of kitchen sponges is not advisable.”

Other suggestions for keeping your kitchen clean include using different sponges for dishes and countertops and throwing away any smelly sponges. It is also advised to allow your sponges to dry out between uses as when wet, the sponge is a perfect environment for bacterial growth. Cooks Illustrated did testing on sponges, half of which had the water squeezed out before putting in an open plastic bowl and half that were left full of water. When a lab analyzed the sponges for bacteria, the wrung-out ones had 20 CFU/ml (colony forming units per milliliter) whereas the wet ones measured 500,000 CFU/ml.

Other recommendations are to use cleaning items that dry quickly such as dish cloths or towels. However, those should be thrown into the laundry at the end of every day. It is interesting that the FDA does not allow the use of sponges in restaurants.

Although the USDA has in the past recommended the above cleaning methods, a 2023 statement on their website says “Kitchen sponges are potential sources of bacteria and are difficult to clean. Microwaving or boiling kitchen sponges may reduce some of the bacterial load; however, these methods alone are not adequate to ensure that your sponge will reduce potential cross-contamination of hands, kitchen counters, and food. If you use sponges, buy new ones frequently.”

I must admit that I do not change out my sponges nearly enough. I need to do better. What about you? Isn’t keeping your kitchen clean and you and your family healthy worth it? I think so.

Cooking Tips · Techniques

How much water do you need to cook pasta?

Image by Jan Vašek from Pixabay

How do you cook dried pasta? We are all taught that you need to bring a large pot of water to a boil, add salt until it tastes like the sea, add the pasta, stir and cook until it is done. There are some who think this technique is not only a waste of water but a waste of time. That is the subject of this Cooking Tip.

One of the first to discuss the method of cooking water in less water was Harold McGee. In his 2004 book On Food and Cooking, he recommends the standard method. However, in 2009, he began to question this and started experimenting with using less water. He found it acceptable as long as you stirred the pasta as the water was coming up to a boil to prevent sticking. He also had two Italian chefs try it.

  • Lidia Bastianich – She thought the pasta cooked in less water lacked the “gradation of texture” that she liked. She also felt the pasta lacked in the nutty flavor that she expects from a semolina pasta.
  • Marcella Hazen – Her only comment was that it took a significant amount of stirring to prevent sticking and thought it was not worth the effort.

I first read about this alternate method in a book published in 2015 – The Food Lab by J. Kenji López-Alt. He explained that the recommendation for cooking pasta in large amounts of boiling water comes from those that think it prevents sticking and clumping, it prevents the pasta from becoming mushy and it helps the pasta cook evenly. So, in his typical manner, he set out to test this directive.

In his testing, he found the textual difference argument by Lidia was not supported by his results. He did agree that stirring was necessary for the first minute or two. However, he thought this was important no matter which method you used.

Another trial he did was to bring a small pot of water to a boil, added the pasta, brought it back to a simmer, stirred, put a lid on and turned off the heat. He waited the usual 10-12 minutes and found the pasta was perfectly done.

In April of 2023, America’s Test Kitchen put this small amount of water method to the test in their kitchen but also added using cold water from the start.

They put 1 pound of dried pasta in 1 quart of cold water, brought it to a boil and stirred occasionally. They then reduced the heat to maintain a simmer. At this point, stirring was no longer needed as the agitation of the water kept the pasta from sticking. After cooking to the desired doneness, the testers found it cooked up just as well as the same pasta cooked in 4 quarts of boiling water.

They found a time savings of about 45% as the cold method took only 16-17.75 minutes depending on the pasta shape whereas the conventional method took 23.5 – 29 minutes. They also touted the water savings as the conventional method took 75% more water.

If cooking strands of pasta, it would be best to use a 12-inch skillet so all the strands can get covered in the small amount of water. Otherwise, a saucepan is sufficient.

We are also always told to save some of the pasta water to use in finishing our pasta sauce. This is because the starch from the pasta dissolves in the water, which not only thickens the sauce, but also aids in emulsification. This helps to sauce to coat the pasta and gives the sauce that silky texture.

If using the method with a small amount of water, the starch will be concentrated in less water. Therefore, you will use less of it to complete your sauce. If you salt your water before cooking the pasta, use less salt as the pasta water may make your dish too salty. One caveat, this method is not for fresh pasta as it can get too mushy.

Have you ever tried this new method? Do you like it? I have to admit that habit just makes me fill a pan with water and bring it to a boil for cooking my pasta. Next time, I will have to step back and break that habit.

Cooking Tips · Techniques

Make It or Buy It?

I have noticed lists all over the place telling you which items you should make and not buy. Those lists are the opinions of the writers and they vary greatly. I decided to see if there were any similarities in those lists and that is the subject of this Cooking Tip.

For me, there are certain items that I never buy including tomato sauce products (pasta sauce, pizza sauce, etc.), pesto, tortillas, most spice mixes and premade desserts. Some of those made it onto the lists that I had seen but not all.

Here are the items that are most commonly on a “Make It – Don’t Buy It” list. The reasons for these recommendations could be the taste, the nutritional value and/or the cost.

Image by hadevora from Pixabay

Bread – along with the next item, this is the food item that most writers recommend making. Making bread is not difficult and it is certainly cheaper than buying store-bought bread. Most decent store-bought bread is a minimum of $3.50 and can go even higher for artisan loafs. You can certainly make it for a fraction of that. Your homemade bread will also lack the preservatives and other additives that are in store-bought bread. However, you do need time to make homemade bread. I will also include in this category items such as croutons and bread crumbs. They are so easy to make and are a great use for bread that is going stale.

Salad Dressings – Vinaigrettes and other salad dressings are very simple to make and you can make flavors that are difficult to find in the store. Once again, it can also be less expensive depending on the cost of your ingredients. It can be as easy as just drizzling vinegar and oil on your salad or something a bit more involved. This is an item where I admit that I have both in my refrigerator.

Stock – this was second only to bread and salad dressings found on “make, don’t buy” lists. However, making your own stock takes time and ingredients. For example, you need some sort of meat bones for chicken/beef broth, shrimp shells or fish bones for seafood stock. If you have the discipline and space to save those items rather than throw them away, making stock is easy but does take time. You also need to portion it out and freeze it when you are done, which takes freezer space that some just don’t have. I try to make home-made stock when I can but I always have good quality store-bought stock in my pantry as it is a frequently used ingredient for me.

Dips such as hummus, guacamole, salsa and pico de gallo – these are items that you probably don’t have in your kitchen all the time. Rather, you want them for certain occasions or dishes. Because of that, you may or may not have the ingredients on hand when you want them. If you do, you can easily throw them together rather than running out and buying a pre-made version. The cost may be a toss-up.

Pesto – as I mentioned, I never buy this. I tend to make different versions when I have the time and ingredients. I freeze it in ice cube trays and transfer to freezer bags or containers. That way, I always have pesto available and I love having versions made with different herbs and/or cheese.

Nut butters – this is not an item that we consume or use much at all. So, I rarely have them in my pantry in either store-bought or home-made versions. If these are a staple for you, you might want to consider making them especially for those that are very expensive in the stores such as almond butter & cashew butter. You can control what goes into them and also personalize the flavors.

Pancake mixes – making pancakes and waffles is so easy with ingredients that you will almost surely have at home that there is really very little reason to buy pre-made mixes.

Tomato products – I never buy pasta, pizza or other tomato products. It is so simple to throw together a marinara or heartier sauce that will be less expensive and so easy to personalize to your tastes.

Granola – if you have never made your own, give it a try. Just make the amount you want with the ingredients you want. It will save you money and taste great.

Spice mixes – except for very commonly used mixes (Italian seasoning) or those that take a myriad of spices that I don’t have on hand (curry powder, chili blends), I never buy spice mixes. If you have the individual spices on hand, you can use those to make just the amount you want and not have left-over mix that might lose its flavor before you use it again. A perfect example is Pumpkin Pie spice.

There are many other items that are on some lists but the above are the most commonly mentioned. Do you agree with them? What do you never buy? Your list will probably be different than my list or other’s lists. It will depend on your priorities, your time and your desire.