Cooking Tips · Ingredients

Fungi — Great Umami Flavor!

I taught a Thanksgiving cooking class but did a Vegetarian take on it. If you look at many vegetarian dishes, you will see that mushrooms often play a large part in those dishes. I realized that I had never written about mushrooms, probably because they are not one of my favorite foods. I decided it was time to delve into this ingredient and that is the subject of this Cooking Tip.

Mushrooms are a type of Fungus (Perhaps that is why they are not my favorite!). As everyone knows, some are edible while others are toxic. If you are going to forage for wild mushrooms, you need to be thoroughly educated about mushroom types.

They have a rich, almost meaty flavor, making them a great ingredient for more substantial vegetarian dishes. This flavor-boosting ability is due to a high content of free amino acids such as glutamic acid. For a more in-depth explanation of how this can boost umami flavor, see this Cooking Tip. I will first discuss storing, cleaning and cooking. That will be followed by a discussion of the most common types of mushrooms.

After harvest, mushrooms remain metabolically active. This can be slowed by storing them in a refrigerator. They should be loosely wrapped in moisture-absorbing packaging to avoid the accumulation of moisture on the surface, which can lead to spoilage. The recommended methods are to leave them in their original packaging or place them in an open paper bag. Do not store them in a plastic bag.

Mushrooms last 4-7 days in the refrigerator. Some say you can freeze them but they will be mushy when thawed. They freeze better when sautéed first as the cooking process will draw out moisture and concentrate the flavor. After cooling, put them in a freezer-safe container and freeze for up to 9 months. To use, there is no need to thaw but because of the textural changes, they are best used in dishes that are cooked.

As mushrooms grow in dirt, you need to pay special attention to cleaning them. One of those “old kitchen tales” is that you should never wash mushrooms as it will cause them to become soggy and less flavorful. In 2009, on the blog Cooking Issues by the International Culinary Center, they claimed to debunk this myth. They cooked two batches of mushrooms side-by-side. One was washed in water and the other was just brushed off. They note that although the mushrooms do take on water, it all cooks off in the hot pan. More importantly, in a taste test of these mushrooms, the tasters could not tell the difference.

They did notice an interesting event. The brushed-off mushrooms tended to absorb a lot of oil and thus, became greasy. The washed mushrooms did stew a bit until the water was cooked off. However, during this time, they were not absorbing oil. By the time the water was all evaporated, the mushrooms weren’t as porous and so, did not absorb the oil very well. The brushed-off ones started absorbing oil from the moment they were in the pan. In this testing, they cooked the wet mushrooms in a very crowded pan whereas they dry mushrooms were given plenty of room. Even with this, tasters preferred the less greasy mushrooms.

Whichever method of cleaning you use, as with much produce, do not clean them until right before you are going to cook them.

Mushrooms can be used whole, halved, quartered or sliced. Some mushrooms such as shitakes must have their stems removed. The stems of portabellas are also very large and woody. They are normally removed before eating although they can be used to flavor stocks, soups or sauces. For most other varieties, the choice is yours.

As for cooking methods, they can be sautéed, grilled, roasted or even microwaved. The cooking method that develops the most flavor is when they are cooked slowly with dry heat. And, of course, they can certainly be consumed raw.

Types of mushrooms

White button – These are undoubtably the most common mushroom you will see in the markets. They make up about 40% of the mushrooms grown around the world. They are the mildest tasting and can be eaten either raw or cooked. Examples of dishes include soups, salads and pizzas.

Cremini – This is a firm, dark brown variation of the standard white button mushroom. They have a fuller flavor than the white but they can be used interchangeably. Another common name you will see is baby bella as they are a young portabella.

Portabella – These are fully-matured cremini mushrooms. They have very large (4-6 inches) flat caps with fully exposed gills. Because of their dense texture and meaty flavor, they are often used in vegetarian cooking as a meat substitute. Other great uses are grilling and stuffed mushrooms. They are very common in Italian cooking as they give depth to creamy sauces and pastas. As mentioned above, the stems are very woody and are usually removed. The dark gills are typically scraped out and thrown away. Although edible, they do no favors for the appearance of your dish. Another spelling is portabello.

Porcini – These mushrooms have round, golden- to reddish-brown caps with bulbous white stems. The flesh is tender and cream-colored while the flavor is described as earthy, meaty and even nutty. They are available fresh or dried although in the US, it can be difficult to find fresh ones. The dried porcinis need to be soaked in water before using. They can be added to braised meat dishes, ground up and sprinkled onto meat or cooked into a risotto.

Chanterelles – Described as trumpet-shaped with yellowish stems and frilly brown caps. The flesh is delicate and golden with an almost fruity aroma. Their shape leads to accumulation of dirt, requiring a thorough cleaning before consuming. Their woodsy flavor means they work well in souffles, cream sauces, soups, pasta or just sautéed in butter.

Morels – Morels have a distinctive spongy and conical shaped cap, ranging in color from tan to dark brown to gray. The flesh is delicate and spongy and their flavor is earthy, nutty and somewhat spicy. They are another type that traps dirt and so must be cleaned well. They are often just sautéed in butter and served with meat or poultry or added to soups or pasta.

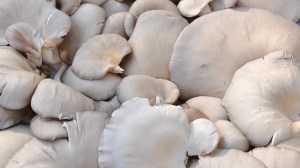
Oyster – These are fan-shaped with cream to gray colored caps (although there are yellow, pink and blue varieties) and short white stem and gills. Delicate in aroma and flavor, they are very common in Chinese cooking for stir-fries and soups. If you use these, be aware that they will take a longer cooking time.

Shitake – These are recognizable by their dark brown umbrella-shaped caps with cream colored gills and stems. The flavor is earthy, woodsy and slightly meaty. As previously mentioned, the stems are tough and should be removed. They come in fresh and dried form with the latter being more intense in flavor. Very common in Asian cuisines, they release an earthy, umami flavor when cooked. They can be sautéed, stir-fried, roasted, sprinkled on pizza or added to soups.

There are, of course, many other varieties. The problem will be in finding them in our supermarkets. You will probably always be able to find button, cremini and portabellas. You can occasionally find some of the other varieties although it might be easier to do so in specialty markets.

Whether you are a forager or just shop for mushrooms in the market, they are an ingredient that can add great umami flavor to your dishes or help you make a substantial and “meaty” vegetarian dish. Have fun with them!

Cooking Tips · Ingredients

Puff Pastry — yummy layers of dough and butter!

After writing about Pastry Doughs in general, I wanted to get a bit more detailed about a few types. I already wrote about Phyllo Dough and in this Cooking Tip, I will expand on Puff Pastry.

The French call Puff Pastry by the name Pâte Feuilletée roughly translated to “pastry leaves”. It is a type of laminated dough, which means layers that are bonded together. In the pastry world, it is layers of dough and butter.

You can certainly buy puff pastry in the market. The most commonly-found and very highly rated is from Pepperidge Farm. They sell it not only in sheets but also in what they call cups and shells.

Making your own is not difficult in a technical manner but does take some time. You start by making something called a detrempe, which is the dough component. It is composed of flour, a small amount of butter, water and salt. The second component is the butter layer – the beurrage.

The detrempe is rolled into a large square and the butter layer is pounded into a slightly smaller square. There are different ways of incorporating the beurrage into the detrempe but most commonly, the beurrage is placed on top of the detrempe in a diamond pattern. Then, each corner of the detrempe is folded up to the center so that the butter layer is totally enclosed within the dough. This results in what is termed a paton. This paton is then rolled out to a rectangle and a process of rolling and folding commences. This process also involves chilling/resting the dough in between a number of these steps.

After the paton is rolled out, there are different types of folds you can do. One is called a “Book Fold” or “Double Fold”. This is where you fold both ends of the rectangular package into the center and then you fold one side over the other. This is termed “locking” the beurrage into the detrempe. This cycle of rolling out the dough and folding it again, turning the orientation by 90 degrees each time is repeated for at least 4 times.

Another type of fold is called a “Letter Fold”, which means just what it sounds like. You fold the dough like a letter. This has less layers than the book fold and so, it is recommended to repeat the rolling/folding 6 times.

How many layers do you end up obtaining? Many sources will quote all sorts of numbers from 500 to over 4000! Any mathematicians out there?

You might ask why a person would ever want to make their own puff pastry rather than buying it. Pros for store-bought are the convenience and consistency. The arguments for homemade are taste and the satisfaction of producing your own. You might also consider the ingredient list.

  • Pepperidge Farm ingredients – enriched wheat flour (flour, niacin, reduced iron, thiamine mononitrate, riboflavin, folic acid), water, vegetable oils (palm, soybean, hydrogenated cottonseed), contains 2% or less of: high fructose corn syrup, salt, mono and diglycerides, soy lecithin, malted barley flour, turmeric and annatto extracts for color.
  • Homemade puff pastry – flour, butter, water, salt.

That being said, there are ones you can purchase with an ingredient list much closer to homemade but probably not in your local supermarket. Whole Foods Market does carry some although they are twice the price of Pepperidge Farm and, of course, there is always online.

Working with puff pastry

  • Use care when rolling out so you do not damage the structure. Do not roll over the edge as that will compress the edges.
  • Try to use even pressure as you roll so the butter is evenly distributed.
  • Try to let the pastry rest 5-10 minutes between rolling and cutting. After cutting, another rest period of 15 minutes helps to minimize shrinkage.
  • When you cut the rolled out dough, try to cut at a 90 degree angle so it will rise straight up in the oven.
  • Try to keep everything cold as you do not want the butter to melt before it goes into the oven.
  • Use a hot oven as you want maximal steam to puff it up.

Freezing puff pastry

This pastry freezes well either as a raw dough or when made up into the shape of your choice. It will be fine in the refrigerator for up to 5 days. Any longer than that could result in fermentation and the dough turning gray.

Uses for puff pastry– both sweet and savory

  • It is often used to wrap items such as with a Beef Wellington or a sausage roll.
  • A sweet or savory tart or pie.
  • Palmiers (elephant ears) are an item that can be either sweet or savory depending on the filling/topping.
  • Cheese straws
  • Mille-feuille – French for a “thousand leaves”, it is very similar to what is known as a Napoleon. Both are composed of layers of puff pastry alternating with a sweet filling (often pastry cream) although a savory version can be made with a cheese filling.
  • Vol-au-vent – a creation where the puff pastry is baked into a sort of shell with a pastry lid and a filling.

Have you ever made your own Puff Pastry? Would you ever want to give it a try?

Let me know and I would be happy to show you how.

Cooking Tips · Ingredients

The Ins & Outs of Phyllo Dough

In my last Cooking Tip, I wrote in general terms about pastry doughs. In this Tip, I want to delve deeper into just one of those types — Phyllo Dough.

The word Phyllo (also known as filo/fillo) is said to come from “the Greek ancestor of the French word feuille, meaning leaf.” This type of pastry dough may go back as far as the 1500s in Istanbul.

It is made by making a stiff flour/water dough with a bit of salt and maybe some acid or oil. It is kneaded, rested and then stretched out so it gets thin enough to be translucent. In recipes calling for phyllo, these paper-thin sheets are layered to give a structure that is similar to puff pastry but the dough itself is virtually fat-free.

We will normally find phyllo in our stores in the freezer section. Although not the only brand, the major one you will find in our supermarkets is Athens and they make not only the sheets but also little phyllo cups. Because of the minimal fat content, many prefer these to little tart shells made with pie dough or puff pastry. They will be crunchier and more delicate, though.

It will most likely be frozen when you buy it and, most sources, including Athens, say phyllo should be allowed to defrost slowly in the refrigerator overnight. Some experts warn that if it thaws too quickly, the dough can become sticky. Others claim it can be thawed for several hours at room temperature. If at all possible, I would opt for thawing in the refrigerator.

Athens also recommends allowing it to sit at room temperature for a couple of hours before using. 

When you are ready to use it in your recipe, you must take certain precautions. Because of how thin it is, phyllo will quickly dry out and become brittle. The typical recommendation is to cover the sheets you are not using with a damp cloth to keep them moist and pliable. Cooks Illustrated finds that people often make the towel too wet leading to a sticky dough. They, therefore, recommend either covering the sheets with plastic wrap or parchment followed by a damp towel.

As the phyllo sheets are layered in a recipe, they are brushed or sprayed with oil or melted butter to keep them supple.  It is easy to get tears in the phyllo dough as you use it. If this happens, just make sure the tears don’t line up as you stack the phyllo sheets.

Bo Friberg in The Professional Pastry Chef warns that if phyllo is re-frozen, the sheets can become brittle. Athens say that you can store unused sheets in the refrigerator for up to 1 week if wrapped tightly in plastic wrap. They also say it can be refrozen for up to 2 months but recommend wrapping tightly in plastic wrap followed by foil. From personal experience, I can say that it does become more brittle the more you refreeze it.

Strudel is a variant of phyllo dough but it is made differently in that it is a wetter dough and contains more fat, often an egg. These two terms (phyllo & strudel) are sometimes used interchangeably and many apple strudel recipes are made with phyllo dough.

So, what can you make with phyllo dough? Many of us think of dishes such as baklava and spanakopita. It is also used in making both sweet and savory strudels. You can experiment and try phyllo in place of other pastry in items such as tarts and pies although the results will be different.

Yes, you can make your own phyllo dough but it does take some technique and quite a bit of practice. Have you ever made your own?  Let me know.

Cooking Tips · Ingredients

Pumpkin Pie or Squash Pie?

Pumpkin season has definitely arrived and I suspect most of us use more of this ingredient during the fall & winter than the rest of the year. Even though it is a very recognizable ingredient, there are some things that most of us do not know about pumpkin. That is the subject of this Cooking Tip.

Pumpkin is a type of squash and according to Harold McGee in his On Food and Cooking, it belongs to the same scientific class as summer squash, acorn squash and spaghetti squash.

Although most of us probably use pumpkin in many different dishes, one of the major pumpkin-based foods that will grace our tables this fall is Pumpkin Pie. Most of us probably grab for the can of pumpkin puree but have you ever thought if there was a better way to make that famous pie?

The first thing you need to know is that inside that can of Libby’s Pumpkin Puree is not what we think of as a traditional pumpkin. It is reported that up to 90% of the pumpkin puree sold in the US is made from a variety of squash known as the Dickinson pumpkin, closely related to butternut squash. The major (although not only) brand is Libby’s and according to them,

All pumpkins, including the Dickinson pumpkin variety LIBBY’S Special Seed were bred from, are a variety of squash belonging to the Cucurbitaceae family or gourd family (which also includes melons and cucumbers). Libby’s proudly uses nothing but 100% pumpkin in our Libby’s solid pack pumpkin. We do not use Hubbard squash, or other types of squash.

Our Libby’s pumpkins don’t look like traditional carving pumpkins, but that’s a good thing because they are much tastier and have a more pleasant texture than your average Jack O’ Lantern!

If you wish to make a pie from a fresh “pumpkin”, you have many choices. Numerous sources have done taste tests using multiple different types of squash. It is very difficult to really come to any sort of conclusion from all these different tests. They did not necessarily use the same types of squash/pumpkin and not all of them compared fresh to canned. Some just compared different varieties of fresh. Despite that, let me share some of those results with you.

The Cooking Channel – They tested Acorn, Sugar, Cheese, Kabocha and Red Kuri squash and compared those with canned pumpkin. Although they felt all made good pies, their favorite was Red Kuri followed closely by Kabocha.

Cooks Illustrated compared canned to sugar pumpkin in both pumpkin pie and bread. Their tasters found the bread made with the fresh pumpkin was “more vegetal and less sweet” whereas in pie, they preferred the fresh as they felt it tasted more of the squash and less of the spices.

Kelly from FoodTasia compared canned to sugar pumpkins, butternut squash and Kabocha squash. When it came to the finished pies, she and her tasters preferred the ones made with the Kabocha and butternut squash, at least partially to what they deemed superior texture. The taste won out, too, and was termed “sweet, deep, rich and pumpkiny”. Between the sugar and canned pumpkins, the sugar’s texture was considered smoother but the tasters preferred the taste of the pie made from the canned pumpkin.

Lindsay from Love and Olive Oil compared Honeynut squash, Kabocha, Pink Banana and Fairytale. Her winners were Honeynut and Pink Banana. They were considered “flavorful with sweet notes of fresh pumpkin and a creamy overall texture.” She felt the Kabocha made a dry pie without much flavor. The Fairytale was watery with a vegetal taste.

Melissa Clark from the New York Times put the following against each other – Acorn, Blue Hubbard, Butternut, Carnival, Cheese, Delicata, Kabocha, Sugar and Spaghetti. Her favorite was the butternut squash. She thought the flavor of the pie made with acorn squash was comparable but she preferred the color of the butternut, making it her number one choice.

Serious Eats is a champion of the butternut squash for your holiday pie. They prefer it over canned pumpkin as they feel it has more pumpkin flavor, a smoother texture and a brighter color.

Joanne, from Fifteen Spatulas found something that many of the other sources noted. That is, even without the flavor difference, they preferred the pies from fresh pumpkin because of a superior texture that was “thicker and more velvety”. She compared canned to only one fresh variety – the sugar pie pumpkin. Besides the textural differences, she also preferred the flavor from the fresh pumpkin.

The test kitchen from Taste of Home prefers canned pumpkin. They felt it was easier, more available and the taste & texture was more consistent. When they did a taste comparison, it was canned vs sugar pie pumpkin. Their tasters felt that the spices were more prominent in the fresh variety but the pumpkin flavor was more pronounced with the canned pumpkin.

So, as you can see, there is not a lot of consensus. One consistency, though, is that you should never try to make a pie using the traditional pumpkin that you would carve and set on your porch. If you want to try fresh, your safest bet is probably butternut squash.

The “normal” pie pumpkin is the Sugar Pumpkin and it is smaller, darker orange, more flavorful and denser and drier than the jack-o-lantern pumpkin. However, not all tasters liked that compared to butternut squash.

As for the rest of the varieties spoken of in the testing, obtaining them may be a challenge. A look on my preferred market’s website shows they carry pie (sugar) pumpkins, butternut squash, acorn squash, fairytale, knucklehead and buttercup squash. That is actually more than I would have expected. Other neighborhood stores did carry Kabocha.

One nice advantage to canned pumpkin puree is its consistency. Each can is assured to taste the same and just like you expect it. Whenever you are using fresh produce, each item can taste different from the same type of item sitting next to it. All you have to do is eat two of the same variety of apple – they are bound to taste different. Second to the consistency is the unarguable convenience and availability of canned pumpkin.

Another item you will see on the shelves is Pumpkin Pie Filling. As opposed to pumpkin puree, it also contains spices and sweetener. It is basically a shortcut for making pumpkin pie. Either can be used in making pumpkin pie, although I prefer the plain puree and adding my own spices. However, pumpkin puree can be used in many different applications, sweet or savory. That is not true with Pumpkin Pie Filling, which is specifically for pies.

Will there be pumpkin pie on your holiday table this year? If so, will you opt for good ole Libby’s (or another brand) or will you make your own pumpkin puree?

Let me know and Happy Baking!

Cooking Tips · Ingredients

Honey — A Wonderful Sweetener

My husband recently harvested his 2020 Wildflower honey. It is very interesting to note the different flavors when compared to his 2019 honey as this year with its drought led to the bees feasting on different flowers/plants. (If you want to taste them or purchase any great local Colorado Wildflower honey, let me know.) I am getting ready to teach a class at Hudson Gardens on how to use honey in your cooking/baking and I thought you might enjoy reading this Cooking Tip that I first wrote last year.

Honey is a delightful sweetener and is lovely to have in your arsenal. Because honey attracts and holds water, it can add great moisture to your baked goods. It can also act as a binder and thickener for sauces, dressings, marinades and dips.

There are, however, some cautions about cooking with honey. You cannot make a 1-to-1 swap from your recipe’s current sweetener (such as granulated sugar) to honey.  With so many wonderful recipes that were created with honey as an ingredient, I encourage you just to find this type of recipe. Someone has already done all the experimentation to come up with the right mix and amount of ingredients.

If you would like to convert a recipe from its current sugar to honey, here are some guidelines.

  • Begin by substituting only half of the amount of sugar in the recipe with honey. You might be able to up this as you continue experimenting but if you do it all at once, your recipe is likely to fail.
  • Because honey is a liquid sweetener, reduce the liquid in your recipe by ¼ cup for each cup of honey used.
  • In cookie recipes where the only liquid is eggs, increase the flour by 2 tablespoons per cup of honey.
  • Honey is an acidic ingredient. Therefore, add about ½ teaspoon baking soda for each cup of honey used.
  • Reduce your oven temperature by 25-75° to prevent over-browning as honey browns faster than sugar.
  • Choose your honey carefully. Very strongly flavored honeys should be used judiciously and are best in items such as spice cakes, spicy marinades and glazes (jerk spice, spare ribs, BBQ sauce). For a lighter dish, choose a lighter honey.

One wonderful characteristic of honey is that it is its own preservative. Therefore, it keeps for years although the flavor is best within a year of harvesting.

Store it at room temperature in your pantry. If you put honey in the refrigerator, it accelerates crystallization. Speaking of that somewhat irritating aspect of honey, what do you do with your honey when it has crystallized? Do not throw it away; it is not an indicator of spoilage, impurity, age or quality. Rather, it is a natural process that occurs when the glucose molecules align into orderly arrangements known as crystals.

You can reverse crystallization by any of the following methods.

  • Bring a pan of water to a boil, turn off the heat, place the honey container in the water with cap open & leave until both have cooled and the crystals have dissolved.
  • Microwave it in 10-second increments until the crystals dissolve.
  • For a more permanent solution, you can add corn syrup (assuming you have no objections to this ingredient). Because crystallization can only occur if all the sugar molecules are of the same structure, by adding something different (such as corn syrup), it will not crystallize. You do not need much – stir in 2 teaspoons of corn syrup per cup of honey.

Honey is such a wonderful ingredient and I would suspect we all have some in the pantry. It is great to spread on your bread or drizzle in your oatmeal. It is also an ingredient that has so much more to offer. Go someplace where you can taste all the different varieties, choose what you enjoy and have fun!

Cooking Tips · Ingredients

Tomato Passata – what is it and do you need it?

As the summer winds down and, with it, the fresh tomato season, you might wonder if there is a way to get that fresh tomato taste throughout the year. I wrote an earlier Cooking Tip on different canned tomato products but now I want to concentrate on Passata. It Italian, it is known as “passata di pomodoro”, meaning tomatoes passed through a sieve.

Passata is basically a thick but pourable uncooked tomato sauce. It is made from crushed and strained tomatoes to remove skin/seeds. Although some will say it is the same as tomato purée, it is not exactly the same product. Purée is the cooked version of tomato passata. Although the latter can be used in many dishes as a substitute for passata, it will not give you the freshness and brightness of a real passata. There are some brands that use both names on the jar.

What do you use it for? It is a great base for a pizza & pasta sauces, Indian dishes, soups, stews, chili, etc. It makes a thicker, more intensely flavored sauce than using the same amount of crushed or diced canned tomatoes.

Tomato passata may or may not be available in your local supermarket. It is certainly available online. If you find the product in the store, look at the ingredient list as it should only contain tomatoes and salt. It should be sold in bottles or small boxes, not cans.

There is no real substitute for passata but if your recipe calls for it and you have none, you can try a substitute. If the recipe only calls for a tablespoon or two, just try tomato paste. If you need more, put your canned tomatoes in a blender and then through a strainer.

You can also make it yourself at home and would be a great use for excess tomatoes from your garden. The best tomatoes to use are those that are ripe and flavorful, especially San Marzano and Roma. They should have a high flesh content compared to seeds.

There are a couple of different methods that people recommend. One has you boil the tomatoes briefly until they are soft and tender. After straining, they are put through a food mill. You can push them through a coarse strainer but it will be a lot more work depending on how many tomatoes you have.

An alternative method is to put chopped fresh tomatoes into a blender and process until there are no visible chunks. Pour through a strainer and push on the contents so only the skins remain. Discard skins.

No matter which method you use, do not add seasoning until you want to use it as it might limit the versatility. If you want it thicker, some recommend reducing it on the heat. However, this does reduce the fresh flavor and the same can be achieved when you actually use it.

For storage, you may either can it (using a proper canning method) or freeze. To freeze, pour into ice cube trays, freeze and then store in a freezer bag/container. Good for up to 3 months frozen. Canned passata may last up to a year in your pantry.

Do any of you have passata in your pantry? What do you use it for? Enjoy the fresh tomatoes while you can and if you have enough, try making passata for those cold, winter months!

Cooking Tips · Ingredients

All about Cherries

Are you a fan of fresh cherries? I am not although my husband loves them. I do, though, very much enjoy using them in cooking/baking. Just as with so many fruits, knowing just a bit about the fruit and the different varieties can help you have success in the kitchen. That is the subject of this Cooking Tip.

There are two main types of cherries – sweet and tart. Sweet cherries are those you eat out of hand as they have a much sweeter flavor than the tart varieties. The tarter version is usually turned into juice as well as being used in baking recipes where the tartness can be offset with sugar. They are also called sour or pie cherries.

With baking, most recipes will call for tart cherries. You can use either sweet or tart but you need to pay attention to the sugar content if the recipe calls for tart. One caution, though, is that sweet cherries can turn a bit mealy when baked. They do well when lightly cooked such as you would do in a pan sauce. An example is one of my favorite pork tenderloin recipes. It calls for roasting fresh cherries with shallots, turning that into a sauce and serving with spiced rubbed pork tenderloin. Another recipe that uses dried cherries is one where the pork is seasoned, seared and finished in the oven. In the same pan, you make a pan sauce with onions, dried cherries, port wine and just a touch of orange marmalade and butter. It is absolutely delicious.

There are many cherry varieties within the Sweet and Tart categories. I just want to mention the most common. They are a summer fruit but for more detail on availability, see this chart.

Sweet Cherries

  • Bing – this is the most popular variety. Its skin is deep red-purple to almost black and its flesh is dark red or purple. They are firm, sweet and juicy with a sweet, intense flavor. They have a 17-19% fruit sugar content. They are most available in May and June.
  • Rainier – these cherries are hard to miss as their skin is yellow with a pinkish blush. The flesh is also yellow and they have a colorless juice. The flavor is delicate and sweet with a 17-23% sugar content. Depending on where they are grown, you will see them in the stores from May through early July.
  • Chelan – ripening of Chelan cherries is about 2 weeks ahead of Bing, making them the leading early ripening sweet cherry of the Pacific Northwest. They are similar in appearance to Bings although a bit more mahogany. They have a 16-18% sugar level.
  • Lapin – these cherries ripen about 2 weeks after Bings. They are larger and very firm with a deep red skin and lighter red flesh. The sugar content is 16-18%.
  • Skeena – similar to Lapin, these ripen about 2 weeks after Bings. They are very dark red to almost black with a dark red flesh and a very dense texture. Sugar content is 16-20%.
  • Sweetheart – the appearance is evident from its name, heart-shaped. They are large with bright red skin and a similar flesh. They are harvested about 3 weeks after Bings. Their flavor is more mildly sweet with a 16-19% sugar content.

Tart cherries

  • Montmorency – this is the most popular tart cherry with about 75% being grown in Michigan. They are bright red with a pale yellow and very juicy flesh. You often find them dried, frozen or canned unless you near where they are grown.
  • Morello – this is really a family of cherries. It is another tart cherry with very dark skin, flesh and juice. They are often grown in the UK and there they are the most popular cooking cherry. English Morello cherry trees are popular in the United States with varieties such as the Kansas Sweet and Northstar.

They are also the dominant kind grown in Hungary. A Hungarian variety known as the Balaton cherry is now commercially cultivated in Michigan. The tart cherry season is short, July into August.

Since tart cherries are hard to find fresh, your choices are to buy them jarred, frozen or canned. Cooks Illustrated did a testing of various types of cherries (both fresh and processed) in making cherry cobbler. They found only one variety that passed their tasters’ muster. That was jarred Morello cherries from Trader Joe’s. However, I do not see it on their website and even on Amazon, it is unavailable.

Maraschino cherries

According to Harold McGee in On Food & Cooking, these cherries originated centuries ago in NE Italy and the Balkans, where the local “mascara” cherry was preserved in its own liqueur for the winter. In today’s version the cherries are bleached and stored in brine and then infused with sugar syrup, dyed a cherry color, flavored with almond extract and pasteurized. Hmm, no wonder I do not like them.

The real maraschino cherry is still available and made by a company called Luxardo. They are said to be the “original” maraschino cherries and supposedly taste nothing like what you find on our store shelves. Have you tried them? I haven’t and at the price (on Amazon, a 14 oz jar sells for $19), I’m not sure I will. If you do, let me know.

How to choose cherries

Try to select cherries that are plump, shiny (a sign of ripeness) and firm with green stems. Look for those that are deeply colored. Avoid ones that are bruised or cracked. It is better to choose ones with the stem on as they deteriorate faster with the stem removed.

Storing cherries

Since cherries should be completely ripe when shipped, they are very perishable. Refrigerate them as soon as you get them home. Do not wash them until you are ready to use them. If possible, store them in layers between paper towels. Cherries like the cold. According to James Michael (vice president of Northwest Cherry Growers), “They lose more quality in an hour at room temperature than they do all day at refrigerator temperature.” They will keep well in the refrigerator for about a week.

Freezing cherries

Remove stems, wash and pat dry. You may pit if desired. Place on a baking sheet and freeze in a single layer. Then, transfer to a freezer safe container.

Cooking/Baking with Cherries

To use them in cooking/baking, you will need to pit them. You can use a sharp paring knife but a cherry pitter will make your life much easier. I use one made by Oxo and find it does a good job. Cooks Illustrated tested a number of different styles and found the Tovolo the winner. In an update on this review, this product had been discontinued. The runner-up was the Chef’n QuickPit Cherry Pitter.

One helpful tidbit is that one pound of fresh cherries will yield 2½ cups of pitted cherries.

Even though as I write this, we are past peak cherry season, I hope this information will help you as you look forward to next year’s harvest!

Cooking Tips · Ingredients

The World of Yeast

I was reading the ingredients on the package of one of my favorite potato chips the other day and near the bottom of the list was “Torula Yeast”. As this is a very uncommon ingredient, I suspected many of you may have never heard of it. That spurred me to write this Cooking Tip about all kinds of yeast. It may be too hot right now to turn on the oven to yeasted items but it will not be too long before fall baking is something we all desire to do.

Before I explain the different types of yeast, let me mention the relationship between rising time (fermentation) and flavor. In our hurry-up world, we all seem to want results faster and faster. Even in the world of yeasts, manufacturers have developed products that lead to a faster rise. This may help you get that bread item on the table faster but it is often at the expense of a more complex flavor. Allowing your dough to slowly ferment, even overnight in the refrigerator, leads to more flavor. This may not be something we can or want to do all the time. Just realize that with convenience often comes decreased flavor.

Let’s start with the three major types of yeast followed by some newer creations. (One type that we will not be discussing as it is outside the scope of this Tip is a sourdough starter.) Today’s world of yeast is a bit confusing and I think, at times, the names are just a marketing ploy and do not necessarily translate to real differences between the types of yeast. That being said, let’s try to make some sense of this topic.

Fresh –this is also known as “cake” or “compressed” yeast. It is 70% water by weight and is composed of 100% living cells. It is soft and easy to crumble. To proof, allow it to soften in the water (95°-100°F) called for in your recipe along with a bit of sugar, which is food for the yeast. It should be foamy in about 10 minutes. Alternatively, you can add a teaspoon of sugar to the yeast and mix it together. If it doesn’t become looser, you can add just enough water to get it to loosen up. When it is bubbling, add it to your recipe.

It does produce the most carbon dioxide of any kind of yeast and yields a very distinctive flavor. However, it is not easy to find in most stores. It has a very short shelf life and so, you need to be aware of its expiration date. You can freeze this yeast but its activity may be lessened when you do you use it. You may need to use more or just accept a longer rising time. Before using the frozen yeast, allow it to come to room temperature before proofing it. Because this type of yeast is very moist, you may want to decrease the water in your recipe just a bit if the recipe was not written for fresh yeast.

Active Dry (ADY) – this yeast is 95% dry matter and is in the form of little granules made up of live yeast cells surrounded by dehydrated cells and a growth medium. This yeast requires proofing, which is rehydrating the granules in lukewarm water to activate them. This removes the dead cells that surround the live yeast. If the yeast is properly activated, it will foam after a few minutes in the water. If it doesn’t, don’t use it as your dough will not rise.

An interesting tidbit comes to us from King Arthur Flour. They say that the “classic ADY manufacturing process dried live yeast cells quickly, at a high temperature. The result? Only about 30% of the cells survived. Dead cells “cocooned” around the live ones, making it necessary to “proof” the yeast—dissolve it in warm water—before using. These days, ADY is manufactured using a much gentler process, resulting in many more live cells. Thus, it’s no longer necessary to dissolve ADY in warm water before using — feel free to mix it with the dry ingredients, just as you do instant yeast.” If this makes you nervous, go ahead and proof it first.

Instant – this is also in granular form, although smaller in size. It is about 95% dry matter. It undergoes a gentler drying process than active dry. This results in all the dried particles being alive. Its shelf life is at least 6 months in your pantry and even longer when kept in the freezer. Instant yeast contains ascorbic acid, an ingredient not found in active dry yeast. It is a dough conditioner and is what makes the dough rise faster, improves the elasticity and increases the volume of the risen dough.

Its great advantage is that since the live yeast is not surrounded by dead cells, it does not require proofing in warm water. Just add it directly to the dough. It will activate quicker than other types as well as being a more consistent yeast. I know if you have been baking for a long time, it will be hard for you to skip this proofing step. I must admit that I see recipes that call for instant yeast and erroneously recommend proofing. It will not hurt anything to proof the yeast but it is an extra unneeded step.

RapidRise & Bread Machine yeasts are really just instant yeast. One of the manufacturers of these yeasts is Fleischmann’s (RapidRise is a name trademarked by them) and their website state that these yeasts are the same as each other and as instant yeast and can be used interchangeably. They explain these products in the following way – the yeast in these products is “grown with a higher level of nutrients and are dried to lower moisture content. The particle size of RapidRise and Bread Machine Yeast are finely granulated to allow complete hydration of the yeast cells during the mixing process … In addition, RapidRise and Bread Machine Yeast contain ascorbic acid resulting in increased loaf volumes.” This allows the baker to use the “rapid bake” cycle on bread machines. So, what is the difference between these two yeasts? Is there a difference, or as I mentioned, is it just marketing? To tell you the truth, I am not sure.

Because these yeasts are formulated to rise even faster than instant yeast, they are unsuitable for doughs that require a long rise, such as when you refrigerate the dough overnight. Neither are they good for doughs that undergo more than one rise. As I mentioned in the beginning, expect a blander and one-note flavor.

Pizza Yeast – this is a product made by Fleischmann’s. It is meant for people who want pizza dough in a big hurry and do not want to have to take the time to let the dough rise. It contains not only yeast but dough relaxers, which inhibit the formation of strong gluten strands. That allows the dough to be easily stretched and quickly rise in the oven.

The downside is flavor & texture. Cooks Illustrated found it to be “leathery, not crisp on the exterior and spongy and soft on the interior.” They also found the flavor to be very bland as one might expect with a dough that has very little fermentation time. A tester at Cookistry.com tended to agree with this assessment.

Osmotolerant Yeast – this is a special strain of yeast that requires less water to function. Therefore, it is helpful in sweet doughs such as Challah. The sugar content of these doughs traps so much water that it interferes with activation of the yeast. If you make a lot of sweet doughs, you may want to consider trying this type of yeast as it will work faster than other types. The brand that is most available to home bakers is SAF in a gold package. Another brand is Instaferm.

Platinum yeast – this is a yeast marketed by Red Star. According to them, it is blended with “dough improvers” to make your dough more “forgiving”. Red Star’s regular instant yeast has the following ingredient list: “yeast, sorbitan monostearate, ascorbic acid”. Their platinum yeast contains “yeast, soy flour, ascorbic acid, sorbitan monostearate, wheat flour, enzymes”. So, as opposed to their regular yeast, it is not gluten free and also contains soy.

They also produce a Platinum Instant Sourdough yeast. Besides yeast, it contains sourdough culture. The ingredient list is “Cultured Rye Flour [rye flour, starter culture (Lactobacillus)], Yeast, Soy Flour, Ascorbic Acid, Sorbitan Monostearate, Wheat Flour, Enzymes”. It claims to give real sourdough flavor to your regular bread recipe. I have not tried it. If you have, let me know what you think.

Does the brand of yeast matter? Probably not as much as the type of yeast. Different manufacturers, though, might use different strains of yeast, which could mean different results. King Arthur Flour states that they do not like to use Fleischmann’s RapidRise. Even though the rising starts quicker than other brands, it also gives out sooner. They prefer SAF or Red Star because they like a longer rise, which leads to better flavor.

As with so many ingredients, I always recommend trying to stick with whatever is called for in the recipe. If you do need to substitute, here is a conversion chart.

Fresh yeastActive dry yeastInstant yeast
1 oz0.5 ozs0.4 ozs
—-1¼ teaspoon1 teaspoon

Cautions with yeast

  1. Don’t use hot water as it can kill the yeast. It should be lukewarm, 80-100°F.
  2. Try not to add salt before the first proofing as it also can kill yeast. If your recipe calls for adding things all at once, do not put the salt right on top of the yeast. I generally mix all the other ingredients first and then add the salt and mix again.
  3. Don’t use expired yeast.
  4. If you are substituting instant for active dry, you can add it directly to the dough but you should also add the water that your recipe would have called for in the proofing step.

All the types of yeast we have discussed so far are known as “Baker’s” yeast as we use them in baking. There is another type of yeast called “Nutritional” yeast. It has been heated to deactivate its leavening power. It is consumed by vegans and vegetarians as it is a source of Vitamin B-12. It also adds a savory flavor due to its high level of glutamic acid. Some use it as an alternative to salt, especially for sprinkling on popcorn.

Torula yeast – this yeast is also inactive as far as leavening ability but is very savory and somewhat smoky and adds a great umami punch to dishes. It has become a popular replacement for MSG (for a Tip on MSG, click here) in products that tout “natural” food products, such as my aforementioned potato chips.

Brewer’s yeast – this is what is used in brewing beer.

Whew, who knew there was so much to know about yeast? To tell you the truth, this Tip has probably just scratched the surface. I hope, though, it has given you the information you need to bake those great yeasted breads!

Cooking Tips · Ingredients

Soft cheeses — a different animal

After discussing cooking with cheese in general and then an explanation of some of the more popular hard/semi-hard cheeses in my last two Cooking Tips, I want to now turn to the world of softer cheeses.

As a review, here is the cheese categorization that I am using.

Hard

Semi-hard (or semi-firm)

Semi-soft

Soft-ripened

Fresh

Blue

Semi-soft cheeses contain much more moisture than the harder cheeses and, as a result, are much softer in texture.

Examples

  • Fontina
  • Muenster
  • Havarti

Soft-ripened cheeses have a smooth interior and a thin rind.

Examples

  • Brie
  • Camembert

Fresh cheeses are unaged with a high moisture content and a soft texture. Their flavor ranges from mild to tangy.

Examples

  • Ricotta
  • Fresh mozzarella
  • Mascarpone
  • Fresh goat cheese (chèvre)

Blue cheeses contain blue veins created by the addition of mold during the cheese-making process.

Examples

  • Blue Vein
  • Danish Blue
  • Maytag Blue
  • Gorgonzola
  • Roquefort
  • Stilton

Fontina – There are different styles and some are considered semi-hard and others semi-soft. The classic is from Italy but now it is made elsewhere.

  • Color – pale yellow
  • Flavor – can vary from mild & nutty to strong & tangy depending on age
  • Texture – classic is semi-soft
  • Aging – about 90 days
  • Uses
    • Fondues
    • Italian dishes

Muenster – an American cheese made in the style of the French Munster, which is a softer and tangier cheese.

  • Color – pale yellow
  • Flavor – mild, savory, sharp
  • Texture – smooth, moist, supple
  • Aging – few weeks
  • Uses
    • Sandwiches
    • Mac/cheese
    • Pizza
    • Cheeseburgers
    • Snacking

Havarti – made with Danish cheese-making techniques. Is often sold as a flavored Havarti such as caraway, chipotle and dill.

  • Color – pale yellow
  • Flavor – buttery, creamy, can vary from mild to sharp depending on aging
  • Texture – semisoft
  • Aging – 3 months
  • Uses
    • Table cheese
    • Grilled dishes

Brie – the best known of French cheeses and is nicknamed “The Queen of Cheeses”.

  • Color – pale cream with slight grayish tinge under a rind of white mold
  • Flavor – fruity, nutty, tangy
  • Texture – soft, runny
  • Aged at least 4 weeks
  • Uses
    • A classic dessert cheese but must be served at room temperature.
    • Pairs well with meat
    • Spread on a baguette
    • Baked with honey and apples

Camembert – the original was created from raw milk in Normandy, France by a woman called Marie Harel.

  • Color – pale yellow
  • Flavor – similar to Brie but with a deeper, more intense flavor. A young Camembert has a milky & sweet taste. As it matures, it becomes runny with a white rind and has a richer, buttery flavor. Rind is meant to be eaten.
  • Texture – soft
  • Aging – 3-5 weeks
  • Uses
    • Baked and served with crackers, bread
    • Eat as is with fruit
    • Breaded and deep-fried

Ricotta – this is an Italian whey cheese from cow, sheep or goat milk. Basically, it is made from what is left over after making other cheeses.

  • Color – white
  • Flavor – smooth, creamy, mildly sweet and fresh taste
  • Texture – soft but firm
  • Aging – generally unaged but can be up to 90 days
  • Uses
    • Can be used in both sweet and savory applications
    • Lasagna
    • Pasta
    • Pies
    • Cheesecakes

Mozzarella – an Italian cheese traditionally made from buffalo’s milk but now often made from cow’s milk. You can buy either “block-style” which is low in moisture and melts well although rubbery in texture if you try to eat it raw or “fresh”, which is packed in water. This is the one you want to grab for if you are making a caprese salad.

  • Color – generally white
  • Flavor – very mild
  • Texture – often rolled into soft balls of different sizes
  • Aging – none
  • Uses
    • Caprese salad
    • Sandwiches
    • Pizza

Mascarpone – It is an Italian cheese from the Lombardy region, made by curdling milk cream with citric acid or acetic acid.

  • Color – white
  • Flavor — milky and slightly sweet
  • Texture – smooth & thick. Has a very high fat content ranging from 60% to 75%.
  • Aging – none
  • Uses
    • Tiramisu
    • Pasta dishes
    • Fresh desserts

Goat cheese – in its fresh form, it is called Chèvre. Can also find hard & semi-hard forms.

  • Color – white
  • Flavor – earthy, tangy, tart, which increases as it ages
  • Texture – soft but firm
  • Aging – varies but generally up to 4 months. Fresh (Chèvre) is unaged.
  • Uses
    • Salads
    • Roasted beets
    • Dessert cheese
    • Snacking

Blue cheese – there are many different types of blue cheese but they are all made by treating the cheese with a mold. Bacteria then proliferates, giving the cheese its distinctive pungent flavor and smell.

  • Color – yellow with blue veining
  • Flavor – yeasty, spicy, pungent
  • Texture – soft
  • Aging – 2-4 months
  • Uses
    • Softer blue cheeses can be used for spreading and melt well in cooking whereas higher-end, drier blues are better for snacking, sandwiches and cheese boards.
    • Salads
    • Roasted veggies
    • With grilled fruits
    • Topping for soups
    • Dips
    • Mixed with softened butter and placed on a grilled steak or burger

Feta – this cheese typically hails from Greece and there must be made from at least 70% sheep’s milk. In the US, it is commonly made from cow’s milk. It is salty, sharp and crumbles nicely.

  • Color – a white brined cheese
  • Flavor – salty, tangy, moist
  • Texture – from crumbly to moderately creamy
  • Aging – up to 2 months
  • Uses
    • Crumble over salads or veggies
    • Sandwiches
    • Tacos in place of Cotija
    • As is with olives, peppers, olive oil, bread

What cheese is in your refrigerator right now? What is your favorite? Do you love the pungent ones like my husband does or you more of a mild cheese person? Let me know.

Cooking Tips · Ingredients

The World of Hard Cheeses

This is the second of a three-part series of Cooking Tips about cooking with cheese. In this one, I want to look at how cheese is categorized and then we will discuss some of the more popular hard or semi-hard cheeses. In Part III, I will concentrate on softer cheeses.

The categorization of cheese can vary somewhat. For simplicity sake, I will use the following listing.

Hard

Semi-hard (or semi-firm)

Semi-soft

Soft-ripened

Fresh

Blue

Hard cheeses have been aged to remove moisture, which also allows the salt in the cheese to crystallize, resulting in a sharp flavor and a slightly granular texture.

Examples

  • Mature Cheddar
  • Dry Jack
  • Dry Gouda
  • Asiago
  • Manchego
  • Parmigiano-Reggiano

Semi-Hard (semi-firm) cheeses have more moisture than hard cheeses and a slightly smoother texture. The aged ones have a bolder, more complex flavor.

Examples

  • Younger Cheddar
  • Swiss
  • Gouda
  • Gruyère

Cheddar – this must be one of the most popular cheeses in the US. I know it is one of my favorites. It was originally made in England by a process called “cheddaring”, in which curds are cut into slabs, stacked and pressed.

  • Color – Cheddars may be white or yellow, the latter created by dying it with annatto seeds.
  • Flavor – the flavors of Cheddars can vary from mild to sharp and are known for their tangy, nutty flavor.
  • Texture – it is dry and crumbly in texture
  • Aging – there is no minimum but best is at least one year
  • Uses
    • The mild cheddar has a higher moisture content and melts better than sharp cheddar. As cheddar ages, the texture becomes more firm and drier. It can tend to curdle when melted. To counteract this, one recommendation is to shred it and toss it with cornstarch or combine with a better melting cheese.
    • Sandwiches, burgers
    • Grated over casseroles
    • Cheese sauces for mac/cheese, savory pies, quiches

Monterey Jack – this is a cheese that was born in California and is at times called Cali Jack cheese. Pepper Jack is the same cheese spiced up. It is a superior melting cheese with a mild flavor.

  • Color – pale yellow
  • Flavor – mild and buttery with slight tang
  • Texture — smooth
  • Aging – about 1-2 months
  • Uses
    • Jack is a great melting cheese
    • Casseroles and mac/cheese
    • Sandwiches
    • Cheese dips
    • Sprinkled over chili

Parmesan – I wrote a prior Cooking Tip on this cheese will that will give you more detail and describe the differences between Parmesan-Reggiano and Parmesan.

  • Color – cream
  • Flavor – a strong, nutty taste that is more pronounced as it ages
  • Texture – a hard granular cheese
  • Aging – Parmesan-Reggiano should be aged at least 12 months and up to 36 months. Domestic parmesans have a varying length of aging.
  • Uses
    • Grated over pasta, casseroles, salads
    • Eaten as a snack
    • Cheese sauces
    • Add to panko and eggs to make a coating for chicken

Gruyère – Produced in France and Switzerland and made from cow’s milk.

  • Color – yellow
  • Flavor – sweet but slightly salty & nutty. Flavor does vary with age.
  • Texture – a hard cheese
  • Aging – the best is aged for about a year
  • Uses
    • Great for melting
    • French onion soup
    • Cheese sauce
    • Fondue
    • Table cheese
    • Grated in salads and pasta

Swiss cheese – now made elsewhere, the traditional is Emmentaler Swiss cheese. The holes are formed when bacteria release carbon dioxide as the cheese ages.

  • Color – pale yellow
  • Flavor –mild, sweet and nutty
  • Texture – medium hard
  • Aging – from 3 to over 6 months
  • Uses
    • Sandwiches
    • Savory pies, frittatas, souffles, omelets
    • Cheese sauces
    • Fondue

Emmentaler – an Alpine-style or Mountain cheese that originated from the milk of cows that were led up into the Alps to graze over multiple seasons. Native to Switzerland.

  • Color – pale yellow
  • Flavor – mild, slightly sweet, slightly nutty
  • Texture – semi-hard with large holes
  • Aging – at least 4 months and up to 14 months
  • Uses
    • A good melting cheese
    • Chicken cordon bleu
    • Traditional for fondue
    • Grilled cheese
    • Casseroles

Gouda – this is a cow’s milk cheese originating from the Netherlands and is one of the most popular cheeses worldwide. Today, the name is applied to any cheese produced in the traditional Dutch manner.

  • Color – yellow
  • Flavor – sweet & nutty
  • Texture – a semi-hard to hard cheese
  • Aging – at least 4 weeks but better if at least a year
  • Uses
    • Young gouda can be melted
    • Aged gouda is better grated over salads or casseroles

Provolone – an Italian cheese of two forms – Dolce and Piccante

  • Color – white to pale yellow
  • Flavor – varies with age. Dolce is milder and sweeter. Piccante is sharper. Some versions are smoked.
  • Texture – a semi-hard cheese
  • Aging – Dolce is 2-3 months. Piccante is more than 4 months.
  • Uses
    • Casseroles
    • Pizza
    • Sandwiches
    • Baked pasta dishes

Edam – A Dutch cheese

  • Color – traditionally sold in spheres with pale yellow interior and coat of red wax
  • Flavor – very mild but slightly salty and nutty. Flavor sharpens as it ages.
  • Texture – a semi-hard cheese
  • Aging – 3 – 12 months
  • Uses
    • Chicken dishes
    • Potato dishes
    • Souffles
    • Salads
    • Soups
    • Sauces

Manchego – A Spanish sheep’s milk cheese

  • Color – ivory to straw yellow
  • Flavor – younger ones have a buttery, rich flavor and aged ones are deeply salty with crystals
  • Texture – a firm, compact cheese
  • Aging – 60 days to 2 years
  • Uses
    • Eat as is, especially paired with quince paste

Asiago – an Italian cheese with two forms – fresh and mature

  • Color – ranges from off-white to yellowish depending on age
  • Flavor – nutty with the fresh form being milder in flavor
  • Texture – fresh is smoother and mature is somewhat crumbly
  • Uses
    • Grating on dishes
    • Melting
    • Slicing

American Cheese – Made from blending cheese with emulsifiers and stabilizers. It must be labeled as “process cheese product” because it is only partly cheese. Try to buy one where the first ingredient is “cultured pasteurized milk” to ensure the best quality.

  • Color – yellow
  • Favor – reminds you of your childhood
  • Texture — smooth
  • Creamy, smooth cheese made from blending natural cheeses.
  • Forms: individually wrapped slices or blocks
  • Uses
    • Good for melting
    • Grilled cheese

That is quite a few cheeses but it only scratches the surface on hard and semi-hard cheeses. I encourage to go to a cheese-monger or your supermarket specialty cheese department and have fun! Stay tuned for another Tip on softer cheeses.