Cooking Tips · Ingredients

Get your fall spices ready!

As I write this, Summer is sadly getting ready to exit the stage. Behind it, though, are the wonderful Fall and Holiday baking seasons. Although we use spices year-round, certain spices and spice blends are essential for this type of baking. To get you ready, I am writing this Cooking Tip. For a more general discussion on Spices, see this Spice Tip and for Spice Blends, take a look at this Tip.

As you get ready for holiday baking, you want to get the most flavor possible from your spices. To ensure that, make sure your spices are fresh. If they are ground spices and you have had them for more than six months, smell them. Do they have a strong aroma? If not, time to get fresh.

Image by westerper from Pixabay

For some of the spices, especially those you do not use regularly, it is best to buy whole rather than ground spices. They will last much longer and you only need to grind the amount you are going to use. For more information on this, see this prior Tip.

Another piece of advice is to make your spice blends rather than purchasing them pre-blended. Why buy a bottle of apple pie spice when you are only going to use it a couple of times and then it will sit in your pantry for another year? By that time, you will need to toss it and buy fresh. This is costly and wasteful. Instead, just make the amount you need from individual spices you most likely already have on hand. Another plus for this approach is that it helps you use up those individual spices before they go stale. There are some exceptions to this advice, which I outline in this Spice Blend Tip. Homemade spice blends are not only a wonderful addition to your pantry but they also make great DIY Holiday gifts.

Which spices do you associate with holiday baking? Different bakers will have their specific lists but these lists will share some commonalities. I will discuss those below. I have written entire Cooking Tips for some of these spices. For those, I have given you the links to read more.

Allspice

  • Can be purchased as whole berries or ground.
  • The flavor has notes of cloves, nutmeg, star anise, black pepper and cinnamon.

Cardamom (sometimes spelled as cardamon)

  • Can be bought in pods, shelled or ground.
  • It has a warm flavor that is herby, sweet citrusy.

Cinnamon

  • This spice is the one that most of us would probably list first as an essential holiday spice.
  • Can be purchased in sticks, chips or ground.
  • The flavor is a balance of sweet and spicy.
  • There are different varieties.
    • The most common cinnamon in our pantries is Cassia (Korintje or Indonesian). It is pungent and woodsy.
    • Ceylon has a gentle, floral flavor.
    • Saigon (Vietnamese) cinnamon is bolder and is a great balance of sweetness and heat. This is my favorite.

Cloves

  • Can be purchased whole or ground.
  • Cloves have a sharp flavor that can be overpowering if used in excess. It is often paired with cinnamon, nutmeg and allspice.
  • Its flavor is described as sweet, bitter and astringent.

Ginger

  • Can be purchased fresh, ground and in crystallized form.
  • This is one of the warm holiday spices and is what gives gingerbread its unique flavor.

Nutmeg

  • Can be purchased whole or ground.
  • It is another spice that is both warm and spicy.
  • Use with restraint so as not to be too overpowering.

Star Anise

  • These are sold as star-shaped pods that are also sometimes used as decoration.
  • This spice has a mild and fragrant licorice flavor

Here are some of the popular fall and holiday spice blends. These blends can vary from company to company as to which spices and in what ratios they are included. That is another advantage of making your own. You can make it to your tastes. I will give you the usual spices that are included in each blend.

Apple pie spice blend
Some recipes only use cloves, cinnamon and nutmeg. Others add allspice, cardamom and/or ginger.

Gingerbread spice
Ginger, cinnamon, nutmeg, cloves. Some recipes add allspice.

Chai baking spice
The most common spices in this blend are cinnamon, cardamom, ginger, cloves, nutmeg and black pepper. Occasionally, anise might be included.

Mulling spice blend
Cinnamon, nutmeg, allspice and cloves. Many recipes also include dried citrus peel. Others might use cardamom, star anise and even peppercorns.

Pumpkin pie spice
Cinnamon, ginger, cloves, nutmeg and allspice. An occasional recipe will include cardamom.

Speculaas spice mix
Speculaas cookies are a Dutch delicacy similar to gingerbread cookies although the spice mix is a bit different. This spice mix uses cinnamon, cloves, nutmeg, ginger, anise, cardamom, white pepper and sometimes mace and/or coriander.

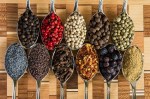
What does your spice pantry look like? More importantly, what does it smell like? It is a good time to investigate all your spices but pay careful attention to these spices that are going to be the mainstay of your fall and holiday baking. Make sure they are fresh, consider whole rather than ground and have fun making your own blends. Happy Fall!!

Cooking Tips · Ingredients

Apple Season is Upon Us

Image by Elias Astudillo from Pixabay

Do you enjoy a good apple pie, crumble or other dessert? Do you enjoy using apples in savory dishes? If you do, you are in luck as we are now entering Apple Season. In this Cooking Tip, I will discuss the different types of apples, which are best for different preparations along with some apple trivia.

Let’s start with that trivia.

  • The US is the second largest apple producer second to China.
  • Apples are the most consumed fruit in the US.
  • It is said that over 2500 varieties of apples are grown in the US but only about 100 are grown commercially.
  • One of the newer apple varieties (although not the only one) is Cosmic Crisp. See this Tip for more about that one.
  • The most-grown apple is the Red Delicious. It is not the best choice for cooking and baking, though, as it has poor flavor and a mealy texture.
  • The crabapple is the only apple native to the US.
  • One 9-inch apple pie requires about 2 pounds of apples.
  • The top 10 varieties in the US are Red Delicious, Gala, Granny Smith, Fuji, Golden Delicious, Honey Crisp, McIntosh, Rome, Cripps Pink (aka Pink Lady) and Empire.
  • US has ~5000 apple growers.
  • One of every three apples grown in the US is exported.
  • Only 5% of the apples consumed in the US are imported.

Even though we can buy apples year-round in our supermarkets, they are best when purchased in season. Depending on the variety, that could mean as early as July and on through November. Apples sold out of season have been held in commercial cold-storage facilities. Those facilities can keep them somewhat ripe but the apples can lose crispiness and become mealy.

Image by lumix2004 from Pixabay

If you go to a pick-your-own orchard, you can expect summer apples to be ready to be picked starting in early August. Autumn apples will start to be picked around the beginning of September. Apples picked too early are tart and small. Apples picked too late tend to suffer in terms of texture, flavor and shelf life.

Whether or not an apple will continue to ripen once picked depends on how mature it is. If an apple falls off a tree when it’s too young, it will not continue to ripen. Nor will very young apples ripen in storage. Apples that have reached sufficient maturity can continue to ripen even after picking. Note that maturity and ripeness are different characteristics. Maturity in apples only indicates that the fruit has developed to the point where it will finish ripening on its own, even if removed from the tree. So, a “mature” apple is not necessarily a “ripe” one.

Growers will pick apples meant for storage once they are “mature”, but before they are perfectly ripe. Apples for fresh eating are best left on the tree until ripe.

When picking an apple choose those that are firm with tight, unbroken skins. As many varieties have naturally dull surfaces, do not be afraid of those that do not have the very shiny finish that you often see in the supermarkets. Choose apples without bruises and that feel firm and heavy. The fragrance of an apple is a good indicator of freshness and quality.

Image by 1195798 from Pixabay

When I teach cooking classes that involve apples, I always get the question of which variety they should use. I wish I could tell you that there were only certain apples that were suited for certain purposes. That is not true although different “experts” will offer their recommendations. It depends on the flavor and texture you want. What I have done for you is to consult eight different sources and made a chart of which apples each of these separate sources recommend. I will give you a list of the apples that seemed to be favorites with at least four of these sites.

Before I do that, I want to mention one recommendation you read repeatedly. That is to use a combination of different apples in your pie. Some apples are considered “Sweet & Firm” while others are considered “Tart & Soft”. Therefore, they will react differently in the recipe. Many chefs feel you can get the best of both worlds by combining apples from these two different categories. Choose one to provide more texture and another to amp up the flavor. Not all agree, though. Serious Eats states when you do this, you “end up with a pie that’s got nice firm chunks of apple interspersed with brown apple mush.”

The firm/sweet apples are those that tend to hold their shape better. The soft/tart varieties will cook down to a mushier filling. Here is a list of some of those.

FIRM/SWEETSOFT/TART
AmbrosiaBelle de Boskoop
CortlandBramley
ElstarCox’s Orange Pippin
GalaGranny Smith
Golden DeliciousGravenstein
Golden RussetJonathan
JonagoldMacintosh
LibertyNewton Pippin
Pink LadyNorthern Spy
 Prima
 Spartan

Now, here are the apples that seem to please a majority of the sites I consulted if you are making apple pie. Fortunately, most of these are easily found in your supermarket or farmer’s market.

  • Braeburn
    • Flavor is a nice balance of sweet and tart.
    • They will remain firm when baked.
    • They work well in pies/tarts where you do not want an overly juicy texture.
  • Golden Delicious
    • Flavor is sweet, mellow and buttery.
    • A great all-around cooking apple as it maintains its shape when cooked.
  • Granny Smith
    • Flavor is tart and sour, but it is also one-dimensional.
    • Texture is crisp.
    • Best when paired with sweeter and spicier apples.
  • Honeycrisp
    • A very popular eating apple with a honey-sweet and somewhat tart flavor.
    • Texture is crisp and juicy.
    • Good for baking as well as applesauce.
  • Jonagold
    • A cross of Jonathan and Golden Delicious apples.
    • Flavor is tangy but sweet. Some describe it as slightly spicy.
    • They hold their shape when baked.
    • Good in salads and applesauce.
    • Because of their small size, thick skin and good shelf-life, they are a great choice for making caramel apples.

Now that you have picked and brought your apples home, how can you prolong their freshness? Apple experts recommend the following.

  • Refrigerate them – apples ripen 6-10 times faster on the counter than in the fridge. Some recommend putting them in a plastic bag before refrigerating. The best temperature is between 30-32°F with a humidity of 90-95%. The rate at which apples lose flavor and juiciness is proportional to the temperature at which they are stored.
  • Separate apples – wrap each apple in sheets of paper, which prevents one apple from going bad and then ripening the rest of them.
  • Some apples are better suited for longer storage than others. The best keepers are McIntosh, Fuji, Rome and Granny Smith. Apples harvested later in the season are better keepers.
  • Avoid apples with bruises, cuts, or soft spots.
  • Apples pick up tastes from other things in the refrigerator so do not put them in the same drawer as something with a strong smell.
  • Apples produce ethylene gas, which ripens other things faster. Do not store with other items you do not want to ripen. Keep away from veggies you do not want to wilt (lettuce) or lose their crispiness (celery).

We also all know that apples turn brown when cut. This is due to a chemical reaction that occurs because an enzyme is released when the apple is cut and subsequently reacts with oxygen. Preventing this is achieved by blocking the oxygen, reversing the chemical reaction, changing the pH of the environment or stopping the reaction by altering the temperature. Here are a few of the suggested actions.

  • Acidulated water– Toss the apples in a bit of water to which an acid has been added, typically lemon juice or cider vinegar.
  • Honey water – Add 2 tablespoons of honey to 1 cup of water and pour over apple slices. This can keep your apples white for more than 24 hours. Even a 30-second submersion can prevent browning for up to 8 hours.
  • Saltwater solution – Add ½ teaspoon kosher salt to 1 cup water. Add apples and soak for 10 minutes. Drain and store until ready for use. Rinse salt off with tap water just before serving.
  • Plain water – Submerge apples in plain water using a paper towel on top to keep them under the water and away from the oxygen in the air. Or, put the apples and water in a zipper-lock bag with the air pressed out. Do not soak for more than about 15 minutes to avoid altering the texture.
  • Plastic wrap – Wrap cut apples in plastic wrap to keep the oxygen away.
  • Carbonated drinks – Submerge apples in a carbonated beverage such as lemon-lime soda, ginger ale or seltzer for 3-5 minutes. Drain and rinse before use.

There is one final thought I want to leave you with. Have any of you thought, as I do, that fruit just doesn’t taste as good as it used to? I think this all the time. How often have you bitten into an apple just to find its flavor bland? According to Eat The Seasons, “The apples sold in supermarkets are varieties developed for good disease resistance or storage properties, often at the expense of flavor. As author Elspeth Huxley wrote: ‘You cannot sell a blemished apple in the supermarket, but you can sell a tasteless one provided it is shiny, smooth, even, uniform and bright.’ For more interesting and flavorsome varieties, look out for growers’ stalls in farmers’ markets or visit a pick-your-own orchard.”

When visiting a fruit stand in California, we were told the same thing about strawberries. He told us that what people want to buy are large, red strawberries. Although they may look pretty, they are often tasteless whereas the small, less-desired berries are more likely chock-full of flavor. If we would all be more discerning consumers, maybe this would eventually change. In the meantime, I feel fortunate that my husband loves to grow his own fruit and vegetables!

Image by Mareefe from Pixabay
Cooking Tips · Ingredients · Techniques

Fresh Fruit – How to Prevent Disappointment

Image by Sven Hilker from Pixabay

One of my favorite food groups is fruit. Not just any fruit, though. It needs to be flavorful, sweet and ripe fruit. It can certainly be a challenge to find that in our supermarkets in today’s world. If you have had the privilege of tasting ripe fruit just picked off the tree, you know what I mean. So much of the fruit in our supermarkets is tasteless and mediocre. You pay good money to purchase this fruit, take it home, and then you are met with disappointment. Although you cannot do anything about the selection of fruit in the markets, you can try to pick the best of the lot. That is the subject of this Cooking Tip.

It goes without saying that you are going to get the best fruit when it is in season. We are somewhat spoiled as we can get almost any fruit at any time of the year. Just because it is for sale, though, does not mean you should purchase it. It will certainly taste better and be a better value when it is in season. That will vary based on where you live. Here is a calendar of in-season produce for Colorado. If you live elsewhere, check with your local department of agriculture for a similar calendar for where you live.

It is also good to know which fruits continue to ripen after they are picked and which do not. Here is a chart from the University of Nebraska extension office. Some fruits, such as pears, are meant to be picked unripe and then ripen afterward. However, the best-tasting fruits will always be those that are ripe when picked. For example, even though a peach can continue to ripen on your counter, it will not taste nearly as good as if it ripened on the tree.

Here are some General Tips for picking ripe fruit. We will look at a few specific fruits below.

  • Weight – ripe fruit tends to feel heavy as compared to its size. If the fruit feels light, it is either unripe or perhaps over-ripe.
  • Pressure – pressing gently on the fruit should yield some give although there are exceptions as discussed below.
  • Aroma – ripe fruit should be fragrant but not overpowering.
  • Color – Light green color on fruit is usually an indicator that it is not ripe.

Avocados

  • The skin should be dark and firm without soft spots. Bright green is an indicator that it is not ripe and very dark green tending towards black means it is overripe. You want one that is a darker shade of green but not black.
  • Avocados ripen first at the stem end. Therefore, gently press on the larger rounded end to see if it gives, which is an indication of ripeness.
  • Pluck off the stem and look at the color. You want to see a nice green color, not yellow.

Berries

  • The color should be bright without bruising or mold.
  • They should be plump and firm.
  • They should have a sweet and fruity aroma.

Cantaloupes

  • The color does not change too much as it ripens although unripe ones may have a slight green tint to them.
  • The best way to tell ripeness is the aroma. If it smells slightly sweet, it is most likely ripe. However, if it is a strong sweet aroma, it could be over-ripe.
  • Pick one that is heavier than the others.

Figs

  • As figs ripen, they will turn darker in color. Depending on the variety, it might be brown or purple. Some figs, though, remain greenish as they ripen. So, you cannot rely on color alone.
  • Ripe figs are heavy for their size.
  • A ripe fig will be slightly soft to the touch.
  • The shelf life of figs is very short. Therefore, enjoy them while you can!

Lemons

  • Choose the heaviest you can.
  • They should be fairly firm but not hard.
  • If you gently scratch the skin, it should smell like lemon.

Limes

  • As a lime ripens, it turns from dark green to a lighter color and almost yellowish.
  • It should have a lime aroma when scratched.
  • It should give slightly when pressed.

Mangos

  • Mangoes come in a variety of colors making color an unreliable indicator of ripeness.
  • A ripe mango will give slightly when pressed.
  • It should also have a slightly fruity aroma at the stem end.

Peaches

  • A ripe peach should have no green around the stem. They should be yellow-orange with some red. White peaches should be off-white with a few areas of red blush.
  • Although peaches will continue to ripen some after picking, they do not ripen well and do not compare to those ripened on the tree. Peaches with a green tint may not fully ripen.
  • Choose peaches with fuzzy skins that are firm but yield to gentle pressure.
  • They should smell like peaches.

Pears

  • Pears do not change color much as they ripen although some varieties will go from green to yellow.
  • Ripe pears can feel as firm as unripe ones. However, if you press the stem and it is firmly adhered to the pear, do not buy it. You want one that has a little give.
  • Ripe pears will give off a mild pear aroma. If the aroma is very strong, it will most likely be over-ripe.

Pineapples

  • The leaves should look fresh and dark green. Avoid dry-looking leaves.
  • Avoid pineapples with soft or dark spots.
  • Pineapples change from green to yellow as they ripen.
  • It should be heavy for its size.
  • A ripe pineapple will have a sweet aroma at the stem end.

Watermelon

  • As this melon grows, part of it sits on the ground and develops a yellowish patch, which is a good indicator of ripeness. Unripe ones will have a white spot or no spot at all.
  • If the melon is not too large to hold in one hand, pick it up and knock on the side of it. A ripe watermelon will sound and feel somewhat hollow.

Even with all these tips, I am sure you will have experiences like I have had. You are yearning for a delightful peach or a sweet cantaloupe. As you feel and look at the fruit available, you do not find any that appear or smell like they might be ripe. I do not know what you do but I walk away. I would rather not waste my money on unripe fruit that tastes of nothing.

I have been known to buy canned or bottled fruit or, depending on what I want to do with the fruit, frozen. The fruit that goes into those items is generally much riper and tastier than what you often find in the produce section. You do, though, need to be careful about the sugar content, including added sugar, of canned and bottled items. If the item says “no sugar added”, it will still most likely be packed in fruit juice. Many also will add an artificial sweetener to the product. Read the nutritional facts label before purchasing.

So, yes, buying fruit in the supermarket or even at farmer’s markets can be a disappointing experience. But, when you find those ripe gems, it is a great day!

Cooking Tips · Ingredients

Olives – a Taste of the Mediterranean

Image by Vagelis Dimas from Pixabay

Are you partial to olives? I must admit that I am not. A nice olive tapenade served with warm bread is one thing but olives served by themselves or as the main flavor is just not to my taste. Many people do, though, enjoy olives. That is why this Cooking Tip is dedicated to that topic.

An olive is a stone fruit (the pit is the stone) similar to mangos, apricots, peaches and cherries. Olives can be served as “table” olives or made into olive oil. Almost 90% of the olives harvested are turned into olive oil. For a more in-depth look at olive oil, especially Extra Virgin Olive Oil, see this prior Tip.

Although any olive can be used for either purpose, producers do have ones they prefer for each end product. For table olives, harvesters like to use a larger olive that has a lower oil content. If destined for oil, the preference is for smaller fruit with a higher oil content

All olives start out green and turn darker as they ripen. Semi-ripe ones turn red to brown although the interior is still green. Fully ripe olives will be purple or dark brown through to the pit.

Some people will tell you that you cannot eat fresh olives as they are toxic. This is not accurate. The reason almost no one eats fresh olives is because of their extremely bitter flavor. This is due to a compound called oleuropein. It acts as a natural defense against predators. To make the olives palatable, they must undergo a curing process that dampens the bitterness by drawing out the oleuropein and converting the natural sugars to lactic acid.

Curing methods

  • Brine-curing – with this common method, fully ripened olives are gradually fermented in brine. The brine acts to intensify the fruit’s natural flavors. The process can take up to a year.
  • Water-curing – this method involves soaking, rinsing and repeating multiple times. Since it is a very slow process, it is not done very often. Some producers will start with a water brine and then move to a seasoned brine.
  • Dry-curing – this method involves packing the olives in salt for a month or longer followed by removing the salt. Salt pulls the moisture and bitterness out. Sometimes the olives get bathed in olive oil to keep them juicy and plump. They have a deeply concentrated flavor and a wrinkly appearance.
  • Lye-curing – touted as both time and cost-effective, this method immerses the olives in an alkaline lye solution. Opponents of this method feel it can be detrimental to the flavor with a chemical aftertaste and a bland olive.
  • Sun/air curing – this is a rarely done process that involves fermenting the olives on the branch or, once picked, in the sunshine.

As you may have seen at your supermarket, there are multiple types of olives. I will discuss a few of the more common ones.

Castelvetrano (aka Nocellara del Belice olives

  • Origin – this olive is grown primarily in a Sicilian town of the same name.
  • Color – naturally bright green. Look at the label to make sure there are no color additives.
  • Flavor – mild & buttery. They are said to be a good choice for those who do not like olives.
  • Texture – meaty
  • Process – harvested young and cured in lightly salted water.
  • Storage – as they will oxidize and brown quickly, keep them submerged in the brine until ready to use.
  • Uses – snacking or as part of a cheese board. They pair well with cheeses such as feta, goat cheese, Pecorino or Asiago. They work well as marinated olives as they hold their shape. They are also a great choice for tapenades.

Kalamata

  • Origin – Greece
  • Color – deep purple
  • Flavor – rich, earthy and complex
  • Texture – meaty
  • Process – brine-cured. In Greece, they are often found packed in olive oil, but in the US they are usually found in a vinegary brine.
  • Uses – one of the best choices for a tapenade or caponata. Experts recommend buying refrigerated ones as they will be fresher. Jarred ones can be mushy and bland.

Manzanilla

  • Origin – Spain and California
  • Color – green
  • Flavor – this type can be a bit bitter, sour and grassy.
  • Texture – meaty
  • Process – brine-cured
  • Uses – these are typically found stuffed with pimento and in a glass jar.

Mission

  • Origin – these are unique to the US. They were originally cultivated in California on Jesuit and Franciscan missions. Thus, their name.
  • Color – black
  • Flavor – most tasters describe them as watery, mushy and metallic.
  • Process – they are usually found canned.

Niçoise

  • Origin – from Nice, France
  • Color – ranges from purple-brown to brown-black, depending on ripeness.
  • Flavor – assertive with a lingering bitterness.
  • Uses – Niçoise salads

Gaeta

  • Origin – Italy
  • Color – purplish brown
  • Flavor – rich, intense, described as having a “coffee-like depth”. Also described as bitter, buttery, fruity and citrusy.
  • Process – these olives remain on the tree until they are ripe and develop a bold, earthy flavor. They can be either dry-cured with salt, which turns them black and wrinkled, or brine-cured and then dipped in olive oil.
  • Uses – because of their bold flavor, they are well suited to slow-cooked stews and braises.

Picholine

  • Origin – France, Morrocco and California
  • Color – green with a torpedo shape
  • Flavor – clean, briny, almost buttery
  • Process – harvested while still green to maintain their crisp, creamy texture and brine-cured.
  • Uses – eat as is or on an antipasto platter.

Alfonso

  • Origin – native to Chile
  • Color – purple color from the red wine or red wine vinegar in which it is cured. They are also large in size.
  • Flavor – sour, plum- or wine-like, tangy
  • Texture – soft but meaty
  • Process – brine-cured in red wine or red wine vinegar.
  • Uses – eating as a snack.

Gordal

  • Origin – Seville, Spain
  • Color – green and one of the largest such varieties. So, also known as “queen” or “colossal”.
  • Flavor – light, fruity, peppery
  • Texture – dense and firm
  • Uses – snacking, especially with mild cheeses.

Ligurian (aka Taggiasca)

  • Origin – from the NW coast of Italy
  • Color – both green and black
  • Flavor – fruity, sweet, smoky
  • Texture – tough skin but relatively soft flesh.
  • Uses – snack or pasta (e.g., puttanesca). Also yields high-quality oil. Is a good substitute for niçoise olives.

Cerignola

  • Origin – Puglia, Italy
  • Color – green, black or maroon
  • Flavor – slightly sweet, vegetal, fruity and very buttery
  • Texture – firm
  • Process – picked when barely ripe and brine-cured with a small amount of vinegar.
  • Uses – good for snacking.

Nyon

  • Origin – France
  • Color – black
  • Flavor – earthy, salty, intense coffee-like bitterness
  • Texture – meaty
  • Process – dry salt cured then soaked in olive oil or brine to rehydrate.

Oil-Cured

  • Origin – this is not a particular type of olive but it is an olive that is dry-brined and coated with olive oil to rehydrate. They are sold as “oil-cured” Moroccan or Provencal olives.
  • Taste – mild, floral
  • Process – dry-cured and then softened in oil for several months. The Provencal style is herb-coated and the Moroccan style is saltier.
  • Uses – the Provencal style is for eating out of hand and the Moroccan is used in cooking.

Olives may be sold pitted or unpitted. The pitted olives might be saltier and mushier. They might also lack the complex, fruity flavors of unpitted. The reason is that once pitted, the olives are returned to the brine for packing. The brine can then penetrate the interior of the olive, turning it mushy as well as increasing the absorption of salt. Therefore, if you have the choice, you may want to consider unpitted olives.

To pit them, you can use a hand-held olive pitter. This causes the least amount of damage to the olive. If you do not have one, place the olive on a work surface. Hold the flat of the knife over the olive and press firmly with your hand to loosen the meat from the pit. You can then remove the pit with your fingers.

You may have noticed that black olives tend to be sold in cans whereas the green ones are in bottles. According to a website called Olive Knowledge, there is a reason for this. The processing of these olives involves placing them in a diluted lye solution followed by rinsing. Lye helps the oxidation process to penetrate down to the pits. After the lye solution, they are placed in a brine to set the color. Following this, they are canned with some of the brine. The canning process is done with a high heat that glass would not tolerate. Also, the cans are airtight for safety. Finally, cans are cheaper than glass.

When buying olives, look for ones that are firm, not mushy and without bruises. Look for those dressed in brine to keep them moist and flavorful.

Store your olives in the refrigerator in the liquid they came in and covered loosely with plastic wrap for up to 10 days. If there is no brine, you can make your own by adding one teaspoon of salt to 1½ cups of water.

Most smaller supermarkets will probably only carry canned or jarred olives. However, larger stores may have a larger olive variety from which to choose. That makes it easier to find just what you like and want to use for your particular purpose. I hope you have that option!

Cooking Tips · Ingredients

Borage – flower or herb?

I am blessed with a wonderful husband who loves to garden. Me – not so much. However, I love what he grows and harvests from his garden. He built me a dedicated herb garden with some typical herbs such as basil, tarragon, thyme, parsley and mint. Although not in the herb garden, he also grows a beautiful herb – Borage. What is borage and how can we use it in the kitchen? That is the subject of this Cooking Tip.

Image by T. S. Tubai from Pixabay

Borage is a nice green plant with beautiful blue-purple flowers making it wonderful just for decorative purposes. Honeybees also love it, to which we can attest as when it is in bloom, there are honeybees all over it.

It is an edible plant said to have a cucumber taste. It also pairs well with dill, mint and garlic. Both the leaves and the flowers are edible. Just make sure it is grown without the use of pesticides. Here are some ideas for incorporating borage into your foods.

Raw

  • Mix new, young leaves into green salads.
  • Beware, though, that the leaves can be a bit tough and “fuzzy.” Because of these characteristics, some chefs prefer to use them as a seasoning and remove them from the dish before serving.
  • Can also be chopped finely and mixed into yogurt or cream cheese.

Pasta

  • Ravioli – cook the leaves in a pan with oil and garlic just as you would spinach. When cool, add to a mixture of ricotta, parmesan and eggs. Use this as a ravioli filling with your freshly made pasta dough or wonton wrappers.
  • Pasta sauce – blanch borage leaves in boiling water and puree with olive oil and lemon juice. Heat a small amount of broth, add borage puree and season. Serve with your favorite pasta.

Soup

  • Cook the leaves in butter or oil and add to a summer soup, especially green soups such as pea or spinach.

Cookies

  • Use them to add a decorative touch to simple sugar cookies.
  • Bake your cookies about half-way, apply the flowers with egg white and then finish baking.

Beverages

  • Steep borage leaves and flowers in a simple syrup for an hour and use in a cocktail or lemonade.
  • Add flowers and/or leaves to your ice cube tray filled with water and freeze. Add to chilled beverages.
  • Can be steeped in hot water for 10-15 minutes for a hot “tea.”

Candied flowers

  • The flowers are beautiful candied and can be used as a decorative touch on cupcakes or other desserts.

Garnish

  • Both the leaves and flowers can be used as a garnish in salads or even in desserts.

I admit that although we have borage growing in our garden, I have not brought it into my kitchen. Rather, I just enjoy looking at the beautiful blooms. What about you? Have you ever tried it?

Image by Annette Meyer from Pixabay
Cooking Tips · Ingredients

Veggies – are they better cooked or raw?

Image by congerdesign from Pixabay

We all know that we should eat more vegetables. They are full of important nutrients and fiber. They add color and texture to our meals. They are low in calories. We might assume that veggies are best to eat in their raw, fresh form. Is that true? That is the subject of this Cooking Tip.

It is not true to make a blanket statement that raw vegetables are better for you than cooked. It actually depends on the vegetable. Although both cooked and fresh vegetables have nutrients that are important to include in our diet, these nutrients can be changed by the cooking process, but not necessarily in a negative way.

Minerals

There are many minerals in raw vegetables. When they are cooked, the heat breaks down the vegetable fibers, thereby making the nutrients easier to digest and absorb.

Vitamins

There are two types of vitamins – fat-soluble (Vitamins A, D, E & K) and water-soluble (Vitamins B & C) The former are less likely to be destroyed by cooking. In contrast, the water-soluble vitamins are much more heat sensitive and can be destroyed by cooking.

Let’s look at a few of the more common vegetables.

Asparagus

This vegetable is packed with healthy antioxidants. Heating the asparagus causes these to be more easily absorbed. A study in the International Journal of Food Science & Technology found that cooking asparagus increased the concentration of six nutrients, including antioxidants.

Broccoli

Since broccoli is a good source of water-soluble vitamins, it is better to eat raw. Its vitamin content decreases when cooked, especially in water. Some people, though, suffer from gas/bloating when consuming raw broccoli. This can be reduced by cooking it, allowing them to eat it more frequently. The preferred method is steaming as that will best preserve both the vitamin C and an important enzyme called myrosinase. Myrosinase causes certain chemical reactions that increase some healthful compounds. Also, chopping the broccoli and letting it sit for a minimum of 40 minutes before cooking helps this enzyme to do its job.

Carrots

In the raw form, carrots are a great source of vitamin C. Another nutrient, beta-carotene, is absorbed much more in the cooked form. With this veggie, cooking in water boosted the amount of these carotenoids whereas pan frying decreased them.

Cauliflower

This is similar to broccoli in that the water soluble vitamins can be destroyed by cooking but some people will better tolerate eating cauliflower in the cooked form.

Green Beans

Green beans also fall into the category of vegetables that are healthier cooked.

Kale

Kale is full of B vitamins and Vitamin C and therefore, is better to consume in raw form. Since it is a cruciferous vegetable such as broccoli and cauliflower, some may prefer to cook it.

Mushrooms

Minerals present in mushrooms such as potassium, zinc, niacin and magnesium become more available to your body when cooked. According to the Department of Agriculture’s nutrient database, one cup of cooked mushrooms is said to have twice the amount of these nutrients as a cup of raw.

Spinach

Many of the nutrients such as calcium and iron are better absorbed from cooked spinach rather than raw. Blanching in simmering water followed by a quick dip in ice water is one recommended method of cooking spinach.

Sweet Potato

Being full of beta-carotene, it is better to cook this vegetable.

Summer Squash/Zucchini

These are better eaten in cooked form.

Tomatoes

As most people know, these are actually a fruit rather than a vegetable. However, most of us think of them more as a vegetable. Just as asparagus, tomatoes contain lycopene, which is increased with heat. Cooking does decrease the amount of Vitamin C but this is offset by the increase of lycopene.

Bell Peppers

Bell Peppers, especially the red variety, contain more Vitamin C than citrus fruit. They are also a great source of antioxidants, including carotenoids. Although you do lose some of the great Vitamin C when cooked, it does make the carotenoids more absorbable. Roasting them rather than cooking in water can help to preserve the Vitamin C.

As with so many things in life, balance is the key. Just try to get many different vegetables in different forms. What will make you eat more of a certain vegetable? For example, I love raw spinach in my salads and on my cold sandwiches. However, I am not a fan of cooked spinach unless it is part of something else such as a ravioli filling. Even though I know it might be better for me to eat more of it in the cooked form, I am not going to fret over it. Eating it in the raw form is certainly not unhealthy.

On the other hand, I am thrilled that tomatoes are better for me cooked as I do not like raw tomatoes. I really only like them cooked in some way.

This information may help you optimize some nutrients but much more important is just getting more veggies into your diet on a daily basis.

Cooking Tips · Ingredients

Fresh Produce & Food-borne Illnesses

All too often we hear about people getting ill (sometimes seriously) from one food or another. Sometimes it is from surprising sources such as the 2018 recall of Kellogg’s Honey Smack cereal over concern of Salmonella infections. Now, there may be good reasons for not eating this cereal, such as 16 grams of sugar per ¾ cup serving, but I suspect that most of us do not expect to get a food-borne illness from it. How to keep ourselves safe from these illnesses is the subject of this Cooking Tip.

Often, the foods that make people ill are those we should be trying to eat more because of their health benefits such as fresh fruit & veggies. So, what can you do to prevent these illnesses from hitting you or your family?

It is good to be aware of food recalls or concerns. Our news outlets are pretty good about informing us. Another thing you can do is to sign up for food recalls from the USDA. Here is a link to do that. Be aware, though, that you will get notifications almost every day. Not all of them have to do with possible pathogens. Some of them are due to undeclared allergens or other sources of concern. The large majority of the notifications will not affect you at all.

Just as important, though, is to make sure that the fruits/veggies that you buy are clean before consuming them. The USDA recommends washing your produce under cold running tap water to remove any dirt & reduce bacteria. If there is a firm surface, such as on apples or potatoes, the surface can be scrubbed with a brush. Do not use detergent or soap as these are not approved for use on foods. You could ingest residues from soap or detergent absorbed on the produce. Note that the recommendation is just for plain water. You don’t need any special type of produce spray. If you really want to do more than just plain water, make a mixture of 1 part distilled white vinegar to 3 parts water. This is really not necessary, though.

This same advice applies to fruits/veggies that you are going to peel. You do not want to transfer pathogens from the exterior to the interior of the item with your peeler. So, wash before you peel.

There is a bit of debate over washing pre-washed, bagged greens. Although some recommend washing these items, many others say you are more likely to introduce contamination from your kitchen by doing so. Also, any pathogens left on pre-washed greens are probably so tightly adhered that washing them again in your kitchen is not going to do anything. This is the opinion of the USDA.

It is usually best to wait to wash produce right before consuming it. This is especially true of fragile items such as berries. Following this, proper storage is also important.

Finally, should you be buying organic? As we have seen with some recent recalls, organic produce is not immune from contamination. You may have other reasons for wanting to buy/consume organic produce, but it has been shown that modern methods of cleaning conventional produce result in a product just as clean as organic. For more information on organic produce, see this Tip.

The risk of not eating fresh produce and therefore lacking very important and much needed nutrients is higher than the risk of food-borne illness. Using common sense and the above guidelines should help encourage you to eat fresh and not be scared off by stories of contamination.

Cooking Tips · Ingredients

GMO Foods – the contrarian opinion

In the last Cooking Tip, I discussed what GMO Foods are as well as the health and safety claims made about them. There are critics, though, and in this Cooking Tip, I will discuss those. I strongly encourage you to read both Tips so you can make your own decision about whether or not to eat these foods.

One of the main organizations concerned with GMO foods in our diets is the Non-GMO Project. They are a 501(c)(3) nonprofit organization that says it is “committed to building and preserving the non-GMO food supply for all.” Their mission is to offer a “rigorous product verification and trustworthy education that empowers people to care for themselves, the planet, and future generations.”

Their concern is that this biotechnology creates combinations of plant, animal, bacteria and virus genes that do not occur in nature or through traditional crossbreeding methods. They feel that we do not have enough “credible, independent and long term studies” to back up the claims of the FDA and others that GMO foods are safe and healthy.

They point to a statement by the Center for Food Safety entitled, Are GMOs safe? No consensus in the science, scientists say in peer-reviewed statement. They also encourage consumers to read the 2014 publication GMO Myths and Truths. There is also an updated and condensed version in book form.

They feel that the governmental Food Disclosure Standard discussed in my last Tip is lacking because of the exemptions to the labeling standard. Other concerns are the negative consequences on farmers and the environment. You can read more about these here.

In answer to the question of whether GMOs are safe, the Non-GMO Project states, “In the absence of credible, independent, long-term feeding studies, the safety of GMOs is unknown.”

The Project has what they term the “High Risk List,” a list of crops and inputs (defined as “any material or substance that is used in the production of a wholesale or retail consumer good that they feel have a high chance of being genetically modified.”) The following list are those considered high risk as well as being able to be tested for the presence of GMOs.

  • Alfalfa
  • Canola
  • Corn (except popcorn)
  • Cotton
  • Papaya
  • Soy
  • Sugar beet
  • Zucchini and yellow summer squash

They have other high-risk crops that they consider “non-testable” as they are not necessarily detectable by current tests.

  • Canola
  • Potato
  • Soy
  • Apple
  • Eggplant
  • Pineapple

Food derived from animals are also considered high-risk due to the prevalence of GMOs in animal feed. These include the following.

  • Meat
  • Dairy
  • Eggs
  • Wool
  • Hides
  • Honey
  • Seafood
  • Livestock and poultry feed
  • Bee forage and feed
  • Fish and other aquatic animal feed
  • Any other materials or substances originating from animals

The Project raises the question of what they say is a double standard when looking at studies that claim no health or safety concerns from eating GMO foods and those that raise questions. The former studies are usually industry-sponsored while the latter are considered independent. Researchers raising questions are considered to be “GMO deniers” and are met with a “kill the messenger” response.

They have their own non-GMO symbol, which is given to products that go through their verification process. They also have a section on their website where you can search for verified products.

Although the Non-GMO Project doesn’t outline any specific health risk concerns, these are the ones to which most critics point.

  • Toxicity – the concern is that genetically engineered foods are unstable, with a theoretical possibility of creating toxins.
  • Allergic reactions – it is felt that this process can transfer allergens from foods that people know they are allergic to other foods that they think are safe. This was actually found when a gene from a Brazil nut was engineered into soybeans, causing an allergic reaction in those with a nut allergy. This product was abandoned and no further reports of allergic reactions have been made. Also noted is the possibility of creating proteins with the possibility of new allergic responses.
  • Antibiotic resistance – critics warn that this bioengineering could create disease-causing bacteria that might be resistant to antibiotics. Some GMOs are engineered for antibiotic resistance and in theory, those genes could be transferred to humans who might develop the same resistance.
  • Immunosuppression – this condition was supposedly found in an animal study looking at the effects on rats of the consumption of genetically engineered potatoes.
  • Cancer – concern is about a genetically engineered growth hormone that is meant to increase milk production in dairy cows. This hormone had been banned by some regulatory bodies in Canada and Europe due to a possible link to some cancers.
  • Loss of nutrition – this is a hypothetical concern about a negative impact on nutrient levels in bioengineered foods.

As I said at the beginning, I encourage you to read both this Tip and the prior Tip that outlines the opinion that GMO foods are safe and healthy. Only by educating yourself will you be able to decide what is best for you and your family. I will admit that if you decide to go GMO-free, it may be more difficult than you think given the increasing use of this technology and its presence in our food supply.

Cooking Tips · Ingredients

GMO Foods – what the proponents have to say.

Do you have an opinion over the debate of GMO foods in our diets? Are those opinions based on research or media reports? In the next two Cooking Tips, I want to explore this subject so we can all make an informed decision. This Tip will explain what GMO means, why the process is done and the viewpoint that GMOs foods are safe and healthy to eat. In the next Tip, I will outline some of concerns about this trend.

GMO stands for “Genetically Modified Organism” and is defined by the FDA as “a plant, animal or microorganism that has had its genetic material (DNA) changed using technology that generally involves the specific modification of DNA, including the transfer of specific DNA from one organism to another.” This is also referred to as “genetic engineering.”

Another term you will see more and more is “bioengineered.” This is because in December, 2018, the “National Bioengineered Food Disclosure Standard” was published. This was pursuant to a 2016 law that “directed [the] USDA to establish this national mandatory standard for disclosing foods that are or may be bioengineered.”

The standard defines bioengineered foods as “those that contain detectable genetic material that has been modified through certain lab techniques and cannot be created through conventional breeding or found in nature.” Although implementation of this standard began in 2020, it wasn’t until January 1, 2022 that it became mandatory to have these items disclosed by food manufacturers, importers, and certain retailers. Exemptions include “food produced by very small food manufacturers, and food served in restaurants, food trucks, trains, airplanes, delicatessens and in similar establishments.” These “will not be required to bear bioengineered food labels, even if the product has bioengineered ingredients.”

The above standard requires this label to be on the bioengineered food.

If, instead the label says “Derived from Bioengineering,” the standard clarifies that these are not bioengineered foods. They state “such labeled foods do not contain detectable modified genetic material.

If a food product carries the “USDA Certified Organic” label, you can be sure there is nothing in in it that has been bioengineered as GMOs are prohibited in organic products.

The reasoning behind creating GMO crops is said to be to higher crop yields, less crop loss, longer storage life, better appearance and/or better nutrition.

GMO foods have been available to consumers since the 1990s. GMO crops grown in the US include the following although there are also non-GMO versions of these crops.

  • Alfalfa
  • Apples – Artic Golden Delicious, Artic Granny Smith and Artic Fuji
  • Canola – canola oil is sold as an oil but also is found in many packaged foods.
  • Corn – most of the corn grown in the US is GMO, about 92%.
  • Cotton – besides being an important component of the textile industry, it is also used to make cottonseed oil, which is used in some packaged foods and for frying in some restaurants. Approximately 96% is GMO.
  • Papaya
  • Pink Pineapple
  • Potatoes – only a few varieties are GMO.
  • Soybeans – most of the soy (~94%) grown in the US is GMO.
  • Summer Squash – one of the first GMO crops on the market but is not widely grown.
  • Sugar Beets – more than half of the granulated sugar on our shelves is made from GMO sugar beets.

The majority of the GMO crops are meant for animal food but they can also end up in foods such as cereals, chips and vegetable oils. Although most fresh fruit and veggies are non-GMO, you may run across some GMO varieties as seen in the above list. The USDA keeps a list of bioengineered foods which can be accessed here.

According to the FDA, GMO foods are just as safe and healthy as non-GMO foods. They also say that they can be even healthier. An example they give is GMO soybeans used to make oil that replaces oils that contain trans-fats.

More than 95% of animals used for meat and dairy in the US eat GMO crops. The FDA states that the nutritional value, safety and quality of these products are equal to those from animals that only eat non-GMO foods. They explain that the engineered DNA that is in the food does not transfer into the DNA of the animal eating it.

They also claim that in some cases, GMO plants contain “plant-incorporated protectants” that make them more disease resistant and thus, reduce the need for many pesticides.

The FDA points to a 2016 Consensus Study Report entitled Genetically Engineered Crops: Experiences and Prospects and published by the National Academies of Science, Engineering and Medicine to back up the following claims.

  • GMOs are safe to eat.
  • GMO foods are no more likely to cause allergic reactions than non-GMO foods.
  • GMO foods are not related to celiac disease.
  • There is no link between GMO foods and cancer.

Despite assurances by the FDA and industry experts, a 2016 publication by Ohio State University found that “There is a significant gap in the opinions of scientists compared to the general public about the safety of consuming GM foods: 37% of consumers feel that GM foods are safe, while 88% of scientists say that GM foods are safe.” Why is this? I think it is partially that consumers do not really understand genetically modified foods. It could also be a general mistrust in new technology as well as not trusting the studies. Stay tuned for the next Tip for more explanation of why this might be and what contrarian opinions say.

Cooking Tips · Ingredients

Honey & its many flavors

Image by Leopictures from Pixabay

I never knew different honeys could taste so unique until about 10 years ago. Prior to that, I had only tasted a generic supermarket honey. At a roadside stand, I had an opportunity to taste over 20 different honeys and each had a very different flavor. When my husband began beekeeping, it was so interesting to taste the honey from year to year and how they differed. Why was this? Today you will also see unusual honeys such as “hot honey”. What is that? Those are the topics that I will discuss in this Cooking Tip. I have written a prior Tip on how to cook with honey and so will not discuss that in this Tip.

Most store-bought honeys are purposely blended to taste the same so the customer knows what to expect each and every time they buy it. Although sweet, it will not have the flavor nuances of natural honey. The latter can be so complex and varied that honey tasters use a Honey Tasting Wheel to help define the flavors. Here is an example of one.

Image by Jürgen from Pixabay

There are really two ways that honey is flavored – natural and infused. In its natural state, honey’s flavor is totally dependent on the flowers on which the bees feast. Bees will forage up to 2-3 miles from their hive. What is in flower in that area is what will influence the flavor and color of the honey. My husband purposely plants abundant wildflowers that are native to Colorado. In season, you can see and hear the bees as they visit these flowers, eat the nectar and gather the pollen. He, therefore, labels his honey as “wildflower” honey. Even though the bees traveled outside of our property and will have visited other flowers, if it is labeled wildflower, the beekeeper believes that the honey was substantially produced from wildflowers.

Common varietals of natural honey include:

  • Acacia
  • Alfalfa
  • Clover
  • Orange Blossom
  • Wildflower

Other varietals include many more than the following but here are a few,

  • Avocado
  • Blueberry
  • Buckwheat
  • Chestnut
  • Eucalyptus
  • Fireweed
  • Sage
  • Tupelo

Infused honey is a product where additional flavors have been added to the honey by allowing the particular ingredient to sit in the honey, a process called infusion.

Here is a list of just some of the ingredients used for infusing flavor into honey.

  • Chili peppers
  • Citrus
  • Dried fruit
  • Elderflower
  • Herbs
  • Honeysuckle
  • Lavender
  • Rose
  • Spices – ginger, cinnamon, cardamon, cloves, etc.

Some people will heat the honey, which speeds up the infusion process. Heat is helpful when trying to extract flavors from dense items such as bark and roots. However, most experts say the heat can destroy some of the honey’s beneficial components. If not using heat, the process can take longer, up to a week or two or more but you do preserve all the healthy compounds.

Image by Hans from Pixabay

At times, the name of the honey can be confusing. For example, lavender honey might be made naturally because the bees feast on lavender blooms or it might be made by infusing the honey with lavender. If the label says “infused” or “lavender flavored”, you will know it is the latter. If it just says “lavender honey”, you may not know for sure unless you are buying the honey from someone you can ask.

The FDA has published a guidance document that says “If a food consists of honey and a flavor ingredient, such as natural raspberry flavor”, the name should “accurately describe the food with its characterizing flavor, such as “raspberry-flavored honey”. Also, “the labeling must include the common or usual name of each ingredient …. For a food consisting of honey and natural raspberry flavor, the ingredient statement would show “honey” and “natural flavor,” in descending order of predominance.” You would hope that would be true for honeys you see on shelves, but it is not guaranteed. That does not mean that an infused honey is necessarily bad. It is just that you want to know what you are purchasing.

Do you like honey? Have you tried any of the myriad of different varietals? If not, I encourage you to seek out a farmer’s market, a roadside stand, a local beekeeper or a store that specializes in honey.