In the prior two Cooking Tips, I discussed general freezing tips that you can use to destress the holidays by making items ahead. Last week’s Tip delved into how to freeze pies before the holidays. In this Tip, I want to look at another staple on our holiday tables – Bread.
Many experts do not recommend freezing unbaked bread dough as the freezer can kill the yeast. Many people do this successfully, although they do take the following precautions.
- Adding additional yeast, anywhere from 20-100% more.
- Using active dry yeast rather than instant yeast.
- Freezing as quickly as possible. Ensure your freezer is no higher than 0°F, and do not open your freezer door until the dough is solid.
- Freeze no longer than 2-3 weeks.
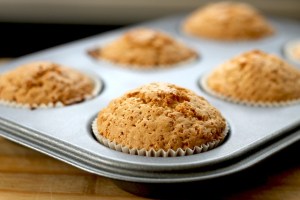
For the holidays, most of us will make dinner rolls rather than full loaves of bread. Here is advice for you on different ways to make rolls ahead of time.
Freezing unbaked dough balls
King Arthur Flour recommends the following technique.
- Make your dough with cool (not lukewarm) liquid. This allows the yeast to stay in a dormant state longer and protect against damage.
- Knead, portion and shape the dough. By not allowing the dough to rise before shaping, it is another way to minimize yeast activity.
- Place dough balls in a pan lined with parchment or wax paper. Cover with plastic wrap and place in freezer.
- Freeze balls until very hard.
- Place in a freezer bag and back in the freezer.
- For serving, remove from the freezer and place in a lightly greased pan. Cover and allow to rise. Set them in a warm area if you wish for them to rise more quickly. To slow down the rising, place in a cooler area. This will take 4-5 hours.
- You may also take it out the night before and let it thaw in the refrigerator.
- Bake and serve.

Freezing baked rolls
- Make and bake rolls according to your recipe.
- Allow to cool completely and wrap tightly.
- Place in freezer.
- Allow them to thaw at room temperature overnight and serve either as is or after heating in a 300°F oven for a few minutes.
Freezing the entire batch of dough
- Make the dough, flatten it into a disk or square, wrap and freeze.
- Allow to thaw overnight in the refrigerator.
- Shape, allow to rise and bake. Because the larger quantity of dough will take longer to freeze and thaw, there may be more yeast damage, resulting in denser rolls.
- Reheat in a 300°F oven for about 8-10 minutes.
You do not need to freeze if you only need a few days of planning.
- Make the dough and allow it to rise.
- Place in a storage container with enough space to allow expansion, cover and place in the refrigerator. When ready to bake, remove from refrigerator, shape into rolls and bake. Plan on an additional 20 minutes or so.
- May also shape risen dough into dough balls and place those in the refrigerator. Remove from the refrigerator and allow to get puffy for about 90 minutes. Bake as in the recipe.
Loaf bread

Breadtopia recommends leaving your freshly baked artisan loaf uncovered and cut side down on a cutting board for two days. They feel this keeps the crust crispy and the interior soft. After that, it is best to cover it. For baguettes, they cover the day after baking. Soft sandwich bread should be covered as soon as it has cooled completely.
Freezing bread dough meant for loaves.
- Make according to the recipe, but follow the above yeast recommendations.
- Allow bread to undergo the first rise.
- Punch down, knead and shape into loaves.
- Place in bread pans lined with greased plastic wrap.
- Place pans in the freezer and allow to freeze for about 10-12 hours.
- Remove from pans, wrap tightly and return to freezer.
- Remove from the freezer the night before you want to bake them and allow them to thaw.
- Place in a greased loaf pan and allow the bread to undergo the second rise.
- Bake as specified in the recipe.
To freeze loaf bread
- For an entire loaf, wrap tightly after cooling and place in a plastic bag.
- Defrost in a 325°F oven until the internal temperature reaches room temperature level.
- If an entire loaf is too much to be eaten after removing it from the freezer, slice it into wedges of the right size or individual pieces.
- To defrost, toast or gently microwave. Allowing the bread slices to come naturally to room temperature increases how quickly it will stale.
Now, you know how to make ahead two holiday mainstays – pies and bread. That has to make your holiday cooking easier!