Cooking Tips

Non-Recipe Culinary Books

I ran across an interesting culinary book the other day that was not a cookbook. It caused me to think about other such books that I have in my library or have found interesting. These books might also be a great gift for those cooks in your life and are the subject of this Cooking Tip.

What’s The Difference?

This little book is by Brette Warshaw and the chapters in it are very similar to these Cooking Tips. Some of the titles are:

  • Apple Cider vs. Apple Juice
  • Aioli vs. Mayonnaise
  • Dutch-Processed Cocoa Powder vs. Natural Cocoa Powder
  • Crème Fraîche vs. Sour Cream

Food FAQs: Substitutions, Yields & Equivalents

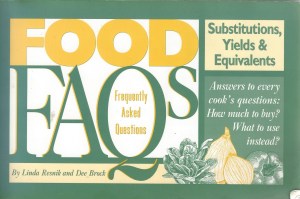
This extremely useful book has been put together by Linda Resnik and Dee Brock. They have painstakingly compiled lists and charts that answer questions such as:

  • How much juice in an average-sized lemon?
  • How many onions are required to make one cup of chopped onion?
  • What can I substitute for a quince?

The New Food Lover’s Companion

A culinary dictionary is a great addition to your collection and this one is by Rob and Sharon Tyler Herbst. My copy (and the one pictured here) was published in 2013 and is a great book to grab when you run across a term or an ingredient with which you are not familiar. The authors also published The Deluxe Food Lover’s Companion in 2015. It is a larger book both in size and content including information on more ethnic ingredients, food labels, ingredient substitutions and safe cooking temperatures.

Ratio: The Simple Code Behind the Craft of Everyday Cooking

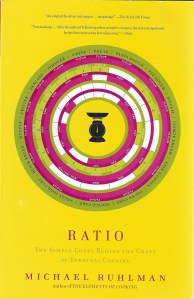
If you would like to be freed from using recipes all the time, this book by Michael Ruhlman may be for you. He discusses many dishes and breaks down the ratio of ingredients that are in each. He also includes representative recipes. Just some of his topics are:

  • Doughs
  • Batters
  • Stocks
  • Sauces
  • Custards

The Flavor Bible

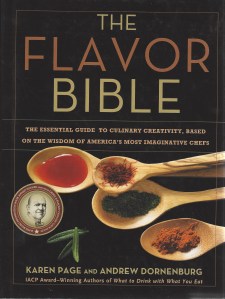
Do you like to be creative in the kitchen but worry about what flavors work together? Karen Page & Andrew Dornenburg have put together an exhaustive guide to help you. It is full of easy-to-use charts arranged alphabetically by ingredient starting with Achiote Seeds and ending with Zucchini Blossoms.

The Spice Companion

This is a recent addition to my bookshelves and is written by Lior Lev Sercarz. It is beautifully illustrated with photographs of all the representative spices. He describes the spice’s flavor, aroma, origins and harvest season as well as listing traditional uses for the spice along with recommended pairings and recipe ideas.

I am sure that there are many other non-recipe culinary books that would be helpful for us home cooks.
Do you have a favorite. Let me know.

Cooking Tips · Techniques

Knives — which ones do you really need?

If you peruse many culinary websites, you are bound to see an article about what items you really need in your kitchen. Such a list is going to vary depending on how you like to cook/bake, the size of your kitchen and who compiled the list. However, one item that will be on everyone’s list is a few essential knives. What knives are usually included on this “must have” list is the subject of this Cooking Tip.

Almost all experts will agree that there are only a very few knives that all cooks should have. The first, and most important, is the Chef’s knife followed by a paring knife. Many will tell you that those are really the only two essential knives. The third most recommended knife is a serrated one. There are a few others, though, that are very useful to have if you have the space and want to spend the money.

Chef’s knife (aka Cook’s knife)

These are multi-purpose kitchen knives that are usually 8-10 inches long although you can find shorter ones. They are easily recognizable by the prominent point and a cutting edge that is a sloping curve. This curve is what allows the user to perform a rocking motion cutting technique, which means you “rock” the knife from tip to heel as you cut. Most people will probably find an 8-inch the most preferable size. Mine is a 9-inch and I love that size.

You can do almost any cutting task with a chef’s knife from cutting through a chicken, slicing/dicing veggies, cutting/slicing meat to chopping herbs. If you are going to splurge anywhere in your kitchen, splurge on an excellent chef’s knife. Splurging does not mean spending hundreds of dollars as very good chef’s knives can be found for much less.

Paring knife

A paring knife looks almost like a very small chef’s knife. Blade length can range from two to four inches long and it allows you to cut with more precision. This kind of knife is great for smaller tasks such as coring tomatoes, hulling strawberries, segmenting citrus, and for cutting smaller items such as shallots. If you just want to cut a lemon in half, reaching for a paring knife rather than a large chef’s knife is perfect. They can also be used for non-cutting tasks such as testing to see if a roasted beet is tender or if a cake is done. Although you want a sharp paring knife, you can certainly opt for spending less money here.

Serrated knife

A serrated knife has a serrated cutting edge that looks like a saw. The blade can be 5 to 10 inches long. The ones with longer blades are often called bread knives as they are the best way to slice through bread. They are not limited to slicing bread, though. They are also useful for slicing tomatoes, pineapples, watermelon, chopping chocolate or making cake layers. Because of their design, they are meant to slice food items, not chop them.

I have both a typical bread knife and a serrated deli knife. Because its blade is offset from the handle, it gives more room between your hand and whatever you are slicing,

Boning or fillet knife

When you need a knife that will bend to go around things such as meat joints, you want a boning knife. The blade is thinner and somewhat flexible so it can maneuver around bones and joints. Fillet knives always have a flexible blade, whereas boning knives can be either stiff or flexible. These knives are not designed to cut through bones, but rather around the bones and so are helpful in breaking down a whole chicken or removing bones from pieces of meat. They are also useful for skinning seafood as well as removing silverskin from meat.

There are many other kinds of knives including utility, carving, cleavers, oyster, cheese and santoku knives. Another piece of cutting equipment that is very helpful is a good pair of kitchen shears.

This Tip should help you equip your kitchen with the knives you will need. Other considerations are how to keep them sharp and how to store them. And, of course, knowing how to best use the knives is an important skill for safety and efficiency during your food prep. Consider booking a class on Knife Skills with me. I would love to show you just how to use those wonderful knives.

Cooking Tips · Techniques

Are you part of the Instant Pot fan club?

One cooking appliance that I have never felt a need to purchase is an Instant Pot. I saw no reason for it and did not want to take up any more precious space in my pantry. One of my husband’s colleagues recently gave us one as she said she did not need it. So, I have begun to delve into the world of the Instant Pot and decided to devote this Cooking Tip to this subject.

At its most basic, the Instant Pot is an electric pressure cooker although it can also be used for other functions such as slow cooking, yogurt making, rice cooker and even sautéing food. The actual programs that are available will depend on the model of the Instant Pot.

Any pressure cooker works by creating high pressure inside the cooker. This allows the boiling point of water to increase above normal. Therefore, you are cooking the food at higher temperatures than you can achieve on the stovetop and thus, the food cooks faster. As the pressure pushes water into the food, it not only helps to speed up the cooking process but also keeps food very moist.

One point about cooking food faster. Yes, that is correct but the cooking time does not usually include the time it takes for the Instant Pot to fully pressurize. The cooking time begins after that happens. You need to add anywhere from 5 to 20 minutes to the overall time to account for this pressurization step. There is also the time to depressurize to consider. If doing a natural (rather than quick) depressurization, add another 10-15 minutes.

If you live at high altitude as I do, you realize that cooking and baking sometimes takes adjustments. For prior Cooking Tips, see these links.

Since pressure cooking increases the temperature that you can achieve within the pressure cooker, you might think that altitude adjustments would not need to be made. However, this is not true. The general recommendation is to increase the cooking time by 5% for every 1000 feet over 2000 feet. For example, I live at 6000 feet, which is 4000 feet above 2000 feet. So, 4 X 5% means I should increase the cooking time by 20%. There are charts that you can find. Here is one from A Mindfull Mom.

So, why use an Instant Pot? It is said to cook foods up to 70% faster than a conventional cooking method. Because of that, I find it most useful for cooking items that do take a significant amount of time such as tough cuts of meat, beans or whole grains. If you are cooking something that would cook in under 20 minutes stovetop, there is really no reason to use the Instant Pot.

There are also things that you should not cook in an Instant Pot. Let me address just a few. Because the Instant Pot cooks by using steam, anything you want crispy such as breaded meats will not get crispy but will rather be soggy. Delicate cuts of meat are better stovetop where you can cook to a recommended internal temperature as well as achieving the surface caramelization. Similarly, burgers are not good in the Instant Pot as they will taste “boiled” and not have that nice crispy exterior.

Dairy and creamy sauces bring their own problems to the Instant Pot. Curdling is a real risk. The pressure valve can easily get clogged from the dairy, leading to problems with sealing and pressurization. So, any dairy product should be either cooked conventionally or added at the end of the cooking time by using the Sauté function or just the residual heat of the Instant Pot,

Another advantage is that it is pretty much “hands off” during the cooking time so you can do other tasks.

Because the Instant Pot is so popular, there are a myriad of online sources that will help you to get the most out of it. There are also cookbooks galore; a search of just my library showed 90 results. You may also try converting your stovetop recipe to one for Instant Pot. Here is another chart that will help you with that.

I have just started experimenting with this appliance and am not totally sure about it as of yet. That may change as I use it more. What about you? Do you have one? What do you love to cook in it? Let me know.

Cooking Tips · Techniques

Microwaves — Friend or Foe?

If I did a poll of all of you and asked if you had a microwave, I would suspect over 90% of you would respond in the affirmative. Statista.com reports that almost 13.5 million microwaves were shipped in the US in 2019. If you are a part of the group that does not have one, let me know and why you made that choice. In this Cooking Tip, I want to discuss this very useful but often maligned kitchen appliance.

Since most of us have a microwave, what should we be using them for and what should we keep out of them?

I mainly use my microwave for just a few tasks. I occasionally defrost food in them. I really do not like defrosting meat in them, though, as they often defrost unevenly and you can even get some cooked parts. I realize that it may be your only choice if you need to get that Chicken Marsala on the table quickly and your chicken is still frozen. If you can plan ahead and put your frozen item in the refrigerator the night before, that is the ideal situation. Another item I have mentioned in another Cooking Tip is a defrosting tray. This option is not as fast as a microwave but it is fairly quick and does a great job.

I will also use my microwave to melt butter and occasionally melt chocolate. The only real “cooking” I do is to heat frozen vegetables or to make my morning oatmeal.

Here are some other “non-cooking” ideas that others recommend.

  • Softening hard brown sugar — measure the amount of brown sugar you need into a microwave-safe bowl. You only want to warm the amount you need as the excess will just harden again. Place a dampened paper towel over the sugar and cover with plastic wrap. Warm in the microwave for 30 seconds at a time, checking often to avoid melting the sugar. I have done this and it does work well.
  • Toast nuts or spices – place in shallow bowl or pie plate in a thin, even layer. Start the microwave but stop, stir and check every 30 seconds until there is browning and you can smell the aroma. I must say that for a small amount of nuts/spices that this can be just as easily done stove-top in not much more time.
  • Softening the rawness of garlic – put unpeeled cloves in bowl and microwave for 15 seconds until cloves are warm. Not only does it soften the flavor but it also makes the cloves easy to peel.
  • Liquifying crystallized honey – Uncover honey jar and microwave 30 seconds or so. I prefer putting my jar of honey in a pot of hot water but the microwave method does work.
  • Soften stale bread — wrap bread in a damp paper towel, microwave for about 10 seconds. Check and repeat as needed.

What about the power levels? Microwaves work differently than your regular oven. In the latter, you turn down the temperature and the cooking temperature lowers. In a microwave, when you change the power level, the “magnetron” just cycles on and off. Because of this, Cook’s Illustrated recommends the following.

  • OK to use high power to:
    • Heat water, watery soups or beverages (But, see below for a warning about heating plain water.)
    • Make popcorn (or other foods less than ½ inch thick)
  • Use 50 percent power when:
    • Heating/reheating foods that can’t be stirred, such as lasagna, frozen chicken, potatoes
    • Bringing food to specific temperatures: softening butter, tempering chocolate
  • Lower power level OR stir frequently when:
    • Heating dairy-based foods such as chowder that can curdle
    • Heating splatter-prone foods such as tomato sauce
    • Melting splatter-prone butter

Here is some other general advice on using a microwave.

  • Always cover food. This not only protects the interior of the oven but it traps steam resulting in better cooking.
  • Stir or flip your food. This allows the microwaves to hit new parts of the food and promotes heat transfer.
  • Allow the food to rest when you take it out of the microwave. This allows the temperature of the food to even out.
  • Realize that not every container in your kitchen is microwave safe. If the item does not tell you that, GE Appliances recommends the following test.
    • Fill a microwave-safe cup with water.
    • Place the cup in the oven on or beside the utensil in question.
    • Microwave for only one minute on high.
    • If the water becomes hot and the dish remains cool, the dish is microwave safe. If the dish heats up, it should not be used for microwaving.

What about items you should not put in a microwave? We all know that foil or any type of metal is a no-no and I just mentioned not using dishes that are not meant for the microwaves but there are other items.

  • Nothing – do not run your microwave empty. Since there is nothing to absorb the microwaves, it can catch fire or otherwise damage the appliance.
  • Grapes – they can explode but I’m not sure why you would want to put your grapes in the microwave. For a scientific explanation, see this link. For a quirky video demonstrating this, see this link.
  • Eggs – whole eggs can explode and egg dishes such as scrambled eggs and frittatas will become rubbery.
  • Paper bags – these can release toxins and even catch fire.
  • Chili peppers – the capsaicin in these peppers can vaporize and irritate you when you open the door.
  • Plain water – water can actually become super-heated and bubble up vigorously and burn you. Putting something in the cup such as a wooden skewer helps to prevent this. It is still preferable, though, to heat your water either in an electric kettle or on the stovetop.

There are plenty of books and websites out there that talk about actually cooking meals with your microwave. I do not really see the point as you can put great food on your table using traditional cooking appliances in not that much time. Others feel differently. How about you? What do you use your microwave for? Let me know.

Cooking Tips · Techniques

Silcone or Parchment?

I was recently teaching a cooking class on making party appetizers. In that class, I used both a silicone baking mat as well as parchment paper. Some questions about those items arose and I thought it would make a good Cooking Tip for all of us.

If you are like me, you have parchment paper, wax paper as well as some silicone baking mats. When should you use one over the other?

Wax Paper

Wax paper is made by applying a coating of wax to paper. Historically, beeswax would be used. Today there are two major types of wax used. Most commonly is food-safe paraffin. A few companies market a soybean wax paper. The first company to make paraffin wax rolls was Reynolds. Their Cut-Rite product is still offered in almost every market today. In fact, Reynolds states each year they sell enough of this product to circle the globe more than 15 times.

Wax paper is mostly used due to its non-stick properties. It is great for goodies such as chocolate-dipped items. It is also often used to wrap food for storage, to pack them for gift giving or to place between items in the freezer. It should not be used in baking if it will be directly exposed to the heat of an oven as it can actually ignite. Reynolds does say it may be used as a pan liner if the dough or batter completely covers the wax paper.

Parchment Paper

This is paper that has been coated with silicone rather than wax. This makes parchment not only nonstick but also heat and water resistant. It come in rolls or individual sheets and in different shapes and sizes. Stores generally carry bleached parchment although you can also find unbleached if you look for it.

Although parchment is heat resistant, not all brands are equal in this characteristic. My favorite brand, King Arthur, is rated to tolerate heat up to 450°F although their unbleached variety’s maximum temperature is 425°F. Reynolds recommends a maximum temperature of 425°F. Walmart’s Great Value is only 420°F. Be sure to check for the rating on the one you buy.

You may ask if those temperatures are absolute or if it is safe to use parchment above the recommended maximum. Cooks Illustrated contacted a couple companies to ask this question. The companies responded that using parchment at a higher temperature than recommended does not release any noxious chemicals. Nor will it burn. You will see, though, that the paper will turn very brown and become brittle, even crumbling.

Although I have no experience with this next product, there is something called Super Parchment. Supposedly it is thin like parchment but reusable like a silicone mat. It may also be cut to size. Have you used it? Let me know what you thought.

Silicone Baking Mats

Most of these mats have a sturdy, woven fiberglass core that is surrounded by a silicone covering. Some brands are made without the fiberglass core but this means they are less sturdy. Maximum temperatures may vary anywhere from 400°F to 480°F.

These mats are nonstick and heat resistant. They were invented by Guy Demarle, a French baker, in 1965. That invention is still being sold today and the original is known as Silpat. Today you are able to find numerous different brands and, as with parchment, they come in different sizes and shapes. Since the brand “Silpat” will probably be the most expensive, some reviewers looked at whether or not they were superior to other brands. Although Silpat consistently rated at the top of the list, other highly rates brands were Kitzini, Mrs. Anderson’s, Amazon Basics and Artisan.

Another discussion point is whether there is a difference in using parchment versus a silicone mat. Here are some considerations.

  • Reusability – silicone mats will last you practically forever whereas you can only reuse a parchment sheet a few times.
  • Temperature toleration – most silicone mats are rated to withstand higher temperatures than parchment.
  • Baking time – since silicone mats add a layer of insulation, your baking times may be a minute or so longer.
  • Size – silicone mats come in different sizes but you are not supposed to cut them due to the fiberglass core. You will, therefore, need to purchase different mats for different sized pans. Parchment on the other hand can be cut to any size you wish.
  • Cookies – Cookies baked on silicone mats tend to spread more than those baked on parchment. There is a bit of disagreement on the browning aspect of the cookies. Some feel that the cookies brown more with parchment and others think that is true for the silicone mats. Cookies baked on mats also tend towards greasy. If using a silicone mat, try to remove the baked cookies to a rack as soon as you can. As silicone doesn’t breathe, cookies left on a mat to cool may sweat, affecting the texture.
  • Nonstick characteristics – although both parchment and silicone mats are nonstick, the latter is more effective in this aspect. This makes a silicone mat a superior product for dealing with very sticky items such as sticky candy, brittle, toffee, etc.

Are you like me and have all of these products? Or, do you just have one or two?

What do you prefer to use? Let me know.

Cooking Tips

Stocking Stuffers for the Cook

If you like to cook, you probably have friends or family members who also like to cook. Something for the kitchen might make the perfect gift but what do you get them? Or, what would you like others to give you? In this Cooking Tip, I would like to share with you some of my favorite little gadgets – most of them would make great stocking stuffers. Some of the links below are affiliate links and I may earn a commission if you decide to purchase.

One item I use in my kitchen almost every day is a bench scraper. This is a photo of mine although there are various other designs. Mine used to have a ruler along the bottom – a very useful bonus. I made the mistake of putting mine in the dishwasher and, voilà, no more ruler. I caution you, therefore, to make sure it is dishwasher safe. It is great to pick up items (such as chopped veggies) from your cutting board, to portion bread dough, to slice soft items (such as cookie dough) or to scrape debris off of your counter. The average price is only $5-$10. Every cook needs one!

Along the same lines are bowl scrapers. Rather than being metal and rigid as the bench scraper, bowl scrapers are plastic and flexible. They are most useful for cleanly scraping all the dough and batter out of your mixing bowl. They can also be used as a counter scraper similar to the bench scraper. They can be found for only about $5.

Rasp graters are the tool of choice for zesting your citrus. You are able to get all of the wonderful essential oils without large pieces of citrus rind. There are many brands but Microplane is the gold standard. These graters are also useful for grating ginger, garlic and nutmeg. They do sell ones labeled specifically for these tasks but a general all-purpose one will work. This photo shows one of those along with one made for grating whole spices. Expect to pay about $15.

Many of us cooks try not to have too may “one use” gadgets taking up space in our drawers. However, if you love cherries, one such uni-tasker is a good cherry pitter. They make a tedious job into something quick and efficient. $10-$15 would be a typical price.

Are you a pro at grating? If so, you may want to pass on this next item. If, like me, you have been known to grate your knuckles on a regular basis, I have a great find that my husband bought for me.  It is a glove that you can wear that protects your fingers from the sharp grater. Mine is well used and only costs about $15.

I am a huge believer in the concept of “mise en place”. In other words, taking the time to get out all of your ingredients and having them ready to go before you start cooking. It might be measuring your spices or dry ingredients or even chopping everything before you start your recipe. To do that, though, you need plenty of little bowls in which to place your ingredients. You can’t have too many of these little guys in your kitchen.

Another uni-tasker is for those of you who do not like separating eggs through your hands. Put this little gadget over a bowl, crack your egg into it and, presto, the whites and yolk are separate. It may sound silly but actually works quite well.

How do you defrost your meat for dinner? Do you remember to take it out the night before and let it sit properly in the refrigerator so it is perfect when you need to start cooking? Or, are you needing to defrost something so you can have dinner on the table in an hour? I suspect many of us find ourselves in that latter category. That is where the microwave often comes into play. However, the microwave can result in uneven defrosting and even some unintended cooking of the meat. This next item was a gift to me from my wonderful mother-in-law and I must say it is amazing and I love it. It is called a defrosting tray and, although, not as quick as the microwave, it will defrost that chicken breast or steak in a very short time and the result is a totally defrosted item without any accidental cooking. There are many brands out there with most of them ranging from $10-$30.

My last two suggestions are a little higher on the price range but well worth it. If you are a baker and have not tried baking with weight rather than volume, you really should. An easy-to-use and accurate kitchen scale is a must for serious bakers. I have two – one I use at home and one is portable so I can use it when I am teaching cooking classes at a location that does not have a scale. There are too many different scales out there to mention but one of the most highly rated is Oxo’s Good Grip scale for about $50.

Finally, every serious cook needs an accurate digital food thermometer. It is essential for ensuring your meat is cooked thoroughly but not over-done. It is also great for testing when your homemade bread is ready to come out of the oven. Making caramels, brittle or toffee is very difficult without one. Although on the pricer side ($80-$100), Thermapen is one of the absolute best. It is fast and extremely accurate. The company is a small business located in Utah and they have outstanding customer service.

I have more favorite gadgets such as my potato ricer, my adjustable measuring cups and poultry shears, but these will give you a great start in shopping for someone else or putting on your own list for the Santa in your life. If you have a favorite gadget, let me know and I will share your ideas with others.

Cooking Tips · Techniques

Measuring Tools in the Kitchen

As fall starts to arrive, many people begin to bake more. If you live in Colorado, you already know baking can be a challenge due to our altitude. If you missed my Cooking Tips on baking at altitude, see this link. Because we start at a bit of a disadvantage, you want to make sure you are not sabotaging your efforts with other variables. In this Cooking Tip, I would like to discuss one of those variables – measuring cups.

Measuring Cups
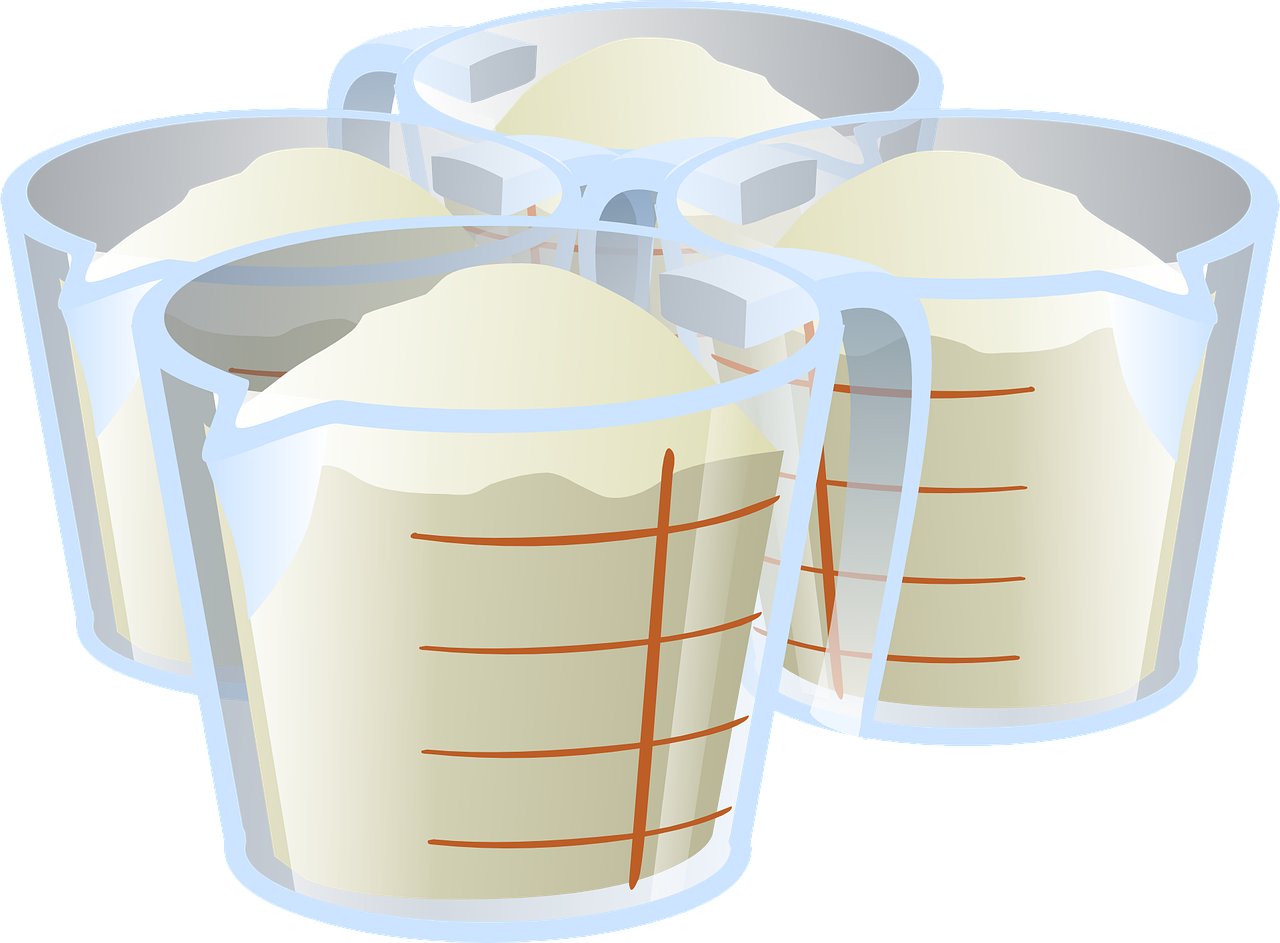
When I teach my cooking classes, I am always amazed that many people do not realize that there are different types of cups for measuring liquids and dry items. Liquid measuring cups are those that have a spout with measuring lines for different amounts of liquid. When you look at them, you will see the top line is below the very top of the cup. These are usually clear, which allows you to easily see the meniscus of the liquid to ensure an accurate measurement.

Measuring cupDry measuring cups are shaped more like a little tub and there are different sized cups for each measurement. The measurement indicated on the handle usually means when the cup is filled to the very top.

The first piece of advice is to use the correct type of measuring cup for the ingredient. When you use a dry measuring cup to measure a cup of flour, you fill it to the top and level off with a flat edge. Trying to use a liquid measuring cup to do this is very difficult. First, it is hard to gauge when you are at a cup since the line is below the top. Also, it is impossible to level it off as you can with a dry cup.

It may be a bit easier to measure liquid in a dry cup but you would need to fill it to the very top to get an accurate measurement and then it is very hard to move without spilling. Cook’s Illustrated did a test where they asked 18 people (cooks & non-cooks) to measure a cup of flour and a cup of water in both wet/dry cups. There was always some variance due to different techniques that people used. However, the variance was even more pronounced when using the wrong type of cup. Trying to measure the flour in a liquid cup led to differences of up to 26%. Measuring liquids in a dry cup resulted in a variance of up to 23%. These inaccuracies can spell disaster for your baking – especially when you are baking at high altitude.

Of course, the best way to measure anything is by weighing it with a food scale. I know that is a step too far for many people. And, most US recipes do not include weight measurements. Accepting that most of you will use measuring cups, you now know how important it is to use the correct type. However, can you just buy any brand and expect it to be accurate?

Unfortunately, the answer is No. A number of food sites have evaluated different brands. Let me summarize for you what they said. If anyone wants links to their actual testing, let me know.

When looking for good measuring cups, you want a number of things. First and foremost, you want accuracy. Other considerations are ease of use and durability. For dry measuring cups, Cook’s Illustrated rated OXO Good Grips Stainless Steel cups the highest. Among liquid cups, Cook’s Illustrated rated Pyrex as the best glass cup and OXO Good Grips Angled cup as the best plastic liquid measuring cups.

Serious Eats felt that Norpro’s Grip-Ez Stainless Steel Measuring Cups were the best dry measuring cups. One nice thing about this set is that it includes a 1/8-cup measure, something that OXO’s set does not. Serious Eats agreed with OXO as the best plastic liquid cup but preferred Anchor Hocking for the glass measuring cups.

A final site that does a lot of testing, The Wirecutter, had their favorite dry cup set as KitchenMade Stainless Steel Measuring Cups and liquid was Pyrex.

A new entry into liquid measuring cups is Euclid. According to the designer, “Euclid is the only measuring cup with a mathematically optimal, tapered design for consistent accuracy across amounts.” Designed by a mathematician, it is an interesting cup that I may just have to try.

While we are at it, what about measuring spoons? Cooks Illustrated found most of the sets they tested were about equal for accuracy but there were differences in ease of use and durability. Their favorite set was Cuisipro Stainless Steel set. For Serious Eats, they found that differences in accuracy to be more of a concern. Their favorite in a rectangular shape was the OXO Good Grips Spice Jar Measuring Spoons. A close runner-up was the RSVP International Endurance Spice Spoon Set. For rounded spoons, they preferred the Amco Advanced Performance Measuring Spoons set. Wirecutter found that Prepworks by Progressive was their choice although their second choice was Cuisipro, Cook’s Illustrated’s favorite.

No matter where you live, if you are a serious home cook, especially a baker, you do want to pay attention to little things such as measuring cups and spoons, which can work against your success. If you live at altitude, there are enough challenges without having to deal with inaccurate measurements. With the recommendations above, I hope you will be one step closer to all of that success in the kitchen!

Cooking Tips · Techniques

Nonstick Cookware

Do you have nonstick pots/pans in your kitchen? Most of us probably do. If you were to look in a professional kitchen, you would probably find only a few, if any at all. Why is that? What do professional chefs know that maybe we do not? That is the subject of this Cooking Tip – nonstick cookware.

When I first started cooking, I had a friend who sold Pampered Chef. My first cookware set, therefore, was a set of nonstick pots/pans from Pampered Chef. I used them for many, many years but as they aged and went to Cookware Heaven and I grew in my culinary knowledge, I replaced them with other types of pots/pans. The only nonstick pans I have now are a couple of small skillets. The rest of my cookware is a mixture: stainless steel, cast iron and enameled cast iron. Because I use induction for most of my cooking, I must take that into consideration when buying cookware. I love my induction cooktop but it does limit my cookware choices. (If you have never read my Cooking Tip on induction cooking, here is a link to it.)

One of the first things to be aware of is that nonstick finishes have different names. Trade names include Teflon, Radiance, Eclipse, Excalibur, Quantanium and Halo. Just because the pan isn’t called “Teflon” doesn’t mean it isn’t the same thing – it just has a different name.

There are some advantages to nonstick cookware.

  • Certain food items are best in nonstick cookware. Making a great omelet is easiest in a nonstick skillet. Flipping out your homemade crepes is a job tailor-made for nonstick. Many also prefer to cook delicate fish in nonstick.
  • They do not require much oil in which to cook, if that is a concern for you.
  • They make for easy clean-up although you do need to take care as I will discuss below.

There are also disadvantages.

  • They cannot withstand high heat. Do not cook above medium-high as at too high of a heat, the nonstick coating can vaporize, which is harmful to the pan and could possibly be bad for your health. (It is definitely bad for birds. According to the Cookware Manufacturers Association, CMA, fumes from a nonstick skillet that has been heated too hot can be harmful or even fatal to birds as they have a very sensitive respiratory system. It is recommended, then, that any pet birds not be exposed to these fumes.)
  • Although it is possible to brown meat in a nonstick skillet, you will not develop the fond that is so important to flavor and making a pan sauce. (What’s fond? – email me for a Cooking Tip on this subject.) Even though you can sear meat in a nonstick pan, I still do not recommend it as it is very easy to over-heat the pan.
  • They are not as durable and are easy to damage if you are not careful.
  • Some people are worried about the nonstick coating for health reasons. According to FDA’s 2017 Food Code “Perfluorocarbon resin is a tough, nonporous and stable plastic material that gives cookware and bakeware a surface to which foods will not stick and that cleans easily and quickly. FDA has approved the use of this material as safe for food-contact surfaces. The Agency has determined that neither the particles that may chip off nor the fumes given off at high temperatures pose a health hazard.” Others have more concerns both for our personal health and the environment. To minimize these issues, do not over-heat them, clean them gently and do not use utensils that could cause the coating to chip off the pan.
  • Concern has also been raised about perfluorooctanoic acid (known as PFOA, APFO or C-8). This was used in the manufacturing of the nonstick coating. There may be debate on whether this chemical is truly harmful but there was enough concern that as of 2015, producers of nonstick cookware in conjunction with the Environmental Protection Agency agreed to eliminate it from their products. An interesting note is that according to the CMA, “While used during the manufacture of the product and while there is a small amount in the finished non-stick liquid product when it is shipped to the applicator, all of the PFOA is driven off in the curing process following the application of the PTFE spray to the pan’s surface. The finished pan does not contain any measurable PFOA after proper curing. The consumer is never exposed to PFOA while using their nonstick pan.”

I feel there is a definite place in our kitchen for nonstick skillets. I do not think other nonstick pots are probably necessary. No matter which you have, be sure to follow the recommended care instructions. Besides the caution against over-heating the pan, here are few other considerations.

  • Take care not to scratch the surface. Nonstick surfaces have gotten much more durable over the years, but rubber, silicone or wood utensils are better than metal ones to minimize the risk of scratching.
  • Store them carefully. Avoid stacking them if possible or, at least, put something like a paper towel or plate between your items to reduce the possibility of scratching.
  • Clean gently. Don’t use an abrasive sponge, which can create tiny scratches, and avoid harsh cleaners. It is best to handwash rather than putting them in the dishwasher, no matter what your instructions say. Also, let it cool before washing it so thermal shock doesn’t cause it to warp.
  • Season your nonstick pan. Before using it for the first time, wash it and dry thoroughly. Apply a thin layer of oil to the surface, heat it gently for about 2 minutes. Allow it to dry and wipe out any excess oil. You may also want to apply a small amount of oil prior to each use. This not only improves its performance, but also prolongs its life.
  • Do not use a nonstick cooking spray. This leaves a stick residue that is very difficult to remove. Rather, use a fat such as butter or oil.

Because of the concerns of the chemicals used in the manufacturing of nonstick pans, companies have been trying to make a “green” skillet. To date, none of these are as nonstick nor do they retain their nonstick quality as long as regular nonstick skillets.

My husband bought me a small Bialetti ceramic nonstick skillet. Although it was very pretty and worked great at first, I found it deteriorated very quickly to the point it lost all its nonstick qualities. This is the only one I have ever tried. What are your experiences with ceramic? Let me know.

I also purchased a “Black Cube” skillet manufactured by Frieling that is made without PFOA. The food cooks on raised stainless steel pixels. It is also advertised to be safe up to 500°F as well as 100% scratch resistant, even with m

In summary, do not feel guilty about having nonstick cookware. Just be aware of what they are best for, how to minimize the risks and how to prolong the life of the cookware.

Cooking Tips · Techniques

Cake Pan Math

Have you ever seen a cake recipe that sounded scrumptious and you decided you just had to make it? Then, as you are reading the recipe (hopefully before you started baking), you notice it calls for a size of cake pan that you do not have. You do have other cake pans, though, and you wonder if you can just use those. In this Cooking Tip, I will give you some guidelines for doing just that. If you are math-averse, you may want to stop reading and just run out for the specified pan size — assuming you have storage space for one more pan! However, if you are willing to bear with just a bit of figuring, read on.

At its most basic, you want to know the capacity of your cake pan and then find another pan with the same or similar capacity. For square pans, that is pretty easy. Just multiply length by width. For example, if you have an 8-inch square pan, multiply 8X8 to get 64. For your 9X13 pan, you get 117.

For a round pan, you have to reach back to what you learned in school. Do you recall that equation Pir2? That is “Pi multiplied by the radius squared.” Oh yeah, you remember hearing that somewhere, don’t you? And, Pi is 3.14. Well, in reality it is more than that, but 3.14 will suffice for our purposes.  (If you care to read about it in-depth, here is an article from Wikipedia. Let’s do an example for a 9-inch round pan. The diameter is 9 inches, which makes the radius 4½ inches. So, we get 3.14 x 4.52 = 3.14 x 20.25 = 63.6. Round it up to 64. If you shriek at even this little bit of math, here is an online calculator that will do it for you.

Remember the capacity of the 8-in square pan? It was 64. Bingo – an easy swap for an 8-in square pan would be a 9-in round pan since they both have the same capacity. (Note: this assumes a pan depth of 2 inches.)

Let’s get a bit more complicated. If you have a recipe for a cake made in a 9×13 pan and you want to make two round layers, what do you do?

Step 1: Figure the capacity of the 9×13 inch pan. Easy – 9 X 13 = 117.
Step 2: Figure the capacity of your round pan. If it is 9-inch, we already know it is 64. Doing the same calculation for an 8-in round, you get 50.
Step 3: Divide the capacity of your bar pan (117) by 2 since you want to put the batter in two pans. That gives you 58.5, which lies in between the capacity of the two round sizes.
Step 4: Make your choice. If you divide the batter into the two 8-in pans, the batter may overflow the pans. If you use the 9-in, the layers may be shorter than you want. So, if you have never made the recipe before, the safer bet would be the 9-inch pans. If you have made the recipe before in the recommended pan size (something I would highly recommend the first time you make it), how high did it rise in that pan? If it had a high rise, you would definitely want go with the 9-inch. If, however, it really did not rise that much, you might be fine with the 8-inch.

Another option is to use an oval-shaped casserole dish although the end shape may not be what you are looking for. To do that, we need to do a bit more figuring. Let’s say you have an 8×12 inch oval dish. Measure from the center to the top – 4 inches. Then, from the center to the side – 6 inches. The equation is now 4 in X 6 in X 3.14 (pi) = 75. Compare this to the capacity in the recipe to see if it might be a viable alternative. For example, this would be too large if the recipe calls for an 8-in square pan (capacity of 64) but not too bad if it calls for a 9-in square pan (81). One caveat – most oval casserole dishes are not made of metal as cake pans are. Rather, they are usually stoneware, ceramic or glass. You might need to tweak the oven temperature and/or baking time but that is another discussion.

Do you love the look of a Bundt cake? Do you have a Bundt cake pan that you barely use? Most recipes that are to be baked in a 9×13 pan can be baked in a Bundt pan. (This only works for a standard butter/oil cake, not for sponge or angel food cakes.) For here, we look at volume rather than capacity as how would you ever calculate the capacity of a Bundt pan???

Bundt cake pans are usually 10-cup or 12-cup but this is just the actual volume you would find if you filled it with water and measured how much water you used. Since the cake will rise to fill the Bundt pan, you cannot put that much batter in the pan. What you need to know is how much batter you can actually bake in that pan. Experts tell us that for a 10-cup Bundt, the batter amount would be about 6 cups. A 12-cup Bundt pan can take up to 7¼ cups of batter.

It just so happens that a 9×13 cake is usually equal to about 6 cups of batter – an amount that would be just fine in your Bundt pan. It may not bake in the same amount of time as it would in the 9×13 pan. Just think about how much thicker the batter is in that Bundt pan. Start checking your cake at the recommended bake time but do not be surprised if you need to add up to 30% more time.

There is much more that could be said but I think the above should suffice for most of your cake baking needs.

Cooking Tips · Techniques

Do you need a kitchen torch?

There are certain kitchen tools that might be considered “essential” to a well-stocked kitchen and then there are others that are “nice to have”. A kitchen torch would, for most of us, be in the latter category. In this Cooking Tip, I want to discuss the uses for this tool as well as some shopping suggestions.

One of the main purposes for a kitchen torch is to apply a brûléed top to certain dishes. Another way of saying this is to caramelize the top. The most classic example is as in a crème brûlée. To make this dish, you make a type of custard, sprinkle sugar over the top and, with a flame, melt the sugar and turn it into a crunchy, caramelized top. Although some recipes will recommend using a broiler for this, a kitchen torch is an easier method with more control over the amount and depth of caramelization.

Custards are not the only dishes which benefit from a small amount of torching. Other dishes that you can brûlée are oatmeal, grapefruit, fresh figs, apples, bananas, goat cheese, cheesecake and so much more.

There are more uses to a kitchen torch than just making a brûléed topping. They are an easy way of getting that wonderful melted and brown cheesy topping on a bowl of French onion soup. Those browned tips on your meringue pie are a cinch with a kitchen torch. Another great idea is to torch your mac & cheese topping in lieu of putting it in the oven if you are impatient for that wonderful cheesy dish.

Have you got the makings for s’mores but no campfire? With a kitchen torch, you can enjoy these in a just a few minutes. I have never tried this but some cooks use their kitchen torches for charring the skin of tomatoes and peppers. This will give you a nice smoky taste and make it easier to peel the item. Some even use it to apply a quick final browning to a piece of meat.

Are you convinced that you need to get a kitchen torch? If so, the next question is which one to buy. I have one made by Kitchen Craft but certainly would not recommend that one. It is much too wimpy to be of much good. On the other side of the spectrum is just using a large propane torch that you would buy at a hardware store. That will certainly do the job, but if you are faint of heart (as I am), it might be a bit intimidating.

There are a few things you should look for when shopping for a kitchen torch. First, you don’t want it too heavy to use easily and it should feel comfortable in your hand. The flame should be adjustable so you can use it for many different tasks. For safety purposes, it is nice to have a lock to prevent it from activating when you don’t want it to do so. Although not necessary, a fuel gauge so you can see how much fuel you have is very useful. Take a look at the warranty, too, in case you have problem after purchasing it.

Different sources recommend different torches but there are some that come up repeatedly in reviews. First is the Iwatani Cooking Torch. Rösle is another brand that comes highly rated. A third quality company is Messermeister. Another brand to take a look at is BonJour. They have a few different models.

Do you have a kitchen torch that you love? Let me know which one it is. Do you have any special ways in which you use it? Please share your favorites!

Happy Bruleeing and Happy Torching!