We all know what mayonnaise is and I would suspect most of us have a jar in our refrigerator. However, do you really know what it is, what it is made of and all the ways you can use it? That is the subject of this and the next Cooking Tip.
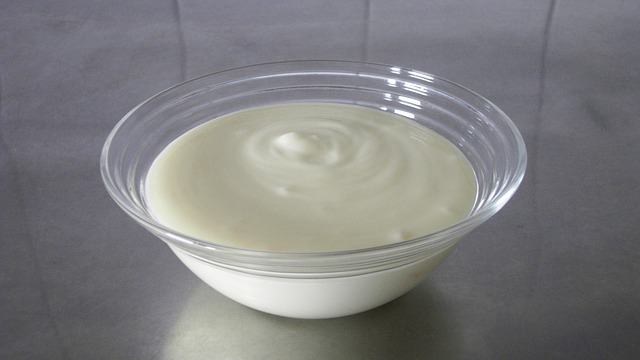
Mayonnaise is a thick condiment made from oil, eggs, an acid and perhaps seasonings. It is called an emulsification because oil and the water found in the eggs do not naturally mix together. You must break up the oil into tiny droplets and combine it in a way that they are suspended in the water.
What products can be called mayonnaise is regulated by the FDA. It must contain at least 65% oil by weight, vinegar and egg or egg yolks. Spices/seasonings may be added except for turmeric, saffron or anything that would give a color simulating that imparted by egg yolk.
As noted above, basic mayonnaise has three ingredients: oil, eggs (or just yolks), and an acid (usually vinegar or lemon juice). Seasonings such as salt and pepper are usually added. You can then personalize it with all sorts of flavorings such as chipotle, herbs, citrus and many others.
The basic procedure is as follows:
- Put eggs and/or egg yolks along with the acid and seasonings in a bowl or the container of a blender or food processor and combine. Some recipes will also add mustard not only as a flavoring agent but also because it assists in emulsification.
- Slowly add oil while blending – by a hand whisk, blender or food processor – until thick and creamy.
- Adjust seasonings to taste. Some recipes recommend adding the lemon juice at this point rather than at the beginning.
- If the mayonnaise breaks, there are a few recommended methods of bringing it back together.
- Add a bit of water and whisk until emulsified.
- Strain the mixture and use the liquid as the oil. Then, start over with a fresh egg/yolk. Some chefs do not think straining is necessary.
- Combine a teaspoon of mustard with a tablespoon of the broken mayonnaise (or one egg yolk plus a little lemon juice), beat until creamy, and then add the rest of the broken mayonnaise, one teaspoon at a time. If mayonnaise becomes oily on the surface, whisk in a tablespoon of water.
- Ratio – You will see variations from different sources but a basic ratio is 1 egg/yolk to 1 cup oil.
- Type of oil – It is best to use a neutral, refined oil such as canola, grapeseed, sunflower, safflower, a light olive oil or a blended oil (mix of olive and veg oils). EVOO has too strong of a flavor.
J. Kenji López-Alt of Serious Eats highly recommends using a hand/immersion blender as an “almost” fail-proof method. To use one, add all the ingredients, including the oil, directly into the blending cup. At this point, the oil will float on top but when you insert the head of the blender, the blades will be at the level of the other ingredients. As you start to blend, a vortex is created, which pulls the oil down into the moving blades. So, instead of you trickling in the oil, that vortex does it for you and you easily end up with creamy, perfectly emulsified mayonnaise. Here is a link to watch this method in action.
He does add, though, that the jar must be the right size – only slightly larger than the head of the immersion blender as the egg/acid mixture must be in contact with the blades of the blender before you switch it on. Also, the head of the blender must be placed firmly against the bottom of the jar until it starts to come together and then you will move it slowly up and down to ensure thorough mixing.
There are those that feel whisking by hand gives you a much superior result in terms of taste claiming it is brighter, less bitter with more pronounced lemon notes. It does, though, give a thinner, more sauce-like texture rather than the thicker, more spreadable texture that we associate with mayonnaise.
One concern that many people have about homemade mayonnaise is that the eggs are not cooked and thus bring a risk of salmonella. Although the risk is small (but not zero) for most of us, it is of more concern for certain populations – children, the elderly, the chronically ill, pregnant women and the immune-compromised.
If you are someone who is not in one of these groups but yet are squeamish about the thought of raw eggs, you could try to find pasteurized eggs. Pasteurization is a process that kills potential pathogens. The main company (perhaps the only company) that sells these is Davidson’s. One of the stores I frequent used to carry them but I have not seen them anywhere near me recently. Can you find them? Let me know.
People who have tested these in-shell pasteurized eggs have found them fine for some applications, such as mayonnaise, but were not happy with them in other applications.
One other option is to try to pasteurize them yourselves. The FDA does not recommend this as it is very difficult to just achieve pasteurization without cooking the eggs and with home methods, it is not 100% effective. There are a number of recommended methods such as sous vide and stove top. If you are just using egg yolks, you could try a microwave method recommended by Cooks Illustrated. According to them, “Heating the yolks to 160 degrees (this takes just a minute or two in the microwave) kills common pathogens, and abundant lemon juice keeps the mayo food-safe for up to one month.”
Although most culinary experts will tell you that there is no commercial version of mayonnaise that beats the taste and texture of home-made, they also realize that it is not practical to always have the latter on hand. It does take a bit of skill to make and has a shelf-life of only a few days. To help you pick out the best store-bought version, there have been some taste tests done. I will just mention four from oldest to newest.
Fine Cooking magazine rated mayos in 2006 and crowned Kraft Real Mayonnaise as their favorite. After Kraft, they liked:
- Hellman’s Real Mayonnaise
- Cains All Natural Mayonnaise
- Spectrum Organic Mayonnaise
- Whole Foods 365 Mayonnaise
Cooks Illustrated did a testing in 2012 and they found that the best tasting brands had the fewest ingredients and the simplest flavors. Their winner was Blue Plate Real Mayonnaise. Their runners-up were
- Hellmann’s Real Mayonnaise
- Hellmann’s Light Mayonnaise
- Spectrum Organic Mayonnaise
- Duke’s Mayonnaise
Epicurious tasted 16 brands in 2018. Their winner was Blue Plate Real Mayonnaise with Hellman’s in 2nd place. The remainder of the brands were listed in alphabetical order but not in any sort of ranking.
Serious Eats’ taste test was in 2019 and they also found that Kraft Real Mayonnaise to be excellent. It tied in the tasting with Duke’s Real Mayonnaise. Others ranked in order from best to worst were:
- Trader Joe’s Organic Mayonnaise
- Hellman’s Real Mayonnaise
- Kewpie Mayonnaise
- Best Food’s Canola Mayonnaise
- Blue Plate Real Mayonnaise
- Whole Foods 365 Mayonnaise
Whether you make your own mayonnaise (I hope you will try it at least once) or buy a good commercial one, there is more to do with it other than spreading it on a sandwich. Stay tuned as we will delve into that subject into the next Cooking Tip!


 Butter is a wonderful and tasty ingredient although I know it gets a bad rap for health reasons. We use it in all types of baking as well as savory applications. In this Cooking Tip, I would like to discuss whether the type of butter you choose makes a difference to your end result.