When you eat pizza, do you go to a pizzeria? Do you order delivery? Do you buy it from the frozen section of your local grocery store? Or, do you make your own at home totally from scratch? I presume most of you do one of the three former methods but I hope this Cooking Tip will encourage you to become a homemade pizza maker. There are things you can do ahead of time so that having a pizza night is a very doable task.
Everyone argues over the best style of pizza. I am not going to try to go over every style but I am going to mention four of the most common.
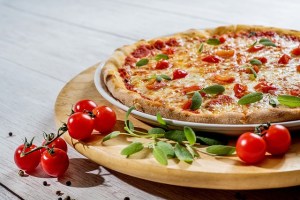
Neapolitan style
- This is said to be the original pizza dating back to the 18th century in Naples, Italy. It is a thin crust pizza that is made with what is called a lean dough. That is a dough that is made only with flour (usually high protein), water, salt and yeast. If it has any sugar or oil, they are only present in very small amounts.
- Classically, it undergoes a long fermentation, which allows time for the starches to break down into sugars, the yeast will create flavors and the gluten will develop.
- The result should be a thin and crispy crust with a soft and chewy interior. The crust is not stiff and you may need a fork/knife to eat it.
- Purists will tell you it must be baked in a wood burning oven between 800-1000°F and it cooks in only ~90 seconds.
- The traditional toppings are simple – tomatoes, mozzarella, basil, oregano and olive oil.
New York style
- A classic description of New York style pizza is that the slices are foldable with a crispy outer crust.
- This dough is thicker than Neapolitan but it is still considered to be a thin crust.
- It is cooked in a slightly cooler oven than Neapolitan.
- Besides the basic ingredients, the dough typically also contains oil and sugar. The oil coats the flour, which limits gluten development and results in a more tender crust.
- The sugar helps the crust to brown more evenly at the lower oven temperatures.
- It also takes longer to bake.
Sicilian style
- This style has a thick and crunchy crust with a soft and moderately chewy dough.
- The dough is baked in a rectangular or square baking tray coated in olive oil. This causes the bottom to fry and you end up with an ultra-crispy and flavorful bottom.
- The dough has a higher percentage of water than other doughs, making it easier to stretch.
Chicago style
- Although there are other styles in Chicago, this term usually refers to deep dish pizza.
- It is a thick crust with raised edges.
- The ingredients are typically layered on in “reverse” order. Mozzarella is put on the bottom followed by meat, veggies and crushed tomatoes.
- Since there is a larger quantity of dough and ingredients, it will take about 30 minutes to bake.

If you wish to make pizza at home, the first thing you need to do is to make the dough. Everyone probably has their favorite recipe. My husband and I enjoy a thin crust pizza and I tried many different doughs until we found one that we liked. Here is the one I use. I will say up front that this recipe does not follow some of the following steps. Although I may be sacrificing flavor, it allows me to make it relatively quickly. I make the full recipe, use one of the pizza balls for dinner and freeze the remaining three so all I have to do the next time I want to make pizza is to take one of the balls out of the freezer to defrost before continuing with the rest of the pizza.
Here are some tips for you to consider that I gathered from pizza experts.
- Use a scale to ensure proper measurement of the flour. It will lead to a better and more consistent dough.
- Baker’s percentages – if you are very serious about making pizza dough, this is a skill you may wish to investigate. With this technique, every ingredient is represented by its proportion by weight to the flour in a recipe. For example, if a pizza dough recipe calls for 60% water (also known as 60% hydration), 2% salt, and 0.5% yeast, that means that for every 1,000 grams of flour, you’d add 600 grams of water, 20 grams of salt, and 5 grams of yeast. Not only is this more accurate but it allows you to scale up and down easily.
- Choose the right flour – since this is the main ingredient in pizza dough, the kind you choose can make a big difference. Most of us will just use all purpose flour and that will work fine. If you want a crust that is chewier with bubbles, you may want to choose a flour with a higher protein content such as bread flour.
- Kneading – this is what develops gluten. A food processor does an excellent job of kneading pizza dough. That is the method utilized in my preferred recipe.
- Cold fermentation – allowing your dough to sit in the refrigerator after mixing leads to superior flavor. Let it sit for 1-3 days, take it out to rise at room temperature and continue with your recipe.
- Shaping – pizza enthusiasts will proclaim that doughs should only be shaped by hand. However, do not let anyone shame you for using a rolling pin. One thing to remember is that the gluten that has developed in the dough will have the natural tendency to shrink back as you are trying to shape it. If that happens, just step back, cover your dough, allow it to rest for a few minutes and then return to shaping it. The relaxation of the gluten during that resting time will make the final shaping much easier.
- Bake hot – this leads to better oven-spring, which is when the dough will be expanding and forming holes. Preheat your oven as hot as it will go. Most will recommend putting your stone/steel in the oven when you turn it on and preheating for an hour to ensure superior heat. There is also the option of pizza ovens, which have become more common today for home cooks.
- Baking steel or stones – for the best pizza crust, use either a baking steel or stone. If most of us have either of these, it is probably a stone. That is what I use and I find I get great results. Pizza aficionados have become to prefer baking steels as they have a higher heat capacity and conductivity. This will give you the crispiest result you can get in a home oven.
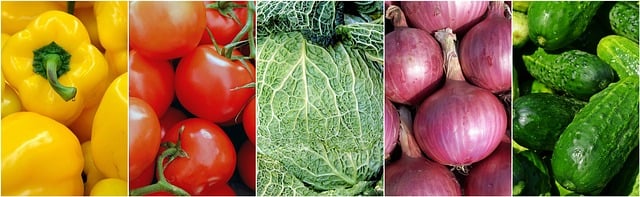
- Toppings – this is a matter of personal preference but in general, the adage that less is more is true with great pizza.
There is so much more to making pizza and there are a myriad of books and websites devoted to just this topic. However, rather than make it complicated, I want to encourage you to just make your own pizza in your own kitchen. If you like the result, that is what is most important. If you are disappointed, let me know and I will try to help you. If you want to become an expert, then seek out some of these other sources and have fun!