Cooking Tips · Techniques

The final step to a great pie — blind baking

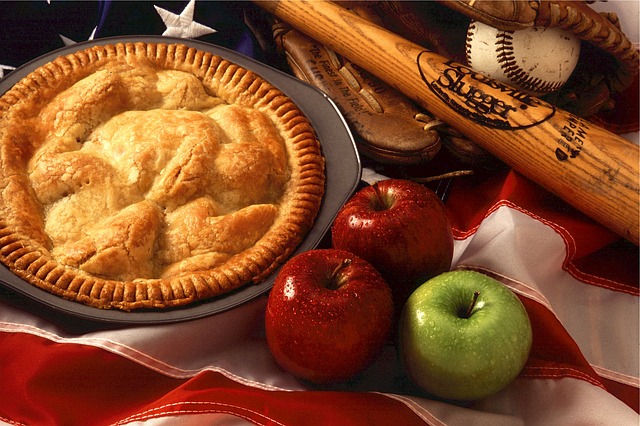
In the last few Cooking Tips, we have been discussing how to put that perfect pie on your holiday table. We looked at ingredients and techniques for making a great pie crust. You are now ready to put it in the oven but there is another subject to discuss – blind baking your pie crust. That is the subject of this Cooking Tip.

Blind baking a pie crust is simply pre-baking your crust (either partially or totally) before adding your filling. So, when do you blind bake your crust? The simple answer you might say is – when the recipe tells you to do so. Yes, that is true, but there are general guidelines to let you know whether you should do this.

Pies that have fillings that are not baked require a fully baked pie crust. An example is a yummy French Silk Pie. Since the pie is not going into the oven after adding the filling, the pie crust needs to be fully baked.

Other times you want to blind bake is with custard pies or pies with delicate fillings. With custard pies (such as pumpkin), the moisture in the filling might make the crust soggy before the crust is fully baked. Partially baking the crust before adding the filling helps to prevent this. There are also some delicate fillings that are only briefly cooked on the stovetop. If you do not blind bake the crust but rather put the filling in an unbaked crust, the filling would be over-cooked before the crust is fully baked. An example is Chocolate Cream pie.

One time you do not want to blind bake is if you are making a double-crust pie. If you blind bake the bottom crust, your top crust won’t adhere to the bottom crust. If your filling is such that you would prefer a blind-baked crust to prevent sogginess, you can place decorative pieces of crust over the top to give you a type of open double crust such as in this Gooseberry Pie recipe.

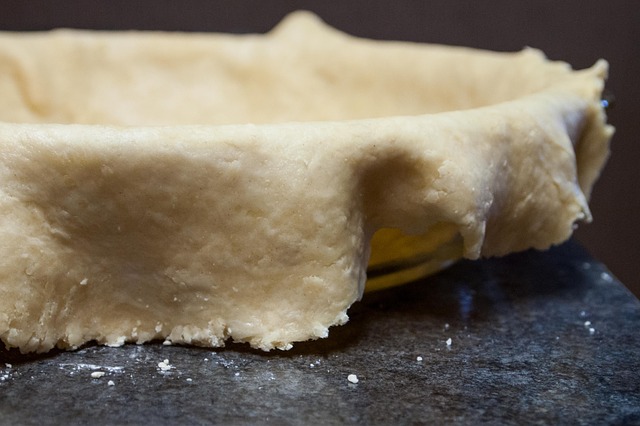
Blind baking is not as simple as putting your unfilled pie crust in the oven. If you do that without adding some weight, your pie crust will puff up – not ideal if you want to put a delicious filing into it. It also makes it much more likely that the sides of your crust will droop before it sets.

Now we know why we need to blind bake a crust, how do we do it? There are three recommended ways depending on what you are looking for in your finished pie.

If you want a pie with a pretty crimped edge or you have a tall crust, line the unbaked crust with foil or parchment making sure it fully covers the crust and the edges of the pie crust. Foil is often preferred over parchment as you can get it into the corners better as well as folding over the crust to prevent overbrowning. Fill the crust at least 2/3 full with something to weight the crust down as it bakes. I love ceramic pie weights. They conduct heat well and fill up the entire crust. Just make sure you have enough to fully cover the crust. I tend to use two boxes of these for one pie crust.

You have probably heard that you can use dry beans or rice. Those are poor heat conductors resulting in a longer baking time to get to the proper stage.  Another option is granulated sugar, an excellent heat conductor.

Stacey Ballis with MyRecipes.com did an experiment testing different types of weights. Her favorite method was granulated sugar, which conducts heat as well as the ceramic weights but gets into the corners of the pie crust better. She uses the sugar a couple of times and then uses it in her baking. Since it has slightly caramelized by being in the oven, she recommends using it for meringues. SeriousEats.com agrees with this choice. If you don’t want to use sugar, the ceramic weights are a close second.

As I discussed in last week’s Tip, you should have chilled your pie crust. If you haven’t done that by this step, you may chill it with the weights in place. After chilling, place it in a 375° oven for 20 minutes. Remove from oven and carefully remove the very hot pie weights. Prick the bottom with a fork and return crust to the oven. If you will be baking the pie filling, bake the crust for another 5-8 minutes. If you are not baking the filling, bake the crust for another 12-20 minutes until fully baked. This method should work for most pie crusts but some recipes may have slightly different baking temperatures and times.

A second method is called the “Low & Slow” method. With this method, the pie crust is baked at 350° with pie weights in place for an hour. Baking at a more moderate heat is said to reduce shrinkage & puffing.

A third method is to sandwich the crust between two pans and bake upside down. This method is good for pies with a flat edge that do not need the extra height or when you are not looking for a decorative edge. To use this method, place the crust in the pan and flatten its edge. Spray the outside of another pie pan and nestle into the crust. You may also line the crust with parchment before putting pans together. At this point, chill for 30 minutes to solidify fats and prevent shrinkage.

Now, place the pans upside down on a baking sheet so that the empty pan is on the bottom. Bake for 20 minutes in 375° oven. As the proponents of this method say, “Gravity ensures that as your crust slips “down” the side of the pan, it’s actually moving up!” When baked, remove from the oven and use a spatula to carefully turn over and prick with fork. Return the crust to the oven right side up without second pan and bake for 15-20 minutes until golden brown. You may now fill the crust. When would you want to do this method? It is ideal for pies where the edge of the pie is not as important as its top, such as Lemon Meringue.

What about your pie plate? SeriousEats.com looked at the types of pie plates and recommends either tempered glass or aluminum. They found that ceramic pie plates conduct heat too slowly resulting in more melting of the butter giving you a more mealy and less flaky crust.

Now you have all the information you need to make that beautiful and delicious pie. Get into your kitchen, give the many recommendations a try and let me know what works best for you. And, send me a photo of that wonderful pie!

Cooking Tips · Techniques

Techniques for a Great Pie Crust

After talking about choosing apples for baking and then discussing the ingredients you need to make a pie crust, I now want to turn to bringing that crust into reality. That is the subject of this week’s Cooking Tip – how to make a great pie crust. As you read this Tip, you will notice that I often give you different recommendations. Everyone has their preferred method and I want to give you alternatives so you can find what works best for you.

The first point I want to make is COLD is your friend when making pie crusts. The fat that you cut into the flour needs to stay solid as long as possible so that once it is in the oven, it will melt at the appropriate time creating steam and thus, the flaky layers we all crave in pie crusts.

Start your pie crust by putting your flour and salt in a bowl and whisk together. I highly recommend weighing your ingredients but if not, measure carefully. At this point, if your kitchen is warm, you may want to refrigerate the bowl/ingredients/equipment. Your aim (no matter the ambient temperature) is a final dough temperature of 65° to 70°. Yes, you can take the temperature of your dough. Just one more reason to have a good digital thermometer in your kitchen armamentarium.

SeriousEats.com points out that if your room temperature is above 73°, everything that touches the dough will warm it. You may have noticed that your dough seems to need less water on a hot day. That is because the butter is softer making it act more like a liquid. Although you may be tempted to use less water, this may lead to a weaker dough giving you headaches when you try to roll it out.

A solution is to chill everything with an aim to keeping your dough temperature below 70°. Take everything (your bowl with the dry ingredients, your rolling pin and your pie pan) and put them all in the refrigerator. Your fat and your water should already be in there keeping COLD until you need them. If your countertop is warm, fill some plastic bags with ice water and place on the countertop to cool it.

Next, add your COLD fat – butter, shortening or a combination. If you are using a combination, cut up the shortening and add first. Mix it in until the mixture is like sand. Then, add your butter, which should be cut into small cubes, and toss gently in the flour. Working quickly, cut the butter into the flour. I think no tool works as well as your hands to do this step although you can use a pastry cutter. Using a snapping motion between your fingers and thumbs, you will flatten out the butter cubes. Continue this until all the butter is flattened. If your hands are warm, you may want to cool them under the cold tap first. Do not overmix – you want to be left with an uneven mixture with butter pieces that vary in size. Remember, this is what is going to give your crust its flaky layers. So, you do not want your butter to melt or totally disintegrate as you are doing this.

This is the point where you add the ICE water. One train of thought is to never add all the water at once. Add it incrementally so the dough does not get too wet. Start with drizzling in a few tablespoons and gently tossing the mixture. A bowl scraper works great for this. Continue until the dough holds together if you squeeze it in your palm. The reasoning for this is that excess water can lead to more gluten development. However, a too-dry dough can be very difficult to roll out.

Another point of view is that gluten is not necessarily the enemy of soft, flaky crusts. Adding the water listed in the recipe all at once and mixing until it comes together will give you a dough that is easier to roll out without tearing.

After adding the water and mixing, empty the bowl onto a very lightly floured surface or onto a piece of parchment paper. There are two ways you can proceed from here. The easiest is to just gently gather the dough into a ball. If it is still too dry, add more ice water but a small amount at a time. A spritz from a spray bottle may be all you need. If you have added too much water, sprinkle a bit more flour and gently mix it in.

A second way of finishing your pie dough is only slightly more work but gives you even more flaky layers. For this method, you may want to put your dough onto a piece of parchment. Press your dough into a rectangle and then, using the paper to assist you, fold it into thirds – just as you would a business letter – and then fold in half so it is square-shaped. If necessary, using a water bottle, spritz any dry areas with the ice water and then fold. You can also do this folding without parchment by putting your dough onto a floured counter and use a bench scraper to help with the folding.

At this point, shape your dough into the shape of the pan into which you will put it. This will make it easier to roll out to the correct shape. If you have made enough dough for a double crust, cut the dough in half before shaping. Some recommend rolling the shaped dough’s sides along a floured surface to smooth the edges.

The next step varies by which expert you prefer to follow. One recommendation is to wrap your dough into plastic and put in the refrigerator for a minimum of 30 minutes. This hardens the fat, which has warmed and softened during the mixing process. It also allows the gluten to relax. You may wish to freeze the dough at this point for use at a future time. If so, wrap in plastic and then in foil before putting in the freezer.

When you are ready to actually assemble your pie, remove the chilled crust from the refrigerator. If it has chilled longer than 30 minutes, you may need to let it warm up just a bit on the counter, leaving it wrapped. It needs to be soft enough to roll but should still be cold to the touch. As you roll it out, you should see large pieces of flattened butter.

Since rolling the dough “wakes” up the gluten and softens the butter, a different recommendation is to roll out your dough and put it in the pan right after you make it. Then, chill it thoroughly in the pie pan – about two hours.

Transferring it to the pan can be done by folding the rolled-out dough into quarters, placing it in the pan and unfolding it. Another method is to gently roll the dough around your rolling pin and then unrolling it over your pan.

You are now ready to finish your pie, right? No, remember the word I mentioned in the beginning – COLD. You want to chill your pie crust before filling it. Once again, this chilling helps to solidify that wonderful fat as well as minimizing shrinkage during baking.

Some just recommend refrigerating the dough after being put in the pie plate. As you have mixed and rolled out the dough, the gluten strands that have developed are stretched and want to snap back. You have probably seen that as you roll your dough; it doesn’t always stay but tends to shrink. Resting the dough allows the tension in the strands to ease so they remain stretched and don’t shrink back when heated. However, as the pie is baked, the dough is not well set by the time the butter vaporizes. So, the air pockets created by the steam when the butter melts disappear. The soft, not-yet-set dough sinks into those spaces resulting in less flakiness.

Others recommend freezing the dough before baking. As you bake frozen dough, it heats up and sets relatively quickly in comparison to the time it takes the butter to melt. By the time the water in the butter starts to turn to steam, the dough is well into its setting stage. The air spaces occupied by the frozen butter, now that it has largely turned to steam, hold their shape because the dough has started to set. Thus, flakier layers. The downside is that as the water freezes, it holds the stretched gluten in place rather than allowing it to relax. So, when you bake it, the gluten strands snap back and the crust shrinks.

Many recommend a compromise by first refrigerating the dough for approximately 40 minutes to relax the gluten to minimize shrinkage followed by putting it in the freezer for 20 minutes to improve flakiness. Yes, this does require a bit more timing but could lead to a superior result.

Now you are ready to choose your favorite filling. However, before putting your filling in the pan, stop and ask yourself if you need to par-bake your crust. Stay tuned for next week’s Tip as we delve into what par-baking is, when you need to do it and how to par-bake. See you then!

Cooking Tips · Ingredients · Techniques

A Great Foundation for your Pie

In last week’s Cooking Tip about apples, I mentioned the foundation for any good pie is a great pie crust. Do you make your own or do you use Pillsbury? Making a pie crust is so incredibly easy. In fact, I made four different pie crusts today in only about an hour. They are now chilling in the refrigerator waiting to be topped and turned into beautiful pies. Although pre-bought crusts may be fine in a pinch, I encourage you to start making your own. They freeze beautifully and you will always be ready for pie. There are really two parts to making a great pie crust – your ingredients and your technique. In this week’s Cooking Tip, we will discuss the ingredients. The technique will come next week.

The ingredients that go into most pie crusts are minimal – flour, fat and water. Some will also have a bit of sugar, eggs, dairy (such as sour cream or cream cheese) or even nut flours. Let’s address these one by one.

Flour – most of us are going to use all-purpose flour for our pie crusts. I recommend mastering the technique with this flour before branching out as other flours will act differently.

Fat – the main fats used in pie crusts are butter and/or shortening. Lard used to be a stand-by but, today it is hard to get good quality lard. This is a subject for another Cooking Tip. For now, let’s stick with butter and shortening.

The main advantage of butter is flavor. It will give you a flaky crust since as the water in butter converts to steam, it puffs up the crust. The downside is that because butter has a low melting point, it is hard to maintain a nice crimp to your pie crust.

Shortening has a higher melting point allowing it to stay in solid form longer. Therefore, the crimp has a chance to set before it melts. There are those that think that this higher melting point also leads to a flakier crust than butter. It does lack, though, the wonderful flavor of butter.

This contrast is what leads to the recommendation of using both butter and shortening. They claim that using a ratio of 3:2 butter to shortening gives you the best of both worlds.

Personally, I think there is nothing better than an all-butter crust. Yes, the crimp does slump but you can try to somewhat prevent this by proper chilling of the dough, discussed in next week’s Tip. What about you? What is your favorite?

Water – all pie doughs need some sort of liquid to pull everything together. It is usually, although not always, in the form of water. Occasionally the liquid will be provided by another ingredient such as eggs, sour cream or other dairy. One point that is very important is that in order to keep our fat in the dough solid as long as possible, the water should be very cold.

There is a debate about how much water to add to the dry ingredients. Because water leads to the development of gluten, some say to add your water gradually just until you have a cohesive dough. They caution that too much water will result in a tougher crust due to the increased gluten. Others say that gluten is not necessarily a bad thing as it helps your dough to be stronger and less prone to tearing as you roll it out. I will discuss this more in next week’s Tip on the proper techniques of making pie dough.

This balance of too much/not enough water is what leads some experts to recommend adding vodka or any 80-proof spirit for part of the water. There is no discernable alcohol taste but they claim it is easier to roll out. The reasoning is that although gluten forms with the water, it does not with alcohol. They recommend mixing ¼ cup of water with the same amount of vodka and using this mixture in your pie dough. A tender but very easy to roll out dough is the result. I must say that I have not noticed this is much of an advantage when I have tried it.  Have you tried it?

What about the old recommendation of adding vinegar or lemon juice to your pie dough? The sources that recommend this say it reduces gluten development. However, when put to scientific tests, it has been found that slightly acidic doughs actually have more gluten. To get the desired tenderizing effect, you would have to use about ¼ cup, which would give your dough a very sour taste.  So, this is one “old wives’ tale” that we can put to rest.

For basic pie dough, called Pâte Brisée (translated broken paste or dough), the only ingredients are flour, fat and water. An easy to remember ratio is 3:2:1 – 3 parts flour, 2 parts fat and 1 part water where 1 part is 4 ounces. Another recommendation is 2 parts flour to 2 parts fat with 1 part water. As I mentioned above, I use all butter as my fat but you could also do a mixture of butter and shortening. This type of pie crust can be used for any application.

There may be times when you want a sweeter dough, called Pâte Sucré (sugar paste/dough). Although recipes vary, the one I like to use contains flour, fat, sugar and eggs. The latter is what provides the liquid. Any sweet pie or tart filling works great with this dough. A delicious example is a Lemon Tart.

A third version is Pâte Sablé (sand paste). In this type of dough, you use a nut flour in addition to your AP flour. Other ingredients are sugar, butter and eggs. This is the only pie dough of these three where the ingredients are better at room temperature as they will be creamed together in a mixer. This dough can be made into cookies or used in other sweet pastry applications.

Now that you have the necessary ingredients, stay tuned for next week’s Tip on technique. Although ingredients are important, it is really the technique that will make or break your pie crust. It sure is getting delicious around here, isn’t it?  See you next week!

Cooking Tips · Techniques

Measuring Tools in the Kitchen

As fall starts to arrive, many people begin to bake more. If you live in Colorado, you already know baking can be a challenge due to our altitude. If you missed my Cooking Tips on baking at altitude, see this link. Because we start at a bit of a disadvantage, you want to make sure you are not sabotaging your efforts with other variables. In this Cooking Tip, I would like to discuss one of those variables – measuring cups.

Measuring Cups
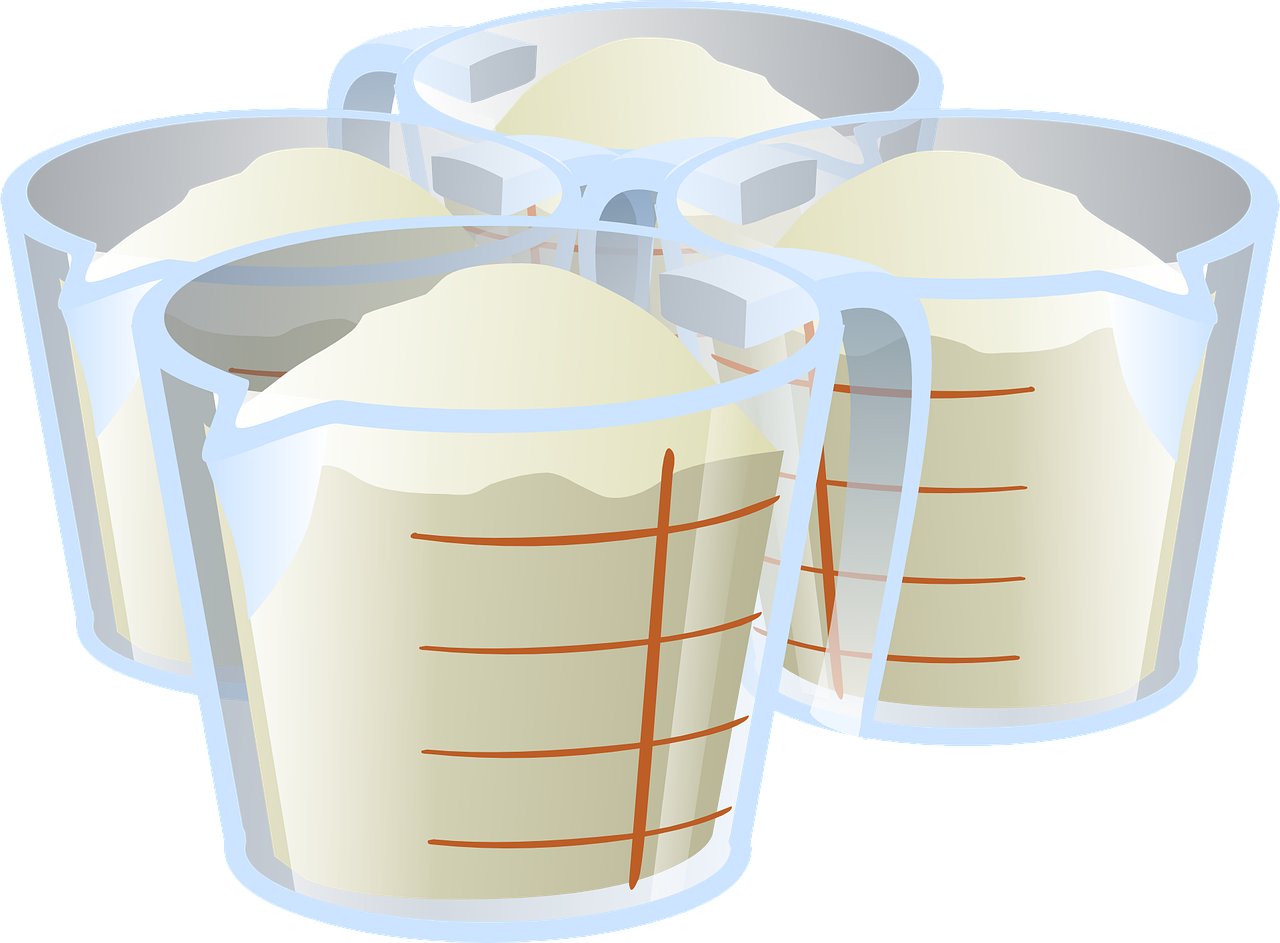
When I teach my cooking classes, I am always amazed that many people do not realize that there are different types of cups for measuring liquids and dry items. Liquid measuring cups are those that have a spout with measuring lines for different amounts of liquid. When you look at them, you will see the top line is below the very top of the cup. These are usually clear, which allows you to easily see the meniscus of the liquid to ensure an accurate measurement.

Measuring cupDry measuring cups are shaped more like a little tub and there are different sized cups for each measurement. The measurement indicated on the handle usually means when the cup is filled to the very top.

The first piece of advice is to use the correct type of measuring cup for the ingredient. When you use a dry measuring cup to measure a cup of flour, you fill it to the top and level off with a flat edge. Trying to use a liquid measuring cup to do this is very difficult. First, it is hard to gauge when you are at a cup since the line is below the top. Also, it is impossible to level it off as you can with a dry cup.

It may be a bit easier to measure liquid in a dry cup but you would need to fill it to the very top to get an accurate measurement and then it is very hard to move without spilling. Cook’s Illustrated did a test where they asked 18 people (cooks & non-cooks) to measure a cup of flour and a cup of water in both wet/dry cups. There was always some variance due to different techniques that people used. However, the variance was even more pronounced when using the wrong type of cup. Trying to measure the flour in a liquid cup led to differences of up to 26%. Measuring liquids in a dry cup resulted in a variance of up to 23%. These inaccuracies can spell disaster for your baking – especially when you are baking at high altitude.

Of course, the best way to measure anything is by weighing it with a food scale. I know that is a step too far for many people. And, most US recipes do not include weight measurements. Accepting that most of you will use measuring cups, you now know how important it is to use the correct type. However, can you just buy any brand and expect it to be accurate?

Unfortunately, the answer is No. A number of food sites have evaluated different brands. Let me summarize for you what they said. If anyone wants links to their actual testing, let me know.

When looking for good measuring cups, you want a number of things. First and foremost, you want accuracy. Other considerations are ease of use and durability. For dry measuring cups, Cook’s Illustrated rated OXO Good Grips Stainless Steel cups the highest. Among liquid cups, Cook’s Illustrated rated Pyrex as the best glass cup and OXO Good Grips Angled cup as the best plastic liquid measuring cups.

Serious Eats felt that Norpro’s Grip-Ez Stainless Steel Measuring Cups were the best dry measuring cups. One nice thing about this set is that it includes a 1/8-cup measure, something that OXO’s set does not. Serious Eats agreed with OXO as the best plastic liquid cup but preferred Anchor Hocking for the glass measuring cups.

A final site that does a lot of testing, The Wirecutter, had their favorite dry cup set as KitchenMade Stainless Steel Measuring Cups and liquid was Pyrex.

A new entry into liquid measuring cups is Euclid. According to the designer, “Euclid is the only measuring cup with a mathematically optimal, tapered design for consistent accuracy across amounts.” Designed by a mathematician, it is an interesting cup that I may just have to try.

While we are at it, what about measuring spoons? Cooks Illustrated found most of the sets they tested were about equal for accuracy but there were differences in ease of use and durability. Their favorite set was Cuisipro Stainless Steel set. For Serious Eats, they found that differences in accuracy to be more of a concern. Their favorite in a rectangular shape was the OXO Good Grips Spice Jar Measuring Spoons. A close runner-up was the RSVP International Endurance Spice Spoon Set. For rounded spoons, they preferred the Amco Advanced Performance Measuring Spoons set. Wirecutter found that Prepworks by Progressive was their choice although their second choice was Cuisipro, Cook’s Illustrated’s favorite.

No matter where you live, if you are a serious home cook, especially a baker, you do want to pay attention to little things such as measuring cups and spoons, which can work against your success. If you live at altitude, there are enough challenges without having to deal with inaccurate measurements. With the recommendations above, I hope you will be one step closer to all of that success in the kitchen!

Cooking Tips · Techniques

Nonstick Cookware

Do you have nonstick pots/pans in your kitchen? Most of us probably do. If you were to look in a professional kitchen, you would probably find only a few, if any at all. Why is that? What do professional chefs know that maybe we do not? That is the subject of this Cooking Tip – nonstick cookware.

When I first started cooking, I had a friend who sold Pampered Chef. My first cookware set, therefore, was a set of nonstick pots/pans from Pampered Chef. I used them for many, many years but as they aged and went to Cookware Heaven and I grew in my culinary knowledge, I replaced them with other types of pots/pans. The only nonstick pans I have now are a couple of small skillets. The rest of my cookware is a mixture: stainless steel, cast iron and enameled cast iron. Because I use induction for most of my cooking, I must take that into consideration when buying cookware. I love my induction cooktop but it does limit my cookware choices. (If you have never read my Cooking Tip on induction cooking, here is a link to it.)

One of the first things to be aware of is that nonstick finishes have different names. Trade names include Teflon, Radiance, Eclipse, Excalibur, Quantanium and Halo. Just because the pan isn’t called “Teflon” doesn’t mean it isn’t the same thing – it just has a different name.

There are some advantages to nonstick cookware.

  • Certain food items are best in nonstick cookware. Making a great omelet is easiest in a nonstick skillet. Flipping out your homemade crepes is a job tailor-made for nonstick. Many also prefer to cook delicate fish in nonstick.
  • They do not require much oil in which to cook, if that is a concern for you.
  • They make for easy clean-up although you do need to take care as I will discuss below.

There are also disadvantages.

  • They cannot withstand high heat. Do not cook above medium-high as at too high of a heat, the nonstick coating can vaporize, which is harmful to the pan and could possibly be bad for your health. (It is definitely bad for birds. According to the Cookware Manufacturers Association, CMA, fumes from a nonstick skillet that has been heated too hot can be harmful or even fatal to birds as they have a very sensitive respiratory system. It is recommended, then, that any pet birds not be exposed to these fumes.)
  • Although it is possible to brown meat in a nonstick skillet, you will not develop the fond that is so important to flavor and making a pan sauce. (What’s fond? – email me for a Cooking Tip on this subject.) Even though you can sear meat in a nonstick pan, I still do not recommend it as it is very easy to over-heat the pan.
  • They are not as durable and are easy to damage if you are not careful.
  • Some people are worried about the nonstick coating for health reasons. According to FDA’s 2017 Food Code “Perfluorocarbon resin is a tough, nonporous and stable plastic material that gives cookware and bakeware a surface to which foods will not stick and that cleans easily and quickly. FDA has approved the use of this material as safe for food-contact surfaces. The Agency has determined that neither the particles that may chip off nor the fumes given off at high temperatures pose a health hazard.” Others have more concerns both for our personal health and the environment. To minimize these issues, do not over-heat them, clean them gently and do not use utensils that could cause the coating to chip off the pan.
  • Concern has also been raised about perfluorooctanoic acid (known as PFOA, APFO or C-8). This was used in the manufacturing of the nonstick coating. There may be debate on whether this chemical is truly harmful but there was enough concern that as of 2015, producers of nonstick cookware in conjunction with the Environmental Protection Agency agreed to eliminate it from their products. An interesting note is that according to the CMA, “While used during the manufacture of the product and while there is a small amount in the finished non-stick liquid product when it is shipped to the applicator, all of the PFOA is driven off in the curing process following the application of the PTFE spray to the pan’s surface. The finished pan does not contain any measurable PFOA after proper curing. The consumer is never exposed to PFOA while using their nonstick pan.”

I feel there is a definite place in our kitchen for nonstick skillets. I do not think other nonstick pots are probably necessary. No matter which you have, be sure to follow the recommended care instructions. Besides the caution against over-heating the pan, here are few other considerations.

  • Take care not to scratch the surface. Nonstick surfaces have gotten much more durable over the years, but rubber, silicone or wood utensils are better than metal ones to minimize the risk of scratching.
  • Store them carefully. Avoid stacking them if possible or, at least, put something like a paper towel or plate between your items to reduce the possibility of scratching.
  • Clean gently. Don’t use an abrasive sponge, which can create tiny scratches, and avoid harsh cleaners. It is best to handwash rather than putting them in the dishwasher, no matter what your instructions say. Also, let it cool before washing it so thermal shock doesn’t cause it to warp.
  • Season your nonstick pan. Before using it for the first time, wash it and dry thoroughly. Apply a thin layer of oil to the surface, heat it gently for about 2 minutes. Allow it to dry and wipe out any excess oil. You may also want to apply a small amount of oil prior to each use. This not only improves its performance, but also prolongs its life.
  • Do not use a nonstick cooking spray. This leaves a stick residue that is very difficult to remove. Rather, use a fat such as butter or oil.

Because of the concerns of the chemicals used in the manufacturing of nonstick pans, companies have been trying to make a “green” skillet. To date, none of these are as nonstick nor do they retain their nonstick quality as long as regular nonstick skillets.

My husband bought me a small Bialetti ceramic nonstick skillet. Although it was very pretty and worked great at first, I found it deteriorated very quickly to the point it lost all its nonstick qualities. This is the only one I have ever tried. What are your experiences with ceramic? Let me know.

I also purchased a “Black Cube” skillet manufactured by Frieling that is made without PFOA. The food cooks on raised stainless steel pixels. It is also advertised to be safe up to 500°F as well as 100% scratch resistant, even with m

In summary, do not feel guilty about having nonstick cookware. Just be aware of what they are best for, how to minimize the risks and how to prolong the life of the cookware.

Cooking Tips · Ingredients · Techniques

Making a Great Burger!

In last week’s Cooking Tip, I discussed how to understand ground beef labeling and what would be best for the dish you will be making. Since burgers are one of the main reasons that people buy ground beef, in this Cooking Tip, I would like to give you some advice on cooking that perfect burger. Some of the links below are affiliate links and I may earn a commission if you decide to purchase.

As we learned in the prior Cooking Tip, you will want to use either ground chuck or a mixture of ground chuck and ground sirloin for your burgers. If you cannot find that in the store, opt for a ground beef with at least 20% fat (labeled as 80/20). The next step is seasoning that meat so it tastes even better. For a classic burger, all you will need is salt and pepper. But, when do you salt the meat? Does it make a difference?

Cooks Illustrated is a proponent of salting the meat before shaping it into patties. They recommend putting the meat in a bowl, gently breaking it up, adding 1 teaspoon table salt for 1½# of meat and then gently mixing it in as you shape them into patties.

A contrary view is voiced by SeriousEats.com. One of their staff did a testing of this. They salted burgers in three ways: seasoned only on the exterior just before cooking, seasoned by tossing the ground meat with salt (like Cooks Illustrated recommends), and seasoning the meat by salting cubes of beef and then grinding it yourself. They used 1 teaspoon kosher salt (equivalent to ½ teaspoon table salt) per 5-oz patty. Other than the salt difference, the burgers were all treated the same.

What they discovered was salting the burgers right before cooking led to the best burger with a loose, tender, open structure. They found this result meant the burger breaks down into small pieces in your mouth while still allowing the burger to hold onto juices. Salting ahead of time caused the burgers to be more sausage-like with a tighter and bouncy texture.

Here are some things that everyone (almost) agrees with:

  • Don’t overwork the meat as you will end up with dense and rubbery burgers.
  • Shape your patty a bit wider than the bun. Then, make a shallow indentation in the center of the patty before cooking. This helps to prevent your burger expanding into a large ball. One caveat, this step is less necessary if you are pan-frying them rather than grilling or broiling.
  • Don’t overcook. This may be a bit controversial for food safety reasons. According to the USDA, ground beef should be cooked to 160°.   If you are sure about the safety of your ground beef, others recommend the following internal temperatures, checked with a food thermometer. (This is my favorite and one of the best on the market.)
    • Rare – 120°
    • Medium-rare – 125-130°
    • Medium – 135-140°
    • Medium-well – 145-160°
    • Well-done – 160 and up°
  • Keep your ground meat cold until right before forming the patties. You do not want the fat to start melting before cooking.

Once they are on the grill or in the pan, another debate occurs. Many say that you should only flip them once and never press down on them as it squeezes out flavorful juices. Or, as my husband likes to quip, “What has that burger ever done to you to treat it like that?”

Once again, SeriousEats.com begs to disagree. Their testing showed that gently flipping the burgers as often as every 15 seconds resulted in a quicker and more even internal cooking. They found this decreased the cooking time about 1/3.

Once your burger is cooked, you can make it your own by your choice of bun, sauce and toppings. What is your favorite burger? Let me know and have a wonderful Labor Day Weekend!

Cooking Tips · Ingredients · Techniques

Cooking with Honey

I recently had a booth at our town’s Honey Festival where I showcased five different goodies make with honey as well as Honey Ginger Lemonade. I was humbled by so many of you who stopped by, sampled these goodies and signed up for my emails. In honor of that, I thought I would write this Cooking Tip on how to cook with honey.

Honey is a delightful sweetener and is lovely to have in your arsenal. Because honey attracts and holds water, it can add great moisture to your baked goods. It can also act as a binder and thickener for sauces, dressings, marinades and dips.

There are, however, some cautions about cooking with honey. You cannot make a 1-to-1 swap from your recipe’s current sweetener (such as granulated sugar) to honey.  With so many wonderful recipes that were created with honey as an ingredient, I encourage you just to find this type of recipe. Someone has already done all the experimentation to come up with the right mix and amount of ingredients.

If you would like to convert a recipe from it is current sugar to honey, here are some guidelines.

  • Begin by only substituting half of the amount of sugar in the recipe with honey. You might be able to up this as you continue experimenting but if you do it all at once, your recipe is likely to fail.
  • Because honey is a liquid sweetener, reduce the liquid in your recipe by ¼ cup for each cup of honey used.
  • In cookie recipes where the only liquid is eggs, increase the flour by 2 tablespoons per cup of honey.
  • Honey is an acidic ingredient. Therefore, add about ½ teaspoon baking soda for each cup of honey used.
  • Reduce your oven temperature by 25-75° to prevent over-browning as honey browns faster than sugar.
  • Choose your honey carefully. Very strongly flavored honeys should be used judiciously and are best in items such as spice cakes, spicy marinades and glazes (jerk spice, spare ribs, BBQ sauce). For a lighter dish, choose a lighter honey.

One wonderful characteristic of honey is that it is its own preservative. Therefore, it keeps for years although the flavor is best within a year of harvesting.

Store it at room temperature in your pantry. If you put honey in the refrigerator, it accelerates crystallization. Speaking of that somewhat irritating aspect of honey, what do you do with your honey when it has crystallized? Do not throw it away; it is not an indicator of spoilage, impurity, age or quality. Rather, it is a natural process that occurs when the glucose molecules align into orderly arrangements known as crystals.

You can reverse crystallization by any of the following methods.

  • Place the honey in a jar in warm water. Allow it to sit until the crystals dissolve.
  • Bring a pan of water to a boil, turn off the heat, place the honey container in the water with cap open & leave until both have cooled.
  • Microwave it in 10-second increments until the crystals dissolve.
  • For a more permanent solution, you can add corn syrup (assuming you have no objections to this ingredient). Because crystallization can only occur if all the sugar molecules are of the same structure, by adding something different (such as corn syrup), it will not crystallize. You do not need much – stir in 2 teaspoons of corn syrup per cup of honey.

Honey is such a wonderful ingredient and I would suspect we all have some in the pantry. It is great to spread on your bread or drizzle in your oatmeal. It is also an ingredient that has so much more to offer. Go someplace where you can taste all the different varieties, choose what you enjoy and have fun!

o

Cooking Tips · Techniques

Cake Pan Math

Have you ever seen a cake recipe that sounded scrumptious and you decided you just had to make it? Then, as you are reading the recipe (hopefully before you started baking), you notice it calls for a size of cake pan that you do not have. You do have other cake pans, though, and you wonder if you can just use those. In this Cooking Tip, I will give you some guidelines for doing just that. If you are math-averse, you may want to stop reading and just run out for the specified pan size — assuming you have storage space for one more pan! However, if you are willing to bear with just a bit of figuring, read on.

At its most basic, you want to know the capacity of your cake pan and then find another pan with the same or similar capacity. For square pans, that is pretty easy. Just multiply length by width. For example, if you have an 8-inch square pan, multiply 8X8 to get 64. For your 9X13 pan, you get 117.

For a round pan, you have to reach back to what you learned in school. Do you recall that equation Pir2? That is “Pi multiplied by the radius squared.” Oh yeah, you remember hearing that somewhere, don’t you? And, Pi is 3.14. Well, in reality it is more than that, but 3.14 will suffice for our purposes.  (If you care to read about it in-depth, here is an article from Wikipedia. Let’s do an example for a 9-inch round pan. The diameter is 9 inches, which makes the radius 4½ inches. So, we get 3.14 x 4.52 = 3.14 x 20.25 = 63.6. Round it up to 64. If you shriek at even this little bit of math, here is an online calculator that will do it for you.

Remember the capacity of the 8-in square pan? It was 64. Bingo – an easy swap for an 8-in square pan would be a 9-in round pan since they both have the same capacity. (Note: this assumes a pan depth of 2 inches.)

Let’s get a bit more complicated. If you have a recipe for a cake made in a 9×13 pan and you want to make two round layers, what do you do?

Step 1: Figure the capacity of the 9×13 inch pan. Easy – 9 X 13 = 117.
Step 2: Figure the capacity of your round pan. If it is 9-inch, we already know it is 64. Doing the same calculation for an 8-in round, you get 50.
Step 3: Divide the capacity of your bar pan (117) by 2 since you want to put the batter in two pans. That gives you 58.5, which lies in between the capacity of the two round sizes.
Step 4: Make your choice. If you divide the batter into the two 8-in pans, the batter may overflow the pans. If you use the 9-in, the layers may be shorter than you want. So, if you have never made the recipe before, the safer bet would be the 9-inch pans. If you have made the recipe before in the recommended pan size (something I would highly recommend the first time you make it), how high did it rise in that pan? If it had a high rise, you would definitely want go with the 9-inch. If, however, it really did not rise that much, you might be fine with the 8-inch.

Another option is to use an oval-shaped casserole dish although the end shape may not be what you are looking for. To do that, we need to do a bit more figuring. Let’s say you have an 8×12 inch oval dish. Measure from the center to the top – 4 inches. Then, from the center to the side – 6 inches. The equation is now 4 in X 6 in X 3.14 (pi) = 75. Compare this to the capacity in the recipe to see if it might be a viable alternative. For example, this would be too large if the recipe calls for an 8-in square pan (capacity of 64) but not too bad if it calls for a 9-in square pan (81). One caveat – most oval casserole dishes are not made of metal as cake pans are. Rather, they are usually stoneware, ceramic or glass. You might need to tweak the oven temperature and/or baking time but that is another discussion.

Do you love the look of a Bundt cake? Do you have a Bundt cake pan that you barely use? Most recipes that are to be baked in a 9×13 pan can be baked in a Bundt pan. (This only works for a standard butter/oil cake, not for sponge or angel food cakes.) For here, we look at volume rather than capacity as how would you ever calculate the capacity of a Bundt pan???

Bundt cake pans are usually 10-cup or 12-cup but this is just the actual volume you would find if you filled it with water and measured how much water you used. Since the cake will rise to fill the Bundt pan, you cannot put that much batter in the pan. What you need to know is how much batter you can actually bake in that pan. Experts tell us that for a 10-cup Bundt, the batter amount would be about 6 cups. A 12-cup Bundt pan can take up to 7¼ cups of batter.

It just so happens that a 9×13 cake is usually equal to about 6 cups of batter – an amount that would be just fine in your Bundt pan. It may not bake in the same amount of time as it would in the 9×13 pan. Just think about how much thicker the batter is in that Bundt pan. Start checking your cake at the recommended bake time but do not be surprised if you need to add up to 30% more time.

There is much more that could be said but I think the above should suffice for most of your cake baking needs.

Cooking Tips · Ingredients · Techniques

Pesto — make it your own!

I was making sandwiches for lunch the other day and wanted something different. Off to the freezer I go where I found cubes of three kinds of frozen pesto – classic Genovese pesto, basil pesto with manchego cheese and sun-dried tomato pesto. Out came the latter, which I then mixed with grilled and chopped red onion & mayo. I proceeded with spreading that on some nice bread, topping with ham and grated Parrano cheese, brushing a bit of olive oil on the outside of the bread and finishing the sandwiches off on my stovetop grill. Very yummy if I do say so myself. That got me thinking that Pesto might be a good topic for a Cooking Tip.

Pesto is such a delicious sauce and requires no cooking. Classic pesto (aka Genovese pesto) is made from fresh basil, pine nuts, Parmesan cheese, garlic and olive oil. Traditionally, it is made in a mortar and pestle although modern cooks tend to use a food processor or blender. The different methods give different results. The mortar/pestle will give you a coarser pesto with a fresher basil flavor where as the food processor results in a finer texture with a less fresh (but still yummy) flavor.

There are many different recipes for classic pesto. Although they all have the same basic ingredients, they may use different ratios of ingredients. I encourage you to try different recipes until you find the one (or ones) you like. Techniques will vary, too. Some will have you put all the ingredients in the blender (or food processor) at once, blend and finish with seasoning with salt to taste. Others will have you blend all the solid ingredients to a paste and then stream in the olive oil to the desired consistency and ending with salt to taste. Others will have you hold off on the cheese, only adding it just before serving. Another method is to start by grinding the garlic and salt to a paste followed by the pine nuts and grinding again. Then, basil leaves are pounded into the mixture. Cheese is next and it is finished by drizzling in the olive oil as desired.

Some professionals recommend blanching the basil leaves before using to help keep the color as green as possible. The blanching supposedly deactivates the enzymes that cause the basil to turn brown. Testing by TheKitchn.com did show this to be true but there was a downside – the pesto made with blanched basil tasted less fresh with less basil flavor.

SeriousEats.com did a different type of testing. They made pesto with three variations. The first was made classically with fresh basil using a mortar/pestle. The second used fresh basil but made in a mini food processor. The third was also made in the mini processor but rather than fresh basil, they used basil that had been frozen and then defrosted. The theory for this latter technique was that freezing leads to cell rupture thereby releasing more flavor into the pesto. Their interpretation of the results was that the classical method produced the best pesto – very creamy with the brightest flavor. They thought the pesto made with the fresh basil in the mini processor was the worst – gritty texture with flavor that was too mild. The final batch – made with frozen basil and the mini processor – fell in the middle. It did have a nice creamy texture and improved flavor over batch #2. However, they still preferred the classic approach. They did conclude, though, that if you do not want to go the mortar/pestle route, at least throw the basil in the freezer before putting it in the processor.

Find your preferred technique and then mix up the ingredients. Use different herbs (cilantro, parsley, arugula, spinach, mint or a combination) or swap out the pine nuts for almonds, hazelnuts, pecans, pistachios or walnuts. You could also vary the cheese from Parmesan to another hard cheese such as pecorino, asiago or manchego. Add some citrus for a bit of zip.

How about that sun-dried tomato pesto I used in my sandwich? It does have some of the classic ingredients (basil, garlic, pine nuts, Parmesan, olive oil) but adds roasted red pepper, sun-dried tomatoes, fresh tomatoes, tomato paste and chili powder.

You may store your homemade pesto in the refrigerator. Just put it in the smallest container possible, pack it down to eliminate air pockets and either pour a thin layer of olive oil over it or put a piece of plastic wrap directly on the pesto before covering the container. It should keep in your refrigerator for up to a week. Or, do as I do. Spray an ice cube tray with nonstick spray, spoon the pesto into the compartments and freeze. Once frozen, you can remove from the ice cube tray and store either in a freezer bag or other freezer-safe container. You may lose some of the vibrant green color but I think that is a fair trade-off for always having homemade pesto at your fingertips.

Rarely does one make pesto as an end in itself. It is always an accompaniment to something else. The most common is as a pasta sauce, usually thinned out a bit with the pasta water. How about spreading it on a sandwich or on a pizza crust? Dollop it on your grilled chicken breast. It is classic served with potato gnocchi.

You will note that I did not give you any one recipe. That is because I think (unlike many culinary professionals) that there is not just one way to do things or one recipe that is the best. You need to find what is best for you. That depends on your taste, your kitchen equipment, your available time, your budget for ingredients as well as your interest in simple versus more complex techniques. Find what works for you and then branch out and experiment. Have fun and realize that there do not have to be so many hard and fast rules in cooking!

Cooking Tips · Techniques

How to succeed in the kitchen!

I read many different sources of culinary information from cookbooks to magazines to emails to blogs. I often find interesting and helpful items. I have seen a number of articles that lay out behaviors that can make or break your success in the kitchen. In this Cooking Tip, I have pulled the best of these for you. If you have taken any of my cooking classes, you will certainly recognize some of these suggestions and, I hope, have begun to incorporate them into your kitchen life. It may be difficult to break old habits and get into good routines, but I guarantee you it will make you a better and more efficient cook!

  1. Read the recipe all the way through before starting. This may seem self-evident but there are many people who do not do this. When reading the recipe, look at the ingredients AND the directions. Only then will you know such things as what you need to pick up at the store, what equipment you will need and the timing. If not, you may miss that Step #3 tells you to chill the mixture for two hours. If you are hoping to get this on the dinner table in under an hour, this is not going to work. Yes, you can skip those steps but do not expect the recipe to turn out as it was intended. There are usually very good reasons why a recipe calls for a particular ingredient, certain equipment and recommended timing. Only by trying to stick to these recommendations the first time you make a recipe will you know how it should turn out.

  2. If you want to double or halve the recipe, do the math up front and write it down. Not all recipes do well with doubling or halving. However, if you are going to do so, write down the adjusted measurements next to each and every ingredient. It is so easy to get partway through and forget to change the amount. I’ve been there! Savory recipes do much better with these alterations than baking ones. If you want to double a baking recipe, just make two separate ones. It usually turns out much better.

  3. Follow the recipe directions as closely as possible. If a recipe tells you to reduce a sauce to a certain consistency, don’t get impatient and stop before you get there. The flavors will not be the same. Note carefully how items are to be cut – chopped, sliced, diced, minced etc. Different cuts produce different results. Also, try to cut them uniformly. If your potato cubes or onion slices vary in size, they will not cook evenly. You do not want to end up with a dish where parts are underdone and others overdone. Not very appetizing!

  4. Be cautious about substituting ingredients. Not all substitutions work. If your recipe calls for white balsamic vinegar, do not assume you can substitute any white vinegar. In baking, not all sweeteners can be swapped for each other in equal amounts. Again, try to make the recipe as written the first time so you know what it should taste like. Then, if you want to try a substitution, you will have a reference point.

  5. Don’t substitute dried herbs for fresh in equal measure. Dried herbs are better for some applications whereas fresh are better for others. Try to use what the recipe recommends. If you do decide to substitute, be aware that it is not a 1:1 ratio. If using dried in place of fresh, use only about a third of what is specified for fresh.

  6. Try to avoid precut, preshredded, etc. Yes, these items are certainly convenient but often, what you gain in convenience, you lose in taste & texture. One of the most glaring examples is cheese. There is a reason that so many recipes call for “Freshly Grated” cheese. Yes, you can find it pre-grated in bags or, even worse, cans. The latter often do not behave as you might expect and a look at the ingredient list often tells the story. There are usually some “anti-caking” agents added such as “powdered cellulose”. Although some may disagree, the taste is often not as vibrant as freshly grated cheese. Another plus for buying a block of cheese and grating it yourself is that it is a better economical choice as you will get more for your money.

    The story is similar with precut veggies and fruit. First, they are much more expensive than the whole versions. Second, it has been shown that it increases your risk of food-borne illness. Thirdly, once a fruit or vegetable has been cut, the nutrients start to degrade.

As I have been writing this, I realize that there is so much more to say such as prepping your ingredients before commencing cooking, weighing ingredients (as opposed to using measuring cups), keeping your knives sharp, watching your ingredient temperature, using a trash bowl and on and on. However, I will stop here so this Tip does not become a Treatise!