Every fall, some people eagerly await the “Pumpkin Spice” season, while others dread it. No matter where you fall on that spectrum, do you really know what it is and what the name means? That is the subject of this Cooking Tip.
The first thing to know is that there is no pumpkin in pumpkin spice. In fact, pumpkin has minimal natural flavor. According to King Arthur Baking, raw pumpkin is up to 90% water, which explains why it is so lacking in flavor.
Pumpkin is a type of squash. As you will learn from this Cooking Tip, Libby’s Pumpkin Puree is made from a Dickinson squash. As for classic pumpkin pie, one of the best you will ever make doesn’t even use pumpkin. Instead, it uses roasted butternut squash. Check out this recipe.
A pumpkin pie without some version of pumpkin pie spice would be very sad indeed. The deliciousness comes not from the pumpkin, but from the other ingredients, including the added spices. The blend of spices that gives pumpkin pie its characteristic flavor is known as pumpkin spice or pumpkin pie spice.
Each producer of pumpkin spice has their own recipe, but the most commonly included spices are the following.
Cinnamon
Ginger
Nutmeg
Cloves
Allspice
You can certainly buy bottles of pumpkin pie spice. McCormick even produces a liquid extract titled “Pumpkin Pie Spice Blend Extract.” If you do not think you are going to use a purchased bottle of pumpkin pie spice before next year, it would be better to make your own. It will be fresher, you only have to make how much you want to use, you can alter the ratio of the ingredients to match your preferences, and you won’t have a bottle of something that you are not using taking up precious space.
People like to talk about before and after the Pumpkin Spice Latte that Starbucks created in 2003. Pumpkin spice as a spice blend certainly existed long before then. A cookbook from 1798 actually has a couple of recipes in it that use nutmeg and ginger, as well as allspice and ginger. However, this Starbucks beverage created a new cult following for this flavoring profile, and decades later, it shows no signs of slowing down.
It is a trend that is not limited to Starbucks. Look at these other products cashing in on the Pumpkin Spice craze.
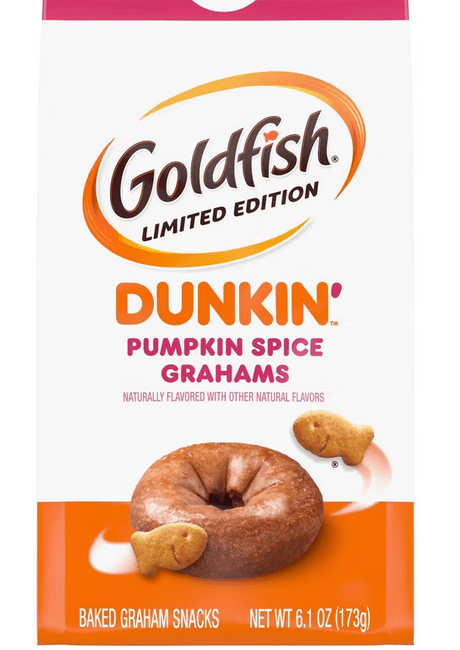
Dunkin’ Pumpkin Spice Goldfish
Target Favorite Day Pumpkin Spice Whipped Cream
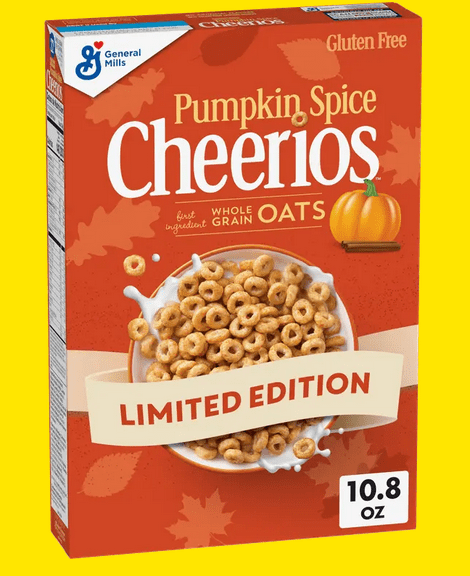
Pumpkin Spice Cheerios
Pepperidge Farm Pumpkin Spice Cheesecake Cookies
Great Pumpkin Imperial Ale
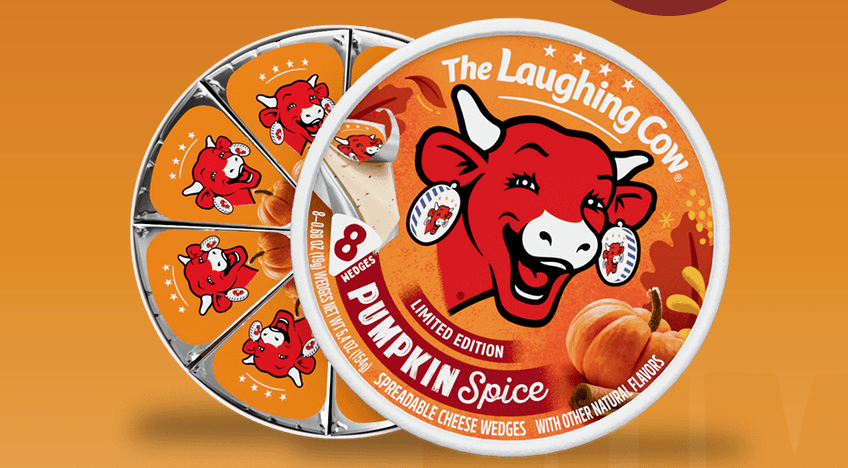
Laughing Cow Pumpkin Spice Cheese Wedges
Ghirardelli Pumpkin Spice Caramel Chocolates
Pepperidge Farm Pumpkin Spice Milano Cookies
Pumpkin Spice Popcorn
Dawn Pumpkin Spice Powerwash
Dunkin Pumpkin Munchkin Creamer
Air Wick Pumpkin Spice Essential Mist
Febreze Air Mist Pumpkin Roll
Do you enjoy the pumpkin spice season? What’s your favorite product?
Almost all of us have likes and dislikes among foods. One food that is definitely on my dislike list is pickles – or anything that undergoes the pickling process. The only time they make it into my shopping cart is when my husband requests them. I typically look at the shelves of pickles and have to search my memory for the variety he likes. If you are the same, this Cooking Tip is for you, as we will delve into the world of pickles.
The word “pickle” can be either a noun or a verb. As a noun, it refers to food that has been preserved in a brine or vinegar solution. The verb applies to the process of preserving food in this brine or vinegar mixture. In this Cooking Tip, we will stick with pickle as a noun.
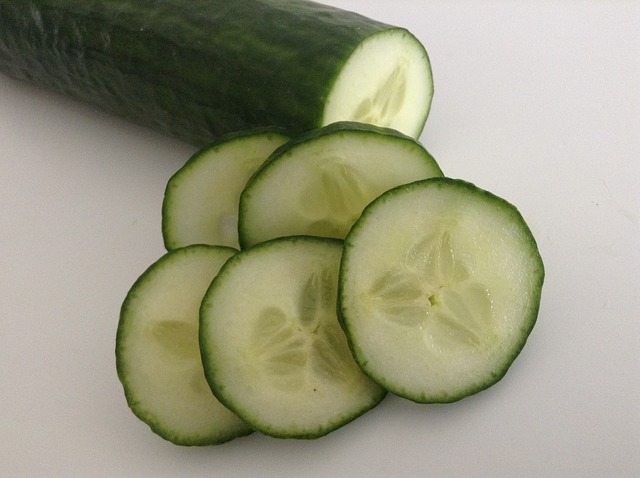
Many kinds of food can be pickled. What we all think of as the average pickle, though, starts as a cucumber. Here is a list along with descriptions of some of the most common pickles.
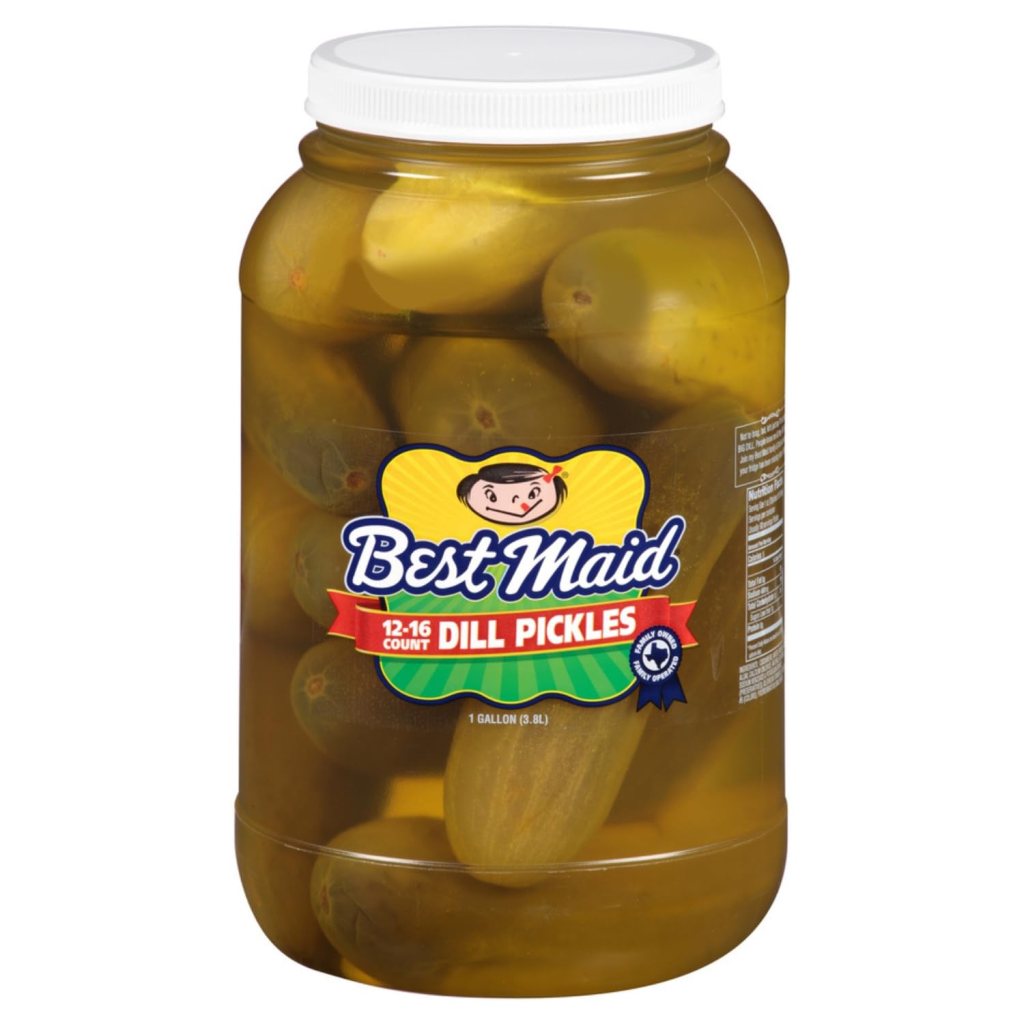
Dill pickle
This is the most popular pickle.
The brine is made with abundant amounts of dill in all its forms.
Dill pickles have a strong and herbaceous flavor.
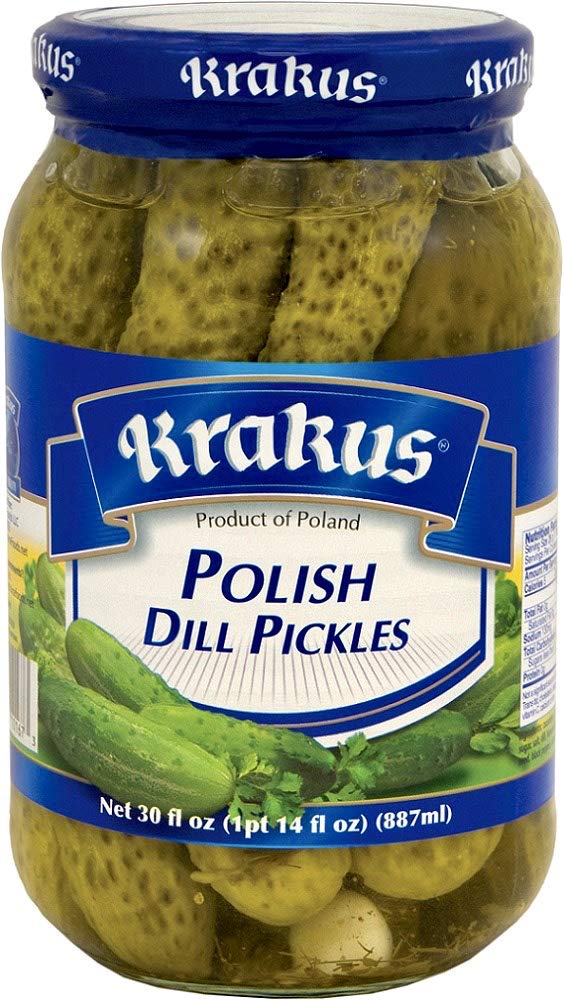
Polish/German Dill
These undergo an extended processing time in wooden barrels, which impart a unique flavor.
The Polish variety contains more spices and garlic than traditional dill pickles. They tend to have a peppery bite.
The German variety has sugar added to the brine, giving them a sweet-sour flavor.
Refrigerator/Overnight dill
These are soaked in a brine for a short period of time (overnight to a few days) in the refrigerator.
Sweet Pickles
Sweeter than other pickles as they are made with sugar, vinegar, and spices.
Bread & Butter Pickles
Bread & Butter pickles tend to be made with vinegar, salt, sugar, mustard seeds, coriander seeds and celery seeds.
They have a tangy taste with sweet notes.
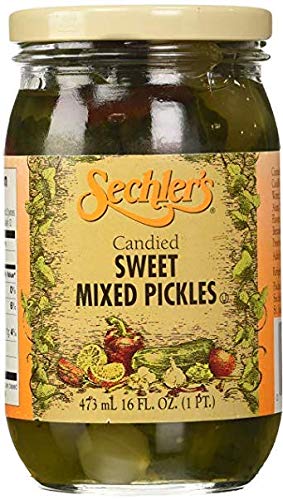
Candied Pickles
As their name implies, these are pickles soaked in a syrupy sugar &vinegar solution for at least a week.
They are much sweeter than sweet pickles because of the sugar concentration of the soaking solution.
Gherkin Pickles (baby pickles)
Gherkins are made from small cucumbers with bumpy skin. These cucumbers are mainly used for pickling.
Gherkins are usually jarred whole.
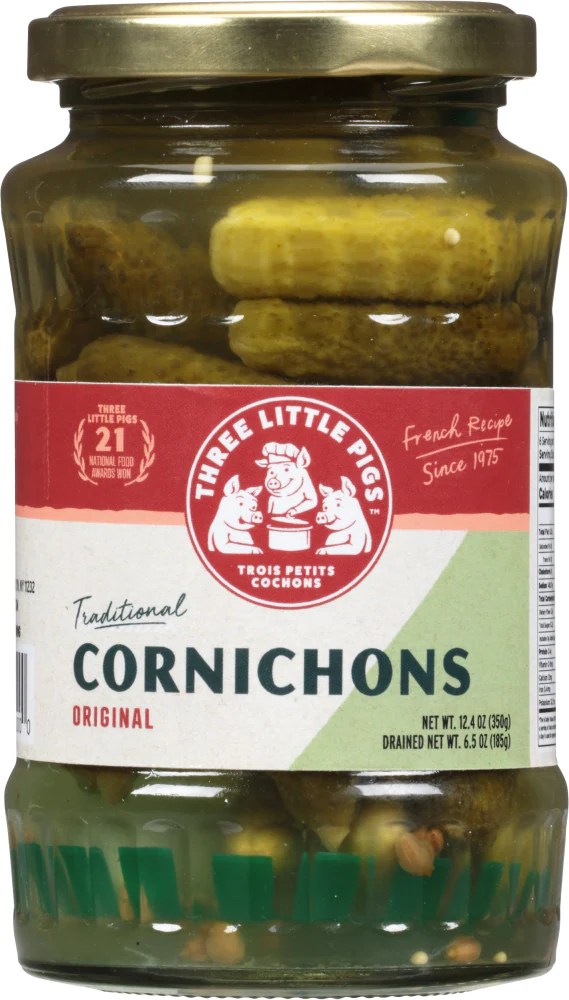
Cornichon
This is the French word for “gherkin”.
Some varieties of cornichons are sweet, and others are brined with tarragon.
Sour pickles
These pickles are fermented not with vinegar, but in a brine of water and pickling salt.
There are two varieties – half-sour and sour. The latter is fermented for twice as long as the former.
Actual fermentation times depend on the company, but they are said to range anywhere between a week and a few months.
Some sources say that if they are eaten before six weeks, they are called half-sour. After that time, they are termed sour.
There are other pickle types, including some unusual ones such as Kool-Aid pickles and Cinnamon pickles. However, the pickles mentioned above are the ones you will most likely see in your supermarket. I hope this Tip will help you as you stare at the supermarket shelf trying to decide what to buy.
Caraway is a spice with a flavor that can be a bit polarizing. It is not extremely common in American pantries, although it is elsewhere in the world. This Cooking Tip will explain what caraway is, how to use it, and whether there are any substitutions.
Caraway comes from a plant in the parsley family. Holland is said to be the largest producer of caraway. It is also grown in a few other parts of Europe as well as in the United States.
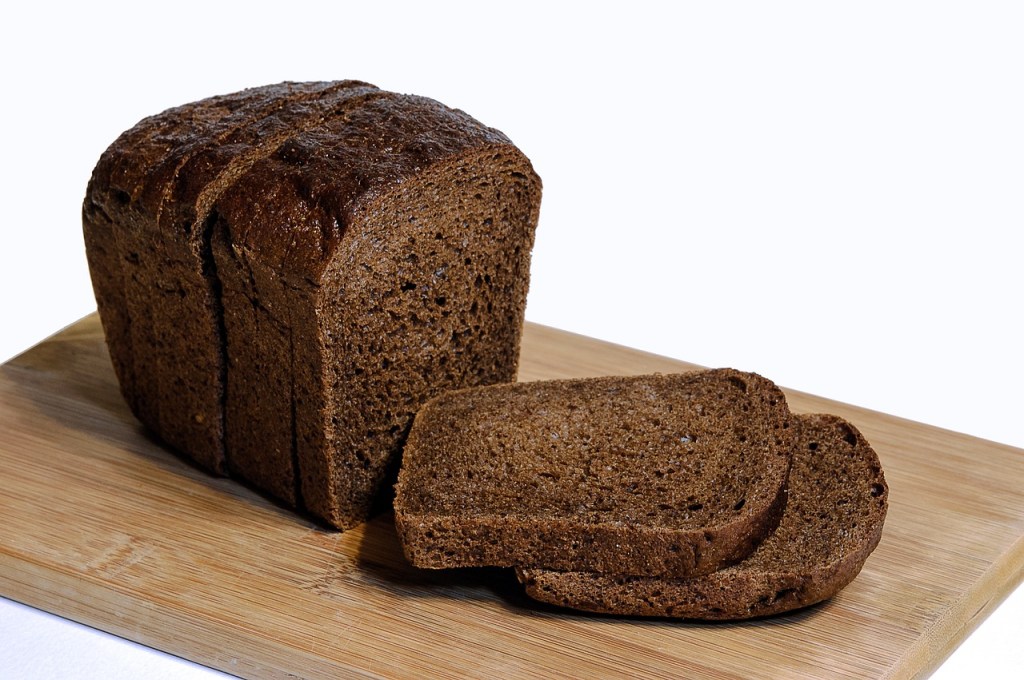
In the US, caraway is probably most well-known for the characteristic flavor of rye bread. It is much more common in European, Asian, and African dishes. Examples are sauerkraut, sausage, cabbage dishes, cheese dishes, and soups.
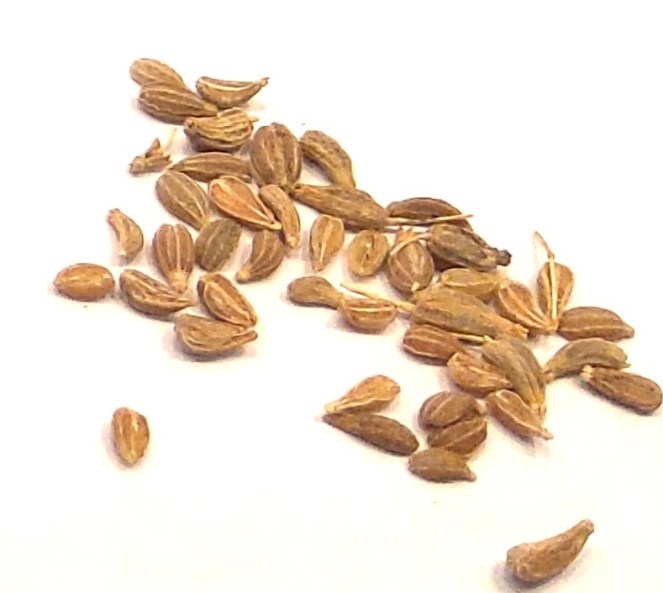
The seed is small, measuring less than ⅛ inch in length. They are dark brown in color and have a crescent-shaped appearance. The aroma is pungent. The flavor is described as sweet and tangy with licorice notes that are similar to anise.
Although you can buy ground caraway, it is much preferable to buy caraway seeds in whole form. Savory Spice has an excellent supply of Dutch caraway. (This is an affiliate link and I may earn a commission if you decide to purchase.) Since it is a spice that you will probably not use frequently, you want it to stay fresh as long as possible. Since the whole seeds stay fresh much longer (up to 2 years), you will get more use out of the whole form. Also, most recipes will call for the whole seeds. Some people find the whole seeds somewhat unpleasant to chew. In that case, you may want to put them in a spice bag or cheesecloth to allow for easy removal.
Caraway seeds are one of many spices that benefit from a quick toast in a dry pan over low heat. Once they become fragrant, remove them from the heat and allow them to cool before using. You may then crush or grind them in a mortar/pestle or use them whole.
As with all spices, store in an airtight container away from light, heat, and moisture.
Since caraway is not the most common of spices, many ask about substitutions. There are some you can try, although none will be an exact replacement.
Anise Seeds
You may consider anise seeds, which will impart a similar licorice note. Anise can have a stronger flavor, which you should take into consideration if you substitute. This will work best in baked goods such as bread and cookies.
Fennel Seeds
Another choice would be fennel seeds. Fennel is more commonly found in Italian and Indian dishes, especially Italian sausage. This spice can also give a licorice flavor. However, caraway’s flavor is more earthy and nutty, while fennel is somewhat sweeter with a stronger licorice note. Fennel will do better in dishes with long cooking times, such as soups, stews, and curries.
Nigella Seeds
Some recommend nigella seeds, although they are not easily found in supermarkets. Their use is better in dishes such as soups and stews, as well as breads.
Dill or Star Anise
Other possibilities include dill seeds and star anise. The latter can be very powerful, so start with a small amount.
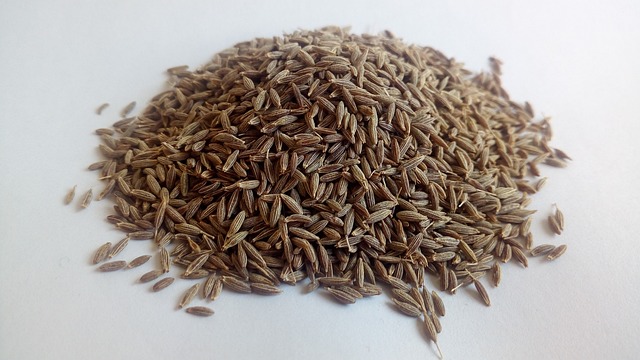
Cumin Seeds
Cumin seeds are in the same family as caraway, and visually, they look very similar to caraway seeds. Their flavor profiles, however, are different. Whereas caraway has that licorice flavor and sweet notes, cumin is nuttier, warmer, and more savory in flavor. They are not good substitutes for each other.
What can you use caraway seeds in?
Rye, pumpernickel, and spiced breads.
Potato salad or coleslaw.
Sauerkraut dishes.
Add to cooked carrot and potato dishes.
Add to a cheese dip.
Add to cabbage dishes.
A good meat pairing would be pork.
Do you have caraway in your pantry? Have you ever used it? I hope this short Cooking Tip will help you use it to its fullest potential.
Almonds are certainly a popular snacking nut. In the stores, you can see flavors from just salt to honey to dill pickle to wasabi to habanero. They are also used in both sweet and savory recipes and come whole, sliced, and slivered. I have written a prior Cooking Tip on the differences and when to use which form. In this Cooking Tip, I want to discuss other products made from almonds.
Three culinary products that are made from almonds are Almond Paste, Marzipan, and Frangipane. All are made from a base of almonds and sugar, but depending on the desired product, they may also contain eggs, flour, butter, and flavoring extracts.
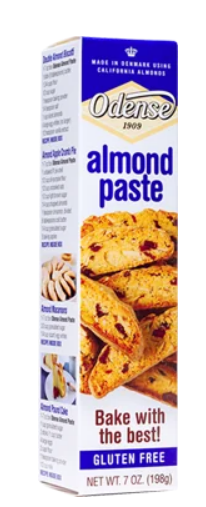
Almond Paste
Courtesy of Odense
Almond paste consists of pureed almonds, sugar, water, and maybe flavoring. The two main brands we see in our grocery stores are Solo and Odense. Solo states that the percentage of almonds in their almond paste ranges from 50% – 55%. Odense, on the other hand, lists its percentage as 45%.
As compared to marzipan, almond paste has a higher ratio of almonds.
It is less sweet and has a more pronounced nutty flavor than marzipan.
Its texture is coarser than marzipan.
Almond paste is used as a baking ingredient in cookies, cakes, tarts, and other desserts.
Although you can find it in the baking section of the supermarket, there are many recipes for making it at home, which involve processing almonds, sugar, and flavorings into a smooth paste. Some recipes start with almond flour rather than whole almonds. Some almond paste recipes use egg whites.
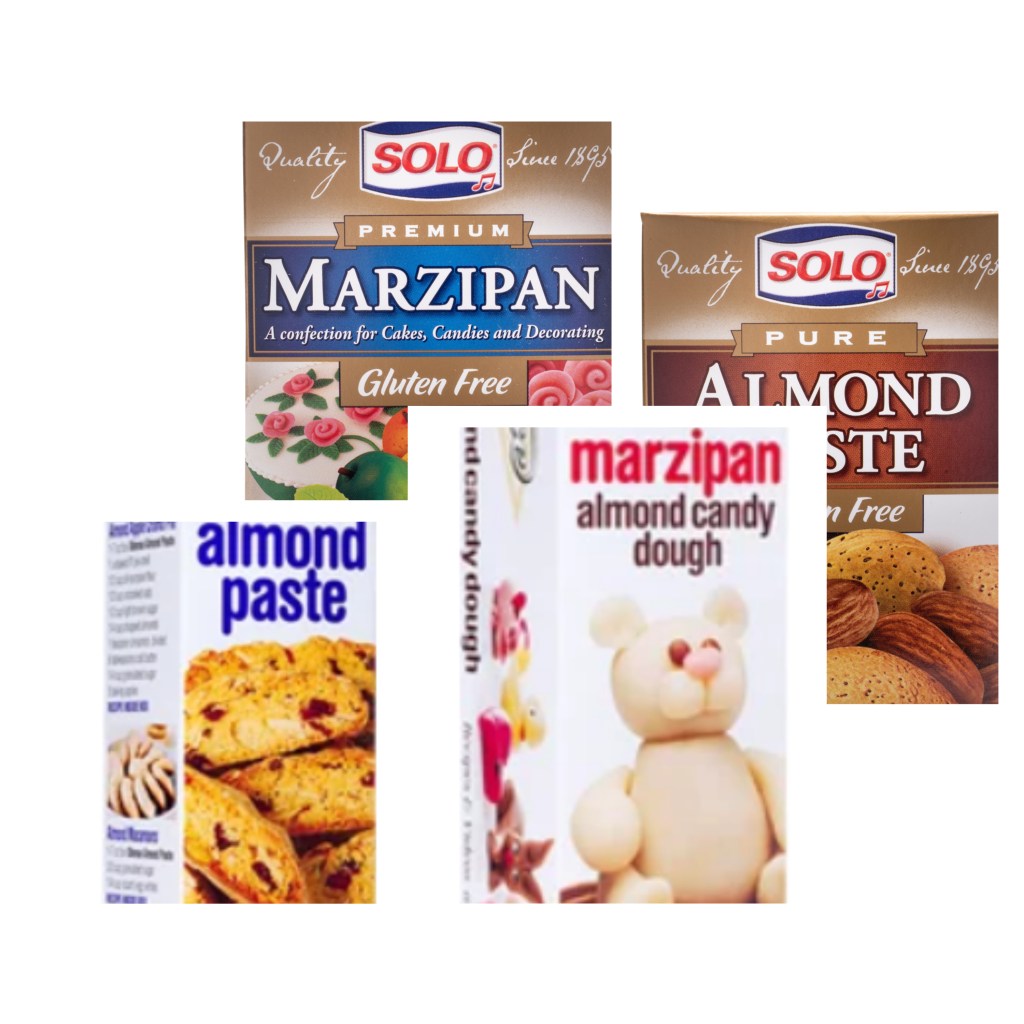
Marzipan
Courtesy of Solo
Marzipan is made from similar ingredients, but contains a higher proportion of sugar and a lower proportion of almonds than almond paste. As opposed to almond paste, where almonds are the first ingredient on the ingredient list, with marzipan, sugar is the first ingredient. Odense lists 28% almonds. Solo does not list the percentage of almonds. It may also be flavored with rose or orange water.
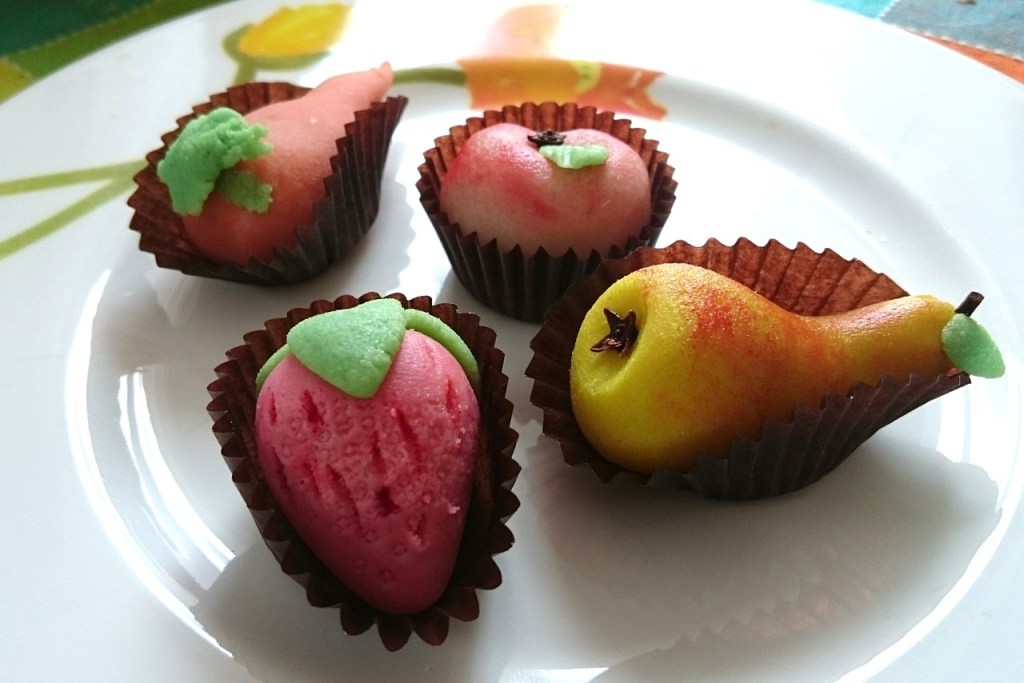
Marzipan is ready to eat out of the box. However, it is usually used to make candy or cake decorations. It can be rolled out to cover cakes or sculpted into marzipan fruits or other shapes, often with food coloring added.
It has a sweeter flavor and is smoother and more pliable than almond paste. Some say it has the texture of Play-Doh.
Frangipane is not something you buy in the supermarket, but rather, you make it at home. Ingredients include ground almonds, eggs, butter, flour, and sugar.
It is used most commonly as a filling in pies, cookies, and pastries.
There is another term – almond cream. Some will use this term interchangeably with frangipane, but French pastry chefs will define frangipane as a mixture of one part pastry cream and two parts almond cream.
Frangipane is very soft and has a spreadable consistency.
Substitutions
Some people ask whether one can use almond paste and marzipan interchangeably. The best answer is no. However, some sources say you can substitute 1:1, but they do list some caveats. First, the amount of sugar in the recipe would have to be adjusted since marzipan has a higher sugar content than almond paste. Secondly, the consistency is different, which may lead to a problem in the texture of the final product.
Almond paste can be used to make marzipan, but the reverse is not true. Solo lists the following recipe to make marzipan from almond paste.
In a mixer, combine 1 pound of almond paste with three cups of powdered sugar. Slowly add two beaten egg whites, and once fully incorporated, knead into a smooth consistency.
Other sources do not use egg whites, but use other ingredients such as water, corn syrup, and/or flavorings.
Since Frangipane is a very different product, it can not be substituted for either of the others.
Storage recommendations
If you are using commercially produced almond paste or marzipan, it will have a long shelf life. Once it has been opened, keep it tightly wrapped and stored in an airtight container in the refrigerator or freezer.
Both Odense and Solo say their products can be refrigerated for up to two weeks or frozen up to three months.
For homemade almond paste made with egg whites, it is best to make it no more than a few hours before you are going to use it. Keep it in the refrigerator until you use it. If your recipe does not use egg whites, it will keep for several weeks in the refrigerator or for up to six months when frozen.
Have you ever baked with any of these products? Using almond paste in your cookies or brownies lends a delightful nutty flavor. A French tart with a frangipane filling will impress any guest. And, who can resist those cute little marzipan fruits? Have fun and enjoy almonds in all of their forms!
We have all heard that you should make your own stock, whether it be beef, chicken, or vegetable. We have all heard that the difference in taste makes it all worth it. However, how many of us have the time to make a proper stock? And, once you make it, do you have freezer space to store it? I do make my own stock when I have the time, but there are many, many times that the only thing I have on hand is store-bought stock. Don’t feel ashamed if you are the same. That’s life, but there are some easy hacks you can do to make that box of stock in your pantry just a bit better. That is the topic of this Cooking Tip. For background, you may want to take a look at this prior Cooking Tips – Stocks & Broths – Is there really a difference?
You want to start with the best store-bought stock you can. See the above Tip for some recommendations. Also, start with the one with the lowest sodium level. Not only is this a good piece of advice at any time, but it is especially important when you are trying to add flavor to a store-bought stock, as some of the ingredients you are going to add contain sodium. The last thing you want is to end up with a too-salty stock.
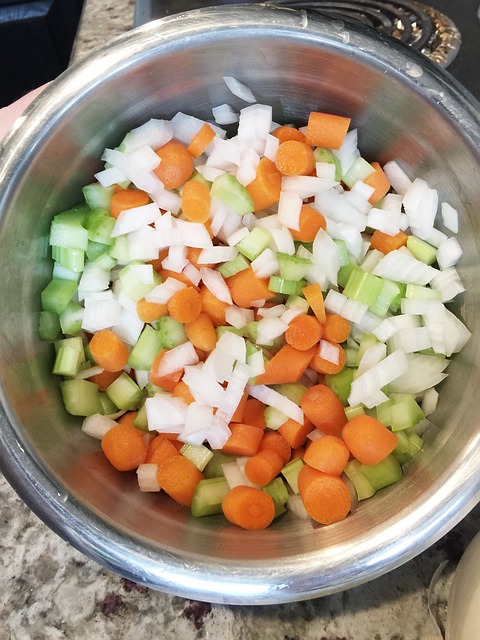
Put your stock in a pan and add diced carrot, celery, onion, and a few peppercorns. If you have the time, sauté your mirepoix until lightly browned before adding the stock. Depending on how you wish to use the stock, you may also consider adding garlic and herbs. Bring to a boil, reduce to a simmer, and cook for about 30 minutes or until you are pleased with the flavor. Strain and use.
Add chicken
For chicken broth, you can add more chicken flavor by actually also adding a chicken breast or any chicken bones you may have in your freezer. Another option is canned chicken. After straining, the chicken can be used for another purpose.
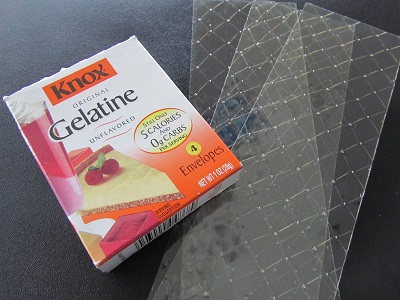
Add gelatin
Mixing a small amount of unflavored gelatin (about 1½ teaspoons per cup of stock) in some of the cold stock and adding it to the simmering pot will increase the body that you get from the bones when making homemade stock. In The Food Lab, J. Kenji Lopez-Alt recommends adding gelatin to his homemade stock to speed up the process and still end up with a flavorful stock with great body.
Add a Parmesan rind
Add three Parmesan rinds for each quart of stock, bring to a simmer, and cook for about 30 minutes. Remove and discard. Other hard cheeses, such as pecorino, will also work.
Add dried mushrooms
Toss umami-rich dried mushrooms into a pot of simmering stock. Recommendations are three to four mushrooms per quart of stock.
Add fermented pastes
Whisk in one tablespoon of miso paste for every quart of stock. Note the sodium content so you do not end up with a too-salty stock.
Add whole spices
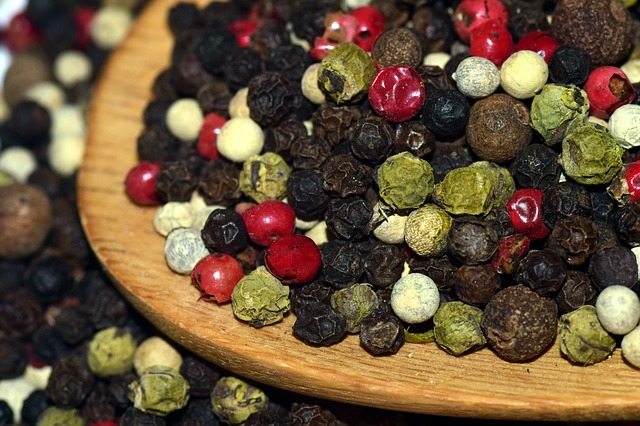
Toast in a dry pan two to four whole spices (cardamon pods, allspice berries, cumin seeds, coriander seeds, mustard seeds, fennel seeds, star anise, peppercorns) per quart of stock. Add stock and simmer.
Add tomato paste
Cook one tablespoon per quart of veggie or beef stock in a dry skillet just until fragrant. Add stock and combine.
Add soy sauce
This is a great umami booster that can be added to your stock. Just be cautious of the sodium content. Worcestershire sauce or fish sauce can also be used.
Reduce the stock
One of the simplest tricks is to simmer the stock in a pan to reduce the volume by half to two-thirds. This helps to concentrate the flavors.
Add acidity
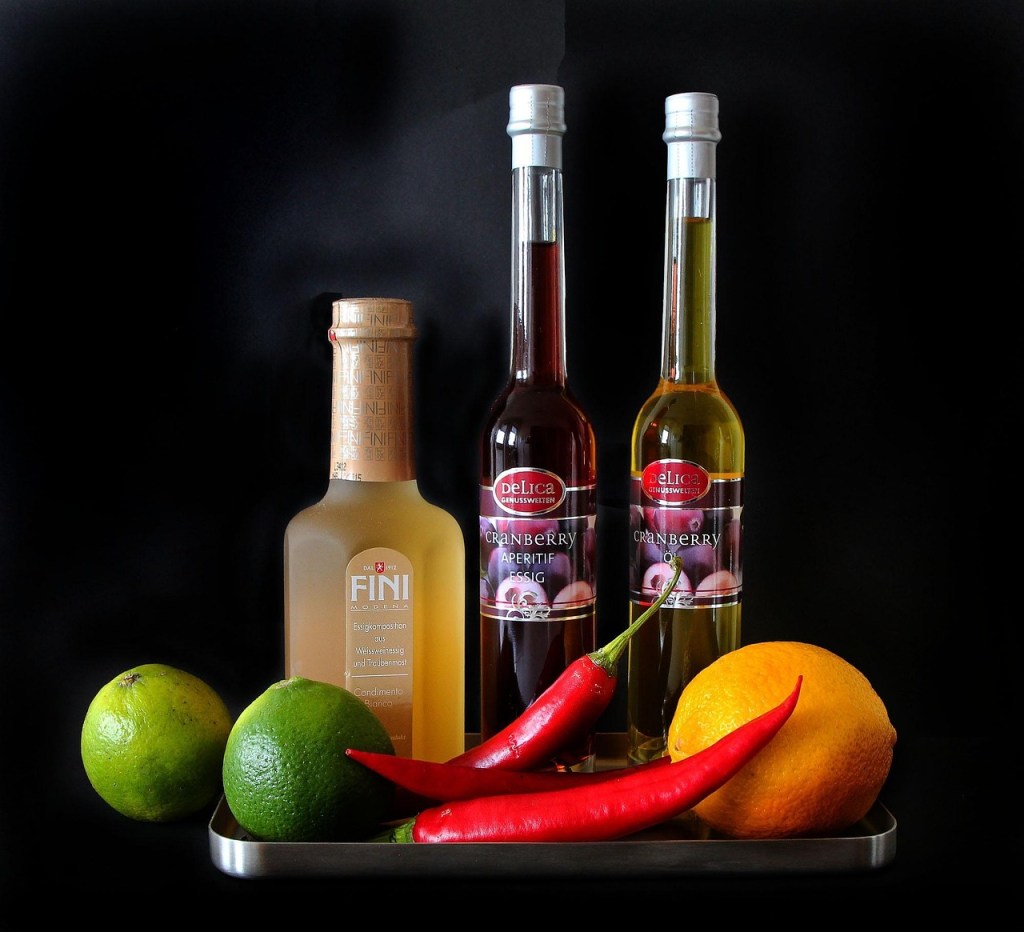
Acid will brighten up dishes. Consider apple cider vinegar, citrus juice, or wine.
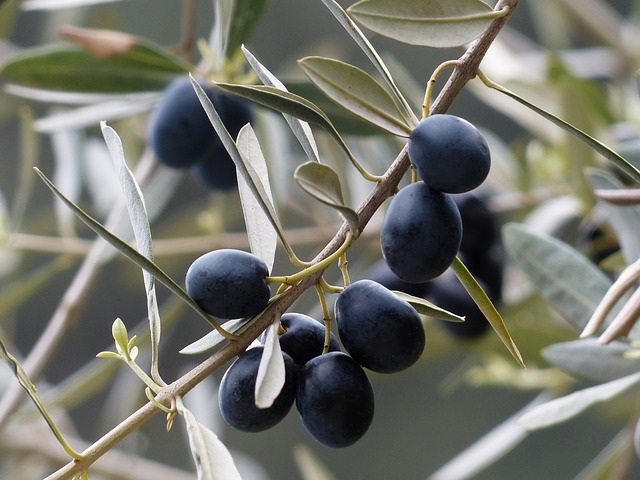
Add olives
Olives add not only umami, but the brininess can add acidity.
Have you tried any of these hacks to boost the flavor of your store-bought stock? Did they work? Don’t feel guilty about using good quality, low-sodium store-bought stock, especially if you amp up the flavor with the above advice.
Oatmeal is my go-to breakfast. I enjoy a good bowl of thick, hearty oatmeal. Oatmeal is not just a single product, though. This Cooking Tip will explore the different types of oats, their best uses and substitution advice.
The way the oats are processed after picking determines what type results.
After the grains are harvested and the husk removed, you are left with oat groats. Further processing to make rolled oats involves removing the outer hull, lightly steaming them, and then putting them through a roller mill (thus the name). The roller mill flattens the pieces into various thicknesses.
When rolled oats are cooked, they have a chewy texture.
In baking, rolled oats can also give a chewy texture to the baked goods.
The whole oats will be visible in the finished product.
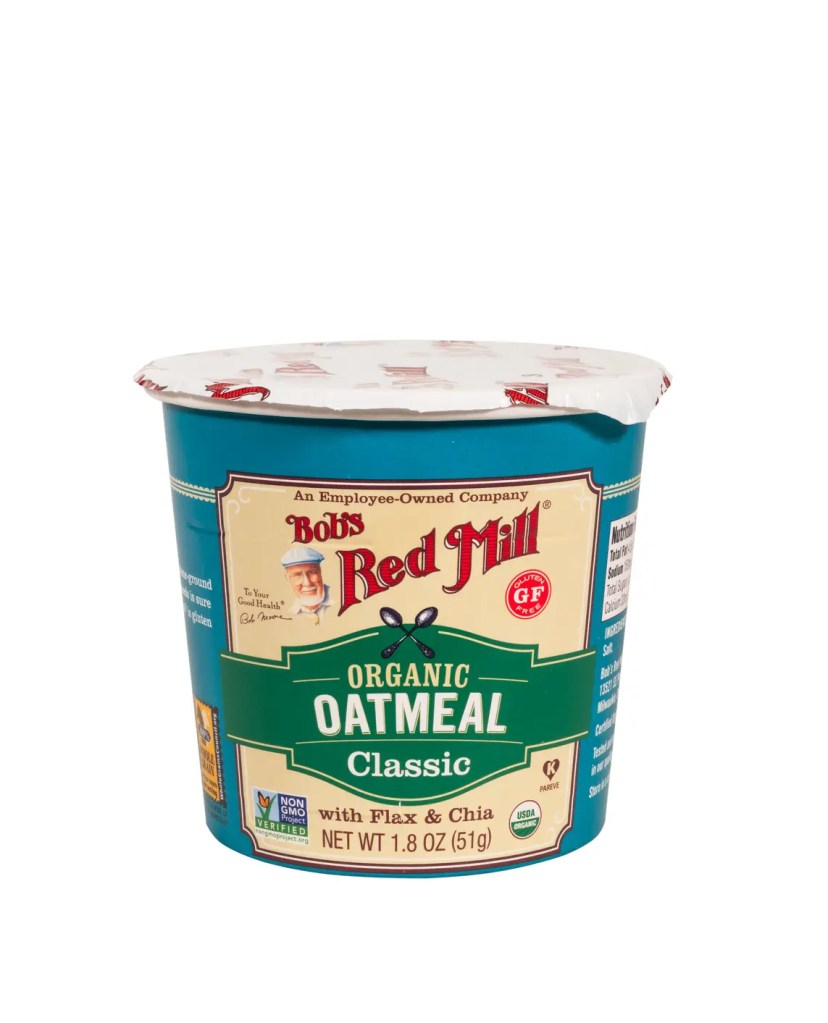
Quick cooking oats
Photo courtesy of Bob’s Red Mill
These are also rolled oats, but they have been steamed a bit longer and then chopped into smaller pieces. The rollers of the mill will also be adjusted to create a thinner product.
The smaller size means they will cook more quickly than regular rolled outs.
The flavor will be about the same, although the texture will be much finer.
In baking, this means that the oats will not be visible.
There is no need to purchase both regular and quick cooking rolled oats. The latter can easily be made by putting the former in a food processor and pulsing into smaller pieces.
Photo courtesy of Bob’s Red Mill
Instant oatmeal
Instant oats have been rolled extra thin, resulting in a finer product that may even be powdery.
It still has an oatmeal flavor, but very little texture.
Because of the processing, it does not lend much texture or structure to a baked item.
Many brands are precooked and come in packets meant to add hot water. Many of these also contain significant amounts of added sugar.
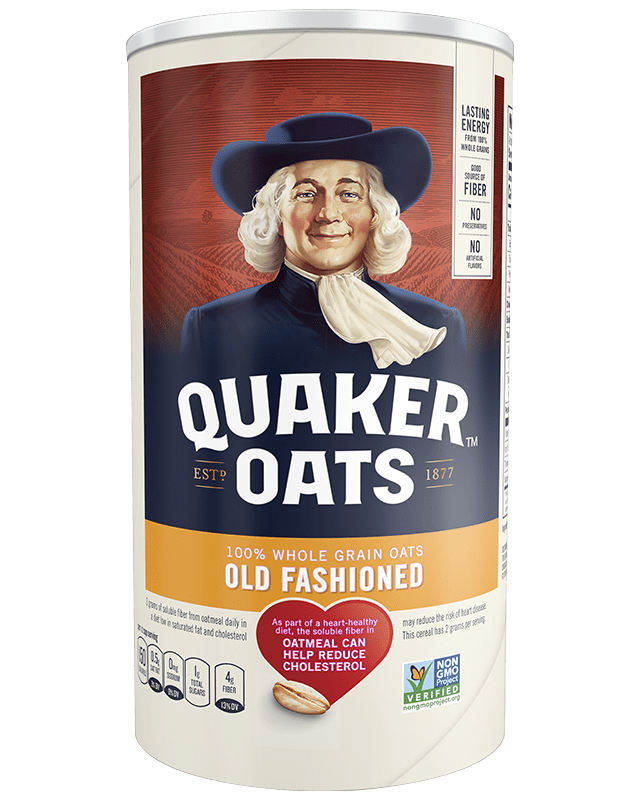
Photo courtesy of Quaker
Steel cut, aka Irish oatmeal
These start as whole oat groats, which are chopped into large pieces with steel blades, thus the name. They have not been steamed or rolled.
Their consistency is much coarser than other types of oatmeal.
They require a long cooking time.
They should not be substituted for regular oatmeal and are rarely used in baking.
Photo courtesy of Bob’s Red MIll
Scottish oats, aka stone ground
As the name implies, Scottish oats have been stone-ground rather than cut with a blade.
This creates pieces of varying sizes, and some say a creamier texture.
Baking with oatmeal
Photo courtesy of Pexels
Regular and quick cooking are interchangeable in baking with a couple of caveats.
Regular oats will show the oat flakes in the final product, whereas quick cooking oats will not be as easily seen.
Regular oats will give you a somewhat chewier texture with a more oaty flavor.
Instant oats should not be used in baking as they can impart a gummy texture.
Whether you like to sit down with a steamy bowl of oatmeal or bake a hearty oatmeal cookie, with these guidelines, you can be a success.
Someone recently told me about a relative who was trying to avoid something called PGPR. This Cooking Tip is all about what PGPR is, which foods it is in, why, and whether you should also avoid it.
What is it?
PGPR stands for Polyglycerol Polyricinoleate. It is an emulsifier, which is an agent that helps to keep oil and water from separating. Think of what happens when you make a vinaigrette. The oil and water (vinegar) will not mix together without assistance. This is often done with vigorous whisking. Without any addition of an emulsifier, the two ingredients will again quickly separate. In our home kitchens, we frequently add mustard, which helps prevent separation for longer.
Where does it come from?
It is typically made from castor bean oil, although some sources say it may also be made from soybean and sunflower oil.
What does it do?
According to Chemsino, a leading food emulsifier manufacturer, these are some of the effects that PGPR can help food producers attain.
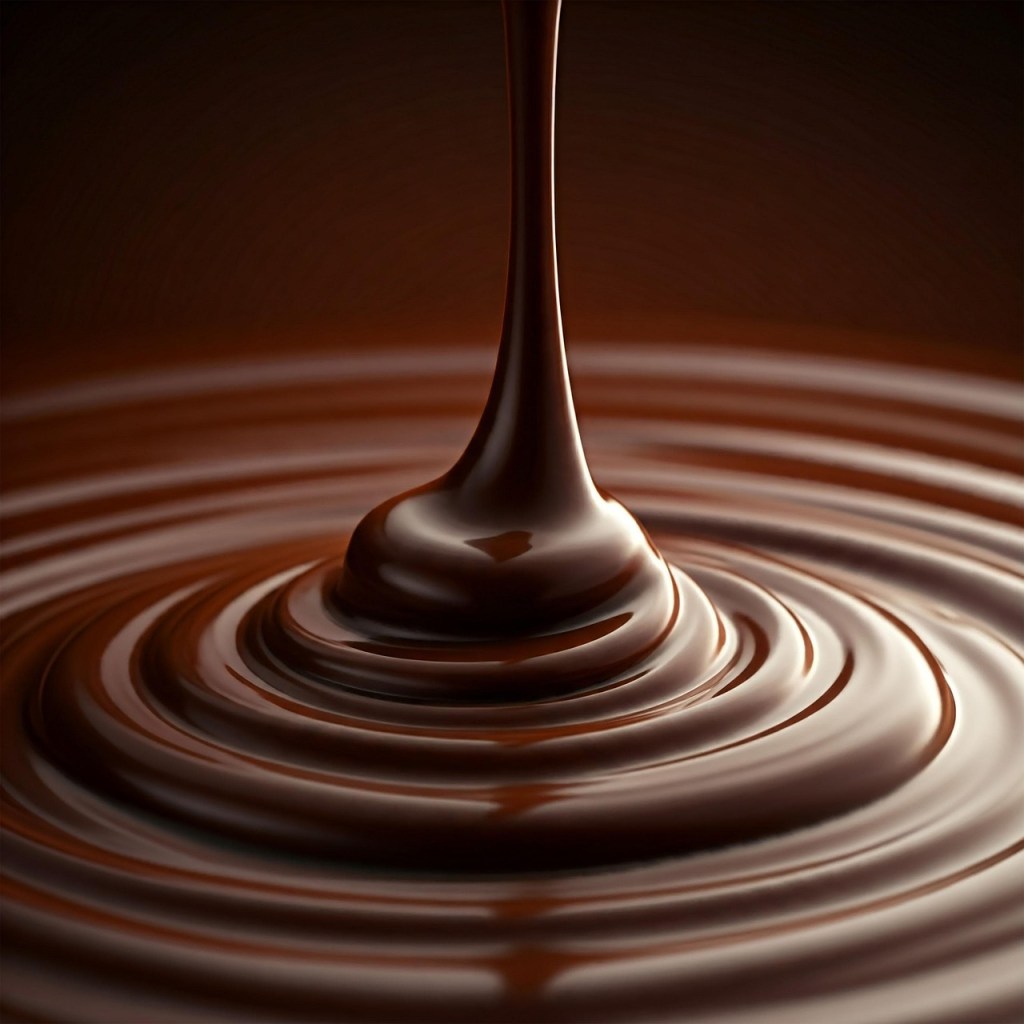
As noted above, PGPR is an emulsifier, which helps unlike ingredients mix. With chocolate, there are dry components such as sugar and cocoa solids and a fat component of cocoa butter. PGPR helps these items to mix and achieve the texture that we all like in chocolate. It also changes the viscosity/thickness of chocolate. This allows it to flow more easily through chocolate manufacturing machines.
It also allows for easier molding and coating of chocolate products by helping to reduce bubbles and empty holes in the chocolate product.
Prevents fat bloom
Fat bloom on chocolate results from the separation of the cocoa butter from the mixture and subsequent crystallization on the surface. PGPR helps to prevent this.
Extending shelf life in baked goods
Through its ability to stabilize emulsions and prevent oil separation, the shelf life of baked goods can be prolonged. It is also said to form a protective barrier between the water and the oil, thereby inhibiting microbial growth.
Fats that are spreadable at room temperature, such as margarine and peanut butter, often contain emulsifiers like PGPR to achieve the proper consistency and maintain the homogenous texture.
Enhancing ice cream texture
PGPR may be added to ice cream to improve the texture. Its emulsifying ability disperses the fat evenly throughout the mixture. It can also help to prevent ice crystals.
Reducing fat content
When food manufacturers reduce or eliminate fat in a product, it is typically replaced by something else. As an example, here is the ingredient list for a store-brand mayonnaise.
Soybean oil, eggs and egg yolks, water, distilled vinegar, sugar, salt, lemon juice concentrate, natural flavors, calcium disodium EDTA
Here is the list for a lower-fat version of the same brand.
The introduction of PGPR gave food manufacturers a way to swap out some fats for reduced-fat ingredients without harming the sensory components they were trying to maintain.
Cost efficiency
Many of the ingredients that PGPR allowed to be swapped also came with a lower cost for food manufacturers.
Is PGPR safe?
The FDA considers it a safe food additive in certain amounts. There have been many studies on the safety of human consumption of PGPR, and none have found ill health effects. That does not mean, though, that certain individuals may not suffer an unwanted reaction from it.
One of the main criticisms is that it “cheapens” chocolate by allowing manufacturers to decrease the fat content. These companies can offer their products at a lower price than those companies that choose to rely on cocoa butter without this additive.
What products contain PGPR?
Chocolate is the main food product where you might run across PGPR. Other possible sources include the following list.
Spreadable fats (margarine, peanut butter)
Cocoa products
Cocoa-based confectionery
Emulsified sauces
Low-fat dressings, mayonnaise
Seafood colors
I have looked in my refrigerator and pantry, and nothing I have contains PGPR. I also searched various brands of the above products and found PGPR only in chocolate. What about you? Have you found it anywhere?
Which chocolate products contain PGPR?
Please note that I did not look at all products from any of these companies. Also, the information is correct as of the writing of this Tip. Since ingredient lists can change, it’s best to check the label before purchasing.
Hershey
This is one of the rare companies that mentions PGPR. Their website states,
The amount of PGPR used is quite small (as is the amount of soy lecithin). For example, in our milk chocolate, it is less than 1% of all ingredients.
A look at their website shows that most of their products contain PGPR.
Mars products
A quick look at their products (3 Musketeers, Twix, Milky Way, M&Ms) showed the absence of PGPR. However, their Dove product line can contain this additive. Their classic milk and dark chocolate do not show PGPR in their ingredient list, although you will find it in some of their flavored chocolates.
Higher-end chocolates
I failed to find PGPR in the ingredient list for Lindt, Ghirardelli, Godiva, or Sees. There are, of course, many other small producers from which you could source PGPR-free chocolates.
Have you ever noticed PGPR in the products you buy? Are you concerned about it? If so, you can certainly avoid it by reading labels, buying less processed foods and cooking more at home!
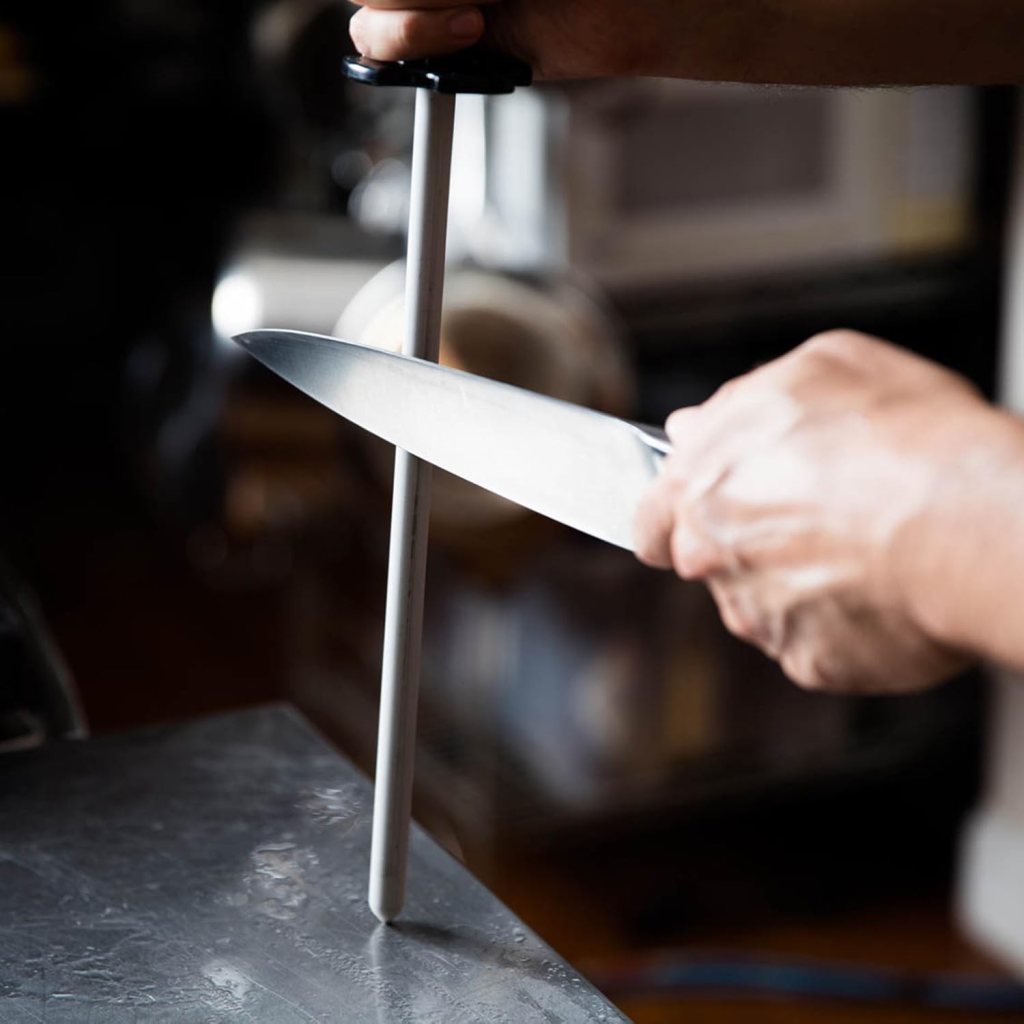
What in the world is a honing rod? Is that something that belongs in the garage or the toolbox rather than the kitchen? This Cooking Tip will explain what these are, other names for them, and why you need one in your kitchen.
We all know that knives (preferably good ones) are essential in your kitchen. I have written a prior Tip on the kinds of knives and which ones you need in your kitchen. Having great knives is important, but you also need to take care of those knives. That is where a honing rod comes into the picture.
Keeping your knives sharp not only increases the enjoyment of using the knives but also increases the safety of using them. One of the easiest ways to have a knife accident is by trying to use a dull knife, having to use more and more force, and slipping and cutting yourself.
As you use your knives, the edges will start to roll, and they will feel dull. By realigning these edges, the knives will feel sharper. This is where a honing rod (also called a honing steel) comes into the picture. They work by realigning these edges. They help your knives stay sharp longer, so you don’t need to sharpen them as often. Although you will see chefs and manufacturers call these items “sharpening rods” or “sharpening steels,” they do not sharpen your knife. The latter involves removing steel from the blade, exposing new steel, followed by polishing and refining. Honing just realigns the edges.
I like how Travis from House of Knives explains the use of a honing rod. He states, “They are meant to keep your knife sharp, not make your knife sharp.”
These honing rods are long rods of steel attached to a handle. The surface can vary from smooth to one with ridges to one with a diamond coating. Let’s look at the pros and cons of each.
Types of Honing Rods
Steel Rods
Photo courtesy of Amazon
Most steel rods will have some sort of ridging on them, although how much will vary by brand. Some will even have different amounts of ridging on different sides. The ridges help users control the angle and speed of the knife when moving from top to bottom.
The rods can restore the edge of the knife without taking off much metal and damaging the knife.
They are relatively inexpensive.
They are easy to use.
Many do not recommend using these for Japanese knives as the Japanese steel is much harder and more brittle than the Western or German steel. They feel that a regular honing steel could do damage. Go with what the knife manufacturer recommends.
Ceramic Rods
Photo courtesy of Amazon
These look smooth, although there are different grit levels.
Ceramic is four times harder than the majority of knife steels, and therefore, can be used for almost any knife.
Ceramic rods can break if dropped.
They do an excellent job of restoring the edge as well as polishing the blade.
They do possess a small amount of sharpening ability, but since they only remove a minimal amount of metal, they can be used daily.
Diamond Coated Rods
Some are more finely textured, and others are coarser and rougher.
Users find they make a horrible, scraping noise while using them.
They do take off pieces of the metal blade, and therefore, can be considered a sharpening aid. However, they can damage your knife if you do not know what you are doing.
They are not meant for daily use.
Besides the type of material, there are other considerations when purchasing a honing rod.
Testers liked longer rods of 10-12 inches as it made it easier to keep the knife angle consistent while running the entire blade from top to bottom.
Testers like thicker rods as they felt they had more control in using them.
Handles also made a difference. Ones that flared out were difficult to use and get the correct angle.
One can look at recommendations, but as usual, different opinions reigned. Here are some similarities in recommended brands.
Steel
Bob Kramer Double Cut Sharpening Steel
Wusthof Classic Ikon Honing Steel
Zwilling Professional Oval Sharpening Steel
Shun Classic Combination Honing Steel
Ceramic
Idahone Fine Ceramic Sharpening Rod
Green Elephant Ceramic Sharpening Rod
Noble Home & Chef Ceramic Honing Rod
Once you have purchased your honing rod, how do you use it?
Place the honing rod vertically on your counter on a towel or something that will keep it from slipping.
Place the blade of the knife at a 15-20° angle on the rod. If you are like me and say, “What is a 20° angle?”, try this. Hold your knife against the upright rod at a 90° angle. Move it in halfway and you have a 45° angle. Halfway again would be a 22½° angle. Just a bit further would be 20°, and a bit more would be 15°.
Start with the heel of the knife at the top of the rod and draw lightly and smoothly down the rod. As it descends, you will be going from heel to tip.
Repeat on the opposite side.
Testing sharpness
It is good to test the sharpness of your knife before and after honing so you can see the difference. Here are some different ways to do this.
Thumb test – Put your thumb lightly on the edge and pull across the blade, never along the blade. If dull, it will feel smooth and round and slide without resistance. Once properly honed, it will feel sharp. Although this is a good test, you must be careful to avoid cutting yourself.
Paper test – Hold a piece of thin paper and slice through at a 45° angle. A sharp knife will easily and cleanly slice through the paper. Dull knives will catch and not make a clean slice.
Pen test – Hold your knife at a 45° angle and slide over the plastic of the pen. If it bites in, it is sharp. If it slides off, it is not.
Tomato test – This is probably the least reliable test for sharpness. Those who recommend it say that dull knives will squash and mash tomatoes rather than making a clean cut as with a sharp knife.
If you have a honing rod, I hope you are using it regularly to maintain your knives. If you do not have one, you should go out and purchase one. One last point, since honing is not sharpening, your knives will need to be sharpened at some point. There are many different at-home sharpening tools, or you can take it to a professional knife sharpener.
One basic skill all home cooks should possess is how to make your own salad dressings and vinaigrettes. In this Cooking Tip, we will delve into these words, what they mean and how to develop this skill.
Do you use the terms vinaigrette and salad dressings interchangeably? Most of us probably do. As one word expert puts it, “All vinaigrettes are salad dressings, but not all salad dressings are vinaigrettes.” Salad dressing is a general term for sauces that we typically put over salads before eating them. They are usually made from oil, vinegar and flavoring agents such as herbs and spices. They might also include ingredients such as cream, yogurt or mayonnaise. They can be somewhat thin and oil-based or creamy, such as we find in Ranch or Blue Cheese dressings. Vinaigrettes are thinner with the only ingredients being oil, vinegar and seasonings.
Whether you call it a vinaigrette or a salad dressing, it is easy to learn this most important culinary skill. Not only can you use these to dress your salads, but they can also be drizzled over roasted veggies or even used as a marinade.
Ingredients
This is one of those recipes that has very few ingredients. Therefore, you want the best quality ingredients you can get.
The main ingredients are oil, vinegar and seasonings. The mantra that you will hear over and over is that the ratio of oil to vinegar should be 3:1. However, that can vary for many reasons. First is personal taste. I know I prefer a dressing made with a lower oil-to-vinegar ratio. Second, not all acids are the same. Many different vinegars can be used along with citrus or other fruit juices. These all differ in how much acidity they have, and thus, how much bite they impart. Therefore, you might want to vary that oil-to-vinegar ratio to achieve the desired taste and balance. If you have never made your own vinaigrette before, start with the standard ratio, but then branch out to create a flavor you enjoy.
Oil – Most commonly, you will use extra virgin olive oil (EVOO). Good EVOO does have a strong taste. If it isn’t something that appeals to you, try a more neutral-tasting oil such as canola oil, sunflower oil, safflower oil, or a combination. You can also vary things by adding a flavorful oil, such as a nut oil. If you do, only make it a portion of the oil content, or it can be too overpowering. See these cooking tips for discussions on oils.
Acid – Use whatever you like and what works well with your salad. It can be any vinegar, even flavored vinegars. Other acids are citrus juices as well as fruit purees/nectars. I often like to combine a fruit-flavored vinegar with some of the actual fruit. For example, I use a peach vinegar along with pureed peaches. See this Cooking Tip for a discussion of the different types of vinegars.
Emulsifier
As we all know, oil and water do not mix very well. Since acids (vinegar, juices) are basically water, you often need something to encourage them to mix, which is called emulsification. Part of achieving emulsification is the technique of making the vinaigrette, but for a more stable emulsion, we add emulsifying agents. These work by attracting oils on one end and vinegars on the other. This helps to keep the oil and vinegar from separating into different layers for some time. Most will eventually separate, but giving the mixture a good shake or whisk will help re-emulsify them. Some of the most commonly used emulsifying agents are mustard, mustard powder, mayonnaise, and honey. Mustard is the one you will see recommended the most often and should be used in a ratio of one teaspoon of mustard for every tablespoon of vinegar.
Seasonings – This might just be salt and pepper, but could also be minced garlic, minced shallots, spices or herbs. You may also want to add a touch of sweetness in the form of honey, maple syrup, sugar, agave, etc. This helps to offset the acidity of the vinegar.
Technique
No matter your choice of ingredients, the technique is the same. Start by putting the acid in the bowl or jar first. The flavorings that you are going to add will mix much better in the acid than in the oil. Add your emulsifying agent, any desired seasonings and mix well.
Next, you will want to add the oil and emulsify the mixture such that the oil and water form a cohesive mixture. This can be done with vigorous whisking. It can also be done by making the vinaigrette in a glass jar with a tight lid and shaking until it is emulsified. A final method is to use the blender. In testing, it has been shown that the most stable emulsion will be produced by using the blender, and the least stable is with the jar method. One caution is that some experts think that putting EVOO in a blender leads to bitterness.
Recipe instructions will often advise adding the oil slowly, especially at first. The theory is that this allows a stronger bond to form. Once you have formed a good base, the oil can be added more quickly.
Once the vinaigrette is emulsified, taste and adjust to your preference. You can taste it on its own, or you may wish to dip a piece of lettuce into it and taste that way.
After you have mastered making a simple vinaigrette, have fun and experiment. Here are some tips for what produces the characteristic taste of some of the most common vinaigrettes and dressings.
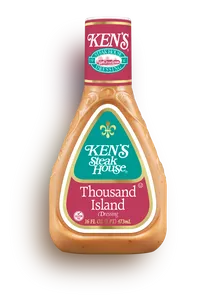
Thousand Island Dressing
Ingredients include ketchup, relish, and mayonnaise.
It should be creamy, tangy, and slightly sweet,
French Dressing
This is classically made with sugar, vinegar, oil, ketchup (or tomato paste), paprika, and other seasonings.
It is light orange in color and creamy in texture.
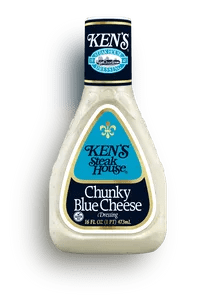
Blue Cheese Dressing
The main ingredients are blue cheese, mayonnaise, buttermilk, milk, vinegar, and sour cream.
It is creamy and tangy.
Balsamic Vinaigrette
One of the simplest vinaigrettes using balsamic vinegar as the acid.
It is a thicker vinaigrette with a sweet component.
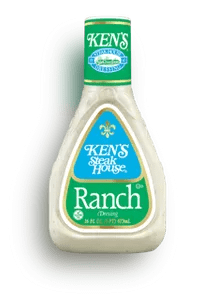
Ranch Dressing
Buttermilk, sour cream, and mayonnaise are the main ingredients. Seasonings include garlic powder, onion powder, and dill.
Another creamy dressing with a more savory flavor profile.
Italian Salad Dressing
Olive oil, vinegar, garlic, and herbs are combined for this classic dressing.
The flavor often has a peppery zing.
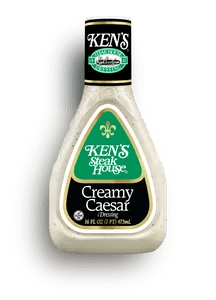
Caesar Dressing
Ingredients for a classic Caesar salad include Parmesan cheese, croutons, romaine lettuce, and Caesar dressing.
The dressing consists of garlic, lemon juice, Worcestershire sauce, Dijon mustard, and olive oil.
What is your favorite vinaigrette or salad dressing? As I noted above, I love a fruity vinaigrette. Whatever you like, making your own at home should be something that is second nature to you.
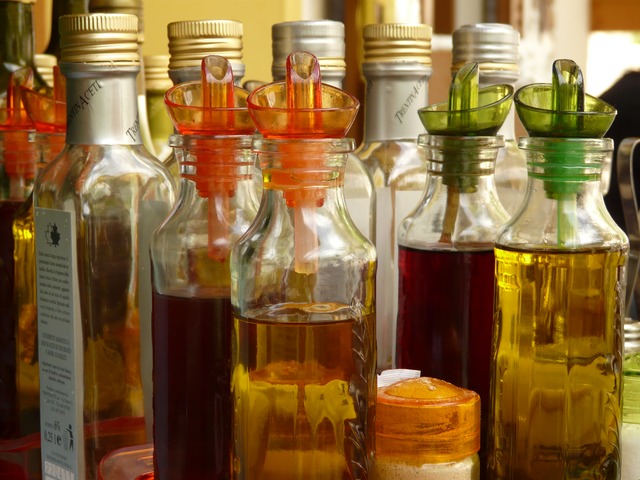
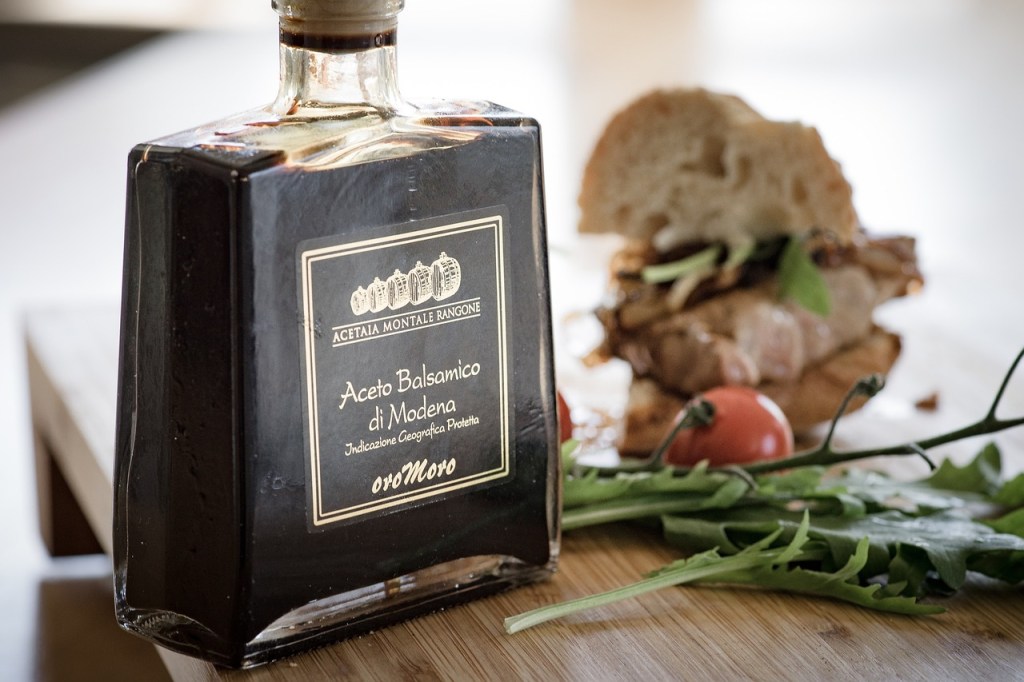
Vinegars are a standard ingredient in all of our pantries. I have written a prior Cooking Tip on the different types of vinegars. In this Tip, I would like to concentrate on one we all use quite frequently – Balsamic Vinegar.
The first thing to recognize is that not all balsamic vinegars are the same. They range from the very expensive, traditionally-made balsamic to what are sometimes called “imitation balsamics”. Let’s explore further.
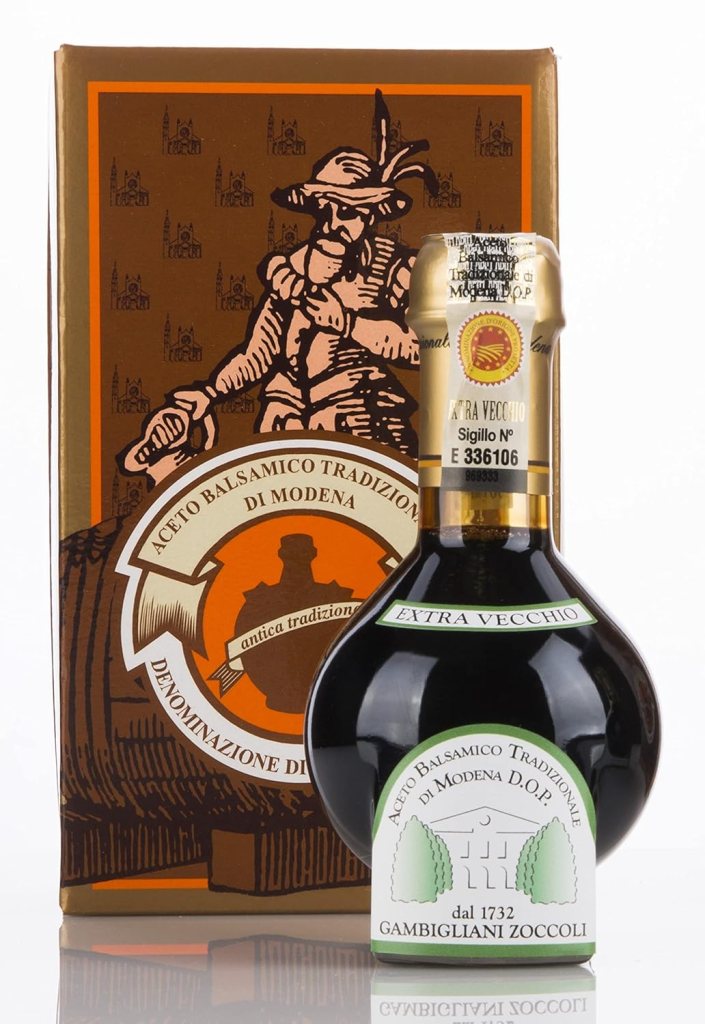
Traditional balsamicvinegar is made only in the provinces of Modena and Reggio Emilia, Italy. It is made only from grape must, which is freshly crushed grapes (including the skin, seeds, and stems) from particular grape varietals. This mixture is cooked down to a syrup and aged in wooden barrels for a minimum of 12 years.
The mixture goes through a series of aging barrels, called a batteria. Each barrel is smaller than the previous one and is typically made of a different wood, contributing unique flavor notes to the finished product. As the aging proceeds, liquid evaporates, leaving a thick and concentrated result. Once a year, the smallest barrel is drained and bottled. Each barrel is then filled from the next size up, with the final barrel being topped off with fresh grape must.
Traditional balsamic is aged for a minimum of 12 years, but can go on for 25 years. Due to the process of going through the different barrels, it isn’t easy to give an exact age to the vinegar. Instead, judges will assess these products, assign grades, with various grades being topped with a different color of cap. An exact age is not listed on the label. In Reggio Emilia, those given a red cap (affinato – fine) are said to correspond to a 12-year aging process. A silver cap (vecchio– old) is 15-20 years, and a gold (extra vecchio – extra old) is 20-25 years. In Modena, there is just a white cap for affinato and a gold cap for extra vecchio.
Similar to Parmesan-Reggiano or Champagne, a system of regulation and classification has been imposed by the Italian government and the European Union for traditional balsamic vinegars.
Photo courtesy of Amazon
To achieve this DOP certification, there are several requirements, including the location where the grapes are grown, the types of grapes used, the production process, and the shape of the bottle used. A consortium must approve and certify that all the standards have been met before allowing the DOP seal to be placed on the bottle.
The strictest category is known as DOP – Protected Designation of Origin. This can be either Aceto Balsamico Tradizionale di Modena or Aceto Balsamico Tradizionale di Reggio Emilia.
A second seal that you might see is the IGP seal, which stands for Protected Geographical Indication. These vinegars are known as Aceto Balsamico di Modena or Aceto Balsamico di Reggio Emilia. It is said that the IGP process began because the supply of balsamic vinegar could not keep up with worldwide demand. This allowed the producers to make vinegar on a larger scale and in a shorter time.
There are standards to achieve this certification, but they are much more relaxed. The production process is not so strictly controlled as with DOP vinegars. This means that vinegars with the IGP seal can vary significantly in terms of flavor, quality and price.
This vinegar will not be 100% grape must but will be mixed with wine vinegar. The type of vinegar and the amount are not controlled. A better IGP will list grape must as the first ingredient, followed by wine vinegar, but many balsamics we see in our stores will have those ingredients in the reverse order. This seal also allows for the addition of up to 2% caramel. Look at the label to see if this has been added. This produces a sweeter flavor and a darker color, particularly when the first ingredient listed is wine vinegar. However, you may prefer one without this additive.
With an IGP vinegar, the grapes may be grown anywhere, but should be of a type similar to the grapes used in the traditional vinegar. The production, however, needs to take place in either Modena or Reggio Emilia. The aging process is only required to be 60 days. Some may age 3 years or more, and if so, you may see “aged” or “invecchiato” on the label.
Traditional DOP balsamics are subjected to a taste test before certification is granted. Nearly 20% of submissions fail this test. In contrast, almost every sample submitted for IGP certification passes. So, there is a wide variety in thickness and flavor from brand to brand.
There is also the Condimento category. This is a large category. It could be a vinegar that was traditionally produced but did not meet the standards for the DOP seal. Maybe the producers wanted to add some wine vinegar, or the product was produced outside of Modena or Reggio Emilia. Or, the producers may not have wanted to incur the monetary costs associated with getting a DOP seal. This means that there may be some excellent balsamics without this seal. However, the term “condimento” is not a protected designation and, therefore, can be placed on inferior products. Even though vinegars in this category may not have a DOP stamp, they may have an IGP stamp instead. Read your labels, though, for the ingredients.
Most supermarket products are not DOP or IGP. This doesn’t necessarily mean they are bad products. Look at the ingredients and aim for those with grape must as the first ingredient and no additives. Stay away from terms such as “reduction,” “cream,” or “glaze.” They are made to mimic a traditional balsamic but are often full of additives.
Balsamic vinegars made outside of Italy will not have these certifications. One can find balsamics made in the US or any wine-producing area. I have seen some of these products labeled as “traditional,” but they are not the same as the DOP balsamics. The term is used as a marketing ploy. Again, this does not automatically mean they are inferior products. Judge them with the same standards as above.
Apart from the ingredients and production methods, how do these balsamics differ?
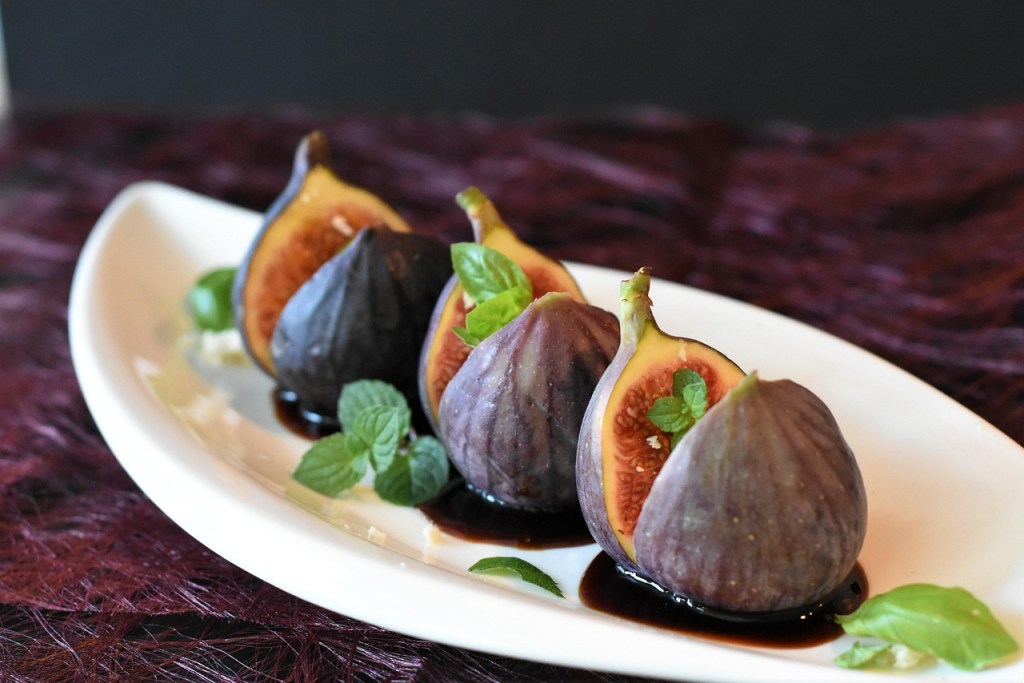
Traditional balsamics (DOP) will be glossy, very dark and thick. They have a syrup-like consistency that feels velvety on your tongue. The flavor is rich, sweet, slightly tart and complex without being overly acidic. Some describe it as having notes of fig, molasses, cherry, chocolate, or prune and even a touch of smokiness. These products are very expensive.
They are not meant for cooking. Instead, they are more of a condiment. Heating it can destroy its complexity. Rather than using it in a cooked application, try putting a few drops on fresh berries, cheese, or ice cream. It can also be used at the end of the cooking process. Drizzle it over a bowl of risotto or a grilled meat dish. In Italy, it is also used as a palate cleanser, an aperitif or digestif, especially on special occasions.
Condimento balsamics will also be thick and dark in color. The flavor will lack the complexity of a DOP balsamic, but should still have notes of acidity, sweetness, and fruit. They are significantly less expensive and can still be used in the same way as traditional balsamic. They can also be used in vinaigrettes.
IGP balsamics can vary greatly in flavor, texture and quality.
Because these products are a mixture of both grape must and vinegar, the flavor has more acidity and it won’t be very complex.
This type of balsamic is the best for vinaigrettes, but it can also be used in soups, stews, and marinades. Ones that are lighter in color tend to be tart, whereas darker ones are sweeter. It can also be reduced by simmering along with sugar, which produces a type of syrup.
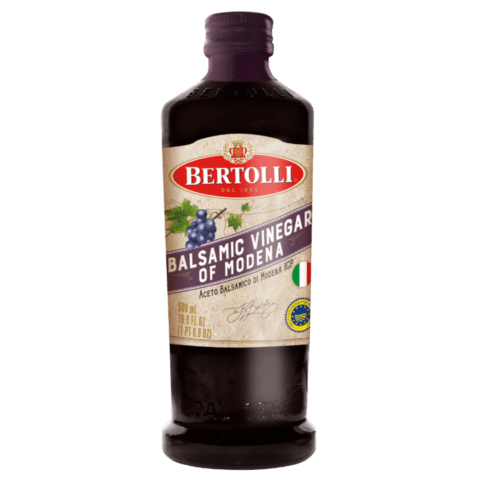
Photo courtesy of Bertolli
Supermarket balsamics
These are made from grape must and wine vinegar. They are meant for everyday use. Although it may have a pleasant taste, it will not be as complex as the traditional product. If the first ingredient listed is the vinegar, it will be more on the tart side. If grape must is the first ingredient, it will be mellower and sweeter. If “grape must” is not listed as an ingredient, it will be a much lower-end product.
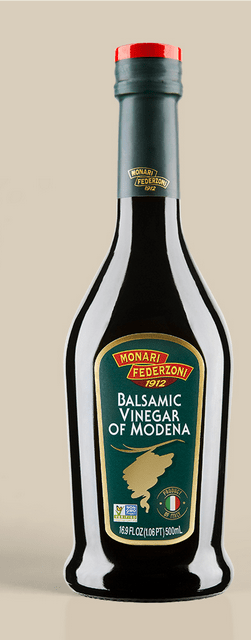
Photo courtesy of Monari Federzoni
Cook’s Illustrated recommends a “hack” to improve the flavor of a less expensive balsamic. Combine ⅓ cup of balsamic vinegar, one tablespoon of sugar, and one tablespoon of port in a saucepan and simmer until reduced by half. In a taste test, they reported that most of their tasters could not distinguish between this and a high-end balsamic vinegar.
When you go to the store to select a high-quality balsamic vinegar, as noted above, knowing what to look for on the label is your best guide. Tasting them is the next best thing. If you are lucky enough to have a store where you can do this, it can greatly help you choose the best balsamic for you.
You can also look at organizations that have done taste tests and made recommendations. The problem with these is that different organizations test different vinegars and may have different rating guidelines.
Photo courtesy of Amazon
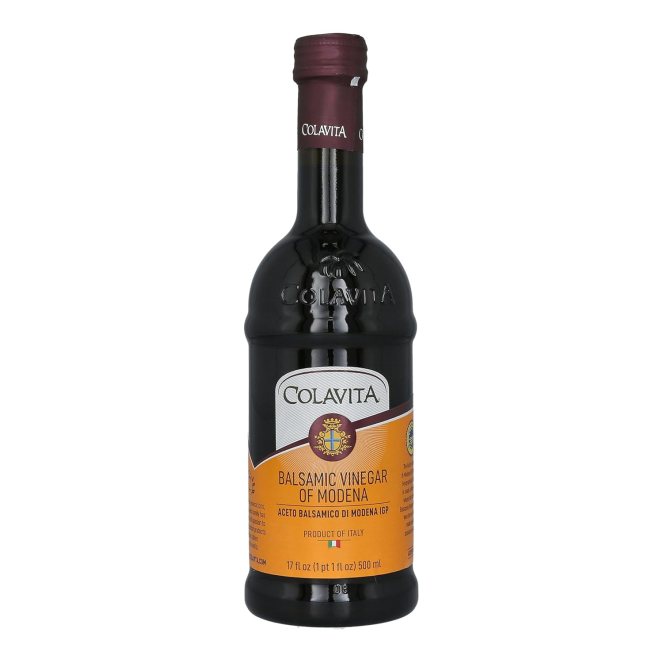
Despite this, some commonalities can sometimes be found. Three balsamic vinegars that are often at the top of the list of recommended supermarket balsamics.
Bertolli Balsamic Vinegar of Modena
Monari Federzoni Balsamic Vinegar of Modena
Colavita Balsamic Vinegar of Modena
Since the high-end balsamics and supermarket ones have different purposes, you may want to have more than one in your pantry. With the information in this Cooking Tip, I hope you can pick out ones you love.