Cooking Tips · Techniques

Instant Read Thermometers

All of us have many different tools in our kitchen. One tool all of us should seriously consider adding to our tool chests is a good instant-read thermometer. It has so many uses to improve your cooking from ensuring meats are safe to eat but not overcooked to monitoring critical temperatures in candy making to helping to achieve a wonderful custard. I was recently asked how to know which thermometer to buy and which ones are accurate. That is the subject of this Cooking Tip. This post contains affiliate links and I may earn a commission if you decide to purchase.

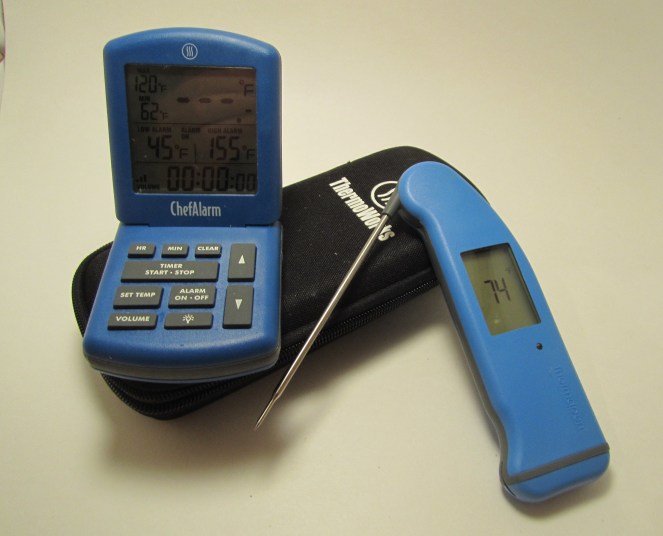
I have my favorite instant-read thermometer – the Thermapen from Thermoworks. As these are more expensive than many other thermometers, I also want to tell you how to ensure whatever thermometer you use is giving you accurate readings.

Whatever thermometer you use should be checked for accuracy, preferably by the use of an ice water bath. To be useful, though, this has to be a properly made ice bath. To achieve this, fill a container with ice all the way to the top. If possible, use crushed ice as there will be fewer gaps between the ice. Add water to this container so that it reaches to about ½ inch below the top of the ice. If the ice is floating off the bottom, pour off some water and add more ice. If you have water below the level of ice, it will not be accurate. Insert your thermometer probe and stir in the center. Allow enough time for the reading to stabilize. If you keep stirring, the probe will not rest against an ice cube, which may give an inaccurate reading. Similarly, do not allow the probe to rest against the sides or bottom of the container. Now, your thermometer should read 32°F. If it does not, you should first check the documentation that came with the thermometer to determine whether the reading is within the manufacturer’s accuracy specifications. If it is within that range, do not try to adjust it. If the reading is outside that range, refer to your instruction manual to adjust the thermometer. If you would like a printable chart that details these steps, email me.

Some ask if they can instead use a pot of boiling water to check the accuracy of the thermometer. One of the problems with this is that the temperature at which water boils varies by your elevation. At sea level it is 212°F but this drops approximately 2°F for every 1000 feet you rise in elevation. You need to know what the boiling point is at your location to use this method. For an easy-to-use online calculator, see this link.

Once you know your boiling point, you can use the following method. Fill a saucepan at least four inches deep with water. Place the pot on the stovetop and allow the water to come to a rolling boil. When it comes to a boil, insert your thermometer probe a few inches into the water and wait until the reading stabilizes. Do not let the probe touch the sides or bottom of the pot. Keep it suspended in the water in the middle of the pot. Take this reading and compare it to your locale’s boiling point.

Another theoretical problem with using this method is that impurities or salt in the water can affect the boiling temperature of water. Therefore, ensure your water is as clean as possible.

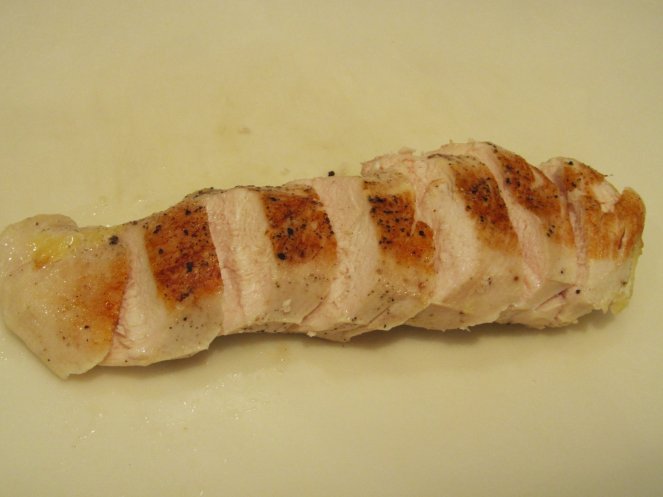
Once you have an accurately-reading thermometer, your next step is to use it properly. To do this, the tip of the probe should be used and it should be placed in the center of the thickest portion of the food. If the food item is large, be sure to take readings in several places. Insert the probe into the food and push past the center, watching how the temperature reading changes. Then, withdraw the probe, again watching the readings. Typically, the center will have the lowest reading and, therefore, is the best place to gauge doneness.

We are so blessed in our world today to have such great technological advancements that can enhance the results of our cooking endeavors. The food thermometer is just one of those advancements that I encourage all of you to consider.

Cooking Tips · Techniques

Induction versus gas cooktops

For all of my married life (32 years this May), we have moved from house to house every 2-3 years. Almost all were rental houses and, thus, I had no say about the kitchen or the kitchen appliances. When my husband reached mandatory retirement from that job, we moved here to Colorado and began building our retirement home. Finally, I could have the kitchen I wanted! As I planned that kitchen, I just assumed I would have a gas cooktop. Afterall, doesn’t every avid cook use gas?

About that same time, I began to hear and read about induction cooking. After much research, I finally decided to put in an induction cooktop. Because of a bit of concern, though, I also installed a small two-burner gas cooktop next to my main induction cooktop. Now, three years later, I can tell you that I LOVE my induction. The only time I use my little gas cooktop is if I need more space than I have on my induction or if I want a real flame for something like quickly roasting a pepper. In this Cooking Tip, I would like to explain why you need to consider induction the next time you have a choice about your cooktop.

I love the way Consumer Reports describes induction cooking. “The power and precision of the technology comes from an electromagnetic field below the glass cooktop surface that transfers current directly to magnetic cookware, causing it to heat up. Essentially, induction cuts out the intermediate step of heating up a burner and then transferring the heat to the pot.”

What is so great about induction? It heats much faster than gas/electric but you also have infinitely more control. If you want to turn down the heat, it responds immediately. Compare that to an electric cooktop where you may need to take the pot off the heat until the burner responds. Even with gas, the grate remains hot for quite a while. I can take a large pot of water to a rolling boil in a short time and when I turn off the heat, the boiling ceases within a second or two.

Depending on the cooktop model, you can achieve & maintain very low heat for as long as you want. Most experts will tell you that you should not melt chocolate over direct heat due to the risk of overheating and/or burning. On the induction, this low heat level allows you to safely melt your chocolate and hold it in that melted state. I also often use the lowest settings to keep food warm without overcooking.

These cooktops are very easy to clean. In fact, since the cooktops themselves don’t heat up (although they will be warm from being in contact with the hot pan), you can quickly wipe up spills or splatters as soon as they happen.

So, why not go with induction? Firstly, you do need the proper pots/pans. If a magnet will not stick to the bottom of your pan, it will not work on induction. I have seen an accessory you can supposedly put between a regular pot and the induction cooktop to allow your regular pot to work. I have not tried this but, if it does work, it would not be nearly as efficient or effective.

A minor disadvantage is that most induction cooktops do emit a buzzing and/or a clicking noise. This doesn’t bother me but I did know someone for whom this was a major problem.

Another problem is one that I was not aware of until very recently but, as I think back, I can testify that this is true. I am a big proponent of using digital thermometers for everything from cooking meat to custards and more. The magnetic field of an induction cooktop can interfere with those digital thermometers. Removing the pan from the cooktop is necessary to get an accurate reading. Alternatively, you can use an analog thermometer.

When I decided on this cooktop, I was pretty nervous. Afterall, it is a big purchase and not one you are going to easily change after it is installed. Now, three years later, I can tell you that I am so happy I purchased my induction cooktop. It is wonderful! And, I have never heard the opposite from anyone else who also installed this type of appliance. That says a lot.

Cooking Tips · Techniques

Cast Iron Cookery

I love my cast iron cookware. I have both enameled and unenameled items. Many people shy away from regular, unenameled cookware because they think the care of it is a hassle. In this Cooking Tip, let’s look at what is true and what is not about unenameled cast iron.

Why consider unenameled cast iron? It is extremely durable and will last for years as well as it is affordable. You will never get a better sear on a piece of meat than you will in a hot cast iron pan. It is also great for making a great crust on a dish such as hash or cornbread. It is oven-safe and so, you can go from the cooktop to oven and back again with ease – just beware the handle will get very hot and you must use an oven mitt or pot holder. It can also tolerate very high heat levels, even more than stainless steel.

Many people say a well-seasoned cast iron skillet is as nonstick as a regular nonstick skillet. Whereas it will get very nonstick the more you use it and the more seasoning it acquires, it will never be as nonstick as a modern coated nonstick skillet.

Most new cast iron pans are sold pre-seasoned. Ones you buy at a flea market or an estate sale may or may not be seasoned. Even with a new pre-seasoned pan, you may want to put it through a round or two of seasoning. The nonstick properties will only improve with more seasoning. Of course, just using your cast iron pan on a regular basis improves the seasoning.

Many posts claim one of the advantages is that a cast iron pan will heat evenly, meaning there will be no hot spots. Therefore, your food will cook evenly. In reality, a cast iron pan will develop definite hot spots. Also, cast iron is a relatively poor heat conductor. This means that it is hard to get an even heat distribution across the surface of the pan. The best way to evenly heat a cast iron pan is in the oven.

Those new to cast iron cookery need to realize that a cast iron pan will take longer to heat up than non-cast iron pans. It will also hold on to that heat much longer. Therefore, just because you take it off the heat does not mean the cooking will stop. You must remove the food item from the pan to really stop the cooking process quickly.

Your cast iron pan may be the most durable pan in your kitchen. It is actually sort of difficult to hurt a cast iron pan. And, the more you use it and the more the seasoning builds up, the more durable it becomes. You may have read to never use soap on your cast iron pan. Most experts disagree with this and say that today’s gentle soaps will not harm your pan. Once the seasoning has built up, you may also use gentle scrubbing along with the soap. It is not recommended, though, that you allow your cast iron pan to soak in water. Make it the last thing you clean. Thoroughly dry it and heat on the stovetop until hot. Follow this by rubbing the pan very lightly all over with an unsaturated cooking fat, like canola, vegetable, or corn oil. Buff it well to remove any visible oil. Repeat this process after every use and cleaning. One caveat, do not put it in the dishwasher.

Another care tip you may have read is that you should never use metal implements. According to Dave Arnold, a cast iron expert, it is good to use metal implements as “gentle scraping of metal along the bottom of the pan while cooking helps to even out the surface of the seasoning and make it more durable, not less.”

There are many brands of cast iron cookware on the market. One of the most highly recommended is the Lodge cast iron skillet. I have one and use it on my small gas cooktop. My major cooktop is an induction and I do not like to use it on that due to imprinting of the logo from the bottom of the skillet. Because of that problem, I bought a second skillet without that type of logo, an Analon Vesta. It was more expensive than the Lodge but it was worth it as I can use it on my induction cooktop without worry and – it came in a pretty cobalt blue to match my kitchen!

If you have cast iron pans, I hope this article encourages you to use them more than you currently do. If you don’t have one, I hope you consider adding one to your pots/pans inventory. I do not think you will regret it!

Cooking Tips · Techniques

Is sous vide cooking for you?

A friend of mine decided to give her husband a sous vide machine for Christmas. She knew I had one and asked me how I liked mine. That sparked me to write this Cooking Tip for those of you who might be getting one yourself for Christmas or just want to know more about it.

Let’s start with basics – what is sous vide cooking? “Sous vide” is French for “under vacuum”. It refers to the method of cooking food in a sealed plastic bag (traditionally vacuum-sealed) in a water bath with very precise temperature control. Many high-end restaurants have long used this technique for producing perfectly-cooked and delicious food, especially steaks. With the advent of affordable home kitchen sous vide machines, this is now something that we can all use.

Why would you want to consider investing in one of these machines?

  1. No over-cooking – since the food is normally cooked at the temperature at which you will be serving that food, there is almost no risk of overcooking your food and ruining your dinner.
  2. Even cooking – since the food is surrounded by water at a precise temperature, the food cooks evenly without over-done or under-done spots.
  3. Hands-off – just like your slow cooker, most of the cooking time is “hands-off”. Great results with little effort!
  4. Less moisture loss – when cooking meat in a skillet, the outer layers get much hotter in a quicker time and this leads to moisture loss. It is why we rest meat after cooking to allow the meat to reabsorb this moisture. When cooking sous vide, there are no such “hot spots” and due to cooking at a lower and steady temperature, there is much less moisture loss and no need for a rest after cooking.

Tenderizing tough cuts – with sous vide cooking, you can hold tough cuts of meat at lower temperatures for longer periods of time, which leads to more tenderizing.

Are there any downsides to sous vide cooking?

  1. You need to purchase a sous vide machine. If you have a small kitchen with little storage, you need to consider if you would use it enough to justify the cost and the storage space.
  2. It is not quick cooking. Since the food is cooked in a gentle manner, it takes longer for the item to be cooked thoroughly. It is usually a matter of hours, not minutes. However, it is mostly hands-off time. Yes, you need to plan ahead but that is no different than if you were using a slow cooker.
  3. Sous vide cooking does not result in a nicely browned and crispy exterior. You will need to add a step – that of a quick, high-heat sear to obtain this result.
  4. Cooking sous vide precludes making a good pan sauce since very little fond develops when doing a quick sear. For a prior Cooking Tip on the importance of fond to sauce making, email me and I will send it to you.

If you are looking to get into sous vide cooking, some of the most highly rated machines for home cooking are the Joule, the Anova, and the Sansaire. Mine is made by Kitchen Gizmo and I have been very happy with it.

Here are some pictures of my set-up and then making a succulent,
perfectly cooked chicken breast for dinner.

Sous Vide Set-Up

Sous Vide with chicken breast cooking

Perfectly cooked (but pale) chicken breast

Perfectly cooked & then seared chicken breast

Do you have a sous vide machine?
If you do, let me know how you like it and what wonderful delights you have made with it!

Cooking Tips · Techniques

Dishwasher Dos and Don’ts

I presume that most of you reading this Cooking Tip have a dishwasher in your house. During the five years that we lived in England, I did not. I must say that I very much missed having that appliance. Even now, as I write this, my dishwasher is running contentedly in the background. Even though I use that dishwasher almost every day, I still do a fair amount of washing dishes by hand. That is because there are things that really shouldn’t go in the dishwasher. This Cooking Tip is about just that – what not to put in your dishwasher.

  • Knives & other utensils with sharp edges
    First, there is always the safety issue. What if you forget the knife while unloading or someone else unloads it not realizing the knife is in there? That is an accident just waiting to happen. Beyond that, though, it is terrible for your sharp utensils. Not only does it dull the sharp edges, it can also damage handles.

  • Pots/Pans
    I know what you are thinking – this is what I want my dishwasher to do for me. Clean those dirty pots/pans. Personally, I don’t put any of my pots/pans in the dishwasher. They cost too much and I don’t want to risk damaging them. Experts say that pots/pans that are fully stainless steel are probably OK to go in there. However, they strongly recommend against putting others in the dishwasher. That list includes cast iron, nonstick pans, enameled cast iron, copper pots & aluminum cookware.

  • Fine china, crystal or other fragile dishware
    Although it is possible to successfully run these through the dishwasher, do you want to take the risk of breakage?

  • Wooden items such as cutting boards, salad bowls & spoons
    It is obvious that wood is very porous and can be damaged by moisture & heat. I must admit, though, I do occasionally throw my wooden spoons in. After all, they are pretty inexpensive to replace.

  • Some plastics
    Although there is still debate among experts, some worry that repeated exposure of plastic items to the dishwasher (and microwave) can degrade the plastic and could possibly be a health hazard. Only you can decide if that is an issue for you. Beyond that, though, the high heat of the dishwasher can warp some plastic items.

  • Items with hollow handles or thermal insulation
    This includes whisks, old-fashioned ice cream scoops, thermos bottles, pans with hollow handles, etc. I must admit that this was a new risk to me. What happens is that water can seep into the hollow space and then, when it is later heated when you are using it on your stove, the water turns to steam and if enough steam builds up, it can blow out of the hollow space. One person reported this happening with a stainless-steel pan that they had repeatedly put in the dishwasher. Upon using it on the stove, it exploded and shot across the room. This sounds a bit extreme but, even if it doesn’t explode, the water could still lead to rusting, the development of mold and/or the destruction of the insulation.

  • Bottles with labels/adhesive on them
    These labels will come off during the cycle and can clog or damage your dishwasher.

  • Graters/zesters
    The dishwasher never gets those holes clean and can damage the sharp grating edges.

So, yes, use your dishwasher. It is certainly well-used in my kitchen. However, it will never, unfortunately, totally replace having to hand wash some items.

Sigh!!