Whether it is New Year’s resolutions or the release of updated Dietary Guidelines, many people seek to improve their diets this time of year. One approach is to consume more whole grains rather than refined grains. This earlier Cooking Tip discusses whole grains we can purchase and incorporate into our diet. In this current Cooking Tip, I want to focus on whole grain flour and how to use it when we are trying to cook and bake at home more.
What is Whole Wheat Flour?
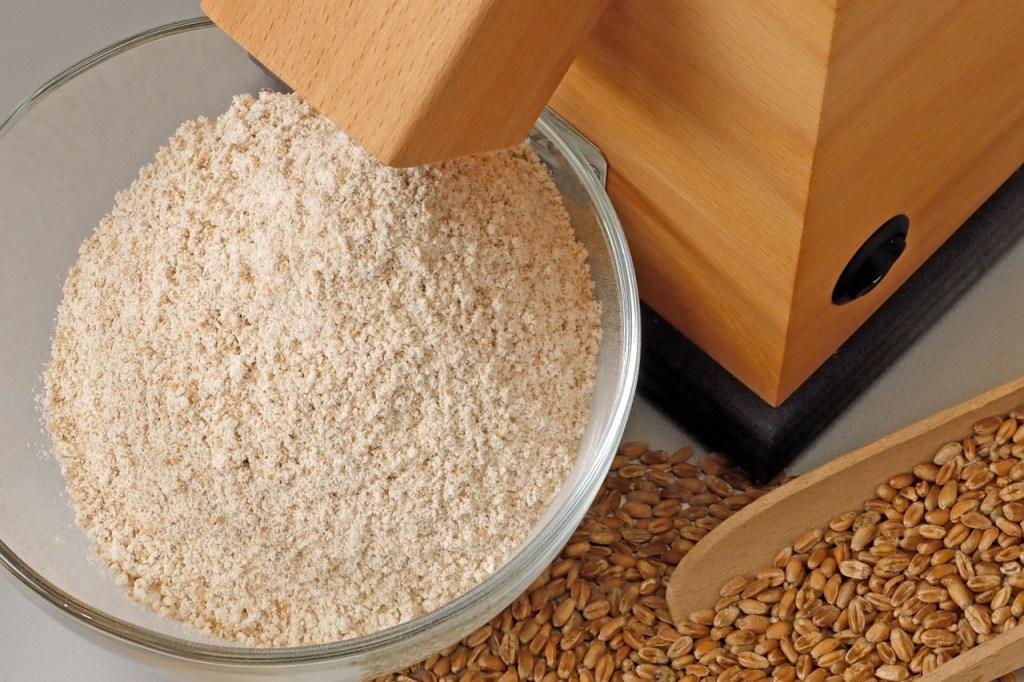
When you find grains of wheat in nature, they are composed of an outer bran layer, an inner core called the endosperm, and the germ.

- The bran is a fibrous outer layer that has abundant B vitamins, insoluble fiber, antioxidants and phytochemicals as well as a small amount of protein. This layer also contains most of the minerals in grain, such as iron, copper, zinc and magnesium.
- The endosperm makes up about 85% of the kernel. It is about 50-75% starch and protein, although it also contains some iron, B vitamins and soluble fiber. This is the part that becomes white flour.
- The germ is high in fatty acids, a small amount of protein, trace minerals, B vitamins, vitamin E and phytochemicals.
In making white flour, the bran and the germ are removed, leaving only the white endosperm. Whole wheat flour is made from the entire grain of wheat, including the bran, germ, and endosperm. In recent years, we have seen the emergence of a flour called White Whole Wheat Flour. Although the name is a bit confusing, it is an actual whole grain. It is milled from a different wheat variety with a lighter color. I will discuss its use later, but many people prefer it because it offers the nutritional benefits of whole wheat with a lighter color and flavor. Because of confusion over the name, some companies have given it a different name from White Whole Wheat.
If you want to try white whole wheat, here are some of the brands that you may see in stores. And, of course, there are always online sources.
- King Arthur Baking Golden Wheat Flour. This is the one that will probably be most available in supermarkets.
- Farmer Direct Foods Whole White Wheat Flour
- Wheat Montana Prairie Gold Whole Wheat Flour
- Ardent Mills Whole Wheat Flour
There are numerous cookbooks and recipe websites devoted to providing cooks with whole-wheat recipes. Many of us, though, would like to use some of our favorite recipes that call for white flour. Can we substitute whole wheat and, if so, how? Because of the differences in the characteristics of whole wheat as compared to white wheat, it is certainly not an easy 1:1 swap.
How is whole wheat flour different than white flour?
- The texture is coarser, which can impart a grainy texture to dishes.
- The color is darker, and thus, the color of your dish will be darker. While the color difference is less with white whole wheat, it will still be darker than regular white flour.
- The flavor is nutty and can be somewhat bitter, due to the tannins in whole wheat flour.
- It absorbs more water than white flour.
- It has less starch and, therefore, less thickening ability.
- The bran and germ can interfere with gluten development, causing baked goods to be dense and crumblier.
- Baked goods will often not rise as much as with white flour. Because this leads to a denser result, the baking time may need to be increased.
Rouxs/Sauces
Knowing how to make a roux and turn that into a delicious sauce is a fundamental skill that all cooks should know. The typical roux is made from equal parts white flour and fat, usually butter. You might think this would be an easy application to replace white flour with whole wheat flour. However, there are cautions.
- Whole-grain flour can give a grainy texture. To minimize this, sift thoroughly before use and whisk vigorously while cooking.
- Because the flour is darker in color, so will be your roux. It will also darken more quickly during cooking. Whereas this may not be a problem for heartier sauces, stews, and soups, you may not want it for your more delicate béchamel or velouté sauce.
- Since whole-grain flour has a nutty flavor, this may come through in your sauce. Again, this is more of a risk with lighter sauces.
- Because whole-grain flour has less starch, it will have less thickening ability. You may need to alter your flour/fat ratio or use more roux to compensate for this.
General substitution advice
How using whole wheat flour affects a recipe varies by recipe type. However, some general tips can be given.
- When first making the recipe, do not substitute more than about 25% whole wheat flour for white flour. As you become more successful, you may consider using more whole wheat flour. Realize, though, that the effects that whole wheat has will increase as you increase the amount.
- You should consider adding additional liquid. Most experts recommend adding two teaspoons of liquid for every cup of flour replaced.
- As you increase the whole wheat flour, the crumb of a baked item will be denser.
- The lighter and airier the baked good, the less well it will adjust to whole wheat.
- Although you will find recipes, baked items such as croissants, challah and brioche are probably not the best choice for whole wheat flour.
- Sifting the whole wheat a couple of times is a good practice.
- Substituting white whole wheat rather than regular whole wheat will probably be less noticeable. The latter will be darker in color and stronger in flavor.
- Substitute by volume, not by weight. Whole wheat flour weighs less than white flour, but it can absorb more liquid. You will obtain better results by using volume measurements.
- If you want to measure by weight, King Arthur Baking recommends using 113 grams of whole wheat flour for every 120 grams of white flour.
- Allow the dough rest for 20 to 25 minutes before kneading. This allows the bran to soften and improve elasticity.
King Arthur Baking has a series of blog posts about substituting whole wheat flour for white flour in different recipes. All their testing seems to have been done using their white whole wheat flour (called Golden Wheat) rather than regular whole wheat. Keep this in mind as you read through my summary of their tips.
Yeasted Breads/Rolls/Pizza crusts
- Start with a 25% substitution and increase from there. If using the Golden Wheat, a 50-50 swap without changing any other ingredients is possible.
- If you want to try to do a 100% swap, allow a rest of at least 20-30 minutes before kneading. Also, add two teaspoons of additional liquid per cup of whole wheat flour, and add more as needed to achieve the desired texture.
- A 100% swap will inhibit the rise of the baked good.
Quick Breads/Pancakes/Muffins/Scones
- They advise that you can probably make a 1:1 swap without any problems. However, you may want to start with 50-50 and adjust from there.
- If you do a 100% swap, the texture may be a bit grainy, and the color will be darker.
- Pancakes with 100% whole wheat may spread more. You can adjust for this by allowing the batter to rest for 30 minutes so it can better absorb the liquid.
Cookies/Brownies/Bars
- Brownies and bars tend to do well with whole wheat.
- Typically, the darker color from whole wheat won’t be noticeable, and chips, nuts, etc can hide the grainier texture that whole wheat can produce.
- Recommendations are for substituting up to 50% without any noticeable differences in results.
- Cookies with 100% whole wheat can be a bit gritty, especially if the cookies have no add-ins or are dry and crunchy cookies, such as sugar cookies and shortbread.
- Drop cookies can be made with 100% whole wheat without any changes if baking immediately. If, however, your dough requires chilling of 25 minutes or longer, you will want to increase the liquid by two teaspoons for every cup of whole wheat flour to compensate for the greater absorption.
- Allow this type of baked good to rest overnight. The item will soften and have an improved texture.
Cakes/Cupcakes
- Substitute only up to 50%.
- The more whole wheat, the crumblier it will be.
- The graininess may stand out because a cake is meant to be smooth.
Are you a whole wheat fan? Do you want to try to use it more? As I mentioned, it would be best to start with recipes that were developed for whole wheat. After you have mastered them, you can try altering your own recipes. If you are not a fan of whole wheat, consider white whole wheat. I think you will be pleasantly surprised!