Cooking Tips · Techniques

Take your bread for a whirl in your food processor

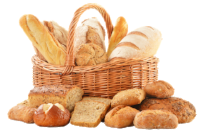
When a recipe calls for bread crumbs, do you grab for a canister from your pantry? While that may be OK in a pinch, homemade bread crumbs are so very easy and a much better choice. This is especially true if, like me, you have a partial loaf of bread on your counter that is starting to dry out.

All you have to do is to tear your bread into chunks, toss into your food processor & whirl it into crumbs. Some like to cut off the crust but others like the color & texture from including the crusts. Package the crumbs into zip-lock bags and store in your freezer. That way, you will always have bread crumbs for when you need them.

It is nice to toast part of the crumbs to make dry bread crumbs while processing the rest as fresh crumbs. To make toasted bread crumbs, preheat oven to 250ºF. Cut your bread into large chunks. Put on a baking sheet in a single layer and bake for about 10 minutes or until the bread is completely dried out. In a very humid environment, some suggest turning off the oven after baking for 10-15 minutes and letting the baking sheet sit in the oven overnight. Be sure to label your bags as to whether the crumbs are toasted or not.

What if your recipe calls for one slice of bread, processed into crumbs and all you have available are your great, homemade frozen crumbs? It is hard to come up with an equivalency because of the variables of type of bread, size of the slice, how finely processed, etc. However, one source I trust has produced this chart.

1 slice bread, 1.5 oz Frozen Crumbs Frozen, toasted crumbs

Finely processed 2/3 cup 1/3 cup

Coarsely processed 1 cup 2/3 cup

What about those Panko breadcrumbs? Panko is lighter, crispier, and airier than regular breadcrumbs. Because of this, it is especially nice for breading fried foods although that is not the only use. Since these are made from a type of Japanese white bread that is cooked in a special way, most experts say it is next to impossible to re-create in your home kitchen. You will find recipes, though, that attempt to do just this. Let me know if you try them and what you think!

Cooking Tips · Techniques

Improve your bread baking

Are you an avid bread baker? Are you always looking for ways to improve your bread baking? Are you willing to do some simple math? If so, this Cooking Tip is for you. For the rest of you, hang in there and next week’s Tip may be just what you are looking for.

If you bake much bread, you know that temperature matters. Recipes will often give you a general guideline for the temperature of the water. The recipe may list an actual number or may just say something like “lukewarm”. Expert bread makers know that there is an ideal temperature for the bread dough and how to get to that temperature.

The temperature of your ingredients (flour, water) as well as your room temperature will affect the final dough temperature. Another factor is what is known as the “friction factor”. That is how much the temperature of your dough increases during mixing and kneading. This can actually be measured but for the purposes of this tip, we will approximate it. (If you want the technique for measuring it, email me.)

For most wheat-based yeast dough, you want to aim for a final dough temperature of 75-78°. Multiply this temperature by 3. From that number, subtract your room temperature, your flour temperature & the friction factor. If you use a stand mixer to mix/knead your dough, estimate the friction factor of 22-24°. If mixing by hand, use 6-8°. When you subtract those three figures, you end up with your desired water temperature.

Let’s look at an example. Say you want a final dough temperate of 78°. For this example, we will presume your room temperature is 71°, your flour temperature is 72° and your friction factor is 22.

Here’s your formula:

78 X 3 = 234
234 – 71 – 72 – 22 = 69°.
This is what you want your water temperature to be.

A couple of caveats. First, there is a different formula if you are using a preferment, such as sourdough. If you are interested in that, email me. Also, it is best for this to use instant yeast, which will still activate in cool water. However, stir your yeast into the flour and do not add it directly to water under 70°. That is another great thing about instant yeast – there is no need to proof it. Just mix it in with your flour and you are good to go.

What difference in your final bread does this make? Well, with a consistent dough temperature, you will get consistent bread results despite varying room temperatures from day to day or season to season. Also, your bread will end up with the best rise, a great crumb structure and wonderful taste.

Try it and see what you think. Just be sure to share some of that yummy homemade bread with me!