Soufflés are one of those dishes that can be savory or sweet and are delicious in both forms. Have you tried making soufflés at home? If not, you should, and this Cooking Tip will give you what you need to serve impressive and satisfying soufflés!
The French word “soufflé” means “breath” in English. What a lovely word to describe this light and airy dish. They are so beloved in France that there are two celebration days – National Chocolate Soufflé Day is on February 28, and National Cheese Soufflé Day is on May 18.
The components of a soufflé are simple – a base, flavoring, and whipped egg whites. Although it is mainly the flavoring that distinguishes a savory soufflé from a sweet one, the base can also differ.
Base
The classic base is usually béchamel sauce (white sauce), enriched with egg yolks or crème patissière (pastry cream). Some sweet soufflés depart from this base to one that allows the flavoring to come through more. It might just be chocolate and butter (or other dairy) melted together or a fruit puree sweetened with sugar and thickened with a bit of cornstarch.
Flavor
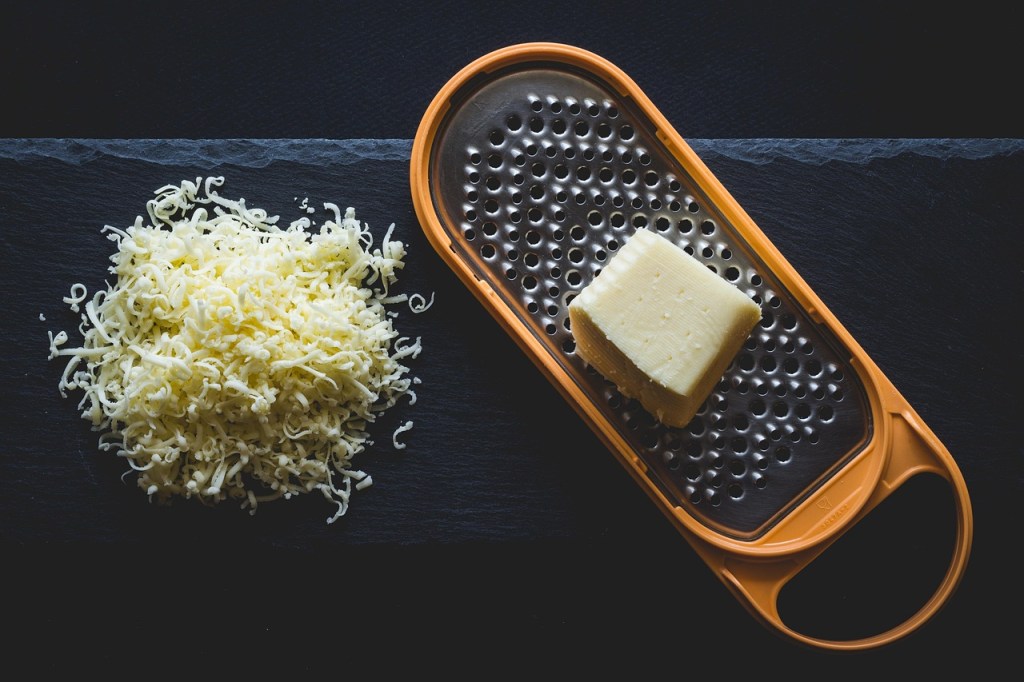
This is added to the base. For a savory soufflé, cheese is common, especially gruyere, but you might also find recipes that call for veggies, either pureed or finely chopped, and even meat or seafood. For sweet soufflés, the classic is chocolate, but a fruit puree also makes a light and summery soufflé.
Whipped egg whites
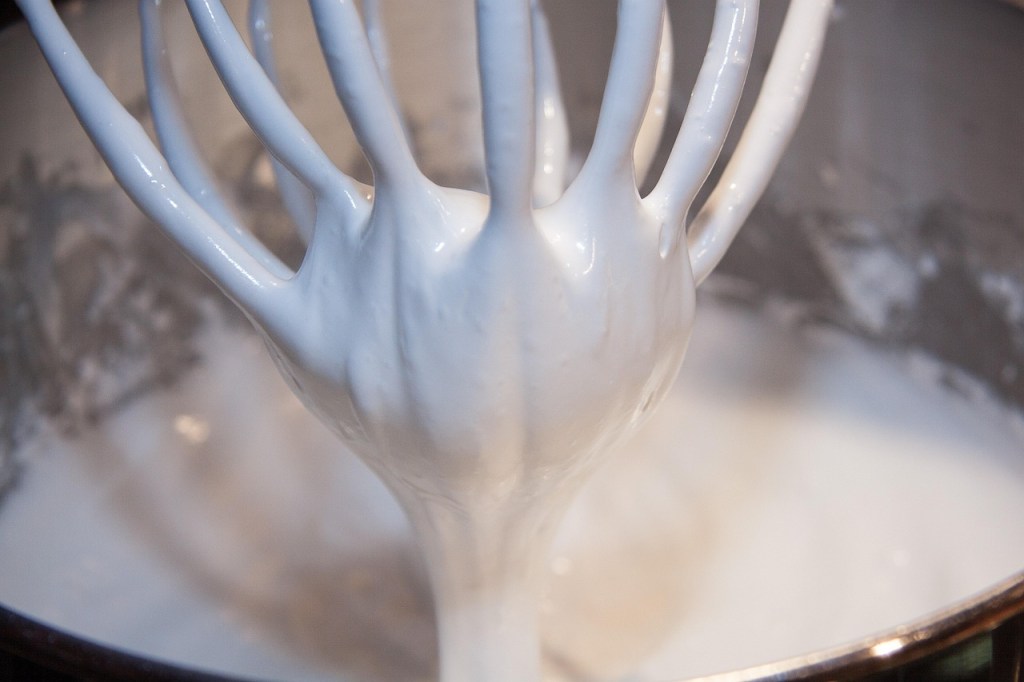
This is what leads to the remarkable rise of a soufflé. Air bubbles in the whipped egg whites expand as the soufflé cooks, causing it to rise. You will hear and read that if you get any of the yolks (fat) into the whites as you separate them, the whites will not whip up. This is true if you get a fair amount of the fat into the whites. However, a minimal amount probably won’t inhibit the process. To avoid this possibility, use the three-bowl method for separating eggs.
- Place two small bowls and the bowl in which you are going to beat the whites on your counter.
- Crack an egg and put the white in one small bowl and the yolk in another.
- Inspect the white. If there is no yolk in it, transfer it to your bowl for beating.
- Continue the process with each egg called for, being sure to inspect each white before adding it to the others.
Another aspect of the eggs is that the whites will beat up faster and have less chance of overbeating if they are at room temperature. However, eggs are easier to separate when they are cold. So, the usual recommendation is that one of the first things you should do is separate the eggs and then allow the whites to sit and warm up a bit before whipping them.
How much should you whip them? Many recipes say “to stiff peaks,” but this can lead to overbeating and drying out the whites, resulting in a soufflé that doesn’t rise well. A better recommendation is to beat them to medium peaks. When you tilt the bowl of medium-whipped egg whites, they should slip a bit.
This is especially important if you live at a higher altitude. Due to the lower air pressure, it is easier/faster for warm air to expand. Fluffy egg whites contain abundant air, and the air bubbles expand so quickly that they burst. This allows the air to escape before the surrounding material can cook, trapping the expanding air inside. The result is that your soufflé cooks but doesn’t rise. If you beat your egg whites less, you trap less air in them, so that you have fewer expanding air bubbles. The surrounding material of the soufflé can do a better job of trapping the air that is trying to escape, which allows the soufflé to rise. Living at 6000 feet, I can attest to the truth of this instruction.
America’s Test Kitchen recommends a different method to get the equivalent of medium peaks. They beat the egg whites to stiff peaks and then combine them vigorously with the other ingredients. They say this beats out some air and breaks down some of the structure, resulting in ”a perfectly risen soufflé with ideal consistency.” I tried this method just last night. I felt the rise wasn’t as much as I would have expected, but it was acceptable and delicious.
Procedure for making soufflés
- Mise en place – You can lessen the stress of making a soufflé if you gather all your ingredients and equipment before you start.
- Prep your ramekins. Use room-temperature butter (not melted) and brush it vertically along the sides of the ramekins. This is said to help the soufflé follow those lines and rise upwards. I have seen recipes recommend using cooking spray instead of butter, and that seems to work fine, too. After buttering, the ramekins are usually coated with a dry ingredient such as cocoa powder, sugar, Parmesan, or breadcrumbs, depending on the type of soufflé you are making. The theory is that this gives the mixture something to hold onto and rise above the rim of the ramekin as it bakes.
- Make your base. Most experts recommend allowing the base to cool before proceeding to the next step: adding the whipped egg whites.
- Whip the egg whites. When making a sweet soufflé, sugar is often added to the whites. Cream of tartar is also usually called for, as it helps the whites reach maximum height.
- Combine the base and whipped whites. Start by mixing in about ⅓ of the whites. Then, gently fold in the remainder so you do not deflate the mixture, unless you are following the above America’s Test Kitchen instructions.
- Pour mixture into ramekins, wiping off any mixture that gets onto the rims. If you want a perfectly flat top to your soufflé, level it with the back of a knife before baking. Some recommend running a knife, an icing spatula, or your thumb along the very top rim to create a channel between the batter and the rim of your pan. The theory is that it encourages the soufflé to rise upwards rather than outwards.
- Bake until the tops are set, and the centers jiggle slightly. This will take about 15-20 minutes, depending on the size of the ramekins.
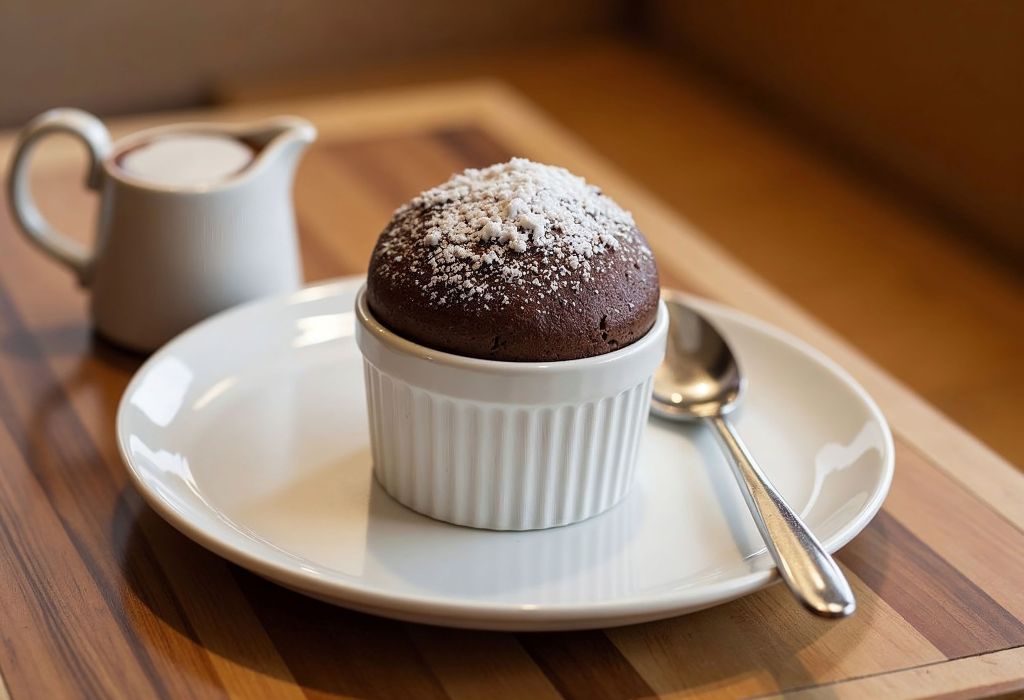
- Serve immediately with any garnish you desire, such as powdered sugar, ice cream, chocolate or vanilla sauce, fruit, etc.
Baking
Follow your recipe for instructions on oven temperature and oven rack placement. Some bake at 325°F, while others use a 400°F oven. Some recommend placing the oven rack in the lower third of the oven. Others suggest the middle.
Daniel Gritzer of SeriousEats.com advises a higher temperature. As he explains, the heat causes the gases to expand inside the air bubbles that you have created with your whipped egg whites. It also converts the moisture in the soufflé batter to steam. This causes the soufflé to rise. He tested different oven temperatures and found “A 400°F oven produced a marginally taller soufflé than a 375°F oven did.”
Another recommendation that you might see is baking the soufflés in a water bath rather than on a dry sheet pan. The water in the water bath never reaches above 212°F, or less if you live at higher altitudes. This allows for very even cooking. I have found this results in soufflés that are very evenly risen but not to the same heights as when baked on a sheet pan. The latter rises more, but they are also somewhat uneven in height.
There is a debate on whether opening the oven door while the soufflés are cooking is a problem. Some say that yes, it can cause it to collapse. Others say no, that is just an old wives’ tale. Gritzer tested this, and these were his results.
“… I cooked two soufflés. One I left undisturbed for the duration of its cooking. The other I abused, opening the oven door every five minutes, slamming it closed, bumping the oven, doing everything I wasn’t supposed to. They came out identical.”
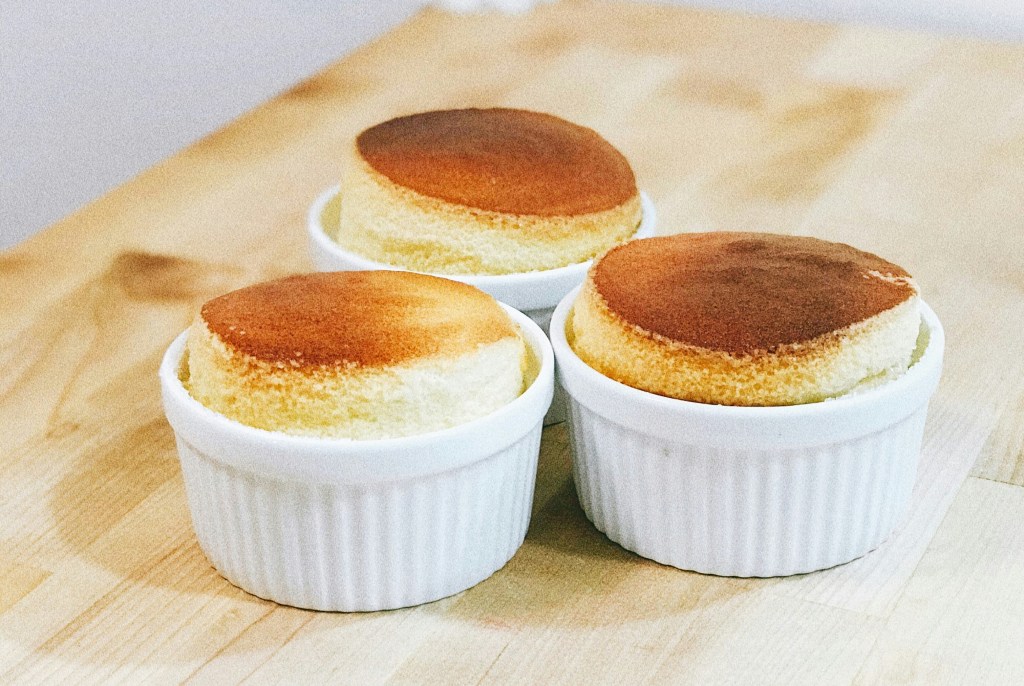
A sign of doneness is that the soufflé will rise above the rim of the dish and will be browned on top. It should be slightly jiggly when you lightly tap the top. Some recipes recommend checking doneness by measuring the internal temperature.
One thing experts agree on is that after baking, they need to go to the table immediately. Soufflés start to “fall” fairly quickly. So, serving them at their maximal height when they leave the oven gives an impressive presentation. Even if they do fall, they will still taste delicious.
Make in advance
- You can make the soufflés partially in advance. You can make the base and refrigerate it. Then, when you are ready, whisk the egg whites and finish.
- You can also complete the soufflé batter, cover and refrigerate until you are ready to bake. It is best, though, to bake within 12-24 hours. You will probably lose some volume if you choose this method.
- America’s Test Kitchen recommends the following procedure for making ahead. First, they only recommend this if you are baking in small ramekins. They “parbake the soufflés in a water bath to ensure that the soufflés cook evenly and retain plenty of moisture as they partially rise.” Cool the soufflés, unmold and refrigerate them. When you are ready to bake, put them in the oven to reheat, and they will continue to rise a bit. They will also brown nicely on top. I have never tried this method, but if you have, let me know.
Soufflés are certainly an impressive dish to serve your loved ones or guests. They are not difficult, but they do require you to pay attention to the details I have outlined above. If you do this, you will be rewarded with wonderful results and accolades from your guests.