Cooking Tips · Ingredients

The Flavor Enhancing Power of Acids!

If you have read my series on “Cooking without a Recipe,” you will have learned how to evaluate a dish when tasting it and how to improve the taste. It involves balancing the components of salt, acid and sweet. This Cooking Tip will concentrate on one of those components – Acid.

We are trained to add a bit of salt when we are seasoning a dish. In addition to salt, great chefs know that adding an acidic element can elevate the flavor in a way that salt cannot. Examples of acidic ingredients are citrus juice, vinegar, white wine, buttermilk, yogurt and sour cream.

You can probably recall from high school chemistry that acids are substances with a pH lower than 7, the neutral point. They also react with alkalis to neutralize them. They do have an essential part in cooking and baking.

Purposes of acids

  • Preservation – in baked goods, acids help extend shelf life.
  • Chemical leavening – acids react with sodium bicarbonate (or other alkalis) to produce carbon dioxide gas, which results in building volume in your baked goods.
  • Flavor enhancement and balancing – acids add desirable sharp or sour notes and balance sweetness.

Before discussing individual acids, realize there are natural sources of all of them, but they are also commercially produced. Some chefs like to have powdered versions of these acids available. This allows them to add the zing of the acid without adding any additional liquid or other flavors such as when you add citrus juice or vinegar. If you have never investigated powdered acids, look at this sample pack from Modernist Pantry. They also have a video talking about the uses of these products. You may also want to watch this episode of What’s Eating Dan by Dan Souza of America’s Test Kitchen.

Citric acid

  • This is found in various fruits and vegetables, especially citrus fruits.
  • It has an intense and bright taste, but it is short-lived.
  • It is also known as sour salt because of its taste and texture, but it has no salt in it.
  • Uses
    • Reach for citric acid when you want a dish to taste fresh, such as with salads, white fish, and cooked veggies.
    • It loses some of its tang when heated. This can be good if you want a more subdued acidity, but if you want it to stand out, add it towards the end of the cooking process.
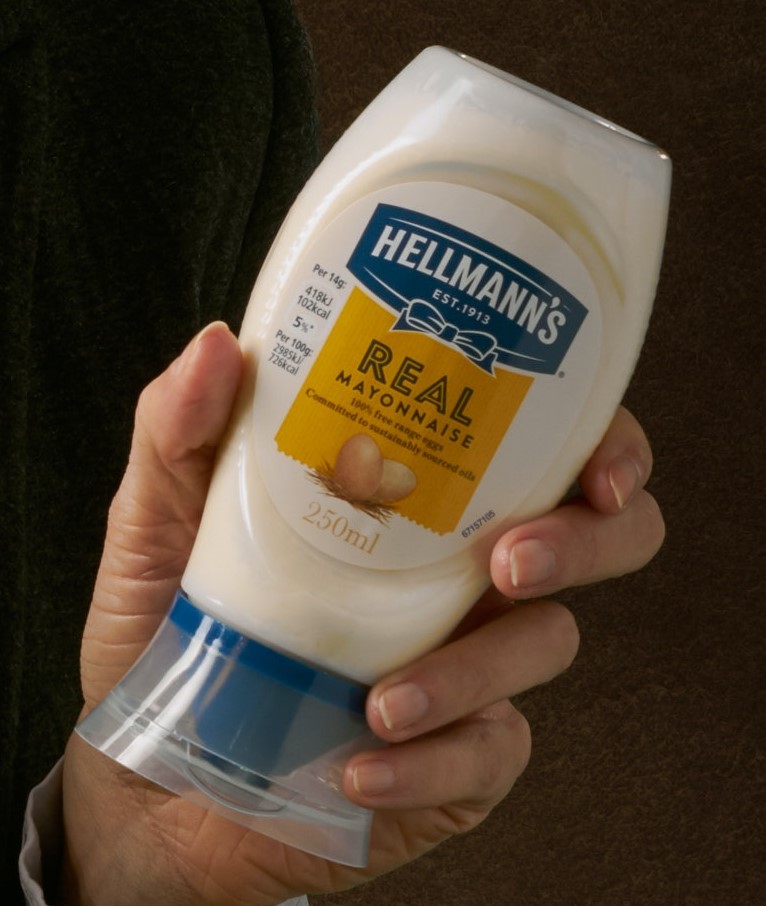
    • It acts as an emulsifying agent in some ice creams to prevent separation.
    • It can keep fruits and veggies fresher by interfering with oxidation and the resulting browning. Serious Eats tested this by using citric acid on apples to prevent browning. They found that the concentration required to prevent browning made the apples too sour to eat. In lesser concentrations, they were more palatable but did not work as well in preventing browning.
    • By combining a small amount with milk, you can easily make ricotta cheese.

Tartaric acid

  • This is derived from wine by-products as well as cherries, lemons, bananas and avocados.
  • It has a sharper flavor than citric acid.
  • It is often combined with baking soda and used as a leavening agent. You might think of this as a DIY baking powder if you just happen to have tartaric acid in your pantry. Few of us do. Manufacturers started producing baking powder by replacing tartaric acid with monocalcium phosphate. If you look at your can of baking powder, you will most likely see monocalcium phosphate.
  • Tartaric acic is the predominant flavor in tamarind.
  • Be aware that tartaric acid and cream of tartar are not identical. In scientific terms, “cream of tartar is the potassium salt of tartaric acid.” Cream of tartar is made by combining tartaric acid with potassium hydroxide. This partially neutralizes the tartaric acid, so cream of tartar is less acidic than tartaric acid. The two of them are not interchangeable.

Lactic acid

  • Since it is found in sour milk products such as yogurt, it is sometimes called milk acid. It is the acid that adds the “sour” to sourdough bread and is involved in the process of fermentation, such as with pickles or kimchi.
  • It is a flavor enhancer and provides a natural sour taste.
  • The flavor is softer than citric acid, but it can add a bit of the taste of fermented products.
  • It can be used when you want a quieter zing of acid, such as in sauces or veggie dishes.

Malic acid

  • This acid is found in unripe fruit, particularly apples.
  • The flavor is very tart and lingers on the palate. Think of a green apple.
  • It is often used in meat dishes.

Ascorbic acid

  • AKA Vitamin C
  • It is found in citrus, tomatoes, melons and berries.
  • It is an antioxidant and is used to prevent the adverse effects of oxidation, such as browning in packaged goods.
  • Is also used to prevent browning of cut fruits and vegetables.
  • Helps to stabilize the gluten network in bread doughs.

Acetic acid

  • Think of the acidity of vinegar or kombucha.
  • Is produced when alcohol is fermented in the presence of oxygen.
  • It has a pungent smell and will assert itself in a dish.
  • Although it can be found in other food items, we mainly see it in vinegars.

Learning to taste and balance flavors should be a goal for all of us cooks. It comes easier to some than others due to the differences in our palates. However, by experimenting with the elements of salt, sweet, and acid, we can see for ourselves how these affect the flavor of our dishes. I still recall a friend making a Mexican-style soup and saying it was bland. However, after I instructed her to add some acid (in this case, lime juice), that soup was elevated from just edible to delicious. Acids are essential, and I trust this tip will encourage you not to forget about them when tasting your food!

Cooking Tips · Ingredients

Food Preservatives – Necessary or Harmful?

Unless you make all your food from scratch, you will surely have some food preservatives in your dishes. And, even if you cook/bake mostly from scratch, some of the basic ingredients will often have preservatives in them. Should you worry? Is there anything you can do about it? That is the subject of this Cooking Tip.

Food preservation has been occurring for centuries. Our ancestors used salt, sugar or vinegar to preserve food for storage. Other methods included refrigerating, freezing, drying and smoking.

Beginning in the late 19th century, alternative preservation methods began to be introduced. Today, we use chemicals (either natural or synthetic) to prolong our food’s freshness and shelf life. The goal is to prevent spoilage that occurs due to air, moisture, or harmful organisms.

The main goal of food preservatives is to reduce spoilage. They are added to food to prevent or slow down the growth of micro-organisms such as molds, yeasts and bacteria. Therefore, they can keep food fresher for longer periods of time. They are also used to slow or prevent changes in color, flavor, and texture, such as preventing browning, caking, clumping, or separating.

Food preservatives are either extracted from natural sources (non-synthetic) that can be found in nature or synthetically produced. Examples of natural preservatives include:

  • Salt
  • Sugar
  • Vinegar
  • Ascorbic acid (vitamin C)
  • Citric acid
  • Tocopherols (vitamin E)

Examples of man-made (synthetic) preservatives are the following.

  • Potassium sorbate/sorbic acid
  • BHA/BHT (Butylated Hydroxyanisole and Butylated Hydroxytoluene)
  • Calcium phosphate
  • Nitrates/nitrites – These can be naturally occurring but are also used in meat to add color and prolong shelf life.
  • Sulfites – These chemicals prevent browning. On the label, you may see sulfur dioxide, potassium metabisulfite, sodium metabisulfite, sodium sulfite or sodium bisulfite. Next time you are in the market, look at packages of dried apricots. The ones with the word “unsulphured” will appear brownish, while the ones that appear brighter orange will have a sulfur additive.
  • EDTA – Ethylenediaminetetraacetic acid
  • Benzoic acid

Natural versus synthetic is one way of categorizing food preservatives. Another is by their function.

  • Acids – These are used as most microbes cannot survive an acidic environment. Examples are citric acid, acetic acid, sorbic acid, lactic acid and fumaric acid.
  • Antimicrobials – Used to prevent the growth of harmful organisms; examples are spice extracts, sodium benzoate, and sodium nitrite. The latter is sometimes listed as “celery powder” on food labels.
  • Antioxidants – Oxidation is an enemy of food as it causes fat to go rancid, flavors to change and degrade, and colors to turn brown and dingy. Think of the browning that occurs when you leave a cut apple on your counter. That is due to oxidation. With the addition of an antioxidant, the oxygen reacts with the antioxidant(s) rather than the food. Examples are ascorbic acid (Vitamin C), sulfur dioxide, tocopherol (vitamin E), and BHT (chemically synthesized, but it does occur naturally in lychees).

All food additives, including preservatives, must be labeled on food packages. You will often see the word “preservative” followed by the actual name of the preservative. Sometimes, you will see the name of the chemical with the word “preservative” in parenthesis. If you wish to look up a particular food additive, see this list from the FDA.

If a preservative has been added to food, the FDA has determined that there is sufficient evidence that they are safe for their intended use. In addition, these preservatives are subject to ongoing review by the FDA as scientific understanding and testing methods improve.

Despite this, should you look for one type of preservative over another? There are three main concerns that you will hear frequently.

  • Sulfur dioxide may invoke responses in people with asthma.
  • Some additives may invoke an allergic response in sensitive individuals.
  • Sodium nitrite is concerning as some feel it can form potentially carcinogenic nitrosamine compounds. That is why we are told to limit our consumption.

The advantages of synthetic preservatives are:

  • Many feel they are more effective than natural ones.
  • They are generally less expensive and more available than natural preservatives, helping to keep food costs down.
  • Some caution that obtaining natural preservatives may have negative environmental impacts.
  • Natural ingredients can be highly variable, making their consistency and potency different from batch to batch. Therefore, they may not be as effective, or a higher concentration may be needed to reach an effective level.
Image by Pete Linforth from Pixabay

Food waste in our country (and worldwide) is a real problem. The EPA estimates that over one-third of the food produced in the United States is wasted. They state that “food waste is the single most common material landfilled and incinerated in the U.S., comprising 24 and 22 percent of landfilled and combusted municipal solid waste, respectively.”

Apart from the negative environmental concerns, this is a financial concern for all of us, especially with today’s food costs. A 2022 article in Fortune magazine estimates the economic cost of food waste is equivalent to “$1,500 worth of groceries for a four-person household each year, an estimate that doesn’t include recent food price inflation.”

We can do many things to reduce food waste in our kitchens. One thing that food manufacturers do is to add preservatives to our foods. Just take a look at the food labels of the items you purchase. Whether you want to source those items with natural preservatives is a personal decision. I hope the above information will help you as you make that decision.

Very few decisions are black and white, and the same is true for food preservatives. For more examples, see my prior posts on Flavorings and Colors.

We can all reduce the preservatives we eat by cooking more and relying less on processed foods and restaurant foods. You may not be able to avoid all preservatives, but you can positively impact your and your family’s diet.

Cooking Tips · Ingredients

Butter – Has it Changed?

I ran across a blog post a day or so ago titled What’s Going on with Butter? It was very interesting and I thought I would share with you in this Cooking Tip the controversy about modern-day butter. This is not a Tip about using butter in your kitchen. For that discussion, see this prior Tip.

There are really two parts to this discussion. The first is from a couple of years ago and was about Canadian butter. The second was much more recent and involved baking disasters during the 2023 holiday season with US butter.

Let’s start with Canada. What Canadian bakers were noticing was that the butter was staying hard despite being left at room temperature to soften. People were so upset about it that it became known as “Buttergate.”

Image by Elsemargriet from Pixabay

The culprit was thought to be palm oil products that were being added to cattle feed. This was being used as an energy supplement and was not limited to Canada. It was also being used elsewhere in the world. Palmitic acid is a saturated fatty acid that occurs naturally in some animals and plants. The Canadian dairy industry said increased demand during the pandemic caused them to add palmitic acid (from palm oil) in greater quantities to boost milk output and increase the fat content.

The theory was that the palm fats in a dairy cow’s diet altered the saturated fatty acid profile of the resulting milk fat, which could possibly cause the butter to be firmer at room temperature. Recall that saturated fats are those that stay solid at room temperature, whereas unsaturated fats are liquid at room temperature.

Not all agreed, though. A food science professor at the University of Guelph in Ontario, Canada, disputed that the addition of palm products could lead to the hardening of butter. He did admit, though, that these products could affect the melting point of the butter.

Laboratory testing of 17 different Ontario butter brands was done. The testing showed only a relatively weak correlation between the amount of palmitic acid and the relative hardness of the butter. They did find that, on average, softer butters had less palmitic acid. However, it was not across the board, as some soft samples had more palmitic acid than hard samples. The conclusion was that there was more involved in the butter’s texture than just the level of palmitic acid.

Other possibilities that were put forward were:

  • Diet – There are many reasons that the cow’s diet might change, and these changes are reflected in the milk and related products.
  • Milking machines – Martin Scanlon, dean of agriculture and food sciences at the University of Manitoba, said that milking machines may play a role. According to him, “One factor is the recent rapid adoption of robotic milking machines on dairy farms. Cows no longer wait to be milked but enter an automated stall when they are ready to be milked. As a result, the milk fat globules do not stay in the udder for as long, resulting in hard fat crystals forming, which may impact the firmness of the final product.
  • Increased demand – During the pandemic, demand for butter was up 12%. Due to this, Scanlon postulated, “Butter makers may have reduced the aging time for the milk fat and sped up cooling after churning to meet the demand. That quick cooling could leave small, hard fat crystals in the butter. Once you start cooling these fat crystals very fast, there’s actually a consequence on the hardness.”

An article in the Journal of Dairy Science was published in September 2021, and it discussed a butter analysis done by scientists from the Department of Food Science at the University of Guelph. They not only looked at the palmitic acid content but also the oleic acid content. The latter is a mono-unsaturated fat and is a principal component of olive oil. Their “preliminary results suggested that butter firmness … was positively correlated with palmitic acid content, negatively correlated with oleic acid content, and positively correlated with the palmitic acid: oleic acid ratio.”

They also postulated other factors that could affect butter’s texture. They said “In a high-throughput manufacturing plant, if fats do not spend enough time being softened by mechanical working and are not tempered at the appropriate temperature for some time, they become harder and more brittle. Thus, we assume that the combination of increased palmitic acid content and higher plant throughput due to large increases in butter demand interacted to create the harder-than-usual butter.”

So, was this phenomenon related to cattle feed or another negative outcome from the pandemic? No absolute conclusions were ever made.

Now, what about the US? I didn’t find reports of anything similar to Buttergate, although, as far as I can tell, palmitic acid is also used in cattle feed in the US.

Image by congerdesign from Pixabay

What I did find was a meltdown during the 2023 holiday season over ruined baked goods that was attributed to a change in Costco butter. Bakers noted failures with recipes that had always been successful in the past. When they switched to a different butter, supposedly the problem resolved. People postulated that the Costco butter had a higher water content than it had in the past and, therefore, a lower butter fat content.

Devon O’Brien of AllRecipes.com decided to test the Costco butter against other brands to see for himself. He put the butters to the test in pie crusts and cookies. He did find pie crusts made from the Costco butter were drier and more crumbly than the pie crusts made with other butters. However, after resting overnight in the refrigerator, the pie crusts were indistinguishable. He noticed no difference in cookies made with the different butters. His conclusion was that he thought there was a possibility that the Costco butter had more water but found no reason to stop using it.

I cannot confirm or dispute either of these stories. First, I do not use Canadian butter and so, cannot comment on the hardness issue. Second, I do not shop at Costco (I know – that might be unbelievable!) and have never used their butter. My go-to butter for baking has always been Land O’Lakes unsalted butter and I noticed no problems using it in my baking.

Although their testing is a few years old, America’s Test Kitchen’s favorite butter for baking is Challenge unsalted butter, although Land O’Lakes was on their recommended list along with some other brands. Bon Appetit likes Cabot butter, while Food 52 says Trader Joe’s butter is unbeatable. Consumer Reports gave another vote for Land O’Lakes.

What about you? What is your favorite butter for baking? If you are a Costco fan, did you notice any problems over this holiday season? Let me know!

Cooking Tips · Ingredients · Techniques

Grilled Cheese – The Ultimate Comfort Food

There are certain culinary delights that are very comforting. Melted cheese has to fall into that category. One of the primary ways we enjoy melted cheese is in the form of a Grilled Cheese Sandwich. Everyone has their own way of making these. Is one way better than another? Let’s dive into this topic in this Cooking Tip.

There are three basic components of a grilled cheese sandwich – bread, cheese and a spread. Many will include a fourth and that is add-ins. Your choice of each of these will affect the resulting sandwich.

Bread

Image of a cut loaf of bread setting on a board with wheat plant behind it.
Image by Ilo from Pixabay

The classic bread choice is just white sandwich bread. Others feel you need something with a bit more flavor. Two principles that most agree with are:

  • Use something with a tight crumb so the cheese doesn’t leak out. You do not want bread with lots of air bubbles.
  • You want a good bread-to-cheese ratio so do not use very thick slices of bread. Aim for about a half inch.

Cheese

The most important characteristic of the cheese is that it should melt good. Within the category of melting cheeses, there are several choices.

  • Young cheddar (under one year)
  • Monterey Jack
  • Young Gouda (under one year)
  • Young Swiss-style cheeses (under one year)
  • American
  • Brie

Harder, aged cheeses may have tremendous flavor but they do not melt well. America’s Test Kitchen offers an approach whereby you can use these cheeses. They combine the hard cheese with a smaller amount of a great melting cheese such as Brie in a food processor to make a paste. They also recommend adding a tablespoon or two of wine or vermouth to aid in emulsifying and to add flavor.

Experts disagree on the form of the cheese for the best sandwich.

  • Some recommend shredding the cheese as you can get good coverage with easy melting, The downside is that this method can be messy.
  • Sliced cheese will work as long as you get slices of uniform thickness so it melts evenly.
  • Some like to use a Y-shaped veggie peeler, which gives you thin and even slices.

Spread

There seems to be two camps on the issue of which spread to use. There is the butter camp and the mayo camp.

Image of small glass bowl with 3 pieces of softened butter in it

Butter

  • Pros – excellent flavor.
  • Cons
    • Needs to be softened.
    • Has a low smoke point.

Mayo

Image of a hand holding a bottle of Hellman's Real Mayonnaise
  • Pros
    • Do not have to soften.
    • It has a higher smoke point than butter.
    • Adds a tangy flavor element.
  • Cons
    • Many do not like the flavor.
    • Does not crisp as well as butter.

Combination

  • Some experts like to use a combination of softened butter and mayonnaise. They feel this results in great browning without this happening so quickly that the cheese doesn’t have time to melt. The flavor is described as multi-dimensional.
  • Everyone recommends staying away from low-fat mayonnaise as it results in uneven browning.

Add Ins & Variations

A great grilled cheese sandwich needs nothing more than the above elements. However, you may also want to experiment a bit.

  • Bread – vary the type of bread keeping the above cautions in mind.
  • Cheese – vary the type of cheese.
  • Add Ins – just do an online search and you will come up with very interesting recipes. There are even entire cookbooks devoted to this dish. Here is just a very short list to get you started.
    • Herbs
    • Caramelized Onions
    • Bacon or Ham
    • Apples
    • Jam

Method of cooking

There are some areas of agreement but other areas of disagreement. Here are the different methods.

Stove-top

  • Preheating the pan over med-high heat for a couple of minutes and then lowering the heat to medium-low is the preferred cooking method. Cook until browned, flip and continue to cook until the other side is brown and the cheese is melted.
  • Some like to put the butter in the pan while others say to butter the bread, not the pan. Proponents of both methods claim that it leads to better and more browning.

Oven

  • If you need to cook for a crowd, place your prepared sandwiches on a rimmed baking sheet in a 450°F oven, flipping half-way through.

Panini press

  • If you have access to a panini press, this method will give you the best crispy sear.

Air Fryer

  • Some have tested using an air fryer. It will work but it takes longer and the bread is more toasted than grilled

Serious Eats Stove Top Method

  • This method involves griddling both sides of the bread.
  • To do this, melt the butter in a skillet over medium heat. Add the bread and cook until that side is evenly browned. Remove the bread and place on a work surface, toasted side up. Add the cheese and close the sandwich with both toasted sides facing inward. Add more butter to skillet, lower the heat to med-low and cook the sandwich until golden on the bottom. Remove the sandwich from the skillet. Add more butter and return the sandwich to the pan, toasted side up. Cook until the second side is golden brown and the cheese is melted.

If you are a really serious grilled cheese eater, you may agree with America’s Test Kitchen. They bemoan the fact that the wonderfully crisp sandwich can get soggy as soon as you place it on a plate. So, they place two chopsticks on the plate and the sandwich on top.

In my book, two slices of bread encasing meted cheese is a winner. However, with the expert tips above, you might be able to take this humble sandwich and elevate it even more.

Image of a grilled cheese sandwich setting on a wooden board, which is setting on a red/white checked cloth.
Designed by Freepik
Cooking Tips · Ingredients

Coconut Flour – Like any other alternative flour?

Do you do much baking with alternative flours? I do not as I have no one I cook or bake for that needs to stay away from regular flour. When I do make something with an alternative flour, it is usually with a nut flour such as almond or hazelnut. Many times, these ingredients are called for because of the flavor they impart, not because they are gluten free. A different alternative flour that I decided to investigate is Coconut Flour and that is the subject of this Cooking Tip.

Image by Ilo from Pixabay

Coconut flour is a by-product of extracting coconut milk from the coconut. The coconut milk is removed and the remaining meat is fully dried and subsequently ground into a powder.

It is a product that you might be interested in trying but realize that it is not a 1:1 substitution for wheat flour as they act very differently. The nature of coconut flour is such that it absorbs much more moisture than regular flour. Therefore, you need to limit how much you use along with adding more liquid.

Here are some Dos and Don’ts from coconut flour experts.

  • Do use coconut flour in dishes that can benefit from its flavor. The flavor and aroma are distinctly of coconut but not overpowering.
  • Don’t replace more than 25% of the flour in a wheat flour recipe with coconut flour.
  • Do add extra moisture when you are baking with coconut flour. Start by adding 2 tablespoons of extra liquid for every 2 tablespoons of coconut flour that you use. If your recipe calls for eggs, many recommend adding one additional egg.
  • Do beat the eggs before adding to the flour as it will help to give a lighter texture.
  • Do sift the flour before using as it tends to clump.
  • Do mix thoroughly to prevent any clumps of coconut flour.
  • Do let the coconut flour sit after adding liquid ingredients to a batter recipe. This will allow for more moisture absorption and help you decide if you need more liquid.
  • Do consider decreasing the sweet ingredients as the coconut flour has a natural sweetness to it.
  • If you are using it in a preparation where you want a crispy texture, add some almond flour.
  • When buying, look for a bag where coconut is the only ingredient. You do not want any added sugars, flavorings or other fillers.
  • Can be used for non-baking uses such as to thicken sauces and coat foods.
  • Don’t assume that coconut flour and other alternative flours are interchangeable as they are not. For example, almond flour is much denser and much higher in fat.

Do you utilize alternative flours? Have you ever tried coconut flour. If not, give it a try but be aware of the above cautions and have fun!

Cooking Tips · Ingredients

Celebrate the Flavors of Anise and Star Anise

Anise and Star Anise are two of those spices that are not used very often but do have a place in our kitchens. What they are, how they differ and how to use them is the subject of this Cooking Tip.

Although the names are similar, they are spices that look different and come from unrelated plants.

Biological

  • Anise (Pimpinella anisum) is native to the Eastern Mediterranean, Egypt and the Middle East. It is also cultivated in Western Asia, Europe and North America. It is a member of the parsley and carrot family and, as such, it is related to cumin, dill and caraway. The anise seeds are small, oval-shaped, and gray-brown. Other names are anise seed and aniseed.

  • Star Anise (Illicium verum) is native to China and Vietnam but is also grown in East and Southeast Asia. It grows on an evergreen tree of the Schisandraceae (Schisandra) family. It has fragrant flowers that are either yellow-green or pink-red. The flowers give way to a pretty eight-pointed star shape. Each section of the star is a seed pod.

Flavor

These spices are known for their licorice flavor that comes from a compound called trans-anethole. A third spice that shares this flavor profile is fennel seed. See this prior Cooking Tip for a discussion on fennel. All three contain trans-anethole but have differing amounts of other flavor compounds, which give additional flavor notes. Therefore, they do not taste identical.

  • Anise seed has an earthy flavor with notes of fennel, caraway, licorice and camphor.

  • Star Anise also has a licorice flavor but with floral and sweet notes. Some describe it as herbal, lemony and woody.

Culinary Uses

Anise

Anise is used in both sweet and savory dishes, including soups, sauces, breads, cakes, and liqueurs. It is essential for many spice cakes, cookies and sweet breads.

Star Anise

Star anise is very common in Asian cuisine but may also be part of holiday baking recipes, as well as mulled wine or cider. One of the most common uses is as a component of Chinese Five-Spice powder and Garam Masala.

It can be used in whole form, but should be removed at the end of cooking as you would a bay leaf. Alternatively, you can grind it before adding it to your dish.

A non-culinary use is as a common addition to potpourri baskets, especially for the holidays.

America’s Test Kitchen investigated whether people could tell the difference between the flavor of anise, star anise and fennel seed. Their recipe testers tested these three spices in biscotti, pho broth and Italian meatballs.

  • With a biscotti recipe that called for anise, but one of the others was substituted, the tasters could quickly identify the difference.
  • With a Pho recipe that called for star anise, it was easy to tell when fennel seed or anise was used instead.
  • The flavor distinctions were harder to tell in Italian sausage meatballs that usually specify fennel seeds. They partially attributed this to the fact that the dish contained many other spices.

The takeaway is to be aware of the differing flavor profiles if you want to substitute.

One final note is to beware of Japanese star anise. It’s not edible as it contains high levels of toxins.

Do not be wary of these spices, as they can add a unique flavor to your dishes. Just know the differences and how they might affect your dishes.

Cooking Tips · Ingredients · Techniques

Condiments – to refrigerate or not?

Image by wixin lubhon from Pixabay

Hello, Food Lovers! If you are like me, you probably have multiple bottles of different condiments. Many, or even most, of these tend to take up residence on our refrigerator door. Have you ever considered which ones need to be there and which might do just as well in your pantry? That is the subject of this Cooking Tip.

Why do we refrigerate these items at all? On the shelf, they have been produced and put in an airtight container. After that seal is broken, the air can allow pathogens to proliferate.

An overall principle is that it is rarely wrong to refrigerate an opened condiment. Most manufacturers advise that refrigeration prolongs freshness and flavor, even if not needed for safety reasons. That is why you often see the wording “refrigerate after opening” or “for best flavor/quality, refrigerate after opening.” Refrigeration will also often prolong the shelf life of the product.

A look at the ingredient list can be helpful. Since salt and vinegar are known to be preservatives, if these are listed at the top of the ingredient list, the more likely that they will do fine without refrigeration.

Ketchup

Image by Alexa from Pixabay

This is one condiment about which people argue. Heinz responded to the “refrigerate or not” controversy by stating their ketchup should be put in the refrigerator. They say it is to “maintain the delicious tangy taste.” They do admit that the acidic nature of the product means it is probably shelf-stable but still recommend cold storage to maintain quality.

Mustard

Experts say this does not have to be refrigerated due to its acidic nature.

Soy Sauce

There is no need to refrigerate this condiment for safety reasons, but it is a good idea to preserve its quality.

Mayonnaise

This is a condiment that I would never consider storing in the pantry after opening. However, some experts say it can be kept at room temperature for up to a month. The acidic ingredients (vinegar, lemon juice) do inhibit bacterial growth. Note that this does not apply to homemade mayo; that should always be refrigerated. (And, if you make your own mayonnaise, I am indeed impressed!)

Hot sauce

As hot sauces are highly acidic, there is no need to refrigerate. As with other condiments, flavor changes can occur at room temperature.

Jams/Jellies

Image by Paolo Trabattoni from Pixabay

These should definitely be refrigerated due to the likelihood of spoilage at room temperature.

Worcestershire sauce

Similar to another umami-containing condiment, soy sauce, refrigeration is not a requirement.

Fish sauce

This is one we can feel comfortable leaving in the pantry due to its high salt content. The above statements about prolonging quality and shelf life, though, still apply.

Oils

Cooking oils, including coconut oil, do not need refrigeration. Most nut oils, however, are much more perishable and should find a place in the refrigerator.

Vinegar

Because of the high acid content, vinegars are shelf-stable after opening for an indefinite time.

Peanut butter

The average peanut butter made with hydrogenated oils is fine at room temperature. If you buy natural peanut butter, it is best to refrigerate to avoid the oils going rancid.

Honey

Honey not only does not need refrigeration but doing so can accelerate crystallization.

Salsa

Although salsas do contain acids, it is not enough to prevent spoilage. So, into the refrigerator it should go.

Maple syrup

True maple syrup should be refrigerated after opening. Artificial ones that are made with corn syrup do fine in the pantry.

Another question about condiments is how long they last, whether or not refrigeration is a concern. The US Department of Health and Human Services has an app called FoodKeeper that will help you understand how long any food, not just condiments, will keep in the pantry and refrigerator. Just find the food you want to look up and the government’s recommendations will be there.

I must admit that apart from honey, peanut butter and fish sauce, I keep all the above in the refrigerator after I have opened the container. As long as you have space, that is a good habit for prolonging the quality of these items. If you run short of real estate in your refrigerator, the above should help you know what you can safely take out.

Cooking Tips · Ingredients · Techniques

Creole & Cajun cooking – aren’t they the same thing?

I will soon be teaching a class on New Orleans cuisine. When you think of food from this area, what types of food come to mind? For many of you, I suspect you would say Cajun and Creole. Just what is the difference in these terms, if anything? That is the subject of this Cooking Tip.

To understand the difference between Cajun and Creole food, we need to look at the history of the people. The history lesson will be a bit of a summary rather than an in-depth look.

Creole

Creole means “native to the colony” and is said to have come from the European colonization of Louisiana. France claimed this land in the 1600s and gave it to Spain in the 1700s. During this time, the term “Creole” was applied to children born in North America, no matter their descent. The term became more important after the Louisiana Purchase in 1803 as it distinguished those living there from new arrivals.

People who claim this heritage come from all sorts of backgrounds. They were in this area before the Louisiana Purchase and tried to maintain their languages, culture, food and faith. Most scholars say the term refers to birthplace, not a race.

Cajun

This is derived from the word “Acadian”. They were French colonists who settled in the Canadian provinces (Nova Scotia and New Brunswick) in the 1600s. The settlers named the region “Acadia,” and they were known as “Acadians.” When the British threatened to expel the Acadians unless they pledged allegiance to the King of England during the 1700s, they refused. As they were removed, they moved southward to Louisiana.

These people were poor and lived rural lives. Their language was a unique dialect of French that differed from those who had arrived in this area from France. This kept them somewhat isolated, and they were treated as inferior people.

These terms – Creole and Cajun – also came to describe cuisines. Although they share similarities, there are also differences. One of the most significant differences people will always note is that Creole cuisine uses tomatoes, and proper Cajun food does not.

Creole Food

This type of food was born in the kitchens of aristocrats, with slave cooks mixing their cooking techniques and ingredients with those preferred by the European colonists. The people of this area could afford imported ingredients as well as dairy. This led to richer and more elegant dishes. In summary, Creole food can be described in the following ways.

  • More refined
  • The roux is based on butter and flour
  • Uses more tomatoes, shrimp, oysters and crab
  • Seasoning is more spice-based (as opposed to herb-based)
  • City cooking with influences from Spain, Africa, Germany, Italy and the West Indies combined with native ingredients.

Cajun Food

Image by Elaine from Pixabay

The food was borne of very frugal practices, such as using every part of the animal that could be used. From these butchered animals, they made tasso (a type of heavily seasoned pork or beef), andouille sausage (a spicy pork sausage) and boudin (a sausage made from pork, rice, various vegetables & seasonings). Rice was also prominent as it was one of the most abundant crops in Louisiana, and crawfish was eaten due to the water sources.

Here is a summary of Cajun food.

  • More rustic, home-cooking rich with local ingredients
  • The roux is based on oil or lard and flour
  • Very well-seasoned food with an emphasis on herbs
  • Contains more pork and crawfish
  • Country food

While there are these differences, there are also some similarities.

  • Holy Trinity – both cuisines use this version of the French mirepoix as the base of many dishes. Rather than the traditional mixture of onions, celery and carrots, the Holy Trinity uses green peppers, onions and celery.
  • Spice – many people associate these cuisines with spicy food. Although they can be spicy, they are better described as very flavorful.
  • Roux – because of the French influences, both Creole and Cajun cuisines use rouxs in their dishes although as noted above, Creole is more likely to use butter and Cajun tends towards lard or oil.
  • Rice – this grain is prominent in both cuisines.

As opposed to many countries, it is hard to say that the US has a particular type of cuisine. Rather, it has many regional cuisines. Cajun and Creole are one of these and now you know the difference!

Cooking Tips · Ingredients

Cantaloupes – Try the different varieties

Cantaloupes are my absolute favorite fruit to feast upon during the summer. Because the melons in the supermarket are often not ripe and are somewhat tasteless, I am happy that my husband grows them for me. This also allows me to enjoy different types of cantaloupes I cannot get at the stores. Some stores have sold some of these other varieties in recent years, and I encourage you to buy them if you can find them. In this Cooking Tip, I want to explore cantaloupes to help you pick the best. Of course, nothing beats the flavor of a melon picked off the vine when ripe. If you do not have the luxury of doing that, read on for some varieties to search out.

Most of the US cantaloupes are grown in California, followed by Arizona. They are, though, grown in other states in limited quantities. These states are Georgia, South Carolina, Florida, Texas, Indiana, Illinois, Pennsylvania, Colorado and Maryland.

Image by droberson from Pixabay

The classic cantaloupe we see in our stores is Cucumis melo Reticulatus, which refers to the net-like appearance of the skin. They can be seen in all food markets during the summer months. For some stores, that is all you will see. Many other varieties can be grown in your garden, but you will probably only see one or two other types in the store. Here are a few you might be able to find.

Tuscan melon

This melon is a cultivar from two Italian melons. In the US, Tuscan-style melons were introduced by Dulcinea Farms (now owned by Pacific Trellis Fruit) in 2004. Subsequently, the company also introduced Tuscan Style Extra Sweet, which they say is an improved version.

They look similar to our standard cantaloupe but usually have more prominent green or yellow stripes on the exterior. They have a sweeter flavor than the regular cantaloupe. Also, the flesh becomes softer and sweeter as the stripes change from dark green to lighter green to tan.

Charentais melon

As the name implies, this is a French heirloom variety. It is said to have originated in the Charentes region of France. Being associated with the French town of Cavaillon, which holds an annual festival (Fête des Melons), it is sometimes called the Cavaillon melon. Most pure Charentais melons are grown in France and are not exported due to the fact that the soft skin and flesh mean the melons do not survive shipping. Therefore, the ones we see in the US are probably a hybrid and have been crossed with North American cantaloupes.

It is usually smaller than the standard cantaloupe, and the flesh is more orange. The exterior varies from grey-green to pale green with dark green stripes. The stripes will darken as it matures, and the exterior will develop a yellow hue.

It is one of the sweetest melons you can buy and is widely touted as the best melon in the world.

Sugar Kiss melons

A hybrid melon that originated in Taiwan, it was bred to have superior flavor and texture. The name comes from the high sugar content, creating a beautiful taste. The texture is one that melts in one’s mouth. Unlike other melons, they are only harvested when ripe.

They are part of a proprietary line of melons called Kiss melons. Other melons in this line are Golden Kiss (a hybrid of the European Charentais), Honey Kiss (a Chinese variety), Summer Kiss (a native of Israel said to be a mixture of cantaloupe and honeydew) and Kiss Limón (sweet and tart with citrus notes).

Until recently, they were easily recognizable in stores as they were packed in blue netting. This year, I found some labeled “Sugar Kiss” but not packed in the netting. The flavor was not as wonderful as the Sugar Kiss from prior years. Besides the taste, what makes me wonder about the melon I purchased is this statement from the growers about why they use the netting. They do not state that they are no longer packing the melons in this manner.

The general advice I wrote in this Cooking Tip on picking fresh fruit does apply to melons, although there are exceptions. This advice is:

  • Weight – ripe fruit tends to feel heavy compared to its size. If the fruit feels light, it is either unripe or perhaps over-ripe.
  • Pressure – pressing gently on the fruit should yield some give.
  • Aroma – ripe fruit should be fragrant but not overpowering.
  • Color – A light green color on fruit usually indicates that it is not ripe.

Some varieties, such as Sugar Kiss melons, naturally have minimal aroma even when ripe. Also, the lack of a green color may not always be accurate. According to the California Cantaloupes website, the primary type of cantaloupes once grown in California were called “Western Shippers.” Because these cantaloupes produce ethylene, a gas that speeds ripening, they tend to spoil fairly quickly. Due to this, fewer of these have been planted; as of 2022, they say only a few Western Shippers are grown.

The main type of California cantaloupe now grown is a newer variety. These do not emit ethylene, which means a longer shelf life. This also means that they do not give off the same sweet smell. Growers call these LSL (Long Shelf Life) and ESL (Extended Shelf Life), although you will not see them labeled as such in the stores.

California Cantaloupes claim they are sweeter due to a higher sugar content. They do want us to understand some differences that stray from the general advice listed above.

  • Pressure – the flesh is firmer, and the exterior shell is harder. This helps to achieve a longer shelf life. If the blossom end (the end opposite the stem) begins to show a bit of cracking and gives when gently pressed, it is an indicator of ripeness.
  • Aroma – they lack that prominent melon aroma. I have personally noticed that today’s cantaloupes do not have a nice aroma, and this may be why.
  • Color – these new varieties may often have a somewhat green hue. The growers advise us not to be deterred by this slightly green cast.

If you love cantaloupes as much as I do, I hope this information will help you get the best melon possible. If you have never tried other varieties, I encourage you to seek them out. I have faith that they will elevate your melon-eating experience!

Cooking Tips · Ingredients

Baking & Roasting – are they the same thing?

In the summer, I love to use my Breville countertop oven. It heats up quickly without heating up the house, uses less energy than my wall ovens, and works great. Among other settings, it has both a “Roast” and a “Bake” setting. I would suspect that most of us think they are the same thing. But are they? That is the subject of this Cooking Tip.

Both of those terms refer to methods of dry heat cooking. Here is another Tip I wrote about these and other dry heat cooking techniques. Here are the definitions of roast and bake according to The New Food Lover’s Companion.

  • Bake – To cook food with dry heat, as in an oven.
  • Roast – To oven-cook food in a shallow, uncovered pan.

I did not find that very helpful. I next consulted the Culinary Institute of America’s The Professional Chef. Their definitions were not much better.

  • Bake – To cook food by surrounding it with dry heat, as in an oven.
  • Roast – To cook in an oven.

When I delved into the interior of this culinary textbook, there was a bit more information. They explained that both baking and roasting are methods whereby the food is cooked with indirect heat in an oven. They explain that roasting involves cooking with dry, heated air held in a closed environment (an oven.) As the food is heated, the liquid inside the food turns to steam, penetrating the food. In its most common usage, roasting is applied to large cuts of meat that give you multiple portions or whole birds. Often, the meat is seared first in hot fat on the stovetop. Baking is better used for portioned foods that are cooked in the oven. It is typically not preceded by searing.

Chefs who distinguish between these terms point out two differences – the temperature of the oven and the type of food.

Temperature of oven

  • Roasting generally calls for higher temperatures than baking, often above 400°F.
  • Baking usually takes place at 375°F or lower.

Type of food

  • Roasting is called for with meat, poultry or vegetables. These foods all have a solid structure before starting the cooking process.
  • Baking is recommended for foods that do not have structure before baking, such as cakes and cookies.

Another difference is that roasting is generally done in an uncovered pan. Baked items may or may not be covered during the cooking process.

That may be interesting academically, but what difference does it make practically? Not much. My wall ovens come with a “Bake” setting, which I use 99% of the time. My Breville countertop oven does come with both settings, but when you consult the manual, the instructions for Bake and Roast read extremely similar. A Breville video, though, explains that the “Element IQ” part of these Breville smart ovens causes the heating elements to cycle differently for roasting and baking to compensate for the difference in pans. I must admit that I did not know that.

As summer is exiting and the cooler temperatures of fall and winter arrive, roasting and baking are skills we will probably use more frequently. Unless you have an oven similar to my Breville, I wouldn’t worry too much about the terms. Just concentrate on making delicious dishes to serve to your friends and family!