Cooking Tips · Ingredients

Fish Sauce – Umami Galore

Fish sauce is an Asian ingredient that is not common in the average person’s pantry. However, if you want to make authentic-tasting Asian cuisine, you should grab a bottle. While taking a cooking class in Thailand, the chef told us that fish sauce is the “salt” of Asian cuisine. However, it doesn’t just impart saltiness; it also adds umami and acidity. What fish sauce is, how to purchase it, and how to use it are the subjects of this cooking tip.

What it is

Fish sauce is the liquid that results from the fermentation of a mixture of fish (usually anchovies), salt and water. This mixture is placed in tanks or vats and allowed to ferment anywhere from a few months to a couple of years. As the fish breaks down, it releases a flavorful liquid that we call Fish Sauce.

The liquid that is extracted first is called “first press” and is considered the most flavorful and valuable. It is sometimes referred to as extra virgin fish sauce. After this first extraction, more salt and water are added to produce more fish sauce, although it will be lighter, have less flavor, and be less nuanced. Sometimes, these later extractions are mixed with earlier extractions to achieve the desired concentration for the final product. Extremely low-quality fish sauce is said to have such a small amount of first press that the producers add artificial color and flavor to compensate. The first press fish sauce will be more expensive and can be harder to find in a regular supermarket. It can, though, easily be found in Asian food markets.

Some brands will have an “N” number on the label. This number indicates the nitrogen concentration and is an indicator of the protein content. Experts will tell you that a sauce with 30°N and above is considered high-quality and has a more complex taste. Vietnamese fish sauces are more likely to display the N content than Thai fish sauces.

Styles of fish sauce

Many Asian countries have their own version of fish sauce. The two we are most likely to see are Thai and Vietnamese fish sauce. Others that you might see in an Asian market are Korean and Filipino.

  • Thai-style fish sauce is known as nam pla. It is a bit on the stronger side in regard to flavor. Thai producers also tend to add sugar to the fish sauce. This is not necessarily bad, as it is added to balance the other flavors in the fish sauce. Great food is generally a balance of salt, acid and sweet. So, with a non-Thai fish sauce, you may end up adding a bit of sweetness to balance the flavors in your final dish.
  • Vietnamese-style fish sauce is called nuoc cham. It undergoes a lengthier fermentation process, which makes it lighter in color and flavor.
  • Premium vs. non-premium fish sauce: This is based on whether or not the fish sauce is a first press, as described above.

How to choose a fish sauce

Many chefs recommend keeping two products on hand: one higher-end first press, which is better used in raw applications such as salads and dips and one less pricey, lower-grade sauce for cooked dishes.

When you are looking at a shelf of bottles, here are some tips to look for.

  • Simple ingredient list – A good fish sauce will only have anchovies, water, salt, and maybe sugar.
  • Higher protein content – Look for one that has at least 2 grams per tablespoon.
  • Price – As with so many things in life, if an item is so cheap as to be unbelievable, there is probably a reason, and it generally means it is not as good quality. Although you do not have to buy the higher-end, more expensive fish sauces, you also don’t want to buy the absolute cheapest.
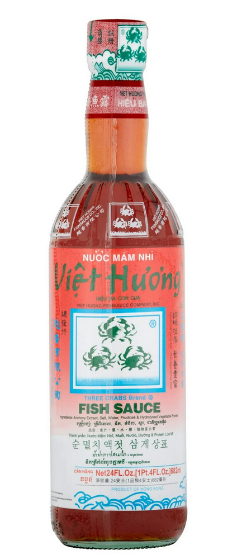
  • The phrase “nuoc mam nhi” – According to Andrea Nguyen, an authority on Vietnamese cooking, in an Epicurious article, this term refers to that first-press liquid. She states that some producers speed up the fermenting process so they can add more salt and water and get more output. They will get higher volumes but of a lower grade. Another term you might see is nuoc mam cot.
  • The term “ca com” – This refers to a specific type of anchovy found in Phu Quoc waters. This is an island off the coast of Vietnam, and the fish are said to be the most desirable, and the producers insist on maintaining traditional production methods. Authentic Phu Quoc fish sauce is made from ca com anchovies and is a Protected Designation of Origin product, like Parmigiano-Reggiano and Champagne. Because copycats are rampant, also look for a statement on the label stating that it was made and bottled in Phu Quoc, Vietnam.

Brands

It is hard to recommend particular brands as testing results vary. However, here are some commonalities between taste tests. Let’s look at both those products more available in general supermarkets and those that will be found in Asian markets. What you are looking for (besides the above advice) is a balanced fish sauce that is not just salty but has a nice umami taste and a complex flavor.

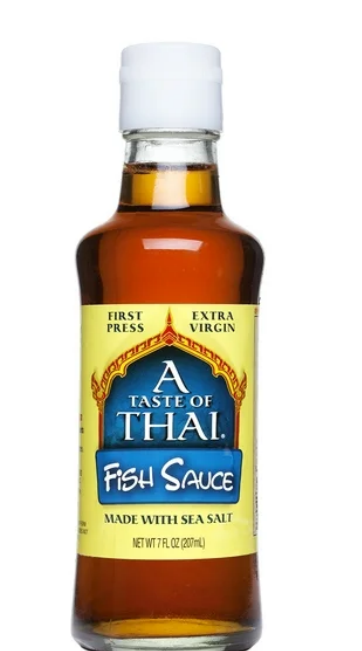
Supermarket brands that you will find are Thai Kitchen, A Taste of Thai, and Dynasty.

Most testers were not enamored with Thai Kitchen but found both of the others to be a good product.

Other brands

  • Golden Boy – Although some tasters found this one acceptable, others did not like it.
  • Squid – There is a general Squid fish sauce and a premium Royal Squid fish sauce.
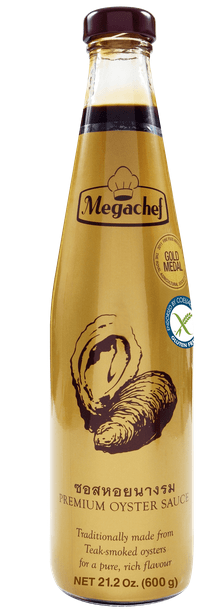
  • Megachef – There are two varieties. One had a brown label and is sold widely in Thailand. The other has a blue label and is for export only
  • Tiparos
  • Red Boat 40°N – This is considered a premium brand, but they also have a higher-end product called Red Boat Phamily Reserve Maple Bourbon fish sauce. It is a 50°N fish sauce and is aged in maple bourbon barrels. The 40°N version is becoming more mainstream and I have found it at Sprout’s Market and Walmart.
  • Three Crabs
  • Abalone

Storage

A bottle of fish sauce will last several years, although it may darken and deepen in flavor over time. It can be kept in the pantry, but if your kitchen is very hot or if you do not use it very often, you may want to put it in the refrigerator.

How to use

Fish sauce is a mainstay ingredient in Thai and Vietnamese cooking, but it does not have to be limited to those kinds of dishes. Use it whenever you want an umami boost or to add depth and complexity to your dishes.

Try it in soups, stews, chili, and meaty sauces such as Bolognese. You can also whisk a small bit into a vinaigrette or drizzle it over roasted vegetables or fried rice.

Do you use fish sauce? Do you have a favorite brand? If you haven’t used it before, you may want to consider adding a small bottle to your pantry!

Cooking Tips · Ingredients

Oyster Sauce – An Asian Umami Ingredient

This is the second installment in a little series about ingredients used in Asian cuisine. Last week, we discussed the very popular Hoisin Sauce. In this Cooking Tip, I want to look at Oyster Sauce.

Origin

As the name suggests, it all starts with oysters. The story told by the company Lee Kum Kee is that this sauce dates back to 1888. According to them, “A restauranteur named Mr. Lee Kum Sheung from Southern China was boiling a pot of oyster soup and forgot about it until the soup was simmered down to a thick gravy. He tasted it and discovered an irresistible, delicious new flavor. Since then, he started selling this as Oyster Sauce.” Mr Lee then became the founder of Lee Kum Kee, a brand that is very well known for its Asian ingredients.

Ingredients

Today, producers use oyster extract to make oyster sauce. Oyster extract (or oyster extractives) is the liquid leftover after shucked oysters are boiled. Other ingredients, such as salt, sugar, and soy sauce, are often added. Most recipes also add a starch as a thickener.

It is also known as oyster-flavored sauce. According to America’s Test Kitchen, do not confuse oyster-flavored sauce with cooked oyster sauce. The latter uses oyster-flavored sauce but adds other ingredients such as broth, soy sauce, sake, and sugar.

Flavor

Its flavor is described as savory with a touch of caramel sweetness. It is an ingredient that will add plenty of umami. Most find that it does not taste of oysters but the more premium brands can have a fishy note. Besides flavor, it also adds a dark caramel color.

Best Brands

Many sources (America’s Test Kitchen, Sporked, Bon Appetit) recommend the Lee Kum Kee brand. This company produces two different products.

Lee Kum Kee Panda Brand Oyster Sauce – This is the one you will most commonly find in regular supermarkets. It has a red label with a panda on it. It is milder in flavor than the premium offering. From its ingredient label, you will see it has 11% oyster extract.

Lee Kim Kee Premium Oyster Sauce – This is a more premium offering with a stronger flavor. Its label lists 40% oyster extract and shows two people in a boat. To purchase this oyster sauce, you will probably need to visit a specialty food store or look online.

Food & Wine, Milk Street, and several chefs prefer a different offering.

Megachef Premium Oyster Sauce—This oyster sauce is from Thailand and is considered to have a deeper and more complex flavor. You may find it in a specialty food store, or you can get it online.

Uses

Reach for oyster sauce when you want to add umami to your dishes. However, start with a lesser amount and titrate to your tastes.

Common uses:
Stir-fries
Kung Pao Shrimp
Marinades
Soups
Asian noodle and rice dishes
Can add a splash to a dish of cooked meat or vegetables.

Storage

As with many condiments, unopened oyster sauce can be stored in the pantry for one year, but once opened, it should be refrigerated, where it will last six to twelve months.

If you are serious about cooking Asian cuisine, oyster sauce is just one of the ingredients you will want to search out and learn to use.

Cooking Tips · Ingredients · Techniques

Does your homemade bread really need salt?

I love to make bread, although I do not do it nearly enough. It takes some time but has a short list of ingredients: flour, yeast, salt and water. Some people wonder just how important that salt is to the final bread product. That is the subject of this Cooking Tip.

Why is salt in bread recipes?

Taste

Image by Couleur from Pixabay

Just as with almost everything we cook or bake, salt helps with flavor. It should not make your dishes taste salty. Instead, it balances other flavors, enhances some flavors, and creates a much yummier result. You can prove this to yourself by a taste test. When you are cooking something, do not put any salt in it to start with. Taste it, add the salt and taste again. You will be amazed at the difference.

It is the same with bread. Bread made without salt will just taste bland and one-note rather than more nuanced and rounded. Salt enhances the natural sweetness in the flour while tamping down any bitterness.

As you will read below, salt also slows down the yeast activity. As I have mentioned in other Cooking Tips, slower fermentation results in a more flavorful dough.

Interaction with Yeast

Image by Karyna Panchenko from Pixabay

Yeast causes fermentation and the ultimate rising of your bread dough. Salt plays an inhibitory role with yeast. It slows down this fermentation by drawing water away from the yeast. Less water means less yeast action.

This slower rising time allows the gluten to develop and strengthen. A stronger dough can trap more gas bubbles and make the distribution more even. This all means that you end up with a better loaf of bread with a nicely risen shape.

Image by Couleur from Pixabay

Crust

Salt gives you a darker, more attractive crust. Because the salt slows down yeast activity, it consumes less sugars. These free sugars contribute to caramelization, which is what gives you a browner crust.

Freshness

An additional advantage is that bread made with salt keeps fresher for longer.

How much salt is needed?

Expert bread bakers always weigh their ingredients and use the Baker’s Percentage. The standard measurement is about 2% salt. The percentage is based on the amount of flour. So, if you are using 1000 grams of flour, you would use 2% or 20 grams of salt.

Image by Couleur from Pixabay

Too little salt prevents the important work of the salt in bread. Too much can be detrimental, as fermentation is halted. Therefore, most bakers stay around that 2% measurement, although some will go as low as 1%, but no lower.

ChainBaker.com has an interesting article in which they bake three loaves of bread. One had no salt, one had the recommended 2% salt, and one had too much salt at 10%. The dough without salt meant the yeast worked rapidly, causing quicker fermentation but weaker gluten. The finished bread loaf rose quickly but spread sideways due to the weaker structure.

The dough with 10% salt did not ferment at all, as that much salt stopped the yeast from doing its job. The result was that the dough was difficult to work and the baked loaf was very dense and unrisen. See pictorial evidence of this here.

Here is another great article by King Arthur Baking showing how differing amounts of salt can dramatically affect bread dough.

When to add the salt to the dough

Everyone has their preferred time for adding the salt. Some will add it at the beginning, while others like to delay it. Proponents of this latter method feel it allows the gluten to develop better before adding the salt and thus makes the initial mixing easier. This is known as the “autolyze” method. Recipes using this method will call for the flour and water to soak for a while. After the prescribed amount of time, the yeast and salt are added, and mixing and kneading commence.

This allows better hydration of the flour and resultant strengthening of the proteins. This is said to make the dough more extensible (the ability for the dough to stretch out without tearing) but less elastic (the tendency for the dough to resist stretching), allowing the shape of the formed dough to be better maintained. An example is a long baguette.

How to add the salt

The most common and easiest method is to mix the salt with the other dry ingredients at the beginning. Some experts feel this method results in a more elastic dough.

Another method is to dissolve the salt in water before adding it to the dough. Experiments show that this could strengthen the gluten better.

A final method is to add it to your yeast mixture if you are blooming it. Although blooming is not necessary with modern-day instant yeast (and probably active dry yeast), some still like to do it. If you do this, you can add the salt to the water as long as there is enough water to totally dissolve the salt, the yeast, and the sugar. Busby’s Bakery states that salt needs three times its weight in water to dissolve at room temperature. Another thing to note is that the salt may slow down the yeast, lengthening the time for it to bloom.

If you bake yeasted products, you will surely have heard that you must keep the salt away from the yeast as it will kill it. Testing has shown that this is not necessarily true. The two ingredients must be in contact for hours before the salt can damage the yeast. So, go ahead and add both the yeast and salt to your flour without fear.

Salt is an essential ingredient in the kitchen in many ways. Here is another Cooking Tip about all the different types of salt—Salts Galore. Don’t fear salt. If you have a medical condition requiring limiting salt, follow your doctor’s advice. Otherwise, embrace all that salt can do for your food, not just in bread but in all your dishes.

Cooking Tips · Ingredients

Deciphering Beef Grades & Beef Cuts

It is no surprise that Americans consume a large amount of beef. For 2024, it is estimated to be about 58 pounds per person. According to the USDA, the most beef consumed was in 1976, almost 92 pounds per person, and the lowest point was in 2009, at about 55 pounds per person. I am not a huge beef lover, so my consumption is very low. Since I buy beef so infrequently, I want to make sure I am buying the best type of beef for my purposes. That means decoding all the terms that are used to describe beef. That is just what I will discuss in this Cooking Tip.

Image by POLAT DÖVER from Pixabay

Ground Beef

According to the National Cattlemen’s Beef Association, ground beef sales were 51% of all retail beef sales as of November 2022. I have written another Cooking Tip on Ground Beef and urge you to read that one for information about the types of ground beef.

When you purchase pre-packaged ground beef from a supermarket, the packaging will probably be one of three kinds.

Traditional Packaging

  • This is the most common type of packaging.
  • The beef is placed on a foam tray and covered with plastic wrap. This packaging allows oxygen in, giving the meat a red color.
  • The oxygen exposure does lead to faster spoilage, meaning you should either use it within just a few days or freeze it in an air-tight package.

Modified-Atmosphere/Controlled Atmosphere Packaging

  • This packaging is usually a plastic container that has had the air vacuumed out and replaced with other gases.
  • The beef still has the desired red color.
  • It also has a slight increase in shelf life.

Vacuum Sealed

  • With the air all removed, the beef looks more purplish-red than bright red.
  • Vacuum sealing produces the most extended shelf life.
  • You can either freeze it in that container or portion it out and freeze it in other air-tight containers.

Chubs

  • These are rolls of ground beef.
  • They have been vacuumed sealed.
  • Just as with the other vacuumed sealed ground beef, it will appear more purplish.
  • It also can be frozen as is or frozen in smaller portions.

Beef Grades

Though inspection for safety is mandatory and carried out by the Food Safety and Inspection Service, meat quality grading is voluntary and paid for by the producer. Because it is voluntary, you will not always see the following grading labels on the package. If you do, though, it will tell you that the USDA has assessed the meat for quality and approved the use of its label.

The degree of marbling, which is the intramuscular fat, determines the grade. It is this fat that provides flavor, tenderness and juiciness. The USDA collaborated with the United States Meat Export Federation and Colorado State University to develop an educational video about the beef grading process. They say the video “provides a comprehensive overview of the beef grading system – from farm to table.”

Prime

  • A beef cut labeled “Prime” will have the most marbling.
  • It will be the most tender.
  • No more than 2% of beef produced in the US will bear the prime label.
  • It is often hard to find in regular supermarkets as it is purchased for sale at high-end restaurants, hotels, boutique butcher shops and upscale grocery stores.

Choice

  • Although less than prime, choice cuts still have a moderate amount of marbling.
  • This cut will still be very tender.
  • It makes up 50% of all graded beef.
  • This is what you will find in mid-level restaurants and not uncommonly in local supermarkets.

Select

  • This cut will have minimal marbling and, therefore, will be tougher.
  • Due to less marbling, it will be slightly leaner.
  • Select cuts compose 65-70% of beef produced in the US.
  • This is a very common cut to find in supermarkets.
  • Because of its lower fat level, it tends to be tough if cooked with high-temperature cooking methods such as grilling or searing. A better use is a gentle cooking method such as braising.

Other lower grades of meat include standard, commercial, utility, cutter, and canner. These are not typically sold to consumers but are used in processed meat products.

If there is no USDA stamp, look for the degree of marbling, as that will generally give you a juicer and more tender cut of meat.

Other Beef Terms

Wagyu

  • This term refers to four main breeds of Japanese beef cattle that produce a large amount of intramuscular fat.
  • This type of beef is graded differently. They use a beef marbling score that ranges from 1 to 12, with 12 having the most marbling.
  • You may also see grades from A to C, with A being the highest.

Grain-Fed or Grain-Finished

  • This term indicates that the cattle are fattened on grain (usually corn) for 3-6 months before slaughter.
  • Very often, grain-fed cattle are treated with antibiotics and possibly growth hormones. However, there are ranchers that raise grain-fed cattle without using either of these.
  • Grain-fed beef is known to be well-marbled.

Grass-Fed or Grass-Finished

  • Here, the cattle are fed grasses and legumes, making the meat lower in saturated fat, cholesterol and calories.
  • The flavor is richer but gamier.
  • This practice of raising cattle is more time-consuming and requires a large amount of land.

Beef Cuts

Besides choosing the grade of beef, you need to choose which cut you want. Below is an explanation of the most popular cuts. For more information on other cuts and recommended cooking methods, see this chart from the Beef Association Website.

Sirloin

  • This cut comes from the rear half of the loin.
  • Although it is tender, it is not as tender as some other cuts.
  • Quality and tenderness vary by type of sirloin.
    • Top sirloin is of excellent quality and will be very tender.
    • The bottom sirloin is of slightly lesser quality and is usually tougher.
  • As it is relatively lean, it is very easy to overcook.

Rib Eye

  • A ribeye is cut from the rib area just behind the shoulder.
  • This is a well-marbled beef cut that can be purchased either bone-in or boneless.
  • A Tomahawk steak is a thick ribeye with a long bone.

Strip (New York Strip)

  • This cut comes from the short loin.
  • It has good tenderness and a beefier flavor than the ribeye or filet.
  • It may be purchased bone-in or boneless.

Filet Mignon

  • This well-known cut is from the beef tenderloin, cut from the back’s center.
  • It is sought after due to its extreme tenderness.
  • It is milder tasting and less rich than the rib eye.
  • It is one of the most expensive cuts.

T-Bone

  • A T-Bone is composed of a strip steak, the accompanying bone and a portion of the tenderloin.
  • It can be challenging to cook as the filet part will cook quicker and can become overcooked before the strip side is done. Experts recommend a 2-stage reverse sear.

Porterhouse

  • This is composed of a strip steak with a whole filet attached.
  • It has the same problems with cooking as the T-Bone. A reverse sear is recommended, although broiling is also an excellent cooking method.

I hope this will help you pick out the best beef for what you want the next time you go to the store. Remember that the grading system is voluntary, so you will likely not see the USDA shields on all the meat. I just took a brief look at the websites of our local supermarkets. When the meat carried the USDA shield, it usually noted Choice meat. Only one or two offerings were of the Prime level. When you find it, the price may make you think twice about purchasing it. No matter what you buy, remember that cooking the meat properly, using an instant-read thermometer and not overcooking it will help you get the best meat on your table.

Cooking Tips · Ingredients · Techniques

Strawberries – The Epitome of Summer

My husband has been harvesting strawberries since June. He has four different varieties growing; they mature at different times and have different flavors. If you do not have a garden, what can you do to ensure you are getting the best strawberries you can? That is the subject of this Cooking Tip.

Strawberries are a member of the rose family and are Native to North America. The large majority of US strawberries come from California, with Florida being a distant second.

Varieties

As with so many produce items, there is not just one strawberry, although you may think so if you only buy them in the supermarket. There, you will find what is known as the Garden Strawberry (Fragaria Ananassa). However, there are said to be over 1,000 different varieties grown worldwide.

If you are a gardener, you will have a myriad of choices to plant. They are broadly broken into two categories.

  • June-bearing – these produce the largest berries over a 2-3 week period during June/July.
  • Everbearing strawberries generally produce two harvests a year – one in the spring and one in later summer/fall. Their fruit is usually smaller.
Image by Shirley Hirst from Pixabay

Although the typical strawberry is red, there are green and white berries. The greens are unripe berries, and the whites have been cultivated so as not to develop the typical red color.

Picking Ripe Strawberries

Because strawberries (as with so much fruit) do not continue to ripen after harvesting, you want to pick the ripest you can when you buy them to get the sweetest and most strawberry flavor. The best way to test the flavor of a strawberry is by tasting it, something that you probably cannot do in the supermarket, although you may be able to do so at farmer’s markets.

Apart from tasting, a deep red color is another indicator of flavor. However, strawberries will continue to redden after being picked, even though they do not continue to ripen. Therefore, color alone can be deceiving. One strawberry grower recommends looking to see how red they are all the way to the top, under the leaves. The redder they are in this area, the sweeter & juicier they will most likely be.

Another tip is to smell them. They are much more likely to have good flavor if they have a wonderful strawberry scent.

Another interesting point comes from America’s Test Kitchen. They tell us that the flavor of a strawberry is related to its aroma, and the aroma is related to temperature. A room temperature berry will likely taste sweeter than one just out of the refrigerator. Too much heat, though, is not good, as it can drive off much of the aroma. Therefore, rather than cooking strawberries, they like to macerate them by tossing them in a bit of sugar and letting them sit until they soften and the liquid starts to come out.

Hulling Strawberries

When you are ready to eat or use the strawberries, after washing them, you will want to hull them, which means removing the leaves and the core. There are different methods for this.

  • Paring knife
    • This doesn’t require any equipment other than what you already have. It does, though, take away more of the berry than other methods.
  • Straw
    • Insert a sturdy straw into the strawberry’s point. Push the straw through the berry, and it will remove the leaves with the hull attached. This method does work, although it is easy to go off-center and miss the hull.
  • Hullers
    • Spruce Eats tested several different hullers and found that the Oxo Good Grips Strawberry Huller worked the best. They liked its nonslip grip, easy cleaning, and ability to use different-sized berries. The only negative was that it was hard to store.

Roasting Strawberries

Roasting strawberries is an interesting way to try to enhance their flavor by intensifying the natural sugars present in the berries. To do this, toss the berries in about two teaspoons of sugar per cup of berries. If desired, add a touch of acidity with a bit of lemon zest. Roast in a 425°F oven for 15-20 minutes, stirring halfway through. Although you may or may not want to eat them out of hand, you can use them in baked goods or as a topping.

Dried Strawberries

Image by Engin Akyurt from Pixabay

Making dried strawberries is not difficult. If you have a food dehydrator, follow the instructions for that appliance. You can still dry them in a low oven if you do not have one. After washing and hulling the berries, cut them in half or quarters. Place the berries on a baking sheet, cut side up. Place in a 200°F oven for about 3 hours. Allow the berries to cool and crisp up, and then store them in an airtight container for up to a week.

Storing Strawberries

We all know just how perishable strawberries are. How can we make them last the longest? There are all sorts of recommendations out there. Three that seem to stand out as the best are the following.

  • Do not rinse them until you are ready to eat them. Rather, pick out any berries that are going bad, put the rest back in the container and store them in the refrigerator. Some recommend storing the container upside down to encourage airflow. This way, your berries should keep up to a week.
  • A second method is to wash them in a solution of 1 part white vinegar to 3 parts water, drain them and dry them thoroughly before putting them in the refrigerator. One method of drying is placing them is in a paper-towel-lined salad spinner and gently spinning them until dry.
  • A final method is to soak them for about 5 minutes in a mixture of 1 tablespoon of kosher salt per cup of water. Drain, rinse, dry and place in the refrigerator. The proponents of this method say that the salt is abrasive, and therefore, it cleans better than water alone. This same source does not like using baking soda or vinegar, as these ingredients can be absorbed into the berry and not rinse off completely, possibly compromising flavor and texture. As can be seen by the second method, though, not everyone agrees with this caution.

Freezing Strawberries

For more extended storage, strawberries can be frozen.

Image by congerdesign from Pixabay
  • Remove the tops.
  • Chop them as you prefer – quarter, slice, etc. You can leave very small berries whole.
  • Freeze in a single layer.
  • Transfer to a freezer bag/container.
  • Use within a few months as their quality deteriorates after about six months.
  • Some like tossing the berries in sugar before freezing, as this preserves the color and texture. However, it does limit how you can use them later.
  • Great uses for frozen strawberries are smoothies, jam, ice cream, fruit topping, and strawberry sauce.

Measuring Strawberries

Although you do not always have to be exact in measuring when using strawberries in a recipe, it is nice to know how many cups are in that container you pick up in the store. The Spruce Eats has put together some conversion figures to make your life easier.

1 cup whole strawberries is equivalent to:

  • 8 large strawberries
  • 5 ounces by weight
  • ½ cup strawberry puree

1# strawberries is equivalent to:

  • 2¾ cup sliced strawberries
  • 3¾ cup whole strawberries

1 pint of strawberries is equivalent to:

  • 12 large strawberries
  • 24 medium strawberries
  • 36 small strawberries
  • ¾# by weight
  • 1¼ cups puree
  • 2½ cups whole small strawberries
  • 1½ to 2 cups sliced strawberries

Now that you know how to pick ripe strawberries, clean them, store them and use them, there is one last important tidbit. Do you know what the fear of strawberries is called? It is “Fragariaphobia.” That is bound to be helpful in your kitchen!

Cooking Tips · Ingredients

Crabapples – Ornamental or Edible?

Sitting at my desk this morning, I looked out the window towards our backyard where the chickens roam, the bees buzz, the flowers bloom, and tree fruit is trying desperately to ripen in Colorado’s less-than-ideal growing conditions. As I look, I see a beautiful green tree with deep red crabapples on it. That is the subject of this Cooking Tip. Are those apples just ornamental, or are they edible? (See this Tip for a discussion on apples in general.)

According to the experts, crabapples are not a different type of fruit than other apples. However, one distinction is that they are the only apple native to North America. What determines if it is a crabapple is its size. If it is under 2 inches in diameter, it is called a crabapple. If it is larger, it is an apple.

Breeding is another difference. The apples we eat for lunch have been bred to be larger and better tasting. Crabapples are bred more for ornamentation. Some varieties are purely ornamental, with no or minimal fruit. Even those crabapples with fruit have not been bred to produce particularly great tasting fruit. Although edible, they are much tarter and sourer than other apples.

Some crabapple varieties are sweeter and better for culinary uses. The two that are described as the sweetest are the Dolgo and Centennial. The Chestnut and Whitney are especially good for other culinary purposes.

Dolgo

What I see when looking into our backyard is a Dolgo crabapple. Its size is larger, and its flavor is sweeter than other varieties. Besides eating, it is commonly used to make ciders, sauces and jams.

Centennial

Some like to eat the Centennial crabapple right off the tree, while others feel it is ideal for jam, jelly, or apple butter.

Whitney

The Whitney crabapple is a smaller tree that yields larger and sweeter fruit than many other crabapples. Its great uses include preserving, canning, and pickling.

Chestnut

The flavor of a Chestnut crabapple is described as sweet and nutty. It is well-suited to jams and sauces.

Uses for crabapples

  • Crabapple Jams & Jellies – the sourness of the crabapple will be offset by added sugar.
  • Crabapple Butter – Apple butter made from crabapples will be pink with a more complex and sweet-tart flavor.
  • Crabapple sauce
  • Crabapple fruit leather
  • Caramel crabapples
  • Pickled crabapples
  • Crabapple chutney
  • Crabapple syrup
  • Crabapple juice/cider
  • Crabapple liqueur
  • Crabapple crisp/tart/pie

Disadvantages of crabapples

  • One of the main disadvantages of using crabapples is the increased labor due to their small size. It takes more work to harvest a sufficient amount, and there is increased kitchen labor to get them ready for your desired dish.
  • As noted above, their natural flavor is sour and tart. This can be adjusted by adding sweeteners and spices, although the result won’t be exactly as it would be with regular apples.
  • The flesh will not get as smooth as other apples, even when cooked and pureed.

According to Robinette’s Apple Haus & Winery in Michigan, winter is the best time to pick crabapples. Although they do ripen during the fall, “freezing temperatures make the crabapples soft and sweet.” Alternatively, they recommend picking them and putting them in your freezer for a couple of days before using them.

What about the myth that you might have heard that crabapples are poisonous? The peel and flesh of the crabapple are perfectly safe to consume. Like all apples, the seeds are toxic and should not be consumed.

If you do not have a crabapple tree growing in your backyard, where do you get them? You probably won’t find them in your general supermarket, but some farmer’s markets carry them. They should be able to tell you which variety they are so you can plan accordingly.

They are also a favorite of foragers since they tend to grow in all sorts of areas. As with any foraging, care must be taken. See this Tip for guidance.

Enjoy apple season, whether it is regular apples or crabapples!

Cooking Tips · Ingredients

Figs – A Mediterranean Delight!

Image by Jose Antonio Alba from Pixabay

I was at one of our local supermarkets earlier today. While there, I saw fresh figs on display. I was thrilled, as I love fresh figs, and they are not available very often in our area. They are delicious right out of the box and great for cooking/baking. This Cooking Tip will delve into figs, the varieties, how to choose them, how to store them and what to do with them.

Figs are typically found growing in Mediterranean countries. They like the warmer weather. In the US, the large majority of figs are grown in California.

There are thousands of varieties grown, although only a very few are found in our stores. The names of the figs can be confusing as the same fig grown in different areas might have a different name. In addition, when a fig is introduced to a location, it is not uncommon to coin a new name. For example, when introduced to California, the Smyrna fig’s name was changed to Calimyrna.

There are two harvest seasons for fresh figs. The first is short and occurs in early summer. The main season is from late summer through fall.

Most figs are tear-dropped in shape, although they may vary in size. The color of the skin can range from pale yellow or green to brown to red to purple to almost black. This color distinguishes the type of fig but tells you nothing about its taste. The fig’s interior or flesh will vary from a light amber to a pinkish-red to a darker red, almost berry-like color. Unlike the skin, the flesh color will give you an idea of its flavor.

According to The Fig Boss, the flavor profiles of figs can be broken into three categories – honey, sugar and berry.

  • Sugar – A fig with melon undertones, dried fruit “figgy” flavor, and often unique sugars.
  • Honey – Higher in melon flavor, accompanied by honey-like sugars and nectar.
  • Berry – Figs with pronounced berry or other fruity flavors

Although these are the main three flavor profiles that most experts will use, The Fig Boss likes to further refine the flavors into:

  • Sugar Berry
  • Melon Berry
  • Cherry
  • Complex Berry
  • Sugar Honey
  • Fruity Honey

Of the thousands of varieties, here are the ones you will most commonly find in grocery stores.

Mission (Black Mission)

Image by StockSnap from Pixabay
  • If you are fortunate enough to stumble across fresh figs in your store, the most common variety you will find is the Mission fig. It is also known as the Franciscana fig, named after the Franciscan missionaries who cultivated it in California in the late 18th century
  • It has purple or black skin with a light pink interior.
  • Its flavor is mellow with honey and earthy notes.
  • It will work well in most dishes that call for figs.

Brown Turkey (Turkish Brown Figs)

  • Another fig you might see in your stores is the Brown Turkey Fig.
  • It is larger than other figs with brown or reddish skin.
  • The flesh is light red to brown.
  • It has a mild flavor, much less sweet, less complex and less intense than the mission fig. The flavor notes are said to be of honey and hazelnuts.

Calimyrna

  • As noted above, this type of Smyrna fig was named Calimyrna when introduced to California. In grocery stores, it is often labeled Turkish figs.
  • Their skin is light green to yellow.
  • The flesh is pale pink.
  • It has a delicate flavor with nutty notes.

Kadota

  • This fig goes by many names: Dottato, Florentine, White Texas Everbearing and Peter’s Honey Fig.
  • It has creamy amber or light green skin.
  • The flesh is light pink or amber.
  • It is a seedless variety.
  • Although less sweet than other varieties, it does have notes of honey and fruit.
  • It tolerates being heated, making it a good candidate for jams and preserves.

When picking out figs at the store, they should feel soft but not mushy. You do not want to buy figs that are hard as they will not continue to ripen. It is perfectly fine to have some slight cracking or wrinkling of the skin. If they are past their peak, they might have a sour smell.

The entire fig is edible, although most remove the dense, fibrous stem. Eating out of hand is my favorite way of consuming figs, but they are also wonderful in other applications. Fig jam and preserves are very popular. Serving them as part of a cheese/fruit/nut platter is also classic. They are an excellent addition to salads, especially if the salad includes goat cheese.

Figs are delicious in this Pork with Figs & Balsamic Dressing recipe from BBC Food. They also make a simple but elegant dessert, as shown in this Fig Compote with Honey Crème Fraîche from Williams-Sonoma.

Figs are very perishable. Once you get them home, leave them in their clamshell packaging and store them in the refrigerator. They will last up to about a week. They never last that long in my refrigerator, and not because they go bad. It is because they get eaten very quickly.

I have never frozen fresh figs, but experts say it can be done. If you wish to try, keep them whole. Remove any very soft figs. Wash and dry them thoroughly. Arrange them on a baking sheet in a single layer, not touching each other. Freeze until sold and then transfer to plastic bags. They should keep up to 6 months. To use, thaw them and use them as usual. The texture will be softer, making them better for cooked applications than raw.

Are you lucky enough to have fresh figs on offer in your supermarkets? If so, grab them while you can. They won’t last long either in your store or your kitchen!

Cooking Tips · Ingredients · Techniques

Beets – Pretty, Nutritious & Delicious!

Image by Nick Collins from Pixabay

I am making a lovely tart for tonight’s dinner that contains two ingredients that can be polarizing for some people – beets and goat cheese. I have already written a Cooking Tip on Goat Cheese. In this Cooking Tip, let’s explore the wonderful world of beets, known in Europe as beetroot.

Beets are a root vegetable, but one in which you can eat the entire plant – the bulb, stem and leaves. They are full of healthful nutrients such as antioxidants, vitamins and minerals.

There are different types of beets, but the ones we find in our stores and on our plates are garden beets. Other varieties include the sugar beet (from which we get 55% of our sugar) and mangold beets, which are used in livestock feed. Even among the garden beets, there are different varieties, although you probably won’t know the variety unless you grow them yourself or buy them from a farmer’s market.

Image by Aline Ponce from Pixabay

The most common variety in the market is the red beet. Some markets may sell golden beets. A third variety is Chioggia, also known as Candy Cane Beets. They are an heirloom variety from Italy and have pink and white concentric circles on the inside. Although not impossible to find, they are much less commonly sold in the average supermarket.

Most stores also sell vacuum-packed cooked beets. Their flavor is comparable to fresh beets, but canned beets are not as good a substitute for fresh.

The flavor of beets is said to be sweet but earthy. Many ask if the different colored beets taste differently. America’s Test Kitchen tested red beets, golden beets and Chioggia beets. They tasted them raw, roasted and marinated. Their tasters thought that the golden beets were less sweet and more earthy. The Chioggia were rated mild but with a bitter aftertaste.

My husband grows both red and golden beets. I love the look of the different colors, but we also thought the red beets were sweeter in a side-by-side test.

Image by Couleur from Pixabay

When shopping for beets, look for medium-sized ones, about 2-3 inches in diameter. Larger ones may be a bit more tough. Look for ones without blemishes or dents. If you have the choice, buy them with the greens still attached, as they will probably be fresher. Once you get the beets home, cut off the greens and store them separately. Wash the greens, wrap them in paper towels and put them into a plastic bag. Store the beets unwashed in plastic bags in the refrigerator. The greens will last a few days in the refrigerator, but the beets can last up to a month.

Preparing them is not difficult, but it can take some time, depending on your chosen method. They do not need to be peeled, but leaving the skin on can result in a tough texture.

Roasting

This is my preferred method. It takes the longest but is practically hands-off. Wrap the beets in foil and put them on a sheet pan in a 400°F oven for about an hour or until they are tender. Remove them from the oven, allow them to cool and then rub away the skin. Quartering the beets before roasting will speed up the cooking time.

Microwave

Peel the beets, cut them into ½-inch pieces, put them in a microwaveable bowl with a splash of water and cook, covered, for about 15- 25 minutes, depending on their size.

Grill

Heat your grill to medium-low heat. Clean, peel and cut the beets horizontally into ¼-inch slices. Toss the slices in olive oil, place them on the grates, and lightly salt them. Cook for 8-10 minutes, flip and continue cooking until tender.

Steam

Cut the unpeeled beets into ½- to 1-inch cubes. Bring a small amount of water in a pan to a boil. Put a steamer basket in the pot, add the beets, cover and steam until tender, 10-30 minutes. Remove from the basket, cool and peel.

Boiling

Beets cooked in boiling water will be less intense in color and leach some nutrients into the water. However, many like this method. Place whole beets in a saucepan, cover with water, bring to a boil, reduce heat and simmer until tender, 20-45 minutes. Remove the beets from the simmering water, put them into an ice bath to cool and stop the cooking, and peel.

Raw

Beets are perfectly edible in the raw state. However, as they can be tough, they should be sliced very thinly or grated. Another option is to use a spiralizer.

Instant Pot

If you cook your beets this way, there is no need to peel them. The skin is barely noticeable after cooking in an Instant Pot. Leaving the skin on also means extra nutrients.

Beet greens

The beet greens can be eaten raw, but others prefer a quick sauté in butter or oil. Garlic is also a nice addition. It helps to separate the stems and cook them for a few minutes before adding the greens.

Besides the storage advice given above, cooked, peeled beets can be frozen for 8-10 months.

Some people do not like the red beets because they stain hands and cutting boards. However, there are ways to deal with this.

To prevent staining:

  1. Wear gloves.
  2. Coat your hands in oil – just ½ teaspoon rubbed on your hands is enough.
  3. Prevent your cutting board from staining by giving it a light spritz with a cooking spray before cutting the beets.

Removing beet stains:

  1. Wash your hands as quickly as you can in hot, soapy water.
  2. Scrub salt and soap into your hands and then wash.
  3. Rub a bit of whitening toothpaste into the stain and then wash.

What is your favorite way to prepare beets? As mentioned above, I prefer to roast them. You can then eat them just with a bit of butter and lemon juice. Or, add the beets to salad greens and pour over a flavorful vinaigrette along with nuts and goat or feta cheese. Here are a couple of great recipes.

What a pretty and tasty way to get your nutrients!

Cooking Tips · Ingredients

Serviceberries – a less well-known delicious fruit.

What is your favorite fresh berry? Strawberry? Blueberry? Blackberry? How about Serviceberry? The latter is a fruit that many of us have probably never heard of. I would not have if not for my husband’s foraging on his work campus. Read on in this Cooking Tip to learn what it is and how to use it in your kitchen.

If you haven’t heard the term serviceberry, perhaps you have heard some of its other names, such as Juneberry, Sarvisberry, Saskatoon berries, Shadberry, and Pigeonberry. Its scientific name is Amelanchier. Genetically speaking, serviceberries are not true berries but rather pome fruits similar to apples and pears. I will refer to them as berries.

Image by ghostpotato from Pixabay

These berries grow on a shrub or tree, reaching up to 10 feet tall. These trees are native to North America and grow as far north as Alaska and as far south as Mexico. They produce pretty white or pink flowers in late April to May. The berries ripen from June to August and change from red to dark purple (the darker the color, the sweeter the flavor), and they are slightly larger than a blueberry. Later in the fall, the leaves turn a gorgeous profusion of reds, oranges and yellows.

Because this fruit is not found in supermarkets or farmer’s markets, if you want to try it, you will probably need to forage. Please see this prior Tip on Foraging before you venture out to do this. Make sure you know what you are foraging, as there are some poisonous plants out there that sport similar-appearing berries.

Image by ghostpotato from Pixabay

One expert describes the flavor as a “fusion of strawberry, blueberry and a hint of almond.” Sounds delicious, doesn’t it? Another claims it is “halfway between a blueberry and a grape … with a slightly nutty, almond-like aftertaste.” A third compares it to a cross between a blueberry and a nectarine.

The berries can be eaten raw but you can also use them in your kitchen in a cooked or dried form. You can substitute 1:1 for blueberries in your recipes, although some adjustments may need to be made as blueberries have a slightly higher water content.

Other ideas are:

  • Muffins
  • Pies
  • Cobblers
  • Pancakes
  • Puddings
  • Soups
  • Sausage fillings
  • Syrups
  • Sauces
  • Ice Cream
  • Smoothies
  • Salad topping
  • Jams

Native Americans have been known to use them medicinally for earaches, gastrointestinal distress, fevers and coughs. The stems, branches, and wood have also been used to make baskets, ropes and furniture.

Like other berries, the serviceberry contains antioxidants and other nutrients.

Serviceberries can be refrigerated in a ziplock bag in your produce drawer for a week or two. At room temperature, they can last up to five days. They are very thin-skinned and, therefore, fairly perishable.

Image by DivaDan from Pixabay

As my husband wanders around his work campus picking berries from the trees, others may look on and shake their heads. However, he is happy about that as it leaves more for him. Have you ever tried serviceberries? Look around your area to see if they are growing there, and see what you think!

Cooking Tips · Ingredients

Cucumbers – Edible Hydration

Cucumbers are a vegetable (more about that in a minute) that most of us probably don’t think about too much. We may eat them on a salad, but that is about it. There is more to understanding about cucumbers and how to use them. That is the subject of this Cooking Tip.

Because they contain seeds in their interior, cucumbers are botanically a fruit. We all, though, tend to consider them and use them as we would a vegetable.

Although there are about 100 varieties, our average supermarket will probably only carry two or three. Mine only has two varieties for most of the year. The size of these different types of cucumbers will vary from about 1 inch long to up to 20 inches in length. That is not the only difference in the various types.

Some people will put them in two general categories.

  • Slicing varieties
    • These are meant to be eaten raw, although they can be used in other culinary preparations.
  • Pickling varieties
    • These are small cucumbers that are cultivated specifically for pickling.

Within these two categories, we can find many different types. Here are the most common you will find in your stores or farmer’s markets

Garden Cucumbers

  • These are also sometimes called slicing cucumbers or American slicing cucumbers. These are the ones that are most commonly found in our stores.
  • The skin is smooth, but it can be tough.
  • They generally measure 6-10 inches in length.
  • The flavor is bright and refreshing, but it sometimes has a slight bitterness.
  • The most common uses are salads, sandwiches, and chilled soups such as gazpacho.

English Cucumbers

  • Other names for these cucumbers are seedless, hothouse, European, and burpless.
  • They are easy to recognize as they are longer (can reach 20 inches long) and slimmer than the usual cucumber.
  • They are usually wrapped in plastic to reduce bruising as the skin is thin and delicate.
  • Because the skin is thin, peeling before eating is unnecessary.
  • This variety contains very few seeds, which contributes to a milder flavor with a subtle sweetness and a less watery texture.
  • The best uses are in salads or sandwiches.

Persian Cucumbers

  • This variety is much smaller than other cucumbers, only about four to six inches.
  • Just as with English cucumbers, Persian cucumbers are known as burpless because they are easily digestible.
  • The skin is this but has a bumpy appearance.
  • The texture is crisp.
  • Their flavor is milder and sweeter than other varieties.
  • They contain minimal seeds.
  • Best uses are snacking, slicing, and pickling. This variety is a top choice for Mediterranean and Middle Eastern cuisine.

Kirby Cucumbers

  • This variety is known as the pickling cucumber.
  • They are small, usually under six inches in length.
  • The skin has a bumpy appearance, and the internal texture is firm and crunchy.
  • Their flavor is slightly sour, making them great for pickling, although some like to use them in salads and sandwiches due to their crisp texture.

Lemon Cucumbers

  • This is an unusual appearing cucumber due to its round shape and yellow color.
  • The flavor is slightly sweet with citrus notes.
  • They are best used raw in salads.

White Cucumbers

  • Another uncommon variety, it is sought out for aesthetic reasons due to its white skin.
  • It is best enjoyed raw but can also be used to make a white gazpacho.

Japanese cucumbers

  • Another name is a Kyuri cucumber.
  • They are long and slender with thin, dark green skins.
  • The texture is crisp, and the flavor is refreshing.
  • They are the variety often used in sushi or other Japanese dishes.

Nutrition

As with most fruits and vegetables, cucumbers are nutritious. By weight, cucumbers are up to 90% water, which makes them great for hydration. They also contain beneficial vitamins, especially vitamins A and C. The skin contains fiber and minerals, and they possess anti-inflammatory properties.

Culinary uses

  • Cucumbers are naturally waxy on the outside. This is generally removed during processing after harvesting. So, it is common for producers to add a waxy coating that mimics the natural one. If this wax coating is applied, the retailer should inform the consumer on the label or signage. Even though it is considered safe to consume, you can remove it with vigorous scrubbing and rinsing or by peeling. The peel does, though, add to the nutritional value of the cucumber.
  • Raw in salads or on sandwiches.
  • Infused water – slice and use in beverages just as you would use lemon slices.
  • Add to smoothies along with other fruits and veggies.
  • Tzatziki – a classic Green dip made with yogurt, cucumbers, and seasonings.
  • Hors d’oeuvres – slice about ½ to 1 inch thick. Scoop out seeds and fill with cheese, a dip or a relish.
  • Chilled soups
  • Pickles
  • Sorbets
  • Can be sauteed or braised as a side dish.
  • Make into pickles
  • Sorbets

Choosing cucumbers

Pick firm ones without soft spots or wrinkles, and a vibrant color.

Storage

  • Although they do not need immediate refrigeration, refrigeration is recommended if they are kept for more than a few days.
  • Some experts like to store them in the warmer part of their refrigerator, such as on a door or the upper shelves. They wrap them in a paper towel and put both in a sealable plastic bag.
  • If uncut and unwashed, they can be kept in the refrigerator for about ten days.
  • If sliced, they should be tightly wrapped and kept in the refrigerator for about five days.

Not everyone is a cucumber fan. If you are one of those, perhaps you haven’t tried the correct variety. Try to find some of these other types and see if they change your mind. Or, try growing your own. My husband grows a variety called Sweet Success and it is outstanding!