Cooking Tips · Ingredients

Crabapples – Ornamental or Edible?

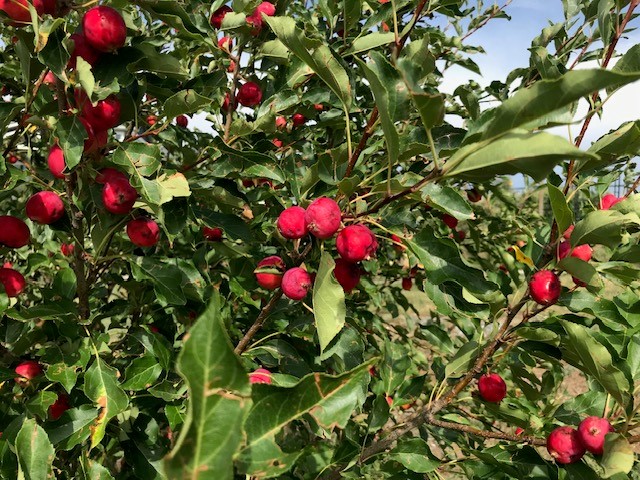
Sitting at my desk this morning, I looked out the window towards our backyard where the chickens roam, the bees buzz, the flowers bloom, and tree fruit is trying desperately to ripen in Colorado’s less-than-ideal growing conditions. As I look, I see a beautiful green tree with deep red crabapples on it. That is the subject of this Cooking Tip. Are those apples just ornamental, or are they edible? (See this Tip for a discussion on apples in general.)

According to the experts, crabapples are not a different type of fruit than other apples. However, one distinction is that they are the only apple native to North America. What determines if it is a crabapple is its size. If it is under 2 inches in diameter, it is called a crabapple. If it is larger, it is an apple.

Breeding is another difference. The apples we eat for lunch have been bred to be larger and better tasting. Crabapples are bred more for ornamentation. Some varieties are purely ornamental, with no or minimal fruit. Even those crabapples with fruit have not been bred to produce particularly great tasting fruit. Although edible, they are much tarter and sourer than other apples.

Some crabapple varieties are sweeter and better for culinary uses. The two that are described as the sweetest are the Dolgo and Centennial. The Chestnut and Whitney are especially good for other culinary purposes.
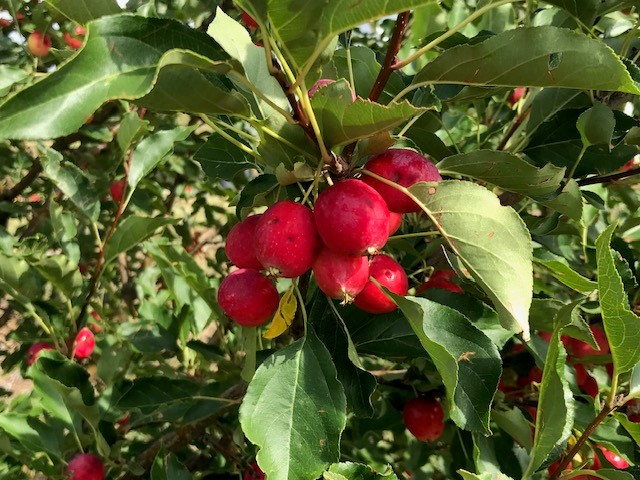
Dolgo

What I see when looking into our backyard is a Dolgo crabapple. Its size is larger, and its flavor is sweeter than other varieties. Besides eating, it is commonly used to make ciders, sauces and jams.

Centennial

Some like to eat the Centennial crabapple right off the tree, while others feel it is ideal for jam, jelly, or apple butter.

Whitney

The Whitney crabapple is a smaller tree that yields larger and sweeter fruit than many other crabapples. Its great uses include preserving, canning, and pickling.

Chestnut

The flavor of a Chestnut crabapple is described as sweet and nutty. It is well-suited to jams and sauces.

Uses for crabapples

  • Crabapple Jams & Jellies – the sourness of the crabapple will be offset by added sugar.
  • Crabapple Butter – Apple butter made from crabapples will be pink with a more complex and sweet-tart flavor.
  • Crabapple sauce
  • Crabapple fruit leather
  • Caramel crabapples
  • Pickled crabapples
  • Crabapple chutney
  • Crabapple syrup
  • Crabapple juice/cider
  • Crabapple liqueur
  • Crabapple crisp/tart/pie

Disadvantages of crabapples

  • One of the main disadvantages of using crabapples is the increased labor due to their small size. It takes more work to harvest a sufficient amount, and there is increased kitchen labor to get them ready for your desired dish.
  • As noted above, their natural flavor is sour and tart. This can be adjusted by adding sweeteners and spices, although the result won’t be exactly as it would be with regular apples.
  • The flesh will not get as smooth as other apples, even when cooked and pureed.

According to Robinette’s Apple Haus & Winery in Michigan, winter is the best time to pick crabapples. Although they do ripen during the fall, “freezing temperatures make the crabapples soft and sweet.” Alternatively, they recommend picking them and putting them in your freezer for a couple of days before using them.

What about the myth that you might have heard that crabapples are poisonous? The peel and flesh of the crabapple are perfectly safe to consume. Like all apples, the seeds are toxic and should not be consumed.

If you do not have a crabapple tree growing in your backyard, where do you get them? You probably won’t find them in your general supermarket, but some farmer’s markets carry them. They should be able to tell you which variety they are so you can plan accordingly.

They are also a favorite of foragers since they tend to grow in all sorts of areas. As with any foraging, care must be taken. See this Tip for guidance.

Enjoy apple season, whether it is regular apples or crabapples!

Cooking Tips · Ingredients

Figs – A Mediterranean Delight!

Image by Jose Antonio Alba from Pixabay

I was at one of our local supermarkets earlier today. While there, I saw fresh figs on display. I was thrilled, as I love fresh figs, and they are not available very often in our area. They are delicious right out of the box and great for cooking/baking. This Cooking Tip will delve into figs, the varieties, how to choose them, how to store them and what to do with them.

Figs are typically found growing in Mediterranean countries. They like the warmer weather. In the US, the large majority of figs are grown in California.

There are thousands of varieties grown, although only a very few are found in our stores. The names of the figs can be confusing as the same fig grown in different areas might have a different name. In addition, when a fig is introduced to a location, it is not uncommon to coin a new name. For example, when introduced to California, the Smyrna fig’s name was changed to Calimyrna.

There are two harvest seasons for fresh figs. The first is short and occurs in early summer. The main season is from late summer through fall.

Most figs are tear-dropped in shape, although they may vary in size. The color of the skin can range from pale yellow or green to brown to red to purple to almost black. This color distinguishes the type of fig but tells you nothing about its taste. The fig’s interior or flesh will vary from a light amber to a pinkish-red to a darker red, almost berry-like color. Unlike the skin, the flesh color will give you an idea of its flavor.

According to The Fig Boss, the flavor profiles of figs can be broken into three categories – honey, sugar and berry.

  • Sugar – A fig with melon undertones, dried fruit “figgy” flavor, and often unique sugars.
  • Honey – Higher in melon flavor, accompanied by honey-like sugars and nectar.
  • Berry – Figs with pronounced berry or other fruity flavors

Although these are the main three flavor profiles that most experts will use, The Fig Boss likes to further refine the flavors into:

  • Sugar Berry
  • Melon Berry
  • Cherry
  • Complex Berry
  • Sugar Honey
  • Fruity Honey

Of the thousands of varieties, here are the ones you will most commonly find in grocery stores.

Mission (Black Mission)

Image by StockSnap from Pixabay
  • If you are fortunate enough to stumble across fresh figs in your store, the most common variety you will find is the Mission fig. It is also known as the Franciscana fig, named after the Franciscan missionaries who cultivated it in California in the late 18th century
  • It has purple or black skin with a light pink interior.
  • Its flavor is mellow with honey and earthy notes.
  • It will work well in most dishes that call for figs.

Brown Turkey (Turkish Brown Figs)

  • Another fig you might see in your stores is the Brown Turkey Fig.
  • It is larger than other figs with brown or reddish skin.
  • The flesh is light red to brown.
  • It has a mild flavor, much less sweet, less complex and less intense than the mission fig. The flavor notes are said to be of honey and hazelnuts.

Calimyrna

  • As noted above, this type of Smyrna fig was named Calimyrna when introduced to California. In grocery stores, it is often labeled Turkish figs.
  • Their skin is light green to yellow.
  • The flesh is pale pink.
  • It has a delicate flavor with nutty notes.

Kadota

  • This fig goes by many names: Dottato, Florentine, White Texas Everbearing and Peter’s Honey Fig.
  • It has creamy amber or light green skin.
  • The flesh is light pink or amber.
  • It is a seedless variety.
  • Although less sweet than other varieties, it does have notes of honey and fruit.
  • It tolerates being heated, making it a good candidate for jams and preserves.

When picking out figs at the store, they should feel soft but not mushy. You do not want to buy figs that are hard as they will not continue to ripen. It is perfectly fine to have some slight cracking or wrinkling of the skin. If they are past their peak, they might have a sour smell.

The entire fig is edible, although most remove the dense, fibrous stem. Eating out of hand is my favorite way of consuming figs, but they are also wonderful in other applications. Fig jam and preserves are very popular. Serving them as part of a cheese/fruit/nut platter is also classic. They are an excellent addition to salads, especially if the salad includes goat cheese.

Figs are delicious in this Pork with Figs & Balsamic Dressing recipe from BBC Food. They also make a simple but elegant dessert, as shown in this Fig Compote with Honey Crème Fraîche from Williams-Sonoma.

Figs are very perishable. Once you get them home, leave them in their clamshell packaging and store them in the refrigerator. They will last up to about a week. They never last that long in my refrigerator, and not because they go bad. It is because they get eaten very quickly.

I have never frozen fresh figs, but experts say it can be done. If you wish to try, keep them whole. Remove any very soft figs. Wash and dry them thoroughly. Arrange them on a baking sheet in a single layer, not touching each other. Freeze until sold and then transfer to plastic bags. They should keep up to 6 months. To use, thaw them and use them as usual. The texture will be softer, making them better for cooked applications than raw.

Are you lucky enough to have fresh figs on offer in your supermarkets? If so, grab them while you can. They won’t last long either in your store or your kitchen!

Cooking Tips · Ingredients · Techniques

Beets – Pretty, Nutritious & Delicious!

Image by Nick Collins from Pixabay

I am making a lovely tart for tonight’s dinner that contains two ingredients that can be polarizing for some people – beets and goat cheese. I have already written a Cooking Tip on Goat Cheese. In this Cooking Tip, let’s explore the wonderful world of beets, known in Europe as beetroot.

Beets are a root vegetable, but one in which you can eat the entire plant – the bulb, stem and leaves. They are full of healthful nutrients such as antioxidants, vitamins and minerals.

There are different types of beets, but the ones we find in our stores and on our plates are garden beets. Other varieties include the sugar beet (from which we get 55% of our sugar) and mangold beets, which are used in livestock feed. Even among the garden beets, there are different varieties, although you probably won’t know the variety unless you grow them yourself or buy them from a farmer’s market.

Image by Aline Ponce from Pixabay

The most common variety in the market is the red beet. Some markets may sell golden beets. A third variety is Chioggia, also known as Candy Cane Beets. They are an heirloom variety from Italy and have pink and white concentric circles on the inside. Although not impossible to find, they are much less commonly sold in the average supermarket.

Most stores also sell vacuum-packed cooked beets. Their flavor is comparable to fresh beets, but canned beets are not as good a substitute for fresh.

The flavor of beets is said to be sweet but earthy. Many ask if the different colored beets taste differently. America’s Test Kitchen tested red beets, golden beets and Chioggia beets. They tasted them raw, roasted and marinated. Their tasters thought that the golden beets were less sweet and more earthy. The Chioggia were rated mild but with a bitter aftertaste.

My husband grows both red and golden beets. I love the look of the different colors, but we also thought the red beets were sweeter in a side-by-side test.

Image by Couleur from Pixabay

When shopping for beets, look for medium-sized ones, about 2-3 inches in diameter. Larger ones may be a bit more tough. Look for ones without blemishes or dents. If you have the choice, buy them with the greens still attached, as they will probably be fresher. Once you get the beets home, cut off the greens and store them separately. Wash the greens, wrap them in paper towels and put them into a plastic bag. Store the beets unwashed in plastic bags in the refrigerator. The greens will last a few days in the refrigerator, but the beets can last up to a month.

Preparing them is not difficult, but it can take some time, depending on your chosen method. They do not need to be peeled, but leaving the skin on can result in a tough texture.

Roasting

This is my preferred method. It takes the longest but is practically hands-off. Wrap the beets in foil and put them on a sheet pan in a 400°F oven for about an hour or until they are tender. Remove them from the oven, allow them to cool and then rub away the skin. Quartering the beets before roasting will speed up the cooking time.

Microwave

Peel the beets, cut them into ½-inch pieces, put them in a microwaveable bowl with a splash of water and cook, covered, for about 15- 25 minutes, depending on their size.

Grill

Heat your grill to medium-low heat. Clean, peel and cut the beets horizontally into ¼-inch slices. Toss the slices in olive oil, place them on the grates, and lightly salt them. Cook for 8-10 minutes, flip and continue cooking until tender.

Steam

Cut the unpeeled beets into ½- to 1-inch cubes. Bring a small amount of water in a pan to a boil. Put a steamer basket in the pot, add the beets, cover and steam until tender, 10-30 minutes. Remove from the basket, cool and peel.

Boiling

Beets cooked in boiling water will be less intense in color and leach some nutrients into the water. However, many like this method. Place whole beets in a saucepan, cover with water, bring to a boil, reduce heat and simmer until tender, 20-45 minutes. Remove the beets from the simmering water, put them into an ice bath to cool and stop the cooking, and peel.

Raw

Beets are perfectly edible in the raw state. However, as they can be tough, they should be sliced very thinly or grated. Another option is to use a spiralizer.

Instant Pot

If you cook your beets this way, there is no need to peel them. The skin is barely noticeable after cooking in an Instant Pot. Leaving the skin on also means extra nutrients.

Beet greens

The beet greens can be eaten raw, but others prefer a quick sauté in butter or oil. Garlic is also a nice addition. It helps to separate the stems and cook them for a few minutes before adding the greens.

Besides the storage advice given above, cooked, peeled beets can be frozen for 8-10 months.

Some people do not like the red beets because they stain hands and cutting boards. However, there are ways to deal with this.

To prevent staining:

  1. Wear gloves.
  2. Coat your hands in oil – just ½ teaspoon rubbed on your hands is enough.
  3. Prevent your cutting board from staining by giving it a light spritz with a cooking spray before cutting the beets.

Removing beet stains:

  1. Wash your hands as quickly as you can in hot, soapy water.
  2. Scrub salt and soap into your hands and then wash.
  3. Rub a bit of whitening toothpaste into the stain and then wash.

What is your favorite way to prepare beets? As mentioned above, I prefer to roast them. You can then eat them just with a bit of butter and lemon juice. Or, add the beets to salad greens and pour over a flavorful vinaigrette along with nuts and goat or feta cheese. Here are a couple of great recipes.

What a pretty and tasty way to get your nutrients!

Cooking Tips · Ingredients

Serviceberries – a less well-known delicious fruit.

What is your favorite fresh berry? Strawberry? Blueberry? Blackberry? How about Serviceberry? The latter is a fruit that many of us have probably never heard of. I would not have if not for my husband’s foraging on his work campus. Read on in this Cooking Tip to learn what it is and how to use it in your kitchen.

If you haven’t heard the term serviceberry, perhaps you have heard some of its other names, such as Juneberry, Sarvisberry, Saskatoon berries, Shadberry, and Pigeonberry. Its scientific name is Amelanchier. Genetically speaking, serviceberries are not true berries but rather pome fruits similar to apples and pears. I will refer to them as berries.

Image by ghostpotato from Pixabay

These berries grow on a shrub or tree, reaching up to 10 feet tall. These trees are native to North America and grow as far north as Alaska and as far south as Mexico. They produce pretty white or pink flowers in late April to May. The berries ripen from June to August and change from red to dark purple (the darker the color, the sweeter the flavor), and they are slightly larger than a blueberry. Later in the fall, the leaves turn a gorgeous profusion of reds, oranges and yellows.

Because this fruit is not found in supermarkets or farmer’s markets, if you want to try it, you will probably need to forage. Please see this prior Tip on Foraging before you venture out to do this. Make sure you know what you are foraging, as there are some poisonous plants out there that sport similar-appearing berries.

Image by ghostpotato from Pixabay

One expert describes the flavor as a “fusion of strawberry, blueberry and a hint of almond.” Sounds delicious, doesn’t it? Another claims it is “halfway between a blueberry and a grape … with a slightly nutty, almond-like aftertaste.” A third compares it to a cross between a blueberry and a nectarine.

The berries can be eaten raw but you can also use them in your kitchen in a cooked or dried form. You can substitute 1:1 for blueberries in your recipes, although some adjustments may need to be made as blueberries have a slightly higher water content.

Other ideas are:

  • Muffins
  • Pies
  • Cobblers
  • Pancakes
  • Puddings
  • Soups
  • Sausage fillings
  • Syrups
  • Sauces
  • Ice Cream
  • Smoothies
  • Salad topping
  • Jams

Native Americans have been known to use them medicinally for earaches, gastrointestinal distress, fevers and coughs. The stems, branches, and wood have also been used to make baskets, ropes and furniture.

Like other berries, the serviceberry contains antioxidants and other nutrients.

Serviceberries can be refrigerated in a ziplock bag in your produce drawer for a week or two. At room temperature, they can last up to five days. They are very thin-skinned and, therefore, fairly perishable.

Image by DivaDan from Pixabay

As my husband wanders around his work campus picking berries from the trees, others may look on and shake their heads. However, he is happy about that as it leaves more for him. Have you ever tried serviceberries? Look around your area to see if they are growing there, and see what you think!

Cooking Tips · Ingredients

Cucumbers – Edible Hydration

Cucumbers are a vegetable (more about that in a minute) that most of us probably don’t think about too much. We may eat them on a salad, but that is about it. There is more to understanding about cucumbers and how to use them. That is the subject of this Cooking Tip.

Because they contain seeds in their interior, cucumbers are botanically a fruit. We all, though, tend to consider them and use them as we would a vegetable.

Although there are about 100 varieties, our average supermarket will probably only carry two or three. Mine only has two varieties for most of the year. The size of these different types of cucumbers will vary from about 1 inch long to up to 20 inches in length. That is not the only difference in the various types.

Some people will put them in two general categories.

  • Slicing varieties
    • These are meant to be eaten raw, although they can be used in other culinary preparations.
  • Pickling varieties
    • These are small cucumbers that are cultivated specifically for pickling.

Within these two categories, we can find many different types. Here are the most common you will find in your stores or farmer’s markets

Garden Cucumbers

  • These are also sometimes called slicing cucumbers or American slicing cucumbers. These are the ones that are most commonly found in our stores.
  • The skin is smooth, but it can be tough.
  • They generally measure 6-10 inches in length.
  • The flavor is bright and refreshing, but it sometimes has a slight bitterness.
  • The most common uses are salads, sandwiches, and chilled soups such as gazpacho.

English Cucumbers

  • Other names for these cucumbers are seedless, hothouse, European, and burpless.
  • They are easy to recognize as they are longer (can reach 20 inches long) and slimmer than the usual cucumber.
  • They are usually wrapped in plastic to reduce bruising as the skin is thin and delicate.
  • Because the skin is thin, peeling before eating is unnecessary.
  • This variety contains very few seeds, which contributes to a milder flavor with a subtle sweetness and a less watery texture.
  • The best uses are in salads or sandwiches.

Persian Cucumbers

  • This variety is much smaller than other cucumbers, only about four to six inches.
  • Just as with English cucumbers, Persian cucumbers are known as burpless because they are easily digestible.
  • The skin is this but has a bumpy appearance.
  • The texture is crisp.
  • Their flavor is milder and sweeter than other varieties.
  • They contain minimal seeds.
  • Best uses are snacking, slicing, and pickling. This variety is a top choice for Mediterranean and Middle Eastern cuisine.

Kirby Cucumbers

  • This variety is known as the pickling cucumber.
  • They are small, usually under six inches in length.
  • The skin has a bumpy appearance, and the internal texture is firm and crunchy.
  • Their flavor is slightly sour, making them great for pickling, although some like to use them in salads and sandwiches due to their crisp texture.

Lemon Cucumbers

  • This is an unusual appearing cucumber due to its round shape and yellow color.
  • The flavor is slightly sweet with citrus notes.
  • They are best used raw in salads.

White Cucumbers

  • Another uncommon variety, it is sought out for aesthetic reasons due to its white skin.
  • It is best enjoyed raw but can also be used to make a white gazpacho.

Japanese cucumbers

  • Another name is a Kyuri cucumber.
  • They are long and slender with thin, dark green skins.
  • The texture is crisp, and the flavor is refreshing.
  • They are the variety often used in sushi or other Japanese dishes.

Nutrition

As with most fruits and vegetables, cucumbers are nutritious. By weight, cucumbers are up to 90% water, which makes them great for hydration. They also contain beneficial vitamins, especially vitamins A and C. The skin contains fiber and minerals, and they possess anti-inflammatory properties.

Culinary uses

  • Cucumbers are naturally waxy on the outside. This is generally removed during processing after harvesting. So, it is common for producers to add a waxy coating that mimics the natural one. If this wax coating is applied, the retailer should inform the consumer on the label or signage. Even though it is considered safe to consume, you can remove it with vigorous scrubbing and rinsing or by peeling. The peel does, though, add to the nutritional value of the cucumber.
  • Raw in salads or on sandwiches.
  • Infused water – slice and use in beverages just as you would use lemon slices.
  • Add to smoothies along with other fruits and veggies.
  • Tzatziki – a classic Green dip made with yogurt, cucumbers, and seasonings.
  • Hors d’oeuvres – slice about ½ to 1 inch thick. Scoop out seeds and fill with cheese, a dip or a relish.
  • Chilled soups
  • Pickles
  • Sorbets
  • Can be sauteed or braised as a side dish.
  • Make into pickles
  • Sorbets

Choosing cucumbers

Pick firm ones without soft spots or wrinkles, and a vibrant color.

Storage

  • Although they do not need immediate refrigeration, refrigeration is recommended if they are kept for more than a few days.
  • Some experts like to store them in the warmer part of their refrigerator, such as on a door or the upper shelves. They wrap them in a paper towel and put both in a sealable plastic bag.
  • If uncut and unwashed, they can be kept in the refrigerator for about ten days.
  • If sliced, they should be tightly wrapped and kept in the refrigerator for about five days.

Not everyone is a cucumber fan. If you are one of those, perhaps you haven’t tried the correct variety. Try to find some of these other types and see if they change your mind. Or, try growing your own. My husband grows a variety called Sweet Success and it is outstanding!

Cooking Tips · Ingredients

Raspberries – A Summery Delight!

Are you a raspberry fan? Do you like to eat raspberries out of hand or just use them in a recipe? If you buy raspberries in a mainstream store, your only choice will probably be red raspberries. A look at my area’s three main grocery stores showed only that one variety. Did you know that there are other varieties out there for your enjoyment? That is the subject of this Cooking Tip.

There are said to be more than 200 species of raspberries. About 90% of those sold in the US come from Washington, California and Oregon. Besides the red raspberry, there are yellow and black ones. Even within these categories, there are many subcategories of each variety. Unless you grow your own, you will probably only find these non-red raspberries in specialty or farmer’s markets. Let’s look at the differences and whether you might want to search them out.

All raspberries contain wonderful vitamins, minerals and antioxidants. They are also low in calories and high in fiber. This makes them something to add to your diet whenever you can in whichever variety you can find.

Red Raspberries

Image by Walter Bichler from Pixabay
  • This is the most common raspberry and the one most available in the average supermarket.
  • They ripen in late summer.
  • The color is red, and the deeper the red, the riper it will be.
  • A ripe raspberry will be sweet, but it does have a tart undertone.
  • They have fewer seeds than black raspberries.
  • They are juicer with a slightly firmer texture.

Black or Purple

Image by Alina Kuptsova from Pixabay
  • Another name for this raspberry is blackcap or black cap.
  • This variety is native to North America and can be found growing wild.
  • They have a short season of just 2-3 weeks in the summer, and the plants have a lower yield than other berries.
  • They have a more robust and complex flavor than the other varieties. Some describe it as slightly sweet and tart with woodsy notes.
  • They tend to be larger, have more seeds and are not as juicy as the red variety.
  • The appearance of a black raspberry is very similar to that of a blackberry. However, the black raspberry will have a hollow core when you look at the stem end, as the core stays on the vine when it is picked. With blackberries, the core stays within the berry when picked. Also, blackberries ripen later in the year than black raspberries.

Yellow

  • These pretty berries are also known as golden or gold raspberries.
  • The color can vary from pale yellow to gold to yellow-orange to yellow-pink.
  • Because these berries are less acidic, the flavor is sweeter, milder and less tangy. You might also notice floral and honey notes.
  • Although all raspberries are perishable, the yellow variety is even softer than the other varieties.
  • These berries ripen from late spring to early summer, although some varieties can have a second season in the fall.

Blue

You may ask why I haven’t mentioned the Blue Raspberry. After all, you see blue raspberry items all over the place. I haven’t mentioned it because it is not a real raspberry variety. Rather, it is an artificial flavor. The story probably goes back to the 1950s when red food colorings were coming under scrutiny. However, it was mainly popularized in the 1970s by the company ICEE. Wanting something that looked and tasted different from their signature cherry, they started using FD&C (The Food, Drug, and Cosmetic Act) Blue No. 1.

If you are buying raspberries in the store, it can be difficult to tell if they are ripe and they do not ripen after harvesting. Try to pick ones that are bright and deeply colored without soft spots. Once you get them home, look them over for any soft, mushy, or rotten berries. Remove and discard them to prevent the others from also going bad. Store them in your refrigerator in a single layer in a shallow container lined with a paper towel to absorb moisture. Since raspberries are very perishable and delicate, you should use them within a day or two or freeze them for later use. To discourage spoilage, do not wash them until just before eating.

Uses for raspberries

  • Eating out of hand
  • Salmon with a raspberry glaze
  • Raspberry fool or trifle
  • Jams
  • Pies
  • Filling for cakes or tortes
  • Sauces—One of the easiest is to make a raspberry coulis and pour it over ice cream. It is often made by cooking the berries with sugar, water and a touch of lemon juice. Once cooked down and the taste is to your satisfaction, it can be stored as is. Or, it can be pureed and strained for a more sophisticated sauce. It can also be made without cooking by just pureeing the berries with sugar and lemon juice. This will give you a fresher taste.

In our markets, we can purchase red raspberries year-round. As with any fruit, it will be much tastier if you buy it in season. Head to your nearest farmer’s market to try some that were picked only the day before and, hopefully, be able to purchase some of the non-red variety. Fortunately, my husband is growing a red, a yellow and two black. I can’t wait to try them!

Cooking Tips · Ingredients

Bananas – is there anything to know?

Image by Duy Le Duc from Pixabay

If you were asked to name your top three or four favorite fruits, would bananas be on that list? They certainly would be on mine. Other than eating them as a snack, there is much more to know about bananas. In this Cooking Tip, we will explore all about the wonderful banana.

Americans have been importing bananas since 1870. An American businessman (Lorenzo Dow Baker) brought 160 bunches from Jamaica to the US. He subsequently started the Boston Fruit Company. This later merged with Tropical Trading & Transport Company and became United Fruit Company.

Although there are hundreds of varieties of bananas, we rarely see more than one or two in our stores.

Cavendish Banana

Image by Hans from Pixabay
  • This is the typical banana that we see in the stores.
  • It represents 47% of all global production and 99% of bananas sold in the US.
  • It is easily recognized by its yellow peel and white flesh.
  • The flavor is slightly sweet and has a somewhat creamy texture.
  • The best uses for the Cavendish banana are eating out of hand and in desserts.

Plantain

  • If you see another variety, it will most commonly be the plantain, which is a relative of the banana.
  • The color can be green, yellow or black. The latter is the color when it is fully ripe.
  • The flavor is mild, but due to its high starch and low sugar content, it is not nearly as sweet as the Cavendish.
  • Texture is firmer.
  • The best use is in savory dishes. Cook them as you would potatoes.
  • It is notoriously difficult to peel. One recommended method is to cut off both ends and slice tip to tip. Then, remove the peel under cold running water side-to-side.

Other varieties exist, although it is unlikely you will find them in the average supermarket. Names you might see are Red Bananas, Baby Bananas, Gros Michel Bananas, Nam Wah Bananas, Mysore Bananas, Pisang Raja Bananas, Lady Finger Bananas, Senorita Bananas, Blue Java Bananas, Manzano Bananas, Apple Bananas, and Lady’s Finger Bananas.

Ripening Process

A common topic around bananas is the ripening process – either speeding it up or slowing it down.

Speeding Ripening

Paper Bag

A typical piece of advice is to put your unripe banana in a paper bag for a few days. The thought is that the bag traps the ethylene produced by the fruit, which is what causes ripening. Some also say that putting another piece of ripe fruit (typically an apple) in the bag will release even more ethylene, making the ripening even faster. Not everyone agrees that this works as well as advertised, though. The critics do not feel it speeds ripening very much, but they do find it leads to more even ripening.

Warmer Temperatures

Placing your bananas in a warmer area, higher than 75°F, does speed ripening. Some will put them on top of the refrigerator for this purpose.

Oven Ripening

Because higher temperatures help with ripening, some will put the bananas in a low oven, about 250°F. The problem is that although they soften and darken in color, they do not get noticeably sweeter. Microwaving bananas leads to similar results.

Egg Yolk Ripening

If the bananas are destined for a cooked preparation, adding an egg yolk to them and letting them sit for about 30 minutes can speed up ripening. The theory is that the amylase in the egg yolk breaks down the starch into sugars. For more information, see this article by Stella Parks.

One of the primary uses for ripe bananas is banana bread. You might ask if you really need such ripe fruit for this purpose. Cooks’ Country tested this by making three loaves – one with green fruit, one with yellow and one with very ripe brown. The first difference they noticed is that mashing the bananas is much easier with brown bananas. They also found that the riper the banana, the more flavorful the bread. Banana bread made with green bananas tasted less sweet and more vegetal. The loaf was also taller, drier, and had a more open crumb. This was contrasted with the loaf made with ripe fruit. It was moist, dense, and had a compact crumb. The bananas in between had a good texture but less banana flavor. This all makes sense if you think of what happens as bananas ripen. Some of the starch is converted to sugar. This gives more sweetness and acts like a liquid in baked goods, leading to a moister and more tender bread.

Slowing ripening

Cooler temperatures

Just as warmer temperatures can speed ripening, cooler temperatures can slow ripening by reducing the production of ethylene and acids. For this to work, they should be stored below 65°F. Refrigeration certainly works, but it also causes the skin to turn dark.

Taping the stem end

Although there is debate on why this method works, it does slow ripening. You may occasionally even see this done in the stores.

Separation

Separating the bananas rather than leaving them in a bunch might slow ripening a bit.

Freezing bananas

  • Most of us have probably thrown bananas that were getting too ripe in the freezer, which is a perfectly acceptable method for preserving them. To do so, choose fully ripe bananas.
  • You may put them whole in a freezer container or slice them crosswise into rounds that are ½- to ¾-inch thick. Place the rounds in a single layer on a baking sheet. Freeze, uncovered, for an hour. After an hour, they start to stick to the sheet, so some like to slightly move them at this point and then return to the freezer for another hour. When solid, store in freezer containers.
  • Although you can leave the peel on, it is tough to remove once frozen. It may also decrease the quality of the frozen bananas.
  • Frozen bananas are best used in smoothies, ice cream, pies, banana bread, and pancakes.

How do you like to use bananas? Is it just good ole banana bread? How about Bananas Foster, banana cake, cupcakes, pancakes or muffins? Or do you have a more unusual method of using bananas? For me, just eating them, particularly if they are chilled, is the way to go!

Cooking Tips · Ingredients

Onions – Is there a place for dried?

Your recipe calls for fresh onion, but when you go to your panty, you find none. You recall that you do have some sort of dried onion product in your spice rack. Can you use that? That is the subject of this Cooking Tip.

Similar to dried garlic products, dried onion products start with fresh onions that are dried and then ground/cut into different sizes. Similar to fresh onions, the flavor will vary depending on the variety of onion used.

When you add fresh onions, you add not only their flavor but also a textural element. Also, as the onions cook, they release water, adding moisture to your dish. Whereas the dried onion products can impart flavor, you will miss out on the texture and moisture.

We all know that cutting fresh onions releases a pungent odor and causes eye tearing. One advantage of dried products is that they do not cause eye discomfort, and the odor is much milder. Let’s look at some of those products.

Onion Powder

  • This is made from fresh onions that have been dehydrated and then finely ground.
  • It can add an onion taste in those dishes where you do not want the moisture or texture of fresh onions.
  • The powder dissolves more fully into a dish and distributes more evenly than fresh onion if added to a spice rub or a meatloaf.

Granulated Onion

  • Granulated onion results from drying the onions but grinding them less finely than is done with onion powder.
  • Depending on the size of the resulting granules, other names you might see are minced onion, chopped onion and onion flakes.
  • These larger-sized onion products are best used in dishes with sufficient moisture and time for the onions to rehydrate.
  • If your dish does not have significant liquid, some recommend that you soak the particles in warm water for five minutes before using.
  • Besides onion flavor, the larger-cut dried onion products could add a small amount of texture.

Granulated Roasted Onion

  • This product is similar to the others, but the onions are roasted before drying and ground.
  • Roasted onions will be less pungent and more sweet.

Onion Salt

  • Just as with garlic salt, this is a mixture of salt and onion, usually in a 3:1 ratio.
  • It imparts an onion flavor but also adds a significant amount of salt.
  • Whereas you can substitute the other dried onion products for onion salt, do not use onion salt instead of onion powder or granulated onion.

Similar to dried garlic products, onion products are not a substitute for fresh onions but are a separate product that will add onion flavor. They are best used as an ingredient in dishes such as onion dips or chili, soups, stews, and sauces.

For those who do want to try to substitute for fresh onion, below are some suggestions. As onions vary in size, these recommendations vary according to what size onion is called for in the recipe. If no size is specified, use the amounts listed for a medium onion. As recommendations differ from expert to expert, always start on the lower side and then increase to taste. Fresh onions are often sautéed before being used in your recipe. You do not need to do this with dried onion products.

1 small onion

  • Yields ¼ to ½ cup chopped fresh onion.
  • Substitute 1 teaspoon onion powder or 1-1½ tablespoons of granulated onion.

1 medium onion

  • Yields ½ to 1 cup chopped fresh onion.
  • Substitute 2-3 teaspoons of onion powder or 2 tablespoons of granulated onion.

1 Large onion

  • Yields 1 to 1½ cups chopped fresh onion.
  • Substitute 1-1½ tablespoons of onion powder or 3-4 tablespoons of granulated onion

If you desire, you can make your own dried onion products with this method.

  1. Peel onions.
  2. Chop finely.
  3. Spread in a single layer and dry either in a food dehydrator or in a 150°F oven.
  4. When they easily crumble, they are dry.
  5. Allow to cool and then grind in a spice grinder or mortar/pestle.

I do have a couple of dried onion products in my spice rack, although they are rarely used and only in certain applications. How do you like to use them?

Cooking Tips · Ingredients

Garlic Powder – Is it ever OK to use?

Garlic is probably one of the most used seasoning ingredients in our kitchens. I have written a prior Tip on fresh garlic and how it compares to the bottled variety. In this Cooking Tip, I want to discuss the dried and powdered garlic products you can find on the shelves of your supermarket.

Many culinary legends, including James Beard and Julia Child, despised these powdered versions of garlic. In an introduction to a recipe for Garlic Soup, James Beard states:

Is that true? Is there no place in our kitchens for these items? Let’s look at what these products are and if and how they might be used.

Garlic Powder

  • Garlic powder is made from fresh garlic bulbs that have been dried and then ground into a fine powder.
  • It is not as potent as fresh garlic but is suitable for when you want a milder garlic flavor dispersed throughout. Fresh garlic doesn’t stick as well and doesn’t spread as evenly as a powder, which makes the powdered version useful in a spice rub. It adds a warm flavor without the pungency of fresh garlic.
  • It should not be considered a replacement for fresh garlic but a separate garlic-flavored product.
  • Cooks Illustrated recommends hydrating garlic powder in an equal amount of water and then sauteing it in fat before adding to the dish.

Garlic Salt

  • As its name implies, this product combines garlic powder and table salt. It is generally made with three parts salt and one part garlic powder.
  • The garlic flavor is much milder than either fresh or garlic powder.
  • The primary consideration is the salt content. If you use this product, you must decrease the amount of other salt you add to the dish. This is also why, although you can use garlic powder in place of garlic salt, you should not do the reverse due to the salt content.

Granulated Garlic

Image by Enotovyj from Pixabay
  • Like garlic powder, this is made from fresh cloves that have been dehydrated and ground up. What makes it different is that it has not been ground as finely as garlic powder.
  • Because it is less likely to clump than garlic powder, it is better than garlic powder in various liquid dishes such as soups, stews, and salad dressings.
  • It is also better in longer cooking dishes as there is more time for the granules to hydrate.

Minced Garlic

  • This product is minced while fresh and then dehydrated and packaged.
  • The garlic pieces will be larger than granulated garlic.
  • Once again, it is better when cooked in a dish with enough liquid and time to rehydrate the granules.

Roasted Garlic

  • Besides the other products, some companies also offer a roasted variety.
  • It might be in the form of a powder or granulated dried garlic.
  • Roasting garlic tames the pungency of fresh garlic and adds a sweet note.

Cooks Country compared fresh garlic to dried garlic products in a Caesar salad and garlic bread. They found minimal differences in the salad, probably due to the other strong ingredients in the dish. There were more notable differences when used for garlic bread. Fresh garlic had the strongest flavor while the others were felt to be muted and artificial. Garlic salt was especially disliked. They concluded that if you want the garlic flavor to be predominant, go for fresh. If it is just a background flavor, you can use powdered garlic, just not garlic salt.

Favorites among taste testers varied.

  • America’s Test Kitchen liked Morton & Bassett.
  • The Kitchn preferred Trader Joe’s.

As mentioned above, none of these products are a great substitute for fresh garlic. However, here are some recommendations for those who do want to substitute when they do not have fresh garlic.

  • For one fresh clove, the recommendation for the amount of garlic powder to use varies from ⅛ teaspoon to ½ teaspoon.
  • Because of the larger sizes of granulated and minced garlic, you will want to use more of those products.
  • If you want to substitute granulated garlic for garlic powder, use double the amount called for.
  • Do not use garlic salt in any of these substitutions as it will not only provide less garlic flavor but could lead to an overly salty dish.

If you wish, you can make your own garlic powder. Here is the basic method.

  1. Separate the fresh cloves and remove the skins.
  2. Cut the cloves into thin slices and place them in a food dehydrator in a single layer.
  3. Alternatively, place the slices on a cookie sheet and put them in a 150°F oven.
  4. When the garlic is dry, you can crush it in your hands, and it will crumble.
  5. Allow the dried garlic to cool, and then grind it in a spice grinder or mortar/pestle.
  6. Store in an airtight container.

Do I have dried garlic powder in my spice rack? Yes, but I must admit I rarely use it. I do like it in a couple of recipes, but other than that, I do not reach for it. How about you?

Cooking Tips · Ingredients

Chorizo – Know which type to use

When I see a menu item or a recipe with Chorizo as one of the ingredients, I am all in. Chorizo is not monolithic, though. There are different types, and what those are is the subject of this Cooking Tip.

Chorizo originated in the Iberian peninsula (Spain and Portugal) and is usually made from pork. Initially, it wasn’t red, but when Europe discovered smoked paprika in the 16th century, it became a staple in chorizo.

There are different ways to categorize chorizo, but the main one is Mexican versus Spanish. Because they are quite different, we cooks need to know why.

Mexican

Image by Quidec Pacheco from Pixabay
  • Mexican chorizo is raw, ground pork (sometimes beef) seasoned with spices such as coriander, paprika, chili powder, chili peppers, dried herbs, and garlic.
  • It is sold in the fresh sausage section of the market, where you can find items such as breakfast sausage or brats.
  • It is often sold in links but can be found in bulk.
  • Since this chorizo is raw, it must be cooked before eating.

There are two categories.

  • Classic chorizo is made of pork or beef and contains, among other spices, chili and vinegar.
  • Chorizo Verde (green chorizo) contains chili (often green), tomato and green herbs such as cilantro and parsley. It may also contain tomatillos.

Spanish

Image by arturo larrazábal from Pixabay
  • Spanish chorizo is usually a cured sausage with a texture similar to salami.
  • It is made with cured or semi-cured chopped and smoked pork and seasoned predominantly with smoked Spanish paprika. Other ingredients include herbs, garlic and white wine.
  • It will be sold in casings that might be short or very long.
  • It will be found in the cured meats department.
  • If cured, it is not necessary to cook before eating. However, if semi-cured or fresh, it must be cooked before eating.
  • If cooking the cured type, it is best to remove the casing as it can become tough.
  • There are various ways to categorize Spanish chorizo.
    • Curing state
      • In the average US market, you will find it in a cured form.
      • In some specialty markets, you may find it semi-cured or raw.
    • Location/Shape
      • In Spain, every region has its own style. These will vary based on the ingredients and shape of the finished sausage.
      • Almost all of them will contain Spanish smoked paprika, which is what results in the red color. Other common ingredients are garlic and white wine, although some locales include black pepper, oregano, thyme, or nutmeg.
      • The shape can vary from rope-like to horseshoe-shaped, and they will also vary in length and diameter.

In the typical US supermarket, you will almost surely be able to find Mexican chorizo. You may or may not find the Spanish type. When you do, your choices will probably be limited to one variety or, at most, two. For the other types, you will need to check a specialty market or search out online sources. There are other chorizos but they, too, are typically described as a Spanish or Mexican type.

Portuguese chouriço

  • This is similar to Spanish but contains less paprika but abundant garlic and red wine.

Chaurice (Louisiana, Creole, Cajun cuisine)

  • Another Spanish-style chorizo but with different spices.
  • Typical spices include chile, cayenne, green onions, garlic, thyme, celery, parsley and bay leaves.

Colombian chorizo

  • This Mexican-style chorizo is less spicy and contains less paprika than many.
  • It also usually contains green onion, cilantro, garlic, and vinegar.

Argentine

  • As Italian flavors inspired this, it often includes herbs such as oregano and thyme.
  • It may also contain garlic, nutmeg and wine.

Filipino Chorizo de Cebu

  • This unique style of chorizo is spherical in shape.
  • It is a vibrant red color, caused by the inclusion of annatto. Another ingredient that results in its characteristic flavor is anise liqueur.

Goan chouriço

  • Another type of Portuguese chouriço that has Indian notes.
  • This sausage is hot and spicy with red chili, ginger, cloves, pepper, cumin, turmeric, cinnamon and vinegar.

How to use Chorizo

Mexican

  • Typical dishes that call for Mexican chorizo are tacos, tortas and scrambled eggs.
  • Cook’s Illustrated recommends using it as a substitute for taco seasoning. They add it to ground beef to give a spicy and complex flavor. Because of the high fat content of Mexican chorizo, they recommend using 90% lean ground beef.
  • A more unusual recommendation by them is making Chorizo Bolognese. They substitute Mexican chorizo for ground beef in a 1:1 ratio. They testify that this gives the flavor of a long-cooked Bolognese but in much less time.

Spanish

  • The cured variety is typically used for snacking or on a tapas plate.
  • One exciting way to prepare it is in the recipe for Chorizo Lollipops.
  • It may also be used in soups and stews.

Suppose you have a recipe that calls for chorizo but does not state what Image by tove erbs from Pixabaykind. Just take a closer look at the recipe. If the flavors are more Mexican, that is probably the type that should be used. Also, look at how it will be used. If the meat is to be cooked, go for Mexican. If you are chopping, slicing or serving raw, go for Spanish.

Are you a fan of chorizo? I prefer the Mexican style, but it can be very spicy at times. Different brands vary in spice level, so you need to find the one that works for you. If you want to throw a fun tapas party, Spanish-cured chorizo will be a wonderful addition.