Cooking Tips · Ingredients

Tomatoes — Heirloom or Hybrid?

It is Tomato Central at our house right now due to the proliferation of what is growing in my husband’s garden. (If you live in my area and want buy some, let me know.) I find the number of tomatoes he grows humorous as neither one of us is a fan of fresh store-bought tomatoes. I love a good pasta sauce or using them in other ways but not to just eat them fresh. However, as he has branched out to grow heirloom varieties, I can now enjoy a caprese salad or a tomato tart. All these types of fresh tomatoes and what to do with them is the subject of this Cooking Tip.

There are two main types of tomatoes – Hybrid and Heirloom. Hybrids are intentionally cross-bred by the plant breeders. This produces tomatoes that are more disease-resistant, have longer shelf lives, better yields, uniform appearance and so forth. Like so much fruit (and veggies), they are bred to give the consumer what “looks” good, not necessarily what tastes good. They are the main type of tomato that you will see in the supermarket.

Heirloom tomatoes are grown from seeds that have been saved and passed down through the generations. Farmers would save the seeds from the best fruits and then use them to grow more. It is said that some varieties can date back 100 years or more.

The reason that many people rave about heirloom tomatoes is that they think they have superior taste. I can personally attest to that but I suppose it depends on your taste buds. They can look unusual, both in color and shape. Note that the term “heirloom” is unregulated. It is one of those terms that has become popular and growers want to jump on the bandwagon. So, try to buy from someone you trust or grow your own.

If you are a gardener, here are a few pros/cons to help you decide what to grow.

Heirloom Pros

  • Flavor—many think it is superior to hybrids
  • Variety – more variety in color, size, texture
  • Tradition – continuing to propagate heirlooms contributes to greater genetic diversity in tomato plants
  • Replanting – the seeds can be reused season after season with the fruit being identical to the parents

Heirloom Cons

  • Appearance – although some people love how different they look, others do not
  • Yield – they have a lower yield than hybrids (You would never know that by looking at my husband’s garden!)

Hybrid Pros

  • Growing conditions – they are more disease- and heat-resistant and manage harsh weather better than heirlooms
  • Yield – these produce more fruits per plant than heirlooms
  • Consistency – with hybrids, you are going to get a more consistent and dependable harvest

Hybrid Cons

  • Replanting – the seeds cannot be replanted as they have been cross bred and the next season, they will not be like the parent and could be very undesirable.
  • Flavor – as the growers try to make better growing fruit, it often loses in the flavor department.

There are thousands of heirloom varieties. One gardening site listed almost 300 varieties with interesting names such as Aunt Ginny, Banana Legs, Black Sea Man, Cosmonaut Volkov, Cream Sausage, Hillbilly, Potato Leaf, Nebraska Wedding, Pink Ping Pong, Sugar Lump and Ten Fingers of Naples.

Every list of “favorites” you look at is different. Therefore, let me just list those my husband is currently growing in Colorado.

Amish Paste – this heirloom is thought to have originated in the 1870s with the Amish people in Wisconsin and later in Pennsylvania. It is fairly large and known for its juicy flesh. Although they can be eaten fresh, they are a superb sauce tomato.

Beefsteak – the most common heirloom with several varieties. There is also a type of hybrid by the same name. The tomatoes are large, about a pound or more.

Black Krim – named for the Crimean Peninsula of Ukraine, it is another beefsteak type tomato that is dark red and salty.

Brandywine – relatively large tomatoes with an excellent flavor and a pink hue. We grow both a red and yellow variety.

Cherokee Purple – a beefsteak tomato with a green shoulder and purplish/blackish interior.

Mr. Stripey – these huge, beefsteak-type tomatoes are very pretty due to their red and yellow coloring. The background color is yellow to light orange, with red spots/stripes radiating out from the stem. They have a high sugar content, making them particularly delicious.

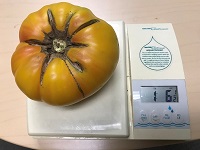
Old German – this tomato was a favorite of Mennonite families from the Shenandoah Valley area of Virginia, and dates back to the mid-1800s. It is in the beefsteak family and can grow to a size of almost 2 pounds. It is bi-colored, featuring golden yellow and reddish stripes.

There is another way to categorize tomatoes apart from heirloom vs hybrid.

  • Cherry tomatoes – these are round, bite-sized and juicy tomatoes. They are great for salads, snacks or kebabs.
  • Grape tomatoes – sources say they should be half the size of cherry tomatoes but I must say this doesn’t appear so when you look at the boxes in the supermarket. They are more oblong in shape, are less sweet than cherry tomatoes, contain less water and a thicker skin. You may use as you would cherry tomatoes.
  • Roma tomatoes – these are larger than either grape or cherry and are also known as plum tomatoes. Due to their sweetness and juiciness, they are good for canning or sauces.
  • Beefsteak tomatoes – large and firm enough to hold their shape when sliced. They are often preferred for sandwiches or burgers although they can also be canned or used in making a sauce.
  • Tomatoes on the vine – sold still attached to the vine, which prolongs their shelf life. Good for sandwiches, canning and sauces.

So, what’s the deal with San Marzano tomatoes? This is probably one of the best known tomato varieties and is a type of plum tomato. The authentic San Marzano is grown in the shadow of Mount Vesuvius in volcanic soil, leading to a lower acidity and a sweeter flavor As with so many things, there are fakes out there. In the supermarket, you will mostly find them canned. Look for the D.O.P label Pomodoro San Marzano dell’Agro Sarnese Nocerino.

Chefs will claim that this is the preferred tomato for making sauce due to its sweet taste and thick flesh. When put under taste tests, neither Cooks Illustrated nor Serious Eats found it necessarily lived up to its hype.

Most of us in the cooking world have been taught that you should never refrigerate tomatoes. It turns out that this is one more of the culinary myths that has been perpetuated through the years. (For more culinary myths, see the two Cooking Tips I wrote on this subject. Find Part 1 here and Part 2 here.)

Taste testers have found that tomatoes do fine in the refrigerator and the shelf life is prolonged by up to 5 days. If they have been cut, put them in an airtight container to prevent them from picking up odors.

Another myth is that you need to remove the seeds. You do not. They do not affect the flavor but if you want them removed for aesthetic reasons, then go right ahead.

What is the best use for heirloom tomatoes? Use them in a way that they can shine such as caprese salads or tomato tarts. Here are two great recipes. The first is a Tomato & Basil Tart, which is like a caprese salad baked in a pie crust. The second is an Heirloom Tomato Tart with a custard filling. Both are excellent.

What about you? Are you a tomato lover? Have you tried heirlooms? What is your favorite?

Cooking Tips · Ingredients

Pears — worth waiting for!

Summer is now winding down and fall is soon to arrive. That makes me sad – not because fall is not a beautiful time of the year, but because it portends the arrival of winter. Anyone who knows me knows that winter is not a happy time for me. Back to fall, though. One of the nice things about fall is fall produce. Pears are one of my favorite fall fruits. That wonderful fruit is the subject of this Cooking Tip.

Since we see pears in our stores year round, we may not realize that they are at their peak in fall. As with so many kinds of fruit, there are many varieties out there but we only see a few at our local market. Let’s look at some of those that are easy to find as well as few that aren’t.

Anjou

This pear is short, squat, very plump with almost no neck. It’s skin is smooth and the flesh is firm but juicy. It is not overly sweet and has a hint of citrus. It comes in both red and green varieties. Although they differ in appearance, they are very close in flavor. The red ones are really more brownish than true red.

It is a great all-purpose pear and can be eaten raw, baked, poached or even used in savory dishes. It is available October through May.

Asian

Also known as the “Apple Pear”, this pear looks and tastes quite different than what we normally think of as pears. Other names include Japanese pear, Korean pear and Taiwan pear.

It is apple-shaped with matte light brown skin that is a bit gritty and rough. Biting into them, they will be crisp, almost crunchy and not very juicy. The flavor is sometimes described as a cross between jicama and apple.

These are best to eat raw in salads and slaws and are available August through February.

Bartlett

Another name for this popular pear is Williams Pear. They have delicate, thin skin, a sweet taste and a soft/juicy bite. You can find both red and yellow varieties. Although one of the favorites in terms of pear flavor, they are also very perishable.

These are wonderful for eating raw. They do lose their shape in cooking and so are good for using is sauces or making pear butter. Most canned and processed pears are Bartletts. They are available July through early winter.

Bosc (Kaiser Pears)

The skins of this type of pear may have a mottled brownish appearance with rough patches of light brown and a greenish skin. They are taller than other pears with an elongated slender neck and are fairly firm even when ripe. The flesh is white, sweet and crisp but can have a grainy texture. They have a strong pear aroma.

It can certainly be eaten raw, but since this pear holds its shape when cooked or baked, it is often called for in recipes where you want that shape such as in a poached pear dish, a pear tart or a salad. It is available September through the winter.

Comice

This pear has a wide, round shape with a bit of tartness and a soft texture. It is often called the “Christmas pear” due to it’s popularity in holiday gift baskets. It has yellow-green skin and often has a red marking on one side that comes from the sun hitting that spot. It has a delicate skin with sweet and creamy flesh.

It is delicious when eaten raw due to a fruity flavor and aroma and is particularly suited to pairing with cheese. It does not have the grittiness that you can get with some pears. It is also good for baking and is available September through February.

Concorde

These are a brighter green than other pears and have longer necks. They are very juicy and sweet. As they ripen, they develop a mellower and vanilla-scented flavor. Their flesh retains its color and doesn’t brown much when cut.

They are good for eating raw and for cooking as they retain their shape. They are available September through February.

Forelle

These are smaller oval-shaped pears and are known by their “lenticels”. As they ripen, their yellow-green skin turns bright yellow and red freckling/lenticels appears. They are very sweet and delicate.

They are available October through February.

French Butter

This is a European variety that is great for pear butter. They start off green and turn golden yellow as they ripen. They can be quite sour and tough if not ripe. Once fully ripe, they become juicy and soft with a slight lemony flavor.

They are available September through December.

Seckel

Another small pear (one or two bites) with firm flesh, they are great when you want to show off the whole pear such as in poached pears. The color ranges from pale green to deep red. They are more tart than other pears and can have a somewhat bitter taste.

They can be eaten raw, cooked or even canned. They are so small that that they can be preserved whole and are available September to February.

Starkrimson

These pears have a deep red color and a mild flavor that is a bit floral and sweet. They are available August through December.

Taylor’s Gold/Gold pear

Related to the Comice pear, its skin is a light golden brown and it is very aromatic. It is almost round with golden-brown skin. The flesh is sweet and juicy. They are great for making jams, jellies and sauces.

USAPears.org has a nice graphic rating pears on texture and taste. Here is a summary of this graphic.

Pear varietyTexture from crisp (1) to soft/juicy (10)Taste from sweet (1) to very sweet (10)
Green Anjou76
Red Anjou76
Bartlett108
Red Bartlett108
Bosc23
Comice910
Concorde410
Forelle41
Seckel23
Starkrimson108

When picking out pears, choose ones with smooth, unblemished skin and that are firm to the touch. Check for ripeness by gently pressing the neck and if it gives a bit, the pear is ripe. Pears do not fully ripen on the tree. (An exception is the Asian pear, which does ripen on the tree. They do not soften or get sweeter after picking.) Once you bring them home, allow them to ripen on the counter at room temperature, which may take 3-6 days. Once ripe, use within a few days or put in fridge. Put Asian pears in fridge right away.

Most pears do not change color was they ripen. The ones that do are:

  • Bartletts – turn from green to yellow
  • Red Bartlett and Starkrimson – turn a brighter red as they ripen
  • French Butter – turn from green to yellow
  • Forelle – turn bright yellow with red lenticels

So, what do you do with pears? I think the best thing is to eat them raw. Here are the best pears for that purpose.

  • Anjou – firm, mild flavor, juicy
  • Asian – crunchy, mild flavor
  • Bartlett – very juicy and among the sweetest of pears
  • Bosc – crisp with delicate sweet flavor, very pear-like
  • Comice – less grainy than other pears, clean, bright pear flavor, sweet, soft, juicy. Some say it is the absolute best pear to eat raw.
  • Concorde – juicy, vanilla-like flavor, smooth texture
  • French Butter and Seckel – make sure they are fully ripe

If you want a pear that keeps it shape when cooked/baked, Bosc is the best option but Anjou, Concord and French Butter can also work.

If you want a pear that falls apart, choose Bartlett. A nice option is to use a mixture of Bartlett & Bosc allowing you to get the best of both worlds.

When cooking with pears, they can be peeled or not. Some peels are smoother and some are rougher. Also, some peels get tougher when heated. Complementary spices to use are cinnamon, nutmeg and ginger.

Typical preparations include:

  • Poached in wine, syrup, fruit juice, water
  • Baking – tarts, pies, cakes
  • Jams, preserves, chutneys
  • Since they are related to apples, pears would be a suitable substitute for apples in recipes
  • Slice and toss in a salad. One of my favorites is a spinach & pear salad with a maple-bacon vinaigrette.

I wish it were easy to find all the different pear varieties in my local market. Right now, I can get Anjou, Asian, Bartlett, Bosc, Concord and Comice. What about you? What’s your favorite? What can you get where you live?

Cooking Tips · Ingredients

The World of Summer Squash

As with so many gardens this time of the year, ours has begun to produce beautiful summer squash. My husband only grows two kinds and they are the two you see most commonly in the supermarket – zucchini & yellow crookneck squash. There is more to summer squash, though, and that is the subject of this Cooking Tip. I will discuss a few of the varieties although the list is not exhaustive.

I am pretty sure you won’t be able to find all of the following varieties in your supermarket. At my local markets, I can buy zucchini, yellow crookneck squash, chayote and tatume. You may find a larger selection at a farmer’s market and you can certainly grow most of these.

Chayote

With a somewhat wrinkled shape and a light green color, this variety is slightly sweet with an apple- or cucumber-like flavor. It may be put into a salad, marinated, pickled, grilled, sauteed or used in soups.

Cousa

This variety of summer squash is shorter and squattier than zucchini. It is lighter in color and may be striated. It has very thin skin and is a bit sweeter than zucchini. Because of the shape, they are great for making stuffed squash boats.

Pattypan

This squash comes in a variety of shades from white to yellow to green as well as different sizes. They are also known as “scallop squash” due to the scalloped edges. The smaller ones take very well to the grill but are also good when roasted or sauteed.

Round zucchini

Also known as Eight Ball zucchini. they taste just like regular zucchini but are shaped more like a grapefruit. They are great for making stuffed squash just as you would stuffed peppers. Another fun use is to spoon out the insides and use as a bowl in which you serve soup.

Tatume/Tatuma

A Mexican heirloom squash also known as calabacita or Mexican grey squash. Some look like a lighter green zucchini and others are more round in shape. No matter the shape, this variety is sweeter and more flavorful than zucchini. Use just as a regular zucchini.

Yellow Crookneck

This is what most of us call yellow squash and can be either straightneck or crookneck. They are bright yellow and the skin can be either smooth or bumpy. They have the best texture if under 6 inches in length. Flavor is mild and similar to zucchini. A popular use is in a summer squash gratin, especially when mixed with green squashes.

Zephyr

This squash is two toned, yellow on top and pale green on bottom. It is a hybrid between yellow crookneck, delicata and yellow acorn squash. They are perfect for slicing into rounds or making into zucchini noodles. They have a somewhat nutty flavor.

Zucchini

This is the squash most people think of when you say summer squash. They are thin skinned with firm flesh. The smaller ones may be eaten raw but may also be grilled, sautéed or grated into zucchini bread.

As you pick out your summer squash, look for ones that are firm, vibrant in color and heavy for their size. Avoid wrinkled skin or soft spots. Pick smaller squash (aim for under 8 ounces) as they will be more tender, less watery and more flavorful.

When you get the summer squash home, store in the crisper drawer of your refrigerator for up to about a week or two. Some experts say they will keep longer if put in a plastic bag with one corner open to promote air circulation.

If sliced and blanched, they can be frozen and kept that way for up to a year. It can also be grated and frozen to use later in zucchini bread or muffins. Note, though, as it thaws, it will accumulate liquid, which will need to be drained.

My favorite way to prepare summer squash is to toss them in oil and Italian seasoning, sear in a grill pan or a cast iron skillet and then serve with a grating of Parmesan cheese. What is your favorite way?

Cooking Tips · Ingredients

Fresh Lemon Substitutes

In a prior Cooking Tip, I wrote about Lemons, different varieties and their uses. If you do not have the fresh fruit available, are there any suitable substitutes? That is the subject of this Cooking Tip.

If your recipe calls for lemon zest, Better Homes & Gardens suggests trying the following although they do caution that you will not get the same flavor as you would with fresh zest.

For 1 teaspoon of freshly grated lemon zest, try one of the following.

  • ½ tsp lemon extract
  • 2 Tbsp bottled lemon juice
  • 1 tsp lime zest or other citrus zest

When it comes to using bottled lemon juice rather than fresh, there aren’t too many side-by-side taste comparisons.

Cook’s Illustrated tried making both lemon curd and lemonade with packaged products. Although none were ideal, they found that ReaLemon lemon juice from concentrate and True Lemon crystallized lemon juice both were acceptable.

A news organization did a taste test among five of their staff where they used fresh lemon juice or one of the substitutes in seltzer water. Only two of the five correctly identified the cup with fresh squeezed juice. However, the fresh juice was preferred for flavor overall.

The other consideration is the ingredient list. For fresh lemons, there is only one ingredient – fresh lemon juice. I looked at the ingredient list for different brands of lemon juice products at my local market. This is what I found and it should help guide you if wish to buy one of these products.

Kroger —lemon juice concentrate (water, lemon juice concentrate), sodium metabisulfite (preservative), lemon oil, sodium benzoate (preservative)

Italia —lemon juice, lemon oil, potassium metabisulfite as a preservative

Santa Cruz — organic lemon juice

Lakewood — organic lemon juice

Minute Maid frozen lemon juice – 100% lemon juice from concentrate

Tantillo — lemon juice (99.94%), essential lemon oil (0.12%), potassium metabisulfite (0.06%) (as a preservative)

ReaLemon —lemon juice from concentrated (water, concentrated lemon juice) and less than 2% of sodium benzoate, sodium metabisulfite and sodium sulfite (preservatives), lemon oil

I try to always have fresh lemons available. If kept wrapped in plastic in the produce drawer in the refrigerator, they will last quite a while. Alternatively, zest and juice the lemon and store them separately in the freezer. I am not a fan of the packaged products for dishes in which lemon is a predominant flavor although they can work in a pinch when you only need a small amount.

What about you? Have you ever done a taste test? Which do you prefer?

Cooking Tips · Ingredients · Techniques

Foraging for Food

During our time in living in Albuquerque my husband and I visited Silver City, New Mexico. While there, we dined at a restaurant called The Curious Kumquat. It was known as a “foraging forward” restaurant. It was an excellent place to dine that featured many dishes composed of ingredients that were obtained by foraging. The chef, Rob Connoley, has also written a cookbook, Acorns and Cattails, in which the recipes feature “ingredients that any home cook can forage, grow, or hunt.” Have you ever foraged for your food? That is the subject of this Cooking Tip.

Have you ever taken a hike and eaten some of the wild-grown berries? My husband has been known to screech to a stop when he sees blooming elderflower along a country road. He picks it and then makes delicious elderflower cordial. That is foraging. Of course, it is much more than that and one needs to be very careful about what one eats in the wild. There are edible and poisonous plants that look very similar. And, we all have been taught about being careful of mushrooms growing in the wild.

Here are some rules that I have gathered from foraging experts. These presume that you are foraging only where it is legal to do so.

  • Seek the help of an experienced forager. Look for foraging clubs or seminars that might be in your area.
  • Familiarize yourself with what grows in your area – herbs, trees, weed, etc. Learn to positively identify them.
  • Learn to identify poisonous plants.
  • Use good foraging guides and cross reference between them. As I mentioned, there are look-alike plants that you do not want to confuse.
  • Do not eat anything that you cannot positively identify as safe.
  • One expert’s mantra is “Assume Nothing, Test Everything”. He warns that you should not eat any wild plant unless you are 150% (yes, that is correct) certain of its identification. Even then, he recommends testing it to ensure you do not have an allergy or sensitivity to it.
  • Begin with easily identified foods such as dandelions, nettles, strawberries and blackberries.
  • Only pick as much as you need and never take all the plants of any one kind in an area.
  • Do not pick in areas that are subject to pollution such as roadsides or near commercial farms.
  • Harvest at peak time for the particular plant. This is when the flavor and aroma will be best. Good guides will be your helper in this regard.
  • Harvest early in the morning. (This is also good advice for cutting the herbs growing in your own garden.) This is when the essential oils are highest.
  • Make sure you properly cook what you forage and use only those parts of the plants that are edible. For example, whereas ripe, cooked elderberries are edible, the bark, stems are roots are considered poisonous.
  • Consider cultivating wild edible plants in your own garden

This map will tell you what might be available where you live. Just as with all produce, there are seasons for wild edible plants. Here is one website that lists what is available at certain months although not all of these items will be available everywhere.

Do you forage? Let me know.

Cooking Tips · Ingredients

Agave Nectar – Should you be using it?

A few years ago, Agave nectar was all the rage and touted as the sweetener to use. I have written about sweeteners in cooking/baking in prior Cooking Tips. Here is one on Liquid Sugars, of which agave is just one type. Here is another one – Sugars – more than just sweetness. In this current Cooking Tip, I will focus only on agave.

Agave nectar comes from the agave plant, also known as the “century plant”. It is used for its supposed healing properties and is the plant from which tequila is made. Agave nectar is a golden-colored liquid sweetener that comes from this same plant. There are different kinds.

  • Light agave nectar – This has undergone multiple processing steps including heating and filtering. This gives it a more neutral taste but it also leads to a loss of some of its nutrients.
  • Raw agave nectar – This is an unprocessed nectar. It is darker in color with a more distinctive taste. No nutrients are lost since it is not processed.
  • Agave sweet powder – With this product, all the liquid is removed, turning it into a granular form, which is then crushed into a powder.

Agave has been pushed by some by saying it is a more natural and healthier sweetener. It is touted as having a low glycemic index (GI) and thus, less impact on your blood sugar levels. However, the story doesn’t end there. The reason it is said to be low on the GI scale is that it is 85% fructose. Fructose will not raise short term blood sugar levels as rapidly as the glucose found in table sugar (table sugar, aka sucrose, is made up of 50/50 glucose and fructose). However, there are those who say because fructose is only processed by the liver, it can lead to other health concerns such as increased triglyceride levels, increased insulin resistance and others. So, as with so many wondrous “health finds”, there are two sides to the story.

Another benefit is said to be that since it is 1½ times sweeter than other sweeteners, you can use less. Another nice thing is that it doesn’t crystallize like honey.

If you wish to use it in your kitchen, there are some recommendations. It can easily be added to beverages, vinaigrettes, sauces and as a topping for things such as oatmeal. The biggest problem comes with baking.

If you have a recipe that was designed using agave, great. However, if you are trying to swap out other sweeteners in favor of agave, there are factors that you need to consider.

  • As mentioned above, it is sweeter. You will, therefore, need to reduce the amount you use by ½ to ⅓.
  • It is a liquid as opposed to granulated, brown or other sugars. This will need to be compensated for by decreasing other liquids.
  • Just as with honey, it can lead to excessive browning of items in the oven. Reduce the oven temp by 25° to prevent this.
  • Baked goods made with agave can be sticky and so the use of parchment is strongly advised.
  • It must first be combined with the liquids or fats in your recipe to prevent a crusty or oily layer on top.
  • If baking time is more than 40 minutes, reduce the cooking time by 5-10 minutes.
  • Sugar does more than just add sweetness. See my Sugar Cooking Tip for a further discussion on this. Be aware of this before simply swapping it out.

I found three tests of head-on comparisons of the same baked goods made with agave and sugar or honey.

  • Cook’s Country tested cornbread and honey-wheat rolls. They found light agave to work just as well as honey, but it lacked true honey flavor. The amber agave led to darker baked goods with an earthier flavor.
  • Cook’s Illustrated tested it in cookies and cakes as a substitute for sugar and found, even with recommended adjustments, the results were subpar.
  • Deseret substituted agave for sugar in brownies. Although the agave brownies were moist, they were more cake-like and lacked the caramelized sugary crust that the brownies made with sugar had.

I looked at multiple sources to come up with the following recommendations for you if you do want to try agave in place of another sweetener.

  • Honey – replace with equal amounts.
  • Maple Syrup – replace with equal amounts.
  • Brown Rice Syrup – use ½ to ⅓ as much agave and increase other liquids in the recipe by up to ½ cup.
  • Corn Syrup – use ½ as much agave, and increase other liquids in the recipe by up to ⅓ cup.
  • White Sugar – recommendations vary just a bit
    • Some sources recommend that for every 1 cup sugar called for, use ⅔ cup agave, and reduce the liquid in the recipe by ¼ to ⅓ cup.
    • Another source recommends the “75% rule”, which means using only ¾ of the amount of agave by volume as granulated sugar. For every cup of sugar that the recipe calls for, reduce the liquid by 2-4 tablespoons.
  • Brown Sugar – again, there are some differences in recommendations
    • One guide is that for every 1 cup sugar called for, use ⅔ cup agave and reduce the liquid in the recipe by 2 tablespoons.
    • Another says to use ¾ cup of agave nectar for each cup of brown sugar the recipe calls for and reduce the liquid by no more than a tablespoon.

When it comes to reducing the liquids, you have choices. Some liquid ingredients (milk, eggs) are made up of water while others are liquid fats. Although both categories are liquid, water will evaporate as it heats whereas the fats will remain. Therefore, you are probably better off reducing the former rather than the latter.

Remember that it is not an all or none situation. You do not have to replace all the sweetener in a recipe with agave. In fact, it may be better to only swap out a portion.

One source recommends the following

  • Cakes & brownies – replace only ½ of the sugars with agave
  • Cookies –replace ⅓ of the sugars with agave
  • Bars containing fruit – replace ⅔of the sugars with agave or 100% if it is fresh fruit

If you use agave or have been thinking about it, I hope this Tip will give you some information to help you be successful with it!

Cooking Tips · Ingredients

The Many Colors of Bell Peppers

I have written a prior Cooking Tip on chili peppers in which I discussed many different varieties. In this Tip, I wanted to talk about the pepper we use most commonly in our kitchens – the bell pepper.

Bell peppers are great for adding not only flavor but also color and texture to your dishes. The one thing they do not add, though, is heat as they rate zero on the Scoville heat chart. You will see them offered in different colors for varying prices. Just what is the difference?

The most common colors you will see are green, red, yellow and orange although rarely you might see brown, white, purple and even striped. The difference in color has to do with the stage of ripeness along with the varietal of the pepper plant.

All bell peppers start out green and change color as they mature. Depending on its varietal, when it is ripe it may become yellow, orange, red or one of the more unusual colors. Some varieties even remain green when ripe.

The taste of a bell pepper also changes as it ripens and changes color. Many people think they do not like bell peppers because they have only tasted the unripe green one. Those are more grassy and even bitter as compared to riper peppers. As they ripen, they become sweeter and lose the bitterness. It is almost like a different fruit. (Yes, even though we think of them as vegetables, they are botanically classified as a fruit.)

When using bell peppers, you can easily substitute one color for another. The only caution I would add is that using an unripe green pepper in place of the riper colored ones will alter the taste. However, swapping out red for yellow and so forth will not change the taste. It will, though, change the appearance.

The nutritional value also changes with the ripening process. Although all bell peppers are a very healthy fruit, as they ripen, they do develop higher amounts of some nutrients such as vitamin A & C, lycopene, and lutein.

When choosing bell peppers, pick ones that have a firm skin without wrinkles. Look at the stem; it should be fresh and green. They should feel heavy for their size. Avoid peppers with any kind of blemishes.

Green peppers will have a longer shelf life because they are less ripe. They will also be less expensive since the colored ones have had longer time on the vine, which necessitates more care. Do not let that discourage you from buying the colored ones, though, especially if you think you do not like bell peppers because you have only tasted green ones. Store them whole and unwashed in your refrigerator produce bin.

I love the ripe ones raw on a salad but they have many other uses such as stuffed peppers, sausage and peppers, made into a romesco sauce and many others. Do you have a favorite use? Let me know.

Cooking Tips · Ingredients · Techniques

Tea – for more than just drinking!

For those of you who know me personally, you know that besides great food, I love a good cup of tea. I do not just love to drink tea, though. I love to teach about tea and do that frequently in our local tea shop/café, English Tealeaves. These two topics of food and tea come together in this Cooking Tip as I discuss Cooking with Tea.

Let me start with a little Tea 101. “Real” tea is made from the leaves of the Camellia Sinensis plant. All tea (white, green, oolong, black, pu-erh) comes from this plant. The differences in tea result from the particular variety of that plant along with how the leaves are processed. This “real” tea is contrasted with what we call Herbal Tea. Herbal “teas” do not contain any tea leaves from the Camellia Sinensis plant. Rather they are made from totally separate plants such as chamomile, peppermint and rooibos. The reason they are called “teas” is that they are brewed in the same manner as real tea. The better terms for these beverages are Herbal Tisanes or Fruit Infusions. Both real tea and tisanes/infusions are wonderful beverages that can be used in many culinary applications.

There are a number of different ways you can use tea in your kitchen. At times, you might use a combination of these methods.

Use the actual tea leaves.

Although we do not normally eat our tea leaves, they are edible. The leaves add both flavor and texture to your dish. Most of the time, you will chop or grind the tea before adding to the other ingredients. In general, 1 Tbsp of loose-leaf tea yields 2 tsp of ground tea, or even less if ground to a fine powder. Some recipes call for first steeping the tea and then chopping the wet leaves.

Examples of applications

  • Peppermint brownies – grind the sugar from the recipe with dried peppermint tea leaves before continuing with the recipe.
  • Chai snickerdoodles – grind masala chai tea and add to your snickerdoodle recipe.
  • Toast appetizers – top bread with a spread made with mayonnaise, cheese and finely ground tea leaves.
  • Homemade pasta – give your homemade pasta a green color and a subtle flavor by mixing matcha into the dough.

Use the infused liquid

Steep the tea in water or another liquid and use that liquid in your recipe. You probably will want to make your tea a bit more concentrated than you would for drinking purposes. If steeping in water, use more tea leaves rather than increasing the steeping time. The latter can easily lead to bitterness due to the release of tannins from the tea leaves.

If you steep in liquids with a higher fat content (whole milk, cream, butter, oil), you can steep the tea for a longer time as the dairy buffers the tannin development. You can steep up to 90 minutes, depending on the taste you wish to achieve.

The concern of tannin development only applies to steeping real tea. Herbal/fruit teas do not get bitter with prolonged steeping. In fact, they require a longer steeping time even for drinking as the flavor infuses a bit more slowly into the water.

A couple of tips are that the lower the moisture content and the higher the viscosity of the liquid, the longer the tea will need to infuse.

Another idea for using tea-infused liquid is to actually cook ingredients in that liquid.

Examples of applications

  • Chicken salad – poach chicken in water to which green tea leaves have been added. The wet leaves are then chopped and stirred into the chicken salad along with the rest of the ingredients.
  • Roasted fruit – toss fresh peaches in brewed green tea and then, roast in the oven. Top the roasted peaches with a vinaigrette also made with tea.
  • Pizza dough – have your friends asking “what is that special flavor” when you use steeped tea to make your pizza dough.
  • Shrimp – marinate shrimp in brewed tea and then make a vinaigrette with more brewed tea.
  • Tea rice – cook rice in brewed tea for a special side dish.
  • Simple syrups – add tea leaves of your choice of flavor to your simple syrup, which can then be used to pour over fresh fruit or added to a cocktail.
  • Tarte Tatin – infuse vanilla black tea into the butter and finish as any Tarte Tatin.
  • Chocolate truffles – infuse your cream/water with your favorite tea to make a tea-flavored ganache. Make into truffles or use in another application.
  • Hot chocolate – infuse tea into the milk and then finish as you would for homemade hot chocolate.
  • Pastry cream – infuse tea leaves into dairy to make a delicious pastry cream, which can then be used to make a fruit tart or a number of other desserts.
  • White chocolate mousse – infuse jasmine tea into cream. Use the hot cream to melt white chocolate and finish into a wonderful light mousse with a delicate jasmine flavor.

Vinegars

You can easily make tea-infused vinegars by bringing the vinegar to a boil, taking it off the heat and then adding the tea leaves to infuse. After cooling to room temperature, strain and use as desired. These infused vinegars are wonderful for making a unique vinaigrette.

Cold steeping

For some liquids that should not be heated such as fruit juices or alcohol, you may steep at room temperature or even in a chilled environment.

Spice Rubs

Add finely ground tea leaves to your favorite spice mixture and add use it as a rub on meat or add to a braising liquid, soup or chutney.

Smoking

Add tea leaves to a stove-top smoker and then smoke the food of your choice. The tea leaves can be the main medium for producing the smoke or used in combination with wood and cooked rice (to buffer the heat). Other flavors components of your choice such as spices may also be added.

There are so many types of teas and tisanes with a myriad of natural and added flavors. Stop thinking of tea just as a beverage but also as an ingredient. You will be amazed at what you can do with it. Do you cook with tea? Have you made something special with tea? Let me know.

Cooking Tips · Ingredients

Mayo — for more than sandwiches!

In last week’s Cooking Tip, we learned just what mayonnaise is, how it is made as well as some taste testing results of commercial products. Mayonnaise can be used for so much more than just spreading on sandwiches and that is the subject of this Cooking Tip.

The first thing is that you can do to enliven your mayonnaise is by adding your own flavors. In my local supermarket, the following varieties can be found. Do you have any fun flavors in your store? Let me know.

  • Chipotle
  • Chipotle Lime
  • Miso
  • Black Truffle
  • Hint of Lime
  • Garlic
  • Sriracha
  • Wasabi
  • Harissa

Mayonnaise also forms the base for many sauces such as aioli, remoulade and others.

Aioli

This is one of the most famous mayo-based sauces. It originated in Provence and was made by pounding garlic with a mortar and pestle and emulsifying with oil. There were no eggs or acid added. Today, though, it is a mayonnaise flavored with garlic. As opposed to mayonnaise, which normally takes a neutral oil, aioli classically uses a fruity extra virgin olive oil.

Aioli is often used as a sauce or dip with seafood in Mediterranean cuisines. It is also used as a burger spread, on pasta, as a topping for crab cakes or a dip for grilled veggies.

Spanish-style aioli is called allioli and is often served with patata bravas (fried potatoes) or seafood.

Just as with mayonnaise, other flavors made be added to create versions such as sriracha, cilantro jalapeno, roasted red pepper, citrus, sundried tomato, avocado, caper peppercorn, honey basil, orange chive, sesame ginger or smoked paprika.

Remoulade

Remoulade is a mayonnaise-based sauce also with French origins. Although it originated in France, regional variations arose as it spread across the world.

There are four basic types of remoulade.

  1. French – this is the classic. The base of mayonnaise is enlivened by mixing in herbs (parsley, chives, chervil, tarragon), capers, diced cornichons, vinegar or lemon juice. It may also contain anchovies and/or horseradish.
  2. Louisiana – this type is spicier because it incorporates Creole and Cajun flavors such as stone-ground or Creole mustard along with paprika, green onions, celery and parsley. Some also add lemon juice, hot sauce/cayenne and hard boiled eggs.
  3. Danish – An interesting variety that contains minced cauliflower, cabbage and cucumber pickles. It often contains turmeric, which is what gives it a yellow hue. Other possible ingredients are sour cream, red onion and carrots.
  4. Comeback sauce – This sauce originates from central Mississippi. It is similar to Louisiana-style remoulade with a base of mayonnaise but typically uses a milder ketchup-like chili sauce rather than hot sauce.

Remoulade is used as a condiment or dipping sauce. It is usually paired with seafood, cold meats and fried foods such as fried pickles, fried green tomatoes, fried fish, crab cakes, a po’boy sandwich or French fries.

Tartar Sauce

Although tartar sauce is often described as a type of remoulade that uses mustard rather than anchovy, it actually has fewer ingredients. The main ingredients are mayonnaise, capers and sweet pickles.

Rouille

This is a French sauce that traditionally does not contain any mayonnaise. I am including it here, though, as modern versions do use mayonnaise. It is ubiquitous in Provence as an accompaniment to the famous fish soup, bouillabaisse. The name means “rust” in French, because of the reddish color of the sauce.

There are two methods to create a rouille.

  1. The traditional method uses olive oil, chili peppers and garlic. Breadcrumbs are added for texture and thickening. A wide range of spices may be added including, but not limited to, saffron, orange peel and basil.

  2. The modern method uses mayonnaise instead of olive oil along with chili peppers or red pimentos and maybe garlic. Because mayonnaise is already thick, breadcrumbs are not always used. As with the traditional rouille, a wide range of spices may be added.  

It is the ideal sauce to accompany a dish of fish, shellfish or fish-based soups.

Salad Dressings

There are also many salad dressings based on mayonnaise. These include:

  • Thousand Island
  • Russian dressing
  • Ranch dressing
  • Lemon poppy seed dressing
  • Coleslaw dressing
  • Blue cheese dressing
  • Buttermilk ranch dressing

How do you use mayonnaise? Do you have a special sauce that you make with mayonnaise? Let me know.

Cooking Tips · Ingredients

Mayonnaise — just what is it?

We all know what mayonnaise is and I would suspect most of us have a jar in our refrigerator. However, do you really know what it is, what it is made of and all the ways you can use it? That is the subject of this and the next Cooking Tip.

Mayonnaise is a thick condiment made from oil, eggs, an acid and perhaps seasonings. It is called an emulsification because oil and the water found in the eggs do not naturally mix together. You must break up the oil into tiny droplets and combine it in a way that they are suspended in the water.

What products can be called mayonnaise is regulated by the FDA. It must contain at least 65% oil by weight, vinegar and egg or egg yolks. Spices/seasonings may be added except for turmeric, saffron or anything that would give a color simulating that imparted by egg yolk.

As noted above, basic mayonnaise has three ingredients: oil, eggs (or just yolks), and an acid (usually vinegar or lemon juice). Seasonings such as salt and pepper are usually added. You can then personalize it with all sorts of flavorings such as chipotle, herbs, citrus and many others.

The basic procedure is as follows:

  1. Put eggs and/or egg yolks along with the acid and seasonings in a bowl or the container of a blender or food processor and combine. Some recipes will also add mustard not only as a flavoring agent but also because it assists in emulsification.
  2. Slowly add oil while blending – by a hand whisk, blender or food processor – until thick and creamy.
  3. Adjust seasonings to taste. Some recipes recommend adding the lemon juice at this point rather than at the beginning.
  4. If the mayonnaise breaks, there are a few recommended methods of bringing it back together.
    1. Add a bit of water and whisk until emulsified.
    2. Strain the mixture and use the liquid as the oil. Then, start over with a fresh egg/yolk. Some chefs do not think straining is necessary.
    3. Combine a teaspoon of mustard with a tablespoon of the broken mayonnaise (or one egg yolk plus a little lemon juice), beat until creamy, and then add the rest of the broken mayonnaise, one teaspoon at a time. If mayonnaise becomes oily on the surface, whisk in a tablespoon of water.
  5. Ratio – You will see variations from different sources but a basic ratio is 1 egg/yolk to 1 cup oil.
  6. Type of oil – It is best to use a neutral, refined oil such as canola, grapeseed, sunflower, safflower, a light olive oil or a blended oil (mix of olive and veg oils). EVOO has too strong of a flavor.

J. Kenji López-Alt of Serious Eats highly recommends using a hand/immersion blender as an “almost” fail-proof method. To use one, add all the ingredients, including the oil, directly into the blending cup. At this point, the oil will float on top but when you insert the head of the blender, the blades will be at the level of the other ingredients. As you start to blend, a vortex is created, which pulls the oil down into the moving blades. So, instead of you trickling in the oil, that vortex does it for you and you easily end up with creamy, perfectly emulsified mayonnaise. Here is a link to watch this method in action.

He does add, though, that the jar must be the right size – only slightly larger than the head of the immersion blender as the egg/acid mixture must be in contact with the blades of the blender before you switch it on. Also, the head of the blender must be placed firmly against the bottom of the jar until it starts to come together and then you will move it slowly up and down to ensure thorough mixing.

There are those that feel whisking by hand gives you a much superior result in terms of taste claiming it is brighter, less bitter with more pronounced lemon notes. It does, though, give a thinner, more sauce-like texture rather than the thicker, more spreadable texture that we associate with mayonnaise.

One concern that many people have about homemade mayonnaise is that the eggs are not cooked and thus bring a risk of salmonella. Although the risk is small (but not zero) for most of us, it is of more concern for certain populations – children, the elderly, the chronically ill, pregnant women and the immune-compromised.

If you are someone who is not in one of these groups but yet are squeamish about the thought of raw eggs, you could try to find pasteurized eggs. Pasteurization is a process that kills potential pathogens. The main company (perhaps the only company) that sells these is Davidson’s. One of the stores I frequent used to carry them but I have not seen them anywhere near me recently. Can you find them? Let me know.

People who have tested these in-shell pasteurized eggs have found them fine for some applications, such as mayonnaise, but were not happy with them in other applications.

One other option is to try to pasteurize them yourselves. The FDA does not recommend this as it is very difficult to just achieve pasteurization without cooking the eggs and with home methods, it is not 100% effective. There are a number of recommended methods such as sous vide and stove top. If you are just using egg yolks, you could try a microwave method recommended by Cooks Illustrated. According to them, “Heating the yolks to 160 degrees (this takes just a minute or two in the microwave) kills common pathogens, and abundant lemon juice keeps the mayo food-safe for up to one month.”

Although most culinary experts will tell you that there is no commercial version of mayonnaise that beats the taste and texture of home-made, they also realize that it is not practical to always have the latter on hand. It does take a bit of skill to make and has a shelf-life of only a few days. To help you pick out the best store-bought version, there have been some taste tests done. I will just mention four from oldest to newest.

Fine Cooking magazine rated mayos in 2006 and crowned Kraft Real Mayonnaise as their favorite. After Kraft, they liked:

Cooks Illustrated did a testing in 2012 and they found that the best tasting brands had the fewest ingredients and the simplest flavors. Their winner was Blue Plate Real Mayonnaise. Their runners-up were

Epicurious tasted 16 brands in 2018. Their winner was Blue Plate Real Mayonnaise with Hellman’s in 2nd place. The remainder of the brands were listed in alphabetical order but not in any sort of ranking.

Serious Eats’ taste test was in 2019 and they also found that Kraft Real Mayonnaise to be excellent. It tied in the tasting with Duke’s Real Mayonnaise. Others ranked in order from best to worst were:

Whether you make your own mayonnaise (I hope you will try it at least once) or buy a good commercial one, there is more to do with it other than spreading it on a sandwich. Stay tuned as we will delve into that subject into the next Cooking Tip!