Equipment · Ingredients

Christmas Food Around the Globe

Image by HANSUAN FABREGAS from Pixabay

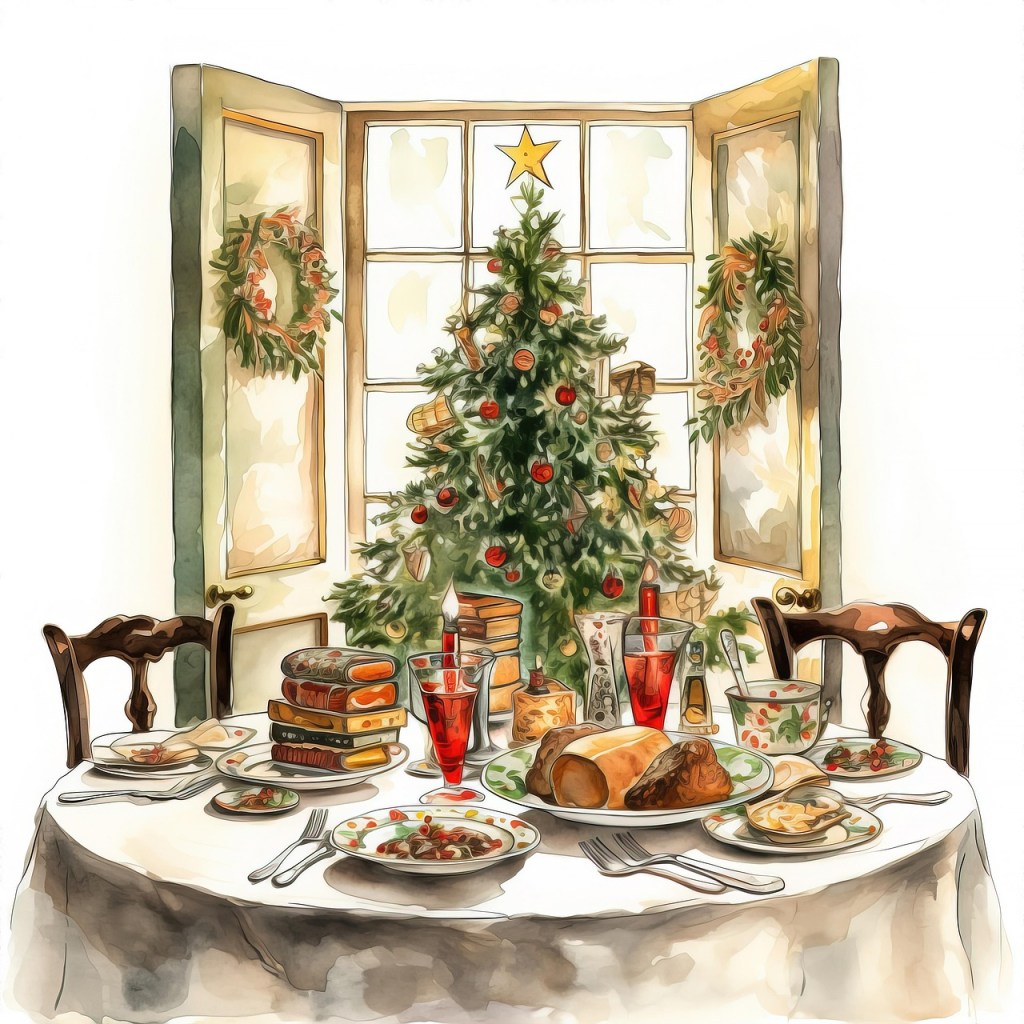
All of you could probably describe the typical American Christmas dinner, although many of us may put our own twist on it. What about other countries? How do they celebrate Christmas at the dinner table? This Cooking Tip will explore the traditions of a few other countries.

England

  • Main dishes & accompaniments
    • The main dish that sits on most English dinner tables is roast turkey, although you might also see roast goose or prime rib.
    • The number one accompaniment to the meat is roast potatoes, often cooked in goose fat.
    • Other sides are pigs in blankets, which are sausages wrapped in streaky bacon (not in pastry as in the US), Brussels sprouts, braised red cabbage, cranberry sauce, parsnip puree and Yorkshire pudding. The latter is similar to popovers.
  • Desserts
    • Traditional English desserts are heavy with dried fruits and spices. This might be in the form of mince pies, Christmas pudding or Christmas cake.
    • Christmas pudding is also called figgy pudding or plum pudding. It is cooked by steaming and contains dried fruit, spices and alcohol. Although not as prominent today, there is something called Stir-up Sunday. That tradition involves making the Christmas pudding on the last Sunday before Advent. All the family would take turns to stir clockwise, east to west, to mark the journey of the three wise men while making a wish for the year ahead.
    • Christmas cake is a spiced fruitcake that is baked in the oven and is less dense than Christmas pudding.
    • Mince pies initially started savory, using a “mincemeat” filling. Today, they are made with a mixture of dried fruit, spices and sugar.
    • A Yule log is a chocolate-covered cake shaped like a log that spread from France to the UK.
    • An English trifle is a dessert made of layers of cake, custard, whipped cream and fruit or jam.
    • Sticky Toffee Pudding is a moist date-based sponge cake served warm with a toffee sauce.
Image by jorono from Pixabay

France

  • Christmas dishes & traditions will differ by region of France.
  • Le Réveillon de Noël – This is Christmas Eve dinner and is the most important meal during the Christmas season. Traditionally, it was not served until after midnight mass. Today, most partake of this meal much earlier.
  • Appetizers/Starters – any of the following might be served at the beginning of the meal.
    • Escargot (snails)
    • Caviar
    • Shrimp
    • Oysters
    • Scallops such as Coquilles Saint Jacques
    • Foie gras, especially with a slice of spiced bread (similar to gingerbread) and fig jam.
    • Gourgères (cheese puffs)
  • Main course and accompanying sides
    • The meat course might be turkey, capon, duck or guinea fowl and is often stuffed with foie gras or a chestnut or other type of stuffing. Less traditional would be Beef Wellington or a fish course.
    • Potatoes are common and may be in the form of pureed potatoes, Gratin Dauphinoise or Duchesse potatoes.
    • Risottos
    • Gnocchi
    • Haricots Verts Amandine – green beans with almonds
  • Salad & cheese course – as is typical with French meals, the main course is followed by a salad course and a cheese course.
  • Dessert
    • The most classic dessert is Bûche de Noël, also known as a yule log and is a chocolate sponge cake put together and decorated like a log in the forest in winter.
    • Other little sweet bites might be chocolate truffles, cookies, nougat or candied fruit.
    • In Provence, one might see Les Treize Desserts (Thirteen Desserts), which is a symbolic arrangement of sweets, nuts, nougats, and fruits representing Christ and his apostles at the Last Supper.
Image by jorono from Pixabay

Italy

  • Just as in France, the dishes served at Christmastime are regional in nature.
  • The Christmas Eve meal is known as Cenone della Vigilia. It is a very important dinner centered around fish and vegetables.
  • Many Americans think of the Feast of the Seven Fishes and assume it is what is served in Italy on Christmas Eve. It is, however, an Italian American tradition. It does not exist in Italy, although their Christmas Eve meal is also seafood-focused.
  • Starters
    • Seafood salad
    • Shrimp cocktail
    • Stewed eel
    • Canapés such as smoked salmon, caviar, or tuna mousse
  • First course
    • Pasta dishes such as spaghetti with clams, salmon penne or fish ravioli
    • Rice dishes such as scampi risotto are also typical.
  • Main course
    • Baked sea bass
    • Grilled prawns
    • Fried salt cod
  • Christmas Day lunch is more meat-based and can last for hours. Here are examples of dishes that might be served at this hearty lunch.
  • Appetizers
    • Cured meats and cheeses
    • Insalta Russa or Russian salad – This is a mixture of diced vegetables and mayonnaise.
    • Savory pies filled with spinach, ricotta or cured meats.
    • Marinated vegetables
  • First course
    • Northern Italy – tortellini in brodo
    • Piedmont – agnolotti
    • Central Italy – lasagna, cannelloni
    • Southern Italy – pasta al forno, fusilli al ragu
  • Main course
    • Northern Italy – roast beef, veal, polenta, roast potatoes
    • Central Italy – roast lamb, rabbit
    • Southern Italy – roast lamb, honey-glazed duck
  • Desserts
    • Panettone – This is the tall, dome-shaped sweet bread we see in bakeries that is filled with candied fruit and raisins.
    • PandoroThis is a soft, buttery cake that is shaped like an eight-pointed star and dusted with icing sugar to resemble snow. It is often served with a drizzle of chocolate or cream.
    • Cartellate is from Puglia and is a sweet dough that is rolled out, coiled and fried.
    • In Sicily, you will find struffoli, small dough balls that are fried and coated in honey & colorful sprinkles.
    • Tuscany showcases panforte, a chewy, dense fruitcake from Siena that is flavored with honey, cloves, coriander, cinnamon and white pepper. Siena also boasts a dense and chewy almond cookie called ricciarelli.
    • In addition, one might find tiramisu and the nougat candy called torrone.
Image by jorono from Pixabay

Mexico

  • Pork is the meat of choice for many Mexicans for a Christmas meal. It is often coated with a spice mixture.
  • Carne Asada is also common.
  • Tamales are very traditional at Christmas.
  • Soups and stews such as pozole, codfish or beef stew, and menudo (tripe and hominy) are often served at this time.
  • A dish called Romeritos is made from the romerito plant and paired with baby potatoes, nopales, and dried shrimp. It is cooked in a rich mole sauce.
  • Ensalada de Noche Buena is a fruity Christmas Eve salad.
  • For dessert, one might find the following.
    • Bunuelos – large rounds of fried dough covered in cinnamon sugar.
    • Marranitos – pig-shaped cookies
    • Churros
    • Rice pudding
    • Cake

You may be a person who only serves a traditional American Christmas meal. If you want to switch it up a bit, try introducing just one or two of these dishes from other countries. Or, if your family will allow it, why not serve a French, Italian or other nationality Christmas?

Whether you say Merry Christmas, Happy Christmas, Joyeux Noel, Buon Natale or Feliz Navidad, I hope it is a wonderful time with friends and family and great food!

Cooking Tips · Equipment

Honing Rods – Yes, you need one.

Image by Steve Raubenstine from Pixabay

What in the world is a honing rod? Is that something that belongs in the garage or the toolbox rather than the kitchen? This Cooking Tip will explain what these are, other names for them, and why you need one in your kitchen.

We all know that knives (preferably good ones) are essential in your kitchen. I have written a prior Tip on the kinds of knives and which ones you need in your kitchen. Having great knives is important, but you also need to take care of those knives. That is where a honing rod comes into the picture.

Keeping your knives sharp not only increases the enjoyment of using the knives but also increases the safety of using them. One of the easiest ways to have a knife accident is by trying to use a dull knife, having to use more and more force, and slipping and cutting yourself.

As you use your knives, the edges will start to roll, and they will feel dull. By realigning these edges, the knives will feel sharper. This is where a honing rod (also called a honing steel) comes into the picture. They work by realigning these edges. They help your knives stay sharp longer, so you don’t need to sharpen them as often. Although you will see chefs and manufacturers call these items “sharpening rods” or “sharpening steels,” they do not sharpen your knife. The latter involves removing steel from the blade, exposing new steel, followed by polishing and refining. Honing just realigns the edges.

I like how Travis from House of Knives explains the use of a honing rod. He states, “They are meant to keep your knife sharp, not make your knife sharp.”

These honing rods are long rods of steel attached to a handle. The surface can vary from smooth to one with ridges to one with a diamond coating. Let’s look at the pros and cons of each.

Types of Honing Rods

Steel Rods

Photo courtesy of Amazon
  • Most steel rods will have some sort of ridging on them, although how much will vary by brand. Some will even have different amounts of ridging on different sides. The ridges help users control the angle and speed of the knife when moving from top to bottom.
  • The rods can restore the edge of the knife without taking off much metal and damaging the knife.
  • They are relatively inexpensive.
  • They are easy to use.
  • Many do not recommend using these for Japanese knives as the Japanese steel is much harder and more brittle than the Western or German steel. They feel that a regular honing steel could do damage. Go with what the knife manufacturer recommends.

Ceramic Rods

Photo courtesy of Amazon
  • These look smooth, although there are different grit levels.
  • Ceramic is four times harder than the majority of knife steels, and therefore, can be used for almost any knife.
  • Ceramic rods can break if dropped.
  • They do an excellent job of restoring the edge as well as polishing the blade.
  • They do possess a small amount of sharpening ability, but since they only remove a minimal amount of metal, they can be used daily.

Diamond Coated Rods

  • Some are more finely textured, and others are coarser and rougher.
  • Users find they make a horrible, scraping noise while using them.
  • They do take off pieces of the metal blade, and therefore, can be considered a sharpening aid. However, they can damage your knife if you do not know what you are doing.
  • They are not meant for daily use.

Besides the type of material, there are other considerations when purchasing a honing rod.

  • Testers liked longer rods of 10-12 inches as it made it easier to keep the knife angle consistent while running the entire blade from top to bottom.
  • Testers like thicker rods as they felt they had more control in using them.
  • Handles also made a difference. Ones that flared out were difficult to use and get the correct angle.

One can look at recommendations, but as usual, different opinions reigned. Here are some similarities in recommended brands.

Steel

  • Bob Kramer Double Cut Sharpening Steel
  • Wusthof Classic Ikon Honing Steel
  • Zwilling Professional Oval Sharpening Steel
  • Shun Classic Combination Honing Steel

Ceramic

  • Idahone Fine Ceramic Sharpening Rod
  • Green Elephant Ceramic Sharpening Rod
  • Noble Home & Chef Ceramic Honing Rod

Once you have purchased your honing rod, how do you use it?

  • Place the honing rod vertically on your counter on a towel or something that will keep it from slipping.
  • Place the blade of the knife at a 15-20° angle on the rod. If you are like me and say, “What is a 20° angle?”, try this. Hold your knife against the upright rod at a 90° angle. Move it in halfway and you have a 45° angle. Halfway again would be a 22½° angle. Just a bit further would be 20°, and a bit more would be 15°.
  • Start with the heel of the knife at the top of the rod and draw lightly and smoothly down the rod. As it descends, you will be going from heel to tip.
  • Repeat on the opposite side.

Testing sharpness

It is good to test the sharpness of your knife before and after honing so you can see the difference. Here are some different ways to do this.

  • Thumb test – Put your thumb lightly on the edge and pull across the blade, never along the blade. If dull, it will feel smooth and round and slide without resistance. Once properly honed, it will feel sharp. Although this is a good test, you must be careful to avoid cutting yourself.
  • Paper test – Hold a piece of thin paper and slice through at a 45° angle. A sharp knife will easily and cleanly slice through the paper. Dull knives will catch and not make a clean slice.
  • Pen test – Hold your knife at a 45° angle and slide over the plastic of the pen. If it bites in, it is sharp. If it slides off, it is not.
  • Tomato test – This is probably the least reliable test for sharpness. Those who recommend it say that dull knives will squash and mash tomatoes rather than making a clean cut as with a sharp knife.

If you have a honing rod, I hope you are using it regularly to maintain your knives. If you do not have one, you should go out and purchase one. One last point, since honing is not sharpening, your knives will need to be sharpened at some point. There are many different at-home sharpening tools, or you can take it to a professional knife sharpener.

Cooking Tips · Equipment · Techniques

The Air Fryer Bandwagon – Should you jump onboard?

Image by Crafter Chef from Pixabay

Air Fryer enthusiasts are very passionate about these appliances, bordering on evangelistic. Those who do not have one can’t imagine trying to find counter space for one more piece of kitchen equipment. Which side of this divide are you on? Is this an appliance you should consider, or should you pass on it? That is the subject of this Cooking Tip.

Despite the name, the first thing to know about an air fryer is that it doesn’t fry food. An air fryer is similar to a convection oven. It has a fan that circulates hot air around the food.

Here is what users like about air-frying.

  • You can obtain a crispy exterior similar to deep-fat frying.
  • The interior of the food stays tender.
  • Food cooks quickly, much more quickly than in a conventional oven.
  • It minimizes how much oil you need to use. Most users recommend still using a small amount of oil. Depending on the food item, the amount of oil might vary from 1-2 teaspoons per serving of food up to a few tablespoons.
  • It can take the place of a toaster oven for small families.
  • It takes either no preheating or just a few minutes, saving time and power.
  • It does not heat the entire kitchen.
  • It is better than the microwave for reheating food to achieve crispy rather than rubbery results.

What’s not to like about them?

  • Although you can get close to deep-fat frying quality, it is not the same.
  • Many have a small capacity, although this does vary among models.
  • They take up counter space.

There are different styles of air fryers.

  • Drawer-style – They contain baskets that pull out from the front. Many users feel this style is the best. One caveat is that models with glass drawers may not be the best choice. They claim to be healthier as there are no plastic or nonstick coatings. Reviewers, though, found that the performance was mixed. They were also harder to use, as they were heavier, harder to lift, and the glass could get very hot.

  • Flip-top models – These have lids that lift up from the top to reveal the baskets inside. These lids are heavy, and there is a danger of them falling on your arm. Since the heating element is in that lid, this can be very dangerous. Many models were so tall that they would not fit underneath a counter when the lid was open.

  • Cube-shaped models – This style features doors that swing open in front and contains multiple racks inside, similar to an oven. Although these can work well, most feel the best results are obtained only when cooking very small amounts of food.

  • Air fryer toaster ovens – These appliances combine the functions and size of a toaster oven with the capability of air frying. These can do an excellent job, depending on the brand, but will be significantly more expensive. More on these below.

Air Fryer vs Air Fryer Toaster Oven

Regular air fryer

  • Better for smaller spaces.
  • They are less expensive than ovens.
  • Takes less time to heat.
  • They accommodate less food, which may or may not be appropriate for the size of your family.
  • Easier to clean than an oven.

Air Fryer Toaster Oven

  • Require more counter space.
  • They are more expensive.
  • They are more challenging to clean.
  • They are more versatile as they can work as both a toaster oven and an air fryer. If you want both functions, this one appliance can replace both of the others.
  • Can cook larger quantities of food than in a regular air fryer.
  • Do require preheating.

What to look for in a traditional air fryer

  • A wide cooking space – Air-fried foods cook best when cooked in a single layer. So, the width of the cooking surface matters more than the height. Some people like deep baskets because they can roast a chicken in them. (See caution on this below.) However, a wide, shallow tray allows you to spread out the food, getting more even cooking.
  • Nonstick interiors make for easier cleanup.
  • Simple controls
    • Digital controls are generally better.
    • Auto-pause timers – these automatically pause the oven timer when you open the door and automatically restart when it is started. Since the food needs to be flipped, turned or shaken, requiring the opening of the door, this feature is very helpful.
    • Automatic shut-off – A control that automatically turns off the oven at the end of the programmed cycle helps prevent overcooking, food burning, and saves energy.
  • Windows that allow you to view the interior are nice to have.

What to look for in air fryer toaster ovens

  • The air frying function should produce food that is nicely browned and evenly cooked, with a crispy exterior.
  • Since this appliance is designed to replace both a toaster oven and an air fryer, it should perform the non-air frying functions well, such as producing great toast and functioning effectively when roasting, baking, and broiling. For the latter, ensure that the top rack is not too low to ensure good broiling.
  • Easy-to-use controls, preferably digital.
  • It should have ample cooking space.
  • Large viewing windows are nice to have.
  • Auto-pause timers and auto shut off are helpful, just as with regular air fryers.
  • Smart technology may be helpful for some, but others found this only moderately convenient and not always reliable.
Courtesy of Breville

Reviews

Researching reviews of regular air fryers led to mixed recommendations. They all did, however agree on the best air fryer toaster oven. That is the Breville Smart Oven Air Fryer.

Here are a number of recommendations from reviews from different sites.

Courtesy of Instant Pot

America’s Test Kitchen

  • Top choice – The Instant Vortex Plus 6-quart Air Fryer
  • Upgrade choice – The Instant Vortex Plus 6-quart Air Fryer with ClearCook and OdorErase

The Spruce Eats ranked products in different categories.

  • Best Overall – Cosori Pro LE Air Fryer
  • Best Runner-up – Ninja 4-quart air fryer
  • Best large capacity – Instant Pot Vortex Plus 10-quart air fryer
  • Best budget – Dash Compact Air Fryer

TheKitchn

  • Their top recommendation was for the Philips Digital Twin TurboStar Airfryer XXL

Wirecutter

  • They rated the Philips 3000 Series L, but noted in their May 2025 review that it had been discontinued and they were busy testing other models.
  • Their budget pick was the Instant Mini Vortex 4-in-1.

Food Network

  • Instant Vortex Plus 6-Quart Air Fryer

Usage advice

  • Preheating – Most models do not require preheating, and for those that do, only a few minutes are needed. Even if preheating is not necessary, completing this step will yield the crispiest results.
  • Avoid overcrowding by arranging food in a single layer; cook in batches if necessary.
  • Food needs to be flipped, turned or shaken to ensure even cooking.
  • To prevent food from sticking to the air fryer basket, try the following advice.
    • A nonstick surface helps with this.
    • Use a small amount of oil. Not only does fat promote browning and crispiness, but it also lessens sticking. Rub or spray the food with oil before cooking.
    • Make a foil sling and cook the food on top of it.
  • Mix dry seasonings with oil before adding them to the food. Otherwise, the mixture is likely to be blown off by the fan.
  • Spray with oil halfway through cooking if the food is looking dry. Will get the best, most even crisp.
  • Ensure the unit has sufficient space to allow airflow around it, with at least 5 inches on each side.
  • Do not cut the veg so small that they fall through the holes in the basket.
  • Clean the unit after every use. Although it may not appear dirty, food residue is often left behind and can promote bacterial growth. Therefore, clean it thoroughly every time you use it. Some parts may be labeled as dishwasher safe, but you can never go wrong with washing by hand with soap and hot water. TheKitchn.com recommends adding two tablespoons of baking soda, two tablespoons of hydrogen peroxide, and two sprays of Dawn Powerwash directly into the fryer basket to create a paste. Use this paste to clean with a soft toothbrush for about two minutes. A nonabrasive sponge is good to remove the paste as the part is rinsed with water.
  • Never submerge the main body in water. Avoid getting the heating element wet.

Foods not to air fry

  • Fresh greens – These can get blown around by the fan, resulting in uneven cooking and possible burning.
  • Wet-battered items – The coating will not adhere to the food long enough for it to cook properly.
  • Heavily oiled food – Although a small amount of oil is recommended, too much oil will drip, smoke and give a charred flavor.
  • Popcorn – Air fryers don’t get hot enough for popcorn.
  • Bacon – You will end up with bacon fat all over the inside of the air fryer.
  • Large, whole chickens – Although some will state that these can be cooked in an air fryer, there is the risk of uneven cooking if using a standard air fryer.
  • Raw grains – Again, these will not cook evenly.
  • Hard-boiled eggs – You will likely end up with a rubbery egg.

I must admit that I have not jumped on the air fryer bandwagon. What about you? Are you an enthusiast?

Cooking Tips · Equipment · Techniques

What should be in your food paper drawer?

I have a drawer in my kitchen that contains plastic wrap, wax paper, aluminum foil, plastic storage bags and beeswax food wraps. I also have parchment paper, although that is stored in another drawer. Most of you probably have a similar collection of these items. Do you need them all? Read on in this Cooking Tip to understand the differences and the best uses of each. One related item that I am not going to cover is silicone. I have written about this before, and I refer you to this prior Cooking Tip.

Parchment Paper

  • This is a paper that has been treated with silicone, and it can be bleached or unbleached.
  • Due to the silicone, the paper is nonstick, heat-resistant, and water-resistant.
  • It can be used both in the oven and the microwave.
  • It is a very versatile product. Although most cooks probably use it to line baking pans before adding cookies, batter, or dough, it has many other uses. It can be used for layering between food items and covering your work space when you do messy things (rolling out dough, working with chocolate and candy, etc.). Many chefs roll it into a parchment cornet for piping purposes. It can be bent into a funnel. It may also be used for cooking “en papillote,” a method of cooking food items (often chicken or fish) wrapped tightly in parchment and baked. 
  • Parchment paper can be reused as long as it is not too greasy or dirty.
  • It cannot be recycled, but it can be composted.
  • It comes in different forms. It is often sold in a roll similar to foil or plastic wrap. It can also be found in flat sheets, which are more convenient but also more expensive. You can even find cooking bags made of parchment.
  • You can certainly buy parchment in regular stores. The most common type is a box containing a roll of parchment. The downside of rolls is that it can be hard to get the paper to stay flat on your pan. It is becoming more common to find sheets in stores, although they are often folded. Whereas it is easier to stay flat, the creases can cause ridges or indentations in the baked item. You can buy flat sheets of parchment, which most chefs prefer. The brand often at the top of the rankings is King Arthur Parchment Paper sheets. The downside of this great product is the price, and it must be ordered online.
Photo from Reynolds

Wax paper

  • This is a paper that has been coated with a thin layer of wax. 
  • Wax paper is moisture-resistant and non-stick. It is not, however, heat resistant. When exposed to heat, the wax can melt and the paper can catch on fire.
  • While it has many of the same uses as parchment paper, baking with it is not one of them.
  • Although it is not oven-safe, it can be used in the microwave.
  • Wax paper is less expensive than parchment.
  • It is not recyclable. Nor can it be composted.

Aluminum foil

Photo from Reynolds

  • As the name implies, this is a very thin piece of aluminum.
  • It has many uses in the kitchen, including lining baking dishes, steaming food, keeping food warm, and wrapping food before freezing.
  • It is not nonstick. That is why many recipes will have you spray the foil with food spray before using it. Reynolds does make a non-stick version that does not have to be sprayed.
  • If it is clean, it can be recycled if your provider allows it.
  • America’s Test Kitchen found that all foil brands were equivalent in performance. They did, though, find differences in the boxes. Boxes that were sturdy and had metal serrations were preferred. They also found that boxes with a secure closure helped to prevent cutting oneself on the cutter part.
  • Makers of aluminum foil warn against using foil when cooking with highly acidic foods such as citrus, vinegar, or tomatoes. They warn that the metal might leach into the food.
  • You will often see regular and heavy-duty foil in the store. The latter is slightly thicker and often wider. America’s Test Kitchen put it to the test to see if this more expensive foil was worth the price. They found that it was a bit more resistant to tearing and was better for enclosing items such as wood chips that might poke through, but not significantly so. There was no difference for basic tasks such as lining a baking sheet or making a sling for baked goods. They found that a double layer of regular foil was actually stronger than a single layer of heavy-duty foil.
  • Many people wonder why there is a shiny side and a dull side. This is solely due to the manufacturing process. Either side can be put next to the food as there are no performance differences.

Freezer Paper

Photo from Reynolds
  • This type of kitchen paper is coated with plastic on one side.
  • It is more durable than wax paper and is better for freezing foods. 
  • Freezer paper is more moisture-resistant than wax paper.
  • It is not safe for use in either the microwave or oven.

Plastic wrap

Photo from Amazon
  • Plastic wrap can be used to store food as well as to freeze food. 
  • It is also useful for tasks such as pounding meat, making logs of cookie dough or compound butter, and covering bowls of food.
  • It is not recommended for use in the microwave.
  • Higher-rated plastic wrap is better at clinging to dishes. It is also thicker and wider, and it is easier to tear.
  • The highest-rated plastic wraps are Freeze-Tite Clear High Cling Freezer Wrap and Stretch-Tite Premium Plastic Food Wrap.
  • For many people, plastic wrap is a necessary evil. Many people want to cut down on their use of plastic, and also find tearing off a piece from the roll to be a frustrating exercise. Today, one can find the typical box of plastic wrap with a row of teeth and boxes with a slide cutter. Many find the latter to be much easier to use.
  • America’s Test Kitchen prefers placing the rolls of plastic in a separate dispenser. These boxes are designed to stay on the counter better, which frees up your hand from having to hold the box. They felt these dispensers were much better than the boxes with built-in cutters. There was a difference in quality. Their recommended brand was Stretch-Tite Wrap’n Snap 7500 Dispenser. The downside of this item is that it is harder to store as it is almost 5 inches high.
Photo from Abeego

Reusable food wraps
Reusable food wraps are sheets of cotton or hemp cloth dipped in a layer of beeswax or soy wax. Although many recommend these for environmental reasons, there are pros and cons.

Pros

  • They are reusable and can last up to a year with proper care.
  • After they have run their course, they can be cut up and composted.
  • They are easy to clean with a bit of soap/water. 
  • They can do a good job of keeping food fresh if they completely cover the food in an air-tight manner.
  • They are attractive.

Cons

  • They do lose their clinging ability over time. 
  • The wraps can melt if left in the sun.
  • They cannot be washed in very hot water. Most makers recommend using cool water and dish soap.
  • They can only be used to wrap cold and room-temperature foods. They should not be used for hot items. Nor are they recommended for freezer use.
  • They are not meant for raw meat.
  • They are expensive.
  • They can leave a residue on your hands and dishes as you use the wraps. The residue will wear off, but it takes some work to get it all off. This problem decreases as you use the wraps more.
  • Over time, the coating can wear down, allowing water into the fabric. This could lead to mold development unless you keep the wraps clean and dry.
  • They can stain.
  • They can absorb smells.
  • Some brands are too stiff to wrap tightly. The softer ones work better.

If you are interested in trying food wraps, look for ones that are clingy and easy to mold. In testing, a couple of brands at the top of the list were Abeego Food Wraps and Akeeko Food Wraps.

What is in your food storage drawer? Do you have an assortment as I do? Or, are you more of a minimalist? I would like to tell you that you only need one of the above products. Depending on what you do in your kitchen, only one item will not be practical. I trust this discussion will help you decide what you need and can live without.

Cooking Tips · Equipment

Cutting Boards – Does it really matter what you use?

Image by tookapic from Pixabay

Cutting boards are in all of our kitchens. Many of us probably never give them much thought. As I have been in many home kitchens teaching cooking, it is clear that many buy their cutting boards based on appearance and not functionality. That, along with a nudge from one of my readers, has led to this Cooking Tip on cutting boards.

Before turning to actual cutting board brands, let’s look at what you want and do not want in a cutting board and the different types of boards.

Picking out a board
Budget
This is often the primary concern for many of us. Some high-quality wooden boards can cost hundreds of dollars. Plastic ones can be under $20. You need to balance cost with durability and useability.

Size

  • Cutting boards come in various sizes and no one size is better. The correct size for you will depend on the size of your work area, your storage area, and how you use the board.
  • You will need a larger board if you like to cut multiple ingredients and keep them all on the board. If you cut one or two items at a time, a smaller board may be fine.
  • A larger board will be better if you carve large pieces of meat.
  • Another aspect of size is the thickness of the board. A thicker board will better resist warping and splitting and be more stable on the counter. However, it will be heavier to move around. It also adds more height, which could be a problem for shorter people.

Features

  • Many boards have extra features that may be nice, although not absolutely necessary.
  • Non-slip grips – These are great to keep your board from moving around as you cut on it. If your board does not have these grips, you may stabilize your board by putting something non-slip underneath it. I use a grippy type shelf liner that I can wash when necessary. Others will use a wet kitchen towel.
  • Liquid-catching trenches – These are nice if you cut items that cause juice to drain out. Rather than running onto your counter, it will run into these trenches or grooves so that you can dispose of it more cleanly.
  • Reversible – This gives you double surfaces if that is important to you. The boards with the non-slip grips may not be reversible.
  • Handles – These make it easier to take in/out of your storage area or move around the kitchen.
  • Textured surface – Aside from keeping the board from slipping on your countertop, some like to prevent the food they are chopping from moving too much about the board. A textured surface helps with that.

Cleaning
Since cutting boards can be a source of food-borne illness, you want to keep them scrupulously clean. More about cleaning your cutting board can be found below.

Material
The main materials used for cutting boards are wood and plastic. They both have advantages and disadvantages.

Wood

My beautiful multi-wood end-grain board
  • A quality wooden cutting board will be more expensive than a plastic one.
  • They are aesthetically pleasing and can also be used as a charcuterie or serving board.
  • Most believe that wooden boards are easier on knives because they do not dull the blade as quickly as cutting on a harder surface.
  • Not everyone adheres to the belief that wooden boards are easier on your knives. Test cooks from America’s Test Kitchen use their cutting boards multiple hours each day and have found that there is not much of a difference to their knives between wood and plastic boards. They also used robots to simulate long-term use and found both kinds of boards dulled knives at the same rate.

Wooden boards can be either “end-grain” or “edge-grain.”
End-grain
This board style is made of many different blocks of wood glued together so that the grain runs from top to bottom in a vertical direction.


Pros
Most experts feel that end-grain boards are softer and, therefore, easier on your knives. This is because the fibers run vertically, and your blade slices between them. Daniel Gritzer, Editorial Director for Serious Eats, uses this analogy:

This is compared to an edge-grain, which is compared to slicing into a bunch of spaghetti lined up lengthwise.
They are also less prone to marks from your knives.


Cons
More expensive.
More prone to warping and even splitting between the blocks of wood.
They can also dry out faster and require more frequent oiling.

Edge-grain
This is also known as long-grain and is when the grain runs horizontally from one edge to another.


Pros
Less expensive
There are fewer seams in the board and, therefore, fewer weak points that could cause the board to split.


Cons
Harder on knives.
They are more prone to gashes and gouges.
Wooden boards take more maintenance.
Many say that the care of the board is more important than what type of construction is used. See below for care advice.

Wood types – Different types of wood can be used in cutting boards.

  • Maple, walnut and cherry are sturdy but still soft and, thus, gentler on knives.
  • Maple is more affordable than some other woods.
  • Bamboo, teak and acacia have higher amounts of naturally occurring silica, which can dull knives faster.
  • In a test of different types of wooden cutting boards, Serious Eats found that most wooden boards, no matter the wood, did not significantly dull a knife even after 200 strokes.

Plastic

Image by Stefan Schweihofer from Pixabay
  • Plastic is easier to clean in that most are dishwasher-safe.
  • They are less expensive than wood.
  • Plastic tends to be easier to store.
  • Plastic boards are lighter in weight. This may make them easier to handle but also makes them more prone to slippage on your counter.
  • They can get grooves from knife use, which can lead to bacterial growth.
  • They often come in fun colors.

Another type of plastic board is known as a flexible cutting mat. These are lightweight; some can even be rolled to funnel food into a bowl or cookware.

  • They are easy to clean and dishwasher safe.
  • Many mats are double-sided.
  • Since they are so lightweight, they are prone to moving around as you use them. Some will have a textured side to minimize this. Others must be placed on top of a grip mat or wet towel to stabilize them.
    Slick foods (halved onions, raw chicken) can slide on the mats, especially perfectly smooth ones. Those that have patterns and textures in them lessen this.

Glass/ceramic

  • Everyone agrees that you should never use this type of cutting board. Although they can be very pretty, they will destroy your knives.
  • They are also so smooth that your knife can slide around and be more difficult to control, leading to more sloppy cuts as well as being dangerous.
  • They are fragile, and there is a risk of breakage if they are dropped.

Wood composites
These can also damage knives.

Safety
There are two safety aspects: avoiding cross-contamination leading to food-borne illness and safety while using the board.

To minimize cross-contamination, use one board for meats and another for non-meat items. Proper cleaning is also mandatory. See below for cleaning advice.

There is disagreement on whether wooden or plastic is less prone to contamination. Some say that wooden boards offer natural antimicrobial protection. They argue that the bacteria do not like the wooden surface and will die if any remain after cleaning. Others argue that the non-porous surface of plastic boards keeps any juices containing microbes from penetrating the board. Plastic boards, however, can develop grooves and depressions from repetitive knife use, giving an inroad to the microbes. Furthermore, plastic boards can be sanitized in the dishwasher, where the cleaning process will likely kill all the bacteria. Even though there is no definitive answer as to which is the most sanitary type of cutting board, properly cleaning after each use is vital to preventing contamination.

Cook’s Illustrated had a lab analyze several boards, all of which had been colonized with salmonella, followed by either washing in hot, soapy water or spraying with a bleach solution or undiluted vinegar. All methods were equally effective at reducing bacteria. There was no difference between wood, plastic, bamboo or composite boards.

For safety, the heavier boards are more stable. Lighter boards need a non-slip surface. It can be built into the board or you can place a grip mat or wet kitchen towel underneath.

Cleaning Cutting Boards
Wooden

  • Only hand wash with dish soap (preferably unscented), warm water and a soft sponge. Pay attention to any crevices. Some recommend washing both sides (even if you only used one side) to prevent uneven drying, which could lead to warping.
  • Immediately & thoroughly dry with a towel to reduce warping, splitting, and mildew development.
  • Some recommend using kosher salt and half of a lemon to gently scrub the board to remove odors and use baking soda to remove stains. I would recommend checking the directions from the maker of the board for their advice.
  • Wooden boards should be regularly conditioned by applying food-grade mineral oil or a conditioner for wooden boards. This helps to prevent the board from drying out.

Plastic

  • Scrub a plastic board with dish soap and hot water.
  • Many plastic boards are dishwasher safe, although some may specify top-rack only. Also, frequent use of the dishwasher can shorten the board’s lifespan.
  • It is highly recommended that you scrape off any meat remnants before placing in the dishwasher so the hot water doesn’t “cook” them into the board.
  • America’s Test Kitchen recommends spraying the board with a vegetable food spray before cutting foods likely to leave a stain, such as beets. When you finish cutting, remove the food to a bowl and wipe down the board.
  • For stains, use a paste made from one teaspoon of baking soda, one teaspoon of salt and one teaspoon of water.

Brands
I perused multiple of my favorite rating sites to see which boards were more highly recommended. As is typical, different opinions abound. However, certain boards did rise to the top of many lists.

Wooden

  • John Boos – They are an American company located in Illinois. Depending on the size and thickness, the type of wood, the type of construction, and the addition of special features, these can run anywhere from about $50 to over $1000.
  • Jones – This is another American company located in Pennsylvania. Although their website was not functioning well when I was checking prices, it appears that they will be somewhat less than John Boos.
  • Boardsmith – A family-owned business in Texas, their boards range from about $150 to $800.

Plastic
If you want a set of flexible mats, the most highly rated was Dexas Heavy Duty Grippmats.


For more standard plastic cutting boards, there were two brands that were most frequently mentioned.

What do you really need? As noted above, that depends on your budget and your needs. I do agree with the advice given by Serious Eats. They recommend one large wooden cutting board in addition to two different-sized plastic cutting boards, a larger one for those messy jobs that can be put in the dishwasher and a smaller one for quick tasks. I will add that one or two flexible mats are also nice.

I have collected a few cutting boards over the years, but the ones most used are a wooden one, a large plastic one and a flexible mat. My most recent addition is a gorgeous wooden board that was a gift from some very dear friends. The husband made the one you see in the photo above. It is not only beautiful, but is a joy upon which to cut. I hope you find the perfect collection of cutting boards for you and your kitchen!

Cooking Tips · Equipment

A Guide to Kitchen Mandolines

Photo courtesy of Amazon

A mandoline is one of those kitchen tools that is not absolutely necessary in your kitchen. However, it is the best tool for specific tasks and, therefore, may be something worth considering. What they are, how to select one, and how to use them safely are topics covered in this Cooking Tip.

What is a mandoline?

  • A mandoline is a manual machine for slicing fruits and vegetables.
  • The user holds the food with one hand and slides it down the length of the mandoline and across the blade.
  • Some models only produce thin slices, while others have blades that enable you to make julienne or waffle cuts.
  • It can generally slice items more precisely, evenly, consistently and quickly than with a chef’s knife.
  • It can not only speed up the preparation of produce but can also produce paper-thin slices that are even in thickness.
  • It can also produce very thinly shredded cabbage for your coleslaw.

What to look for in a mandoline.
Sharp Blades
According to everyone, the most crucial aspect of a good mandoline is that it should have very sharp blades. Duller blades make it more difficult to push the food through. Users then compensate by putting more pressure as they push the food, making it more likely that they might slip and cut themselves. Some brands have blades that can be removed for sharpening. For more inexpensive models, the entire unit will need to be replaced.

Type of Blade
There are three basic models: French, Japanese, and V-shape. The French style has a straight blade that is perpendicular to the sides of the mandoline. Japanese models typically feature a blade placed at an angle. The final style has a V-shaped blade.

One is not always better than the other, as each has its advantages and disadvantages. Some users prefer the straight blades as they feel it is easier to push food through. With the V-blade, it can be harder to push the food through, necessitating more force. It can also be more challenging to cut even slices with the V-shaped blades. However, V-blades are better suited for larger items, while the angled blades are more suitable for smaller foods.

Some mandolines also come with additional blades that allow you to julienne items or make waffle cuts.

Varying Thicknesses
Better mandolines possess the ability to cut in a wide range of thicknesses, so you can slice from very thin to thicker and do so evenly. Most mandolines will have preset thickness levels, although some will have an infinite control. When using those, however, there is no setting that tells you the exact measurement you are cutting. It is more of a trial-and-error experience to achieve the desired thickness.

A wide, rigid platform
The platform of the mandoline should be large enough to accommodate larger foods, such as potatoes unless you plan to use it only on smaller produce. You also want a platform that is stable and will not sag as you slice.

Rubber feet or stand
These keep the mandoline from moving around as you slice. A more stable mandoline is a safer one.

Handheld vs Kickstand
Some mandolines are called Handheld. They are made to rest atop a bowl, or you can hold them at an angle on a countertop. They are thinner and lighter, taking up less storage space. However, cutting horizontally over a bowl is more difficult.

Kickstand models feature a built-in stand that holds them upright on the counter, typically with an adjustable angle, making it easier to perform the repetitive motion required for using a mandoline.

Handguards
Mandolines have a reputation for being dangerous, and they can be unless you are informed and careful. As you are moving the food back and forth across very sharp blades, it is easy to slip and cut yourself. That is why the use of a Handguard is highly recommended. This guard is positioned between your hand and the food, providing protection from the blades. Most mandolines will come with a guard, although not all are the most effective. With some, it is challenging to keep the food solidly on the guard. Additionally, some are considered wasteful because they do not allow you to cut all the food down to the very last piece. However, as many will tell you, a bit of waste is preferable to a severe cut and a trip to the emergency room.

Cut-Resistant Gloves
These are not a part of the mandoline but are something you should seriously consider getting. Although it is not recommended to slice food without the handguard, using these gloves should be mandatory if you do. Even if you are using the guard, the glove can give you extra protection. Realize that they are not totally puncture resistant, and they do wear out after about a year.

Dos & Don’ts

  • Pay attention and do not get distracted. It is the same when you are using a knife. I recall the only times I have cut myself with my chef’s knife was when I looked away as I was chopping.
  • Only use mandolines with sharp blades. Just as with knives, dull mandolines are more dangerous.
  • Work on a flat, dry surface to prevent the mandoline from slipping.
  • Cut foods in half, especially round items such as potatoes or apples. This gives you a flat surface that moves against the blade.
  • Don’t cut too quickly. You will have more control when you cut slower.
  • Position the food towards the side of the mandoline as the platform is less likely to flex. Not only will it be safer, but you will also get more evenly sliced pieces.
  • Clear food from underneath the mandoline as you work. That way, it won’t obstruct the food that you are slicing.
  • At times, some food may become stuck on the blade. Do not force it through the blade, as you might slip and cause injury. Instead, use the handle of a wooden spoon (or similar tool) to knock the food back off the blade.
  • Just as with your knives, do not place them in the dishwasher. Handwashing helps to maintain their edge.

If you have decided to buy a mandoline, which one should you choose? Are some superior to others? Yes, but it depends on who you ask. Many excellent sites have reviewed mandolines and listed their recommendations. The problem with these lists is one person’s favorite is a no-go on another person’s list. I will attempt to provide some generalizations by consolidating these reviews.

There are certain brands that rise to the top of the reviews. However, there are often different models within those brands. These different models might have different blades, different ability to adjust, different handguards, etc. If you are reading a review, pay attention to which model was tested. I will list the different models for each company as I discuss the pros and cons of those devices. Prices listed are as of March 2025.

Photo courtesy of Amazon

Benriner – This is one of the companies that consistently appears at the top of reviews by many culinary professionals, and it can be found in many professional kitchens. The model generally preferred is the Super Benriner Mandoline Slicer.

  • Cost – $60-$80
  • Pros
    • Extremely sharp – this is the main characteristic that users like, although one review noted that it was not as sharp as they expected right out of the box.
    • Wide range of thicknesses. The updated model features a dial that is significantly easier to use than the one on the older model. Although the range of thicknesses is very good, there is no measurement to tell you the exact thickness.
    • Easy to set up, use, clean and store.
  • Cons
    • One con that is mentioned is the lack of a handguard. This is not accurate as it does come with a handguard. An older model’s guard was deemed ineffective, but an updated version comes with a significantly improved guard. Not only is it easier to use, but there is very little food waste.
  • Models – these mostly vary in size.
    • Benriner Super Slicer
    • Benriner Vegetable Slicer
    • Benriner Japanese Slicer
Photo courtesy of Oxo

OXO – This company is well-known for its kitchen tools and gadgets. Its mandolines receive mixed reviews but are generally well-liked. Most of the reviews were based on the V-Blade model.

  • Cost – see below with list of models.
  • Pros
    • Easy to use (Chef’s 2.0)
    • Many different thicknesses that are easy to set using a dial. (Chef’s 2.0)
    • Comfortable handle (Handheld)
    • Good handguard (All models)
    • A see-through slicing plane that allows you to view what you have sliced. (Handheld)
  • Cons
    • Some say it is not as sharp as other brands.
    • Bulkier to store. (Chef’s 2.0 & V-Blade)
    • The julienne blades only come in 2 preset widths and thicknesses. (Chef’s 2.0)
    • Jumps between settings were too large.
    • Thinnest settings didn’t work well. (Chef’s 2.0)
    • Only has a straight blade. (Handheld)
    • Doesn’t work well with soft items. (Handheld)
    • Food can get stuck on the blade. (Chef’s 2.0)
  • Models
    • V-Blade Mandoline Slicer – $45
    • Chef’s Mandoline Slicer 2.0 – $100
    • Steel Chef’s Mandoline 2.0 – $115
    • Handheld Mandoline Slicer – $20
    • Large Adjustable Mandoline Slicer – $30
    • Simple Mandoline Slicer – $50

Kyocera

Photo courtesy of Kyocera
  • Cost – see below with list of models.
  • Pros
    • Very sharp. (Soft Grip Ceramic)
    • Soft, ergonomic handle. (Soft Grip Ceramic)
    • Compact, lightweight. (Soft Grip Ceramic)
    • Easy to store. (Soft Grip Ceramic)
    • Easy to use. (Soft Grip Ceramic)
    • Inexpensive (Soft Grip Ceramic)
  • Cons
    • Too small to accommodate large produce. (Soft Grip Ceramic)
    • Only makes slices. (Soft Grip Ceramic)
    • Only four preset thicknesses. (Soft Grip Ceramic)
    • Poor handguard. (Ceramic Adjustable)
    • Can flex with pressure. (Ceramic Adjustable)
  • Models
    • Double-Edge Ceramic Mandoline Slicer – $20
    • Ceramic Julienne Mandoline Slicer – $35
    • Ceramic Mandoline Adjustable Slicer – $25
    • Soft Grip Adjustable Mandoline Ceramic Slicer – $30
    • Wide Adjustable Mandoline Slicer – $40

Mueller

Photo courtesy of Mueller
  • Pros
    • Five interchangeable blades give versatility.
    • Sturdy.
    • Good handguard.
  • Cons
    • Not as sharp as others.
    • Doesn’t cut very thin.
    • Takes some force on medium and wide settings.
    • Bulky.
  • Models
    • MuellerLiving Mandoline – $30
    • MuellerLiving Stainless Steel Mandoline – $40

Microplane – This company is well-known for its excellent zesters. Their only mandoline is the Adjustable V-Blade Mandoline Vegetable Slicer.

Photo courtesy of Mircroplane
  • Cost – $40
  • Pro
    • Cuts thin slices well.
    • Compact.
    • Easy to store.
    • Has a nonslip foot.
  • Cons
    • Julienne blade easily dislodges from the back of the mandoline when slicing using the V-blade
    • Blade tore food and food can get stuck on the blade.
    • Duller than others.
    • Doesn’t slice well at thicker settings.
    • Too small for larger produce.
Photo courtesy of Dash

Dash Safe Slice Mandoline
I mention this mandoline because it is unique. Although there are different models of all the above mandolines, they all share the same basic shape. This one is a vertical unit that sits on your countertop. It has a chute into which you feed the food while pumping the unit up and down.

  • Cost – $30-$40
  • Pros
    • Definitely the safest, as your hand does not get near the blade.
  • Cons
    • Limited utility as the items you want to cut must fit into a chute.
    • Must trim larger items.
    • Bulky.

Several other brands were evaluated, but none received a high rating. Do you have a mandoline, and do you use it? Is it one of the above units, or is it something not mentioned? A mandoline is a nice addition to your kitchen, provided you have the space, although it is not a necessary piece of kitchen equipment.

Cooking Tips · Equipment · Techniques

Cookware Cleaning Tips

Photo by Fatma Çekmez

What sort of pots and pans do you have in your kitchen? Are they new or old? What are they made of? Are they well-used or barely touched? No matter what they are, do you know how to take care of them? That is the subject of this Cooking Tip.

Although the advice I will give you applies to most types of cookware, I will discuss some specialty pans later. I have already written a Tip on Cast Iron Care, so I will not discuss that type of cookware in this Tip.

Just as important as how you should take care of your cookware is what you shouldn’t do. Let’s investigate that first. One caveat is that you should always read your cookware’s warranty to ensure you are not doing anything that might void it.

What not to do

  • Do not use abrasive cleansers. For most general cookware cleaning, dish soap is all that is needed. Beyond that, you can use a nonabrasive cookware cleaning powder. Many cookware brands make their own product. I use and like the one made by All-Clad. Others prefer Bar Keeper’s Friend. They have two different products, their all-purpose cleaner and one advertised specifically for use on cookware. I have tried both, and I think the latter is more effective. Baking soda is another alternative. It is less expensive and readily available in our kitchens. Although it will be effective in many situations, it probably won’t do as great a job as the commercial cleansers.
  • Do not use steel wool or other abrasive sponges. Only use sponges or cleaning implements that are advertised as nonabrasive.
  • Allow your pans to cool before washing them. Never submerge a hot pan into cold water, as the thermal shock is likely to damage it.
  • Even though some manufacturers claim their pans are dishwasher-safe, hand washing is the preferred way to keep them in the best condition.

How to care for your pots/pans

Now that we know what NOT to do, let’s delve into some care tips to keep your cookware in the best condition.

  • Most cookware manufacturers recommend using low to moderate heat to preheat their pans. High heat is only recommended when you want to bring something to a boil.
  • Manufacturers also generally warn against heating an empty pan, especially with nonstick pans. You may have heard that it is better to preheat your pan dry and then add any fat you are using. See this in-depth Tip on the truth about this advice.
  • Once you are done cooking, allow the pan to cool before cleaning. Rinse off any food particles and wash in warm, sudsy water with a sponge or soft cloth. You may even allow it to soak in this sudsy water to help release stuck-on food. Finally, rinse with warm water and dry the pan to prevent spotting.
  • Although you want to allow the pan to cool before washing it, the sooner you clean it, the easier it will be to remove debris. The longer it sits, the harder it will be to clean.
  • As noted above, you may use a nonabrasive cleanser for tough spots. Follow the instructions on the container, but in general, you will sprinkle the cleanser over the wet surface and gently rub it with a soft cloth or sponge. Rinse it thoroughly and dry. If necessary, allow the paste to soak on the pan a bit before scrubbing. However, some commercial cleansers say not to allow the cleanser to remain on the pan for more than a few minutes. Read the directions for the one you are using.

For especially dirty pans, the following methods may help.

  • Boiling water method – This is similar to deglazing your pan, which is often the only thing you need to do to bring up stuck-on food particles. Add water to the pan, bring it to a boil, and scrape up the food with a wooden implement. After the food loosens, pour out the hot water and wipe with a nonabrasive sponge. You may also turn off the heat and allow the pan to soak for 15-20 minutes or even overnight. Some like to add a bit of baking soda or white vinegar to the boiling water.
  • If you find your pots developing white hard water spots, use a 1:1 white vinegar-to-water solution that you bring to a boil. Then, follow with a normal wash, rinse and dry.
  • Blue or rainbow discoloration can be removed by wiping the pan with white vinegar on a sponge or soft cloth.
  • In general, you do not want to use bleach on your cookware. However, some recommend that if you have enameled cookware with stains on the surface, you could try this trick. To remove the stain, make a gentle bleach solution of 1 teaspoon bleach in one pint of water. Pour this into the pan and allow it to stand for a few hours or overnight. Pour out the bleach solution and scrub with a soft sponge. Clean and dry as normal.

I must admit that cleaning is a chore I do not enjoy. Although I am very good at cleaning the inside of my pots, I am not nearly as fastidious on the outside and bottom. It was with interest that I tried another method for those stains. You will need a pot large enough to hold the pan you are trying to clean. Fill with water and bring to a boil. Add ¼ to ½ cup of baking soda and stir until dissolved. Being very careful, place your stained pot into the boiling water. Allow your pan to remain in the gently boiling water for 15-20 minutes. After the residue begins to flake off, carefully remove with oven mitts. You may need to then make a baking soda slurry and use that to scrub more spots off. I personally tried this method and, although not magic, it did work. The biggest problem was finding a pan large enough to place my skillet inside. It requires a bit of scrubbing, but in the end, it was much cleaner than it was before.

Carbon steel

Photo courtesy of Made In Cookware
  • These types of pans are particularly loved in professional kitchens because they are lightweight, have superior heat conduction and are naturally nonstick. However, they do need to be seasoned, so your cleaning method should not destroy that seasoning.
  • When cleaning, if all that is in the pan is a bit of oil or maybe a small amount of food particles, wipe it out with a paper towel, and it will be ready for the next time. If there is more in the pan than cannot be wiped away, sprinkle some coarse salt, scrub with a paper towel and wipe clean. Some will add neutral oil to the salt in a 1:1 ratio. Scrub, wipe out and finish with a quick rinse. Place the pan over low heat to ensure it is completely dry. Finish by adding just a tiny amount of oil to the pan and wiping thoroughly.
  • For a more serious clean, cover the bottom of the pan with a small amount of water and bring to a boil. Using a wooden spoon or spatula, scrape up the food, dump it out and then wipe it off. Follow the above instructions for drying the pan and finishing with a coat of oil, especially if there are dry spots on the pan’s surface.
  • If all of the above fails, you can gently scrub the pan with steel wool. However, your pan will need to be re-seasoned after this.
  • Some will say never, ever use dish soap on carbon steel. However, just a small amount used sparingly will be acceptable.

Copper

Image by Stefano Ferrario from Pixabay
  • This type of cookware is beautiful but expensive. You, therefore, want to treat it carefully to maintain its beauty. Cleaning like other cookware with soap, hot water, and a non-abrasive tool will do the job.
  • Because copper is a reactive metal, it is natural for copper pans to darken and even appear greenish. This does not affect its usability, but you will want to polish it regularly if you prefer that “new” appearance. Just as with regular cookware, you can purchase cleansers made specifically for copper. You may use white vinegar (or lemon juice) and salt if you do not have that. Make a paste of equal parts, and using a gentle sponge, rub the pan and buff it until it is shiny. Rinse to remove any remaining paste and dry thoroughly. Some experts recommend using tomato paste or ketchup in place of the vinegar.

Storage

A final piece of advice is to store your pans properly to prevent damage. If you stack your pans, put paper or cloth towels or pan protectors between them. This will prevent chipping or scratching. A hanging rack is great if you have the space to install one. Pegboards are another option.

Pots and pans are a necessity in the kitchen and good ones are not cheap. By taking the time to properly clean your pots and pans, you can extend their lifespan and keep them looking nice.