Cooking Tips · Ingredients

Chorizo – Know which type to use

When I see a menu item or a recipe with Chorizo as one of the ingredients, I am all in. Chorizo is not monolithic, though. There are different types, and what those are is the subject of this Cooking Tip.

Chorizo originated in the Iberian peninsula (Spain and Portugal) and is usually made from pork. Initially, it wasn’t red, but when Europe discovered smoked paprika in the 16th century, it became a staple in chorizo.

There are different ways to categorize chorizo, but the main one is Mexican versus Spanish. Because they are quite different, we cooks need to know why.

Mexican

Image by Quidec Pacheco from Pixabay
  • Mexican chorizo is raw, ground pork (sometimes beef) seasoned with spices such as coriander, paprika, chili powder, chili peppers, dried herbs, and garlic.
  • It is sold in the fresh sausage section of the market, where you can find items such as breakfast sausage or brats.
  • It is often sold in links but can be found in bulk.
  • Since this chorizo is raw, it must be cooked before eating.

There are two categories.

  • Classic chorizo is made of pork or beef and contains, among other spices, chili and vinegar.
  • Chorizo Verde (green chorizo) contains chili (often green), tomato and green herbs such as cilantro and parsley. It may also contain tomatillos.

Spanish

Image by arturo larrazábal from Pixabay
  • Spanish chorizo is usually a cured sausage with a texture similar to salami.
  • It is made with cured or semi-cured chopped and smoked pork and seasoned predominantly with smoked Spanish paprika. Other ingredients include herbs, garlic and white wine.
  • It will be sold in casings that might be short or very long.
  • It will be found in the cured meats department.
  • If cured, it is not necessary to cook before eating. However, if semi-cured or fresh, it must be cooked before eating.
  • If cooking the cured type, it is best to remove the casing as it can become tough.
  • There are various ways to categorize Spanish chorizo.
    • Curing state
      • In the average US market, you will find it in a cured form.
      • In some specialty markets, you may find it semi-cured or raw.
    • Location/Shape
      • In Spain, every region has its own style. These will vary based on the ingredients and shape of the finished sausage.
      • Almost all of them will contain Spanish smoked paprika, which is what results in the red color. Other common ingredients are garlic and white wine, although some locales include black pepper, oregano, thyme, or nutmeg.
      • The shape can vary from rope-like to horseshoe-shaped, and they will also vary in length and diameter.

In the typical US supermarket, you will almost surely be able to find Mexican chorizo. You may or may not find the Spanish type. When you do, your choices will probably be limited to one variety or, at most, two. For the other types, you will need to check a specialty market or search out online sources. There are other chorizos but they, too, are typically described as a Spanish or Mexican type.

Portuguese chouriço

  • This is similar to Spanish but contains less paprika but abundant garlic and red wine.

Chaurice (Louisiana, Creole, Cajun cuisine)

  • Another Spanish-style chorizo but with different spices.
  • Typical spices include chile, cayenne, green onions, garlic, thyme, celery, parsley and bay leaves.

Colombian chorizo

  • This Mexican-style chorizo is less spicy and contains less paprika than many.
  • It also usually contains green onion, cilantro, garlic, and vinegar.

Argentine

  • As Italian flavors inspired this, it often includes herbs such as oregano and thyme.
  • It may also contain garlic, nutmeg and wine.

Filipino Chorizo de Cebu

  • This unique style of chorizo is spherical in shape.
  • It is a vibrant red color, caused by the inclusion of annatto. Another ingredient that results in its characteristic flavor is anise liqueur.

Goan chouriço

  • Another type of Portuguese chouriço that has Indian notes.
  • This sausage is hot and spicy with red chili, ginger, cloves, pepper, cumin, turmeric, cinnamon and vinegar.

How to use Chorizo

Mexican

  • Typical dishes that call for Mexican chorizo are tacos, tortas and scrambled eggs.
  • Cook’s Illustrated recommends using it as a substitute for taco seasoning. They add it to ground beef to give a spicy and complex flavor. Because of the high fat content of Mexican chorizo, they recommend using 90% lean ground beef.
  • A more unusual recommendation by them is making Chorizo Bolognese. They substitute Mexican chorizo for ground beef in a 1:1 ratio. They testify that this gives the flavor of a long-cooked Bolognese but in much less time.

Spanish

  • The cured variety is typically used for snacking or on a tapas plate.
  • One exciting way to prepare it is in the recipe for Chorizo Lollipops.
  • It may also be used in soups and stews.

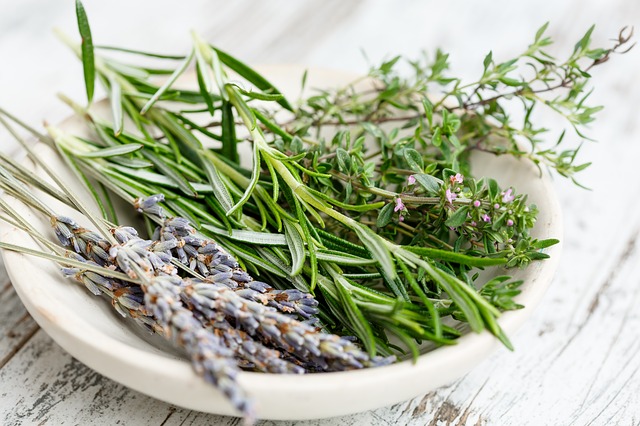
Suppose you have a recipe that calls for chorizo but does not state what Image by tove erbs from Pixabaykind. Just take a closer look at the recipe. If the flavors are more Mexican, that is probably the type that should be used. Also, look at how it will be used. If the meat is to be cooked, go for Mexican. If you are chopping, slicing or serving raw, go for Spanish.

Are you a fan of chorizo? I prefer the Mexican style, but it can be very spicy at times. Different brands vary in spice level, so you need to find the one that works for you. If you want to throw a fun tapas party, Spanish-cured chorizo will be a wonderful addition.

Cooking Tips · Ingredients · Techniques

Roasted Red Peppers – Jarred or Homemade?

Image by Hans from Pixabay

Roasted red peppers are a delicious condiment and a crucial ingredient in many recipes. They are not hard to make, but what do you do if you don’t have any red peppers in your kitchen? Are jarred roasted red peppers a suitable alternative? That is the subject of this Cooking Tip.

Red peppers are a type of sweet pepper. They are wonderful raw or cooked in many different savory dishes. A favorite way of using them is roasting them. There are various ways of doing this in your kitchen.

Oven method

  • Preheat oven to 500°F.
  • Line a baking sheet with foil.
  • Wash the peppers and place them on the baking sheet.
    • Many people will cut them in half, remove the seeds and ribs, and then place them flat on the baking sheet.
    • Many others like to roast them whole as they feel you are less likely to get burned edges. They also find precut roasted peppers more difficult to peel.
  • If whole, rotate the peppers every 10 minutes.
  • Roast until charred on all sides and the skin looks wrinkled, 30-40 minutes.
  • Once charred, remove the baking sheet from the oven and allow the peppers to cool before peeling. Placing them in a covered bowl, plastic or paper bag, or even wrapping them in the cooking foil causes the peppers to steam, resulting in a softer texture. Many say it also makes them easier to peel.
  • Leaving them uncovered to cool will give you a firmer texture.
  • When cool, remove the stem and seeds, peel them, and use them in your dish as directed.

Grill pan or dry cast iron skillet

  • Preheat the pan until very hot.
  • Place the peppers on the pan and cook, turning as they char.
  • Finish as in the oven method.

Directly over a gas flame

  • You may also roast the peppers using the flame of your gas cooktop.
  • Using tongs, hold the pepper directly over the flame, turning until all sides are charred.
  • Finish as in the oven method.

Broiler

  • Cut the peppers to lie flat, removing the stem, seeds and ribs.
  • Heat the broiler with the rack 2½ to 3½ inches from the broiler element.
  • Line a baking sheet with foil and lie the peppers on the sheet pan.
  • Broil until the skin is charred but the flesh is still firm, about 8-10 minutes, rotating the pan halfway through.
  • Finish as in the oven method.

Grill

  • You may also roast them on a grill, which is the method that will result in the most robust smoky flavor.

Jarred peppers are already roasted until they are charred and then peeled. They are shelf-stable until open. Are they a suitable alternative to homemade ones? Most chefs would say yes in certain preparations.

Make them yourself if you want to put them in salads, on a pizza, or on an antipasti plate. However, if you will be pureeing them into a soup or a sauce, the jarred variety will work fine. Just be sure that you like the taste of them and that you check for any ingredients that might have been added to the jarred peppers.

Supermarkets carry various brands in my area. Here are the ingredient lists for these brands. Note that some contain sugar, and one even contains vinegar.

Mt Olive

  • Roasted red bell peppers, water, salt, sugar, citric acid

Mezzetta

  • Peppers, water, sea salt, citric acid

Delallo

  • Red bell peppers, water, salt, brown sugar, citric acid, calcium chloride

Safeway’s Signature Select

  • Roasted red peppers, water, salt, citric acid, calcium chloride

Walmart’s Great Value

  • Roasted red peppers, water, salt, citric acid, calcium chloride

Trader Joe’s Roasted Red Peppers

  • Red peppers, water, sea salt, red wine vinegar

I looked for taste tests on jarred roasted red peppers. There were only a handful and they disagreed on which brand was best. Another problem with taste tests is that they often taste different brands, making it hard to compare results.

America’s Test Kitchen tasted them plain and in roasted red pepper soup. For plain, the tasters preferred firm, smoky and sweet peppers and those that were packed in a brine of only salt and water. Bottles that contained other ingredients such as vinegar, garlic and olive oil were felt to have an interesting flavor, but they also thought that the vinegar masked the red pepper flavor. In soup, the texture was not important, but tasters still preferred sweet and smoky ones. Those packed in vinegar gave a sour note to the soup. Their two preferred brands were Dunbars and Cento. Further down on their rating was Divina. They did not recommend Mt Olive or Mediterranean, among other brands.

Another taste test showed that Divina came out on top. Looking at the brands America’s Test Kitchen also tasted, they did not like Cento. You will note that this was one of the two preferred brands in the testing by America’s Test Kitchen.

Because there are not many taste tests and the above two are inconsistent, I recommend that you just do your own taste test and find one you like.

Whether you make your own roasted red peppers or buy jarred ones, what do you do with them? Here are a few ideas.

  • Red pepper sauce – puree with or without additional seasonings. Use on pasta or meat.
  • Romesco sauce: Pulse in a food processor with olive oil, sherry vinegar, toasted almonds, garlic, salt and pepper. Serve with raw veggies or crackers.
  • Make a soup.
  • Use on an antipasti platter.
  • Add to salads.
  • Use as a pizza topping.
  • Make a delicious twist on hummus.
  • Make a red pepper pesto.
  • Use in a quiche or scrambled eggs.
  • Throw in a summer veggie tart.

There is also a difference in cost between making your own and buying the jarred variety. Currently, in my area, one fresh pepper costs $1.59. The jarred ones vary from $2.15 for a 12 oz jar to $4.49 for a 16 oz jar. The first is $0.18 an ounce and the latter $0.28 an ounce. My fresh red pepper weighed 8 ounces. Not accounting for the weight of the peel, seeds and ribs, that price came to about $0.20 an ounce. Of course, with the fresh ones, there is also the cost of the foil, the power to run the oven as well as your time. Considering all of this, we can say that there is not a huge difference in cost between making your own and buying the jarred ones.

Roasted red peppers will last in the refrigerator for a week or two. For longer, freeze them for up to 3 months. I have a bottle in my refrigerator right now that I want to use up. I will be making a pasta sauce. One choice uses red peppers, parmesan cheese, green chili and cilantro. The other one uses peppers, garlic and feta cheese. Which sounds better? What about you? What will you make with your roasted red peppers?

Cooking Tips · Ingredients

Garden Herbs – Culinary, Medicinal or Both?

I love to read historical fiction. One aspect that has always fascinated me is when the characters turn to herbs for medical treatment. Of course, they did not have the medical miracles in terms of drugs, equipment and other therapies that we have today. I sometimes think that modern medicine has pushed herbs so far to the side that people are not aware of some of their medicinal qualities. That is the subject of this Cooking Tip.

Image by gate74 from Pixabay

I have written about the culinary use of fresh herbs and provided more detailed tips on some specific herbs. Those tips were all about using these herbs in the kitchen.

This discussion will only touch on a few of the most common herbs. There are infinitely more out there that I do not include. This post is also not intended to be medical advice, only a general discussion. It’s crucial to exercise particular caution, especially with pregnant women, those with serious illnesses, children and anyone on prescription medication. Your safety is paramount, so please consult your medical professional before instituting any herbal remedies.

This blog post does not provide a comprehensive guide on how to use these herbs. They can be prepared in various forms, such as tea, infused oils, vinegars, tinctures, salves, lotions, creams, ointments, and poultices. For detailed instructions, I recommend referring to publications by trained herbalists. Additionally, this discussion focuses on mild health concerns. For more serious ailments, it’s best to consult your physician.

We all know herbs are delicious and do wonders in our kitchen. But why do some think there is a place for herbs outside of the culinary world? The answer lies in their long-standing history. Herbs have been used in a medicinal way for health and wellness for thousands of years. Also, there is scientific research on many herbs, although much more needs to be done.

In general, herbs are said to be helpful in a variety of ways. They provide significant amounts of vitamins, minerals and antioxidants. Some herbs are felt to strengthen certain bodily systems, such as the digestive and immune systems. They can possess antibacterial, antiviral, antifungal and antioxidant properties. Some herbs are sedating, while others are stimulating.

You might say that may be true, but that was before all the advancements of modern medicine. Why would I want to use them now? I like the approach of one herbalist who stated that rather than thinking of herbs as a substitute for a prescription drug or therapy, consider them a complement to that treatment. Let’s take a look at some of these herbs in alphabetical order.

Basil

  • Basil has antibacterial qualities and contains vitamins A, C, calcium, and iron.
  • Basil essential oil is used in aromatherapy to treat mild depression and ease overworked muscles. It should only be applied externally and should always be diluted before applying to the skin. Basil essential oil should never be used internally.
  • Basil infusions may help with dyspepsia, gas, bloating and nausea. Some say just chewing on a leaf may ease indigestion or gas.
  • Basil tea is thought to reduce symptoms associated with a cold or flu and be a pain reliever.
  • Making a poultice of crushed leaves can treat insect bites and skin irritation.

Bay

  • An infusion made with bay leaves may help to stimulate appetite and settle one’s stomach.
  • The infusion may also be applied to the scalp to relieve dandruff.
  • The essential oil can be used during a massage to relieve sprains and joint pains.
  • Add a decoction to bath water to tone skin and relieve aches.

Bee Balm

  • This herb is also known as horse mint, Oswego tea and wild bergamot.
  • As a soak, it may be helpful for athletes’ foot and nail fungus.
  • It has some antimicrobial and anti-inflammatory properties and may ease respiratory symptoms from the cold and flu.
  • It is also suggested for indigestion and nausea.

Borage

  • A Roman author and philosopher who lived AD 23-79 claimed it worked as an antidepressant. Experts today feel it can calm anxiety and mild nervous disorders.
  • It can be used to treat eczema, premenstrual symptoms, and fever.
  • It has expectorant qualities and, thus, can help alleviate cough.
  • Its anti-inflammatory properties aid in treating bug bites, bee stings, bruises, and rashes.

Calendula

  • During the Civil war, this herb was used as an antiseptic and to stop bleeding and speed the healing of wounds.
  • It can relieve the itching from bug bites and possibly help with painful skin conditions caused by radiation treatment. It is felt to have skin-healing properties.

Catnip/Catmint

  • As a mild sedative, this herb may help with sleep and reduce anxiety.
  • It is also said to ease stomach cramping, promote digestion and stop diarrhea.
  • Poultices may reduce inflammation and swelling.

Chamomile

  • Known to contain antioxidants as well as possessing anti-inflammatory and antispasmodic effects.
  • A chamomile mouthwash is used to treat mouth ulcerations and oral pain.
  • It has skin-healing qualities, helping with conditions like chicken pox, eczema, and psoriasis. In these cases, it is usually added to a bath or lotion.
  • Chamomile tea is considered a mild sedative that can aid in treating insomnia.

Chives

  • Although this herb is not considered medicinal, it contains large amounts of vitamins A & C and healthful minerals.
  • It could be a mild aid to digestion and help with sore throats.

Dandelion

  • We may think of this as a weed, but it is known to have antibacterial and immune-boosting qualities.
  • It may help build bone strength due to high amounts of certain minerals.
  • It may also help to fight urinary tract infections.

Echinacea

  • We have all seen reports of how this herb can help us fight off colds or flu and reduce the severity of symptoms.
  • It also possesses anti-itch and anti-inflammatory qualities.

Garlic

  • Garlic is thought to help the viruses that cause colds and flu as well as being an expectorant.
  • In addition, it may have antibacterial and antifungal effects.
  • A garlic-containing hair rinse can ease dandruff. The recommendation is to apply at night and rinse out in the morning to remove the odor.

Ginger

  • The most known medicinal quality of ginger is as an anti-nausea agent. It is often recommended for travel sickness.
  • Besides nausea, it may have pain relief qualities. A compress made with hot ginger tea is said to be helpful for painful joints.
  • A compress of cool tea may ease minor burns and rashes.

Lavender

  • We have all probably seen lavender-containing sleep sachets and bath oils. That is due to its anti-anxiety, muscle relaxing and sedative properties.
  • It is thought to help alleviate nervousness, mild depression and insomnia.
  • It also possesses pain-relieving properties and is used as a headache treatment.

Lemon Balm

  • This is another aromatic herb that helps calm nerves, improve mood and aid sleep. It is felt to be one of the most effective herbs in reducing mild depression.
  • As a pain reliever, it can reduce menstrual cramps and headaches.
  • As for gastrointestinal effects, it may increase appetite and aid indigestion.
  • Just as with other aromatic herbs, it is used in aromatherapy to promote relaxation and rejuvenation.

Mint

  • It was used in medieval times to treat bad breath, dandruff, and other ailments.
  • Possesses natural antibiotic properties.
  • Aids in eradicating bad breath.
  • It is said to help alleviate nausea, indigestion, and gas. It is also thought to have an anti-spasmodic effect, helping with cramps.
  • The menthol content can help with sore throat and acts as a decongestant. Putting mint essential oil in a pan of hot water and inhaling the steam may help relieve congestion.
  • It has a mild sedative effect, making it helpful with mild anxiety and nervousness.

Oregano

  • This herb is considered an infection fighter due to its antiseptic and anti-inflammatory properties, as well as its significant antioxidant levels.
  • Tea made from the leaves and flowers may help coughs, colds, flu, indigestion, menstrual and muscular pain.
  • The leaves can also be used as a hot compress for skin conditions and joint pain.

Parsley

  • Good source of iron, calcium, vitamins A & C and possesses antimicrobial properties.
  • Applied topically, it could help reduce facial dark spots and soothe chapped skin, bug bites, and bruises.
  • It may give gastrointestinal support and alleviate nausea, vomiting, indigestion and gas.
  • It is said to promote estrogen secretion, leading to reduced menstrual pain.
  • Chewing on the leaves can sweeten the breath.

Tarragon

  • Medicinal uses of this herb are limited, but it is felt to improve digestive health.
  • It is rich in minerals such as manganese, iron, potassium and beneficial carotenoids.
  • In Chinese medicine, it is recommended to reduce inflammation.
  • The French will make a tarragon tea to reduce insomnia.

Thyme

  • It has antibacterial qualities.
  • The essential oil has been used for muscle aches and skin irritations.
  • When combined with honey, it could be effective for treating coughs and sore throats.

These are just a few herbs that may have some medicinal value. Whether or not they do and their efficacy level is certainly deserving of more scientific research. We should also be reaching for them to use in our kitchens. They may do more than just add flavor and interest to our dishes.

Cooking Tips · Ingredients

Foie Gras – Delicacy or Cruel?

Image by takedahrs from Pixabay

If you read much about French cooking, you will encounter the classic delicacy of foie gras. Besides being decadent and elegant, it is also controversial and polarizing. This cooking tip will explain what foie gras is and why there is this controversy. The first part of the discussion will define foie gras and its different categories. The controversy about foie gras will follow that.

Foie gras is the fattened liver of a duck or goose, but more commonly, a duck. It is produced by gavage, described as the force-feeding of ducks or geese through a tube inserted into their mouths and down the esophagus. This increased food intake leads to an elevated fat content and a distinctive flavor that is described as rich and buttery. The process is said to date from 2500 BC.

Foie gras is typically served as an appetizer or as a bread topping. Fruit flavors work very well with foie gras, particularly plums, grapes, and apples. Therefore, it might be served with bread and a fruit chutney.

There are different ways to categorize foie gras; they can be confusing and somewhat inconsistent from source to source. I will try to simplify it for you.

Foie gras entire (whole foie gras) refers to a whole liver made from one or two lobes. It may be raw or cooked with minimal seasoning, allowing the natural, rich flavors of the liver to dominate.

Foie gras is used for pieces of foie gras, not entire lobes, pressed together and seasoned.

Bloc de foie gras means reconstituted foie gras and refers to a cooked, formed block of which 98% or more is foie gras. One source likened the difference between this and “whole” foie gras to ground beef and a steak. Industrially produced Bloc de Foie Gras is actually a pâté made from minced foie gras and seasoning.

There are a few other products that contain foie gras plus other ingredients.

Pâté de foie gras: this must contain at least 50% foie gras. The liver is mixed with other meats, seasonings, and often some form of alcohol such as spirits or wine. The result is a spreadable, richly flavored paste that can be used on toast, crackers, or other dishes.

Parfait de foie gras: a parfait of foie gras is required to contain a minimum of 75% foie gras.

Mousse de foie gras must contain 50% or more foie gras. It has a creamy and airy texture due to being whipped either with just air or sometimes with dairy. Besides the lighter texture, the intense flavor is diminished somewhat.

Livers are also graded for quality.

Grade A livers are the best quality and are the largest at over a pound. They are firm, smooth, sweet smelling, consistent in color, with no blemishes. This is the type that a chef will prepare simply – seared, sautéed or in a terrine. It is also the most expensive.

Grade B foie gras will be smaller (under a pound) and somewhat softer in texture. They may have some minor surface defects and blood spots with more prominent veins. Although it has excellent flavor, chefs use Grade B in items such as pâté, mousse and terrines, where the blood content will dissolve with cooking.

Grade C is less prevalent than the other two and is generally not available on the retail market. It is often used to flavor and thicken sauces, although it can also be used in mousses and pâtés.

Now, let’s turn to a discussion of the ethics of foie gras production. According to Chowhound, the anti-foie gras movements started appearing in the 21st century, and the first country-wide ban (India) was in 2014. Since then, a few other European countries have followed suit with some level of ban. As you might expect, France is not one of those countries. Outside of Europe, bans are less common but are said to exist in Turkey, Australia, Israel, and Argentina.

Even in countries with bans, most still allow the importation of foie gras. India is one where even that is prohibited.

Different US cities and states have attempted to ban it, but these actions are usually challenged in court and are not always upheld. California has had more success in banning foie gras. In 2004, a ban on both sale and production was imposed. A court case forced the state to allow sales of out-of-state foie gras although the production is still banned. You will not see it in restaurants, as residents are still barred from ordering out-of-state foie gras and reselling it.

Why do some people and organizations seek bans? The following reasons are given.

  • The living environment for the birds is overcrowded and in cages.
  • The birds are force-fed more than they would naturally eat, causing their livers to grow multiple times their normal size.
  • The feeding method causes esophageal inflammation.
  • There is significant stress from the capture and insertion of the feeding tube.

Those who disagree with the bans give the following arguments.

  • Ducks’ throats are designed for swallowing rocks and eating whole fish, including fins, so the tube insertion is not traumatic.
  • The duck’s crop is made for stretching to hold food and stretching to several times its original volume.
  • Ducks lack a gag reflex.
  • Ducks have two pathways – one for breathing and another for eating.
  • There are good farms that use very humane methods. Some say all the US-based foie gras producers fall into this category. It is argued that one should not ban a product based on bad farms. There were three leading US foie gras producers. The ban forced a California one (Sonoma Artisan Foie) out of business. The two remaining ones are both in New York State.
  • Looking at Europe, there is the European Federation of Foie Gras.
    • Their objectives (taken verbatim from their website) are:
      • To promote foie gras, a thousand-year-old cultural and gastronomic tradition, and the profession of foie gras producer.
      • To develop common reflexions and proposals at European level on the various topics of interest to the sector.
      • To make European policy makers aware of the foie gras sector and, in particular, of its production methods.
      • To establish a continuous exchange of experiences and know-how among member countries for a constant improvement of practices.
    • The production method
      • There are two stages to foie gras production. You can read more on this page, but here is a summary.
      • The rearing stage—Birds are said to spend 90% of their lives outdoors during this stage.
      • The fattening stage—This amounts to 10% of the animal’s lifetime. They choose only healthy adult ducks or geese, and they are fed twice every 24 hours for about 12 days for ducks and 16 days for geese. According to Hudson Valley, the feeding time is only for a few seconds each time.
      • They note the “particular anatomical characteristics (possible alignment of the beak and neck thanks to the absence of cartilaginous glottis, the elasticity of the walls of the esophagus) which allow them to swallow large prey such as fish or frogs and predispose them to the fattening phase during the production of foie gras.”


The purpose of this Cooking Tip is not to take a side in this debate. It is to give you the information so you can decide if you wish to try this French delicacy and, if so, to provide you with the knowledge to know what to purchase.

Cooking Tips · Ingredients · Techniques

Smoothies – Friend or Foe?

Smoothies have never been a part of my daily routine. I suspect, though, that many of you do make smoothies regularly. They are one of those items that do not require a recipe. Instead, some general principles will help you make whatever smoothie you want. That, along with a discussion on the healthfulness of smoothies, are the subjects of this Cooking Tip.

Smoothies are thick, creamy beverages made by pureeing together fruits and vegetables with liquid and, at times, add-ins such as nuts and seeds. All smoothies start with two essential ingredients: a base and a liquid.

Popular ingredients include the following.

  • Fruits such as berries, bananas, apples, peaches, mango, avocado, pear, grapes and pineapple.
  • Vegetables might be kale, spinach, arugula, romaine, bok choy, Swiss chard, collards, wheatgrass, microgreens, cucumber, beetroot, cauliflower, or carrots.
  • Nuts and seeds could be in the form of nut butter, or items such as chia seeds, and flax meal.
  • The liquid can be as simple as water but might also be fruit juice, vegetable juice, milk, non-dairy milk, coconut water/milk, iced tea, or even cold brew coffee.
  • Dairy items such as cottage cheese or yogurt are common.
  • Sweeteners might include maple syrup, raw sugar, honey, pitted dates, simple syrup, fruit juice concentrates, stevia, ice cream, or sorbet.
  • Some people like to add nutritional and herbal supplements such as spirulina, bee pollen, matcha powder, protein powder, and powdered vitamin or mineral supplements.

There are different categories determined by the basic ingredients.

Image by Raul Florinto from Pixabay
  • Fruit smoothies usually consist of one or more types of fruit blended with fruit juice, water, milk, yogurt, or ice cream.
  • Green smoothies usually contain fruit for sweetness, but they also include leafy green vegetables in a larger proportion.
  • Protein smoothies usually consist of one fruit or vegetable, a liquid, and a significant protein source, such as Greek yogurt, cottage cheese, silken tofu, or protein powder.

Smoothies are popular because they are seen as healthy. They can be very healthy, but they also have some drawbacks.

Here are some positives about smoothies.

  • They usually contain a significant amount of healthy nutrients.
  • They help you to eat more fruits and veggies if you do not eat them in the whole form.
  • They are convenient and portable for those on the go.

Here are some of the cautions.

  • Sugar—The major problem with smoothies is that they often contain a significant amount of added sugar. This is especially true of commercially prepared smoothies, as opposed to homemade versions.
  • Calories – depending on the ingredients and the smoothie size, some can contain over 1000 calories, not exactly a low-calorie snack. The suggested serving size of a smoothie is 5 ounces, far less than most people consume.
  • Fiber—Although smoothies can contain a significant amount of fiber if you make them from whole foods, they still will not contain the same amount of fiber as if you were eating the whole foods without blending them.
  • Satiety—Although smoothies may be satisfying in flavor, they may be less so in satiety. It is typical for those drinking smoothies to become hungry again soon afterward, particularly if the smoothie lacks protein or fiber.

To make a healthier, more filling, and pleasant-tasting smoothie, follow this advice.

  • Choose whole fruit, not juice.
  • Add leafy greens. Research has shown that cooking the greens increases their mineral and antioxidant content. Therefore, steam or blanch them, puree them and then freeze them in ice cube trays. Once frozen, store them in a freezer bag.
  • Try to sweeten only with the natural fruit without adding any other sweeteners.
  • Increase the fiber content by adding oats, oat bran, psyllium husks, or chia seeds.
  • Include healthy fats by adding ground flax, chia seeds or flax oil. Alternatively, add nut butter or avocado.
  • Add protein in the form of yogurt or even a protein powder.
  • Blend the ingredients in stages. Most recommend blending the leafy greens and liquid together first, then adding the fruits and blending again.
  • Some will use ice to increase the thickness, but you may also use frozen fruit instead of ice.
  • Some like to make their smoothies using a 60/40 ratio. That is 60% fruits and 40% leafy greens. For example, 2 cups leafy greens, 2 cups liquid, and 3 cups ripe fruit.
  • Homemade smoothies are generally much healthier than ones you purchase in stores or cafes. You can control the amount of sugar in them and amp up the healthy ingredients. The most nutritious smoothies utilize whole foods, contain little or no added sugar, and include a balanced amount of carbohydrates, fiber, protein, and healthy fats.

As the weather is warming up, many people turn to smoothies. Just be aware of what you are drinking and, even if it is a healthful smoothie, it is only one part of a healthy diet that should rely more on whole foods rather than just smoothies.

Cooking Tips · Ingredients · Techniques

Hidden Gluten – Do you know where to find it?

Image by CatsWithGlasses from Pixabay

I do not have a gluten sensitivity. Nor do I cook for anyone who needs to avoid gluten. I was recently teaching a class where one of the recipes we were using called for chili powder. The only one I had contained flour. That might be surprising to those who pay no attention to gluten. Some call these “hidden” sources of gluten. I decided to write this Cooking Tip on those unexpected gluten sources. I hope it is helpful for those of you who may need to cook for others who need a gluten-free diet.

Gluten is a family of proteins naturally found in certain grains, such as wheat, barley, and rye. It gives bread its great chew and elasticity. Too much gluten can make baked goods tough; too little can mean a lack of structure. That is all most of us think about when we consider gluten. However, if you have celiac disease or even a gluten sensitivity, it can seriously impact your health.

We all know not to offer bread, pastries, or pasta to someone who needs to avoid gluten. However, gluten can be hiding in many other places of which we should be aware. This is not an exhausting list by any means. It does highlight some of the more common places where you wouldn’t expect to find gluten, but it can certainly be there.

Seasonings

As I mentioned above, gluten may be hiding in your seasonings. If it is a single spice or herb, it is most likely gluten-free. You have to be cautious when it comes to blends. If you are a regular reader of these Cooking Tips, you know I am a big proponent of making your own spice/herb blends rather than buying pre-made ones. See this Tip for more information. Besides the reasons given in that Tip, add this one – you can avoid putting gluten in these blends.

The main reason that wheat starch is put in some seasoning mixes is that it acts as an anti-caking and anti-clumping agent. Common examples of spice blends are curry powder, chili powder and Italian seasoning, although there are many more.

This is why you should pay attention to ingredient labels, which are required to list any gluten-containing ingredient. My favorite spice source is Savory Spice. They state in their website’s FAQ section that most of their spices/seasonings contain no gluten. They also list those details on the product pages.

One of the largest spice companies, McCormick’s, has this statement on its website, followed by a list of 13 different potential allergens.

We are aware of allergies and sensitivities and will always declare the[se] … ingredients on our label in the ingredient statement – they will never be hidden under the notations of “spices” or “natural flavors.”

If you buy other brands, be sure to check their product information as well as the product labels. Be wary of spices sold in bulk bins, as cross-contamination can easily occur with scoops or other items.

One comforting thought comes from celiac expert Shelley Case, RD. She writes the following on BeyondCeliac.org.

“A single serving of a ground spice is typically quite small (about 0.5 grams). So, if a spice had 160 ppm of gluten and an individual ate 0.5 grams of this spice in a meal, the amount of gluten consumed would be 0.08 milligrams (mg). Studies have found that a threshold level of less than 10 mg of gluten per day is safe for most individuals with celiac disease.”

Soy Sauce

Wheat is used in the traditional method of making soy sauce. This Tip talks more about that process. To avoid gluten but have a product with a similar taste, many people choose Tamari. That is the liquid byproduct formed during miso-making. It is thicker and richer than soy sauce and is made just with fermented soybeans but little or no wheat. Because of that, it is touted as a gluten-free soy sauce. However, not all of the brands are totally free of wheat, so you need to check the label.

Salad Dressings & Vinaigrettes

Some may use malt vinegar (another source of gluten), soy sauce or even flour. As always, check the label or, even better, make your own.

Processed deli meats

Some may contain gluten-containing ingredients, which are used as thickeners. Even if they do not, be wary of cross-contamination by the deli workers.

Oats

Many feel oats are a safe gluten-free food. However, there is some concern about cross-contamination when oats are grown in fields next to wheat fields. To be certain, only buy oats that are certified gluten-free.

Potato Chips/French Fries

Although potatoes do not contain gluten, seasonings often applied to them may contain malt vinegar and wheat starch. There is also the chance of cross-contamination if they are fried in the same oil as gluten-containing foods.

Marinades & Sauces

Many store-bought products in these categories contain malt vinegar, soy sauce or flour. Even sauces (homemade or in the restaurant) served with meat or veggies are thickened with a roux, which is generally made from butter and flour but can be made with gluten-free alternatives.

Sausages

Sometimes, sausages contain a binder made of flour-based ingredients.

Cooking Spray

Most are fine, but some brands can contain flour. Baking sprays are different and are purposely formulated with flour.

You need to become a label-reading expert. However, the words used will not always be flour or wheat. Here are just a few words that could signify gluten unless it states gluten-free.

  • Starch
  • Modified food starch
  • Hydrolyzed vegetable protein
  • Hydrolyzed plant protein
  • Textured vegetable protein
  • Dextrin
  • Maltodextrin
  • Glucose syrup
  • Caramel
  • Malt flavoring
  • Malt extract
  • Malt vinegar
  • Brown rice syrup

There are also apps to help you know if a food is gluten-free. One is Fig. You set it up by indicating what foods you want to avoid. Its search function will tell you which foods will be appropriate for you and in which stores you can find them. You can also scan the barcode to see if the ingredients match your dietary needs. The starter version is free. I have not tried this app, but it has good reviews. Another is Spokin, although it is only for Apple devices.

Many websites can be very helpful for people trying to avoid gluten and those of you who cook for them. Here are just a few.

You may not need this information the majority of the time you take to the kitchen. But, for those times you do, I hope you find this helpful.

Cooking Tips · Ingredients · Techniques

Lentils – Not just for vegetarians!

So many of us are trying to cook and eat in a more healthful manner. I wrote an entire series of Cooking Tips on how to do that. Here is the first one in that series. One way we could all do that is to increase our intake of foods that I suspect we do not eat regularly. One such food is Lentils. What lentils are and what to do with them is the subject of this Cooking Tip.

Some people think lentils are a type of grain. However, they are part of the legume family, similar to beans, peas, and chickpeas. Lentils are a nutritious source of fiber, protein, and other nutrients.

Although you will probably just see a couple of varieties in your market, there are numerous types. They vary in color from brown to green to black to reddish-orange. Some are considered large, others small, and even others petite.

Most lentils will be sold in a whole shape. However, some, such as red or yellow, are sold as “split.” This means their seed coat is removed, and they are cut in half.

Brown Lentils

  • These are the ones most commonly found in supermarkets.
  • Size/shape – large, flat
  • Color—light brown. Because the brown color can have a greenish tint, they are sometimes called green lentils. Do not confuse these with French green lentils.
  • Taste – Mild, earthy flavor
  • Uses
    • They are intermediate in their ability to maintain their shape. They break down easier than French green lentils or Beluga lentils, but not as much as red and yellow. To keep them as firm as possible, do not overcook them.
    • Use in soups, stews, curries, salads, pilafs or meat replacement dishes.

Green Lentils

  • Some sources consider these a type of brown lentil, while others describe them as a separate variety. They are not the same as Puy lentils, though.
  • Size/shape – similar in size/shape to brown lentils
  • Color – a dusky green color
  • Taste – earthy but slight peppery quality
  • Uses are similar to brown but may maintain their shape better when cooked.

Lentilles du Puy (du Puy lentils)

  • These are only grown in the Puy region of France and are known as French green lentils. Not all French green lentils are grown in this particular region of France. If they do not say “Puy,” they are probably the same variety but grown elsewhere.
  • Size/shape – smaller and rounder than other lentils. They have a thicker skin than other green lentils, which gives them a firmer texture.
  • Color – greenish with dark specks.
  • Taste – If true “Puy” lentils, they will have mineral and peppery notes due to the volcanic soil in which they are grown. This may not be so if you have green lentils grown in other areas of France.
  • Uses
    • They take longer to cook.
    • As they hold their shape, they work well in salads and soups, although they may require pureeing in the latter.

Red Lentils

  • Size/shape—These are often sold as “split,” meaning their coat has been removed, and the inner part has been split in half.
  • Color – reddish-orange
  • Taste – Earthy and nutty with floral notes.
  • Uses
    • These cook more quickly than other lentils.
    • They break down completely so they can be made into a puree.
    • Good in soups and curries.

Yellow Lentils

  • These are very common in Indian cooking.
  • Color – yellow
  • Flavor – slightly sweet
  • Uses
    • They become soft when cooked and can act as a thickener.
    • Common in Indian dals, hummus, and as a thickener in soups and stews.

Beluga (black) Lentils

  • They get their name due to their resemblance to caviar.
  • Size/shape – very small and sphere-shaped
  • Color – dark brown to black
  • Taste – meaty and earthy
  • Uses
    • They have thicker skin, meaning they will retain their shape but take longer to cook.
    • Use in salads and soups.

Cooking Lentils

  • Purchase lentils that are as fresh as possible, as older lentils take longer to cook. If they are very old, they may not soften at all, despite how long you cook them. Some recommend buying from bulk bins as they tend to be fresher due to the more considerable turnover.
  • Lentils should be rinsed before cooking to remove dust or debris.
  • You should also sort through them to pick out any pebbles or grit that might be present.
  • They do not need to be soaked before cooking as they have a relatively short cooking time.
  • Cook lentils in plenty of water as they will swell in size as they cook.
  • Bring the water (or broth) to a boil, then reduce to a low simmer to prevent the skins from splitting.
  • Do not add salt until the lentils are cooked, as it can cause the lentils to stay crunchy rather than soft and tender. Some caution against adding acidic ingredients, such as tomatoes, for the same reason. However, others like to add them earlier to aid in flavor absorption.
  • To add more flavor, add aromatics (onion, leeks, celery, carrots, garlic), spices, herbs, or even meat. Cook aromatics gently first before adding lentils.
  • Be aware that brown and green lentils will be firmer and hold their shape better, while red and split green lentils will quickly break down.
  • Cooking Times
    • Brown lentils – 20-30 minutes
    • French green lentils – 25-35 minutes
    • Red and yellow lentils – 15-20 minutes
    • Black Beluga lentils – 20-25 minute
  • America’s Test Kitchen likes to make crispy lentils to top soups and salads. After a short brine (see below), they strain and pat them dry. After heating oil in a pan until very hot, the lentils can be fried until crispy and golden. After removing from the pan, they can be tossed in seasonings of your choice.

Brining

  • As with other legumes, the skin of the lentils can easily rupture during cooking. To prevent this, America’s Test Kitchen recommends soaking them in a salt brine before cooking. They recommend a teaspoon of salt in a quart of water and soaking for an hour.
  • Do not brine split lentils since their coat has been removed.
  • Skip brining if you want a softer, more mushy texture.

Storage

  • Dried lentils have a very long shelf life. Store in an airtight container away from light, heat and moisture.
  • Cooked lentils may be stored in an airtight container in the refrigerator for up to a week or in the freezer for up to a month.

Are you a regular consumer of lentils? I must admit that I am not although my husband likes them in soup. I challenge all of us who are not lentil-eaters to set a goal of trying the different varieties. That is one healthy challenge!

Cooking Tips · Ingredients · Techniques

Japanese Milk Bread – Is it worth the effort?

People often ask me if I like to bake or to cook. I always find this question hard to answer as I love to do both. If I was forced to pick one, I just couldn’t do it. Many people, though, find themselves gravitating towards one or the other. If you consider yourself an avid baker, you probably have heard of Japanese Milk Bread. If you shy away from baking, you may not have heard of it. It is a delicious creation, and what it is and why you might want to try it are the subjects of this Cooking Tip.

If you love artisan bread with its thick, chewy crust and interior full of holes, milk bread is not for you. If you only want to eat bread made with whole grains, milk bread is not for you. If, however, you love the guilty pleasure of soft, creamy, slightly sweet white bread, read on.

Image by Sornram Srithong from Pixabay

According to Bon Appetit, Japanese milk bread may have been invented by a British baker who opened a bakery in Japan in 1862. If you have never tasted milk bread, the closest thing you may recognize is white supermarket sandwich bread, although that is not as flavorful or as fluffy as milk bread.

Japanese milk bread is an enriched bread, meaning it contains more than just flour, water and yeast. Enriched breads also contain fat, dairy, eggs and/or sugar.

Other names you may see are Hokkaido milk bread or Shokupan. The latter Japanese term means “food bread.” It is a general term for a loaf that you slice and toast into sandwiches. It has a soft interior with a mild flavor and minimal crust. As it has evolved, today’s shokupan contains more fat than the original.

The key to making this bread is something called Tangzhong, which is a Chinese technique. It is a warmed roux usually made with milk and flour, although some recipes use water and flour, and others use all three. This tangzhong is said to do a couple of things. According to MasterClass, it allows the flour to absorb more liquid, yielding a moister result. The warm liquid also starts activating the gluten in the flour, aiding in trapping the liquid and achieving the final soft texture. It also helps to give milk bread a slightly longer shelf life than other breads.

As a sideline, not all bakers agree that tangzhong is the key to milk bread. Read this post from Epicurious for more information. Since the large majority of recipes use the tangzhong method, I will discuss that.

Besides the tangzhong, the other ingredients are flour, yeast, milk, sugar, butter, eggs and salt. Some recipes will add nonfat dry milk powder, saying it improves the bread’s tenderness and flavor.

  • Tangzhong – This is made by mixing the flour, milk, and/or water together over low heat until it thickens to a pudding-like consistency and reaches 150°F. It is then set aside and allowed to cool slightly before continuing with the recipe.
  • Flour – Most recipes use bread flour, although some have developed recipes using all-purpose flour.
  • Sugar – This gives the bread a sweeter flavor than other breads. Most recipes call for about ¼ cup.
  • Butter – As with all baking, use unsalted unless salted is specifically called for. Some recipes just have you soften it, while others will melt and cool it before adding it to the mixture.
  • Egg – Another enriching ingredient that increases the fat content.
  • Folding/Shaping – After the dough is mixed sufficiently and allowed to rise, most recipes require you to follow a folding technique for shaping followed by a second rise. The folding technique will vary depending on the recipe, so consult the one you are using for their recommendations. The classic baking method is in a Pullman pan, but you can also use a loaf pan or even shape the dough into rolls.

Although most recipes are similar, they can vary somewhat. As with all baking, it is best to follow your specific recipe carefully and use weights rather than volume measurements, if possible. Here are three recipes to try—all from reputable sources. The first two give measurements in weight and volume, while the third is volume only.

Have you made milk bread before? Did you like it? If you haven’t made it, I encourage you to try it. Although it is not the healthiest bread, it is delightful on the palate!

Cooking Tips · Ingredients

Tap Water – Hot, Cold or Neither?

Image by Karolina Grabowska from Pixabay

Imagine you are making pasta for dinner, and you are running behind. Your sauce is ready, but you still need to cook your pasta. For that, you need boiling water. You fill your pot with hot water from the tap to save time. Or, you want to make a beverage that requires hot water. Why heat cold water? Why not use the already hot water from your tap? Have you ever been in those situations? What you should and shouldn’t do is the subject of this Cooking Tip.

The simple answer is don’t do it! Don’t use that hot tap water for your cooking or drinking. Why not?

Lead

  • Lead is commonly found in our plumbing systems, especially in older homes. Even newly-manufactured pipes have a permissible amount of lead in them.
  • Lead dissolves more easily in hot water than cold and, therefore, is more likely to contain higher amounts of lead. We all want to limit our exposure, but especially those of our children, to lead.

Contaminants

  • Hot water systems like tanks and boilers contain metallic parts that corrode as time goes by. These can contaminate your water. Hot water dissolves these contaminants faster than cold water.

Bacteria

  • Hot water tanks can act as biological incubators and grow bacteria.
  • The CDC says boiling water for one minute (or three minutes at elevations higher than 6,500 feet) will kill bacteria. However, boiling water does not remove lead.

Minerals

  • Hot water contains more dissolved minerals from your pipes, which, although not a health hazard, can negatively affect the taste of your food and beverages.

Ben Montross, Vermont’s Drinking Water Program Manager, has the following advice to consume tap water with the lowest possible risk.

  • Only consume cold tap water.
  • Flush the taps until the water runs truly cold before consuming it.
  • Regularly clean and sanitize appliances that use water.

I have always used cold tap water, but others in my household do not always heed this advice. What about in yours?

Cooking Tips · Ingredients · Techniques

Beurre Monté – just another butter sauce?

Sauces are one of my favorite things to make. They are easy, and they elevate food from ordinary to delicious. I have written three prior Cooking Tips – Sauces Demystified, Mother Sauces I and Mother Sauces II on different types of sauces. One sauce I have not discussed is Beurre Monté. That is the subject of this Cooking Tip.

Image by Peter Toporowski from Pixabay

As you might suspect, beurre monté is a French invention. It is translated in various ways: “worked up butter,” “prepared butter,” “mounted butter,” or “whipped butter.” It is also a very simple and delicious sauce, as long as you don’t mind that it is made almost entirely of butter.

We all know that fat and water do not mix. We must force them to do so by the process called emulsification. This is done by slowly adding one ingredient to the other while vigorously mixing. This suspends tiny droplets of the one into the other. Vinaigrettes are one type of emulsion. The water element is typically vinegar, citrus juice, fruit juice or a combination. The fat usually is olive oil. If you pour them together, they will naturally separate. It is only by whisking the water-like ingredient while you slowly pour in the oil that you will get them to combine into an emulsion. They will often separate when setting, but you can again re-emulsify the mixture by shaking or mixing.

If you have read my Sauce Cooking Tips, you will have read that most pan sauces are finished by whisking a small amount of cold butter into the sauce. This thickens the sauce and gives it a glossiness and richness. That process is called “monter au beurre.”

Although it sounds similar, beurre monté is different. It is an emulsion, one that is made by whisking cold butter into simmering water. As one source puts it, it is the “lifeblood of many professional French kitchens.” That sounds like it would also be a good sauce for us home cooks to know.

There are only two ingredients – butter and water. Cooks Illustrated will tell you that the ratio of butter to water is crucial. You want only enough water for the fat droplets to disperse themselves without the result being too thin and watery. However, not everyone is such a stickler for that ratio.

Cooks Illustrated recommends three tablespoons of water to eight tablespoons of butter. Thomas Keller of The French Laundry uses four tablespoons of water to one pound (32 tablespoons) of butter. Masterclass agrees with Keller.

Despite your water-to-butter ratio, all agree on the method. Bring your water to a boil and reduce to a very low simmer. Start whisking the cold butter in piece by piece. You want the butter to melt and break into droplets that you emulsify in the water bit by bit. Continue this process until you have emulsified all the butter. Season to taste and you are done.

Feel free to try some variations on this basic recipe.

  • Stock – substitute stock for water, but be cautious of the sodium content.
  • Herbs – whisk in minced fresh herbs. Hardy ones (rosemary) can be added at the start, but more delicate ones (tarragon) should be added at the last minute.
  • Preserves, liqueurs, juice – After adding the butter to the water, whisk in 1½ Tablespoons jam or jelly and 1½ teaspoons of liqueurs or juice. Cooks Illustrated recommends raspberry jam plus Chambord, apple jelly plus brandy, or plum preserves plus amaretto.

Some might ask how this is different than just melting butter by itself. The result is quite different. Melted butter will be thin and just run off the food. By contrast, beurre monté coats and clings to the food and provides a more luxurious experience.

How would you use beurre monté?

  • As a sauce on its own for meat, fish, pasta or veggies.
  • As a base for another sauce. Make the beurre monté and add other flavorings such as herbs, spices, lemon juice, shallots, jams, liqueurs and more.
  • As a poaching liquid for veggies, delicate meat or seafood. Because of fat’s low heat conductivity as compared to water, it will allow you to cook meat and fish more gradually, giving you a tender and not overcooked result. It also infuses the meat and fish with the flavor of butter.

You may make smaller amounts to meet your immediate needs. You can also make it ahead and hold it for up to 4 hours. To do that, put a lid on the pot and keep it warm but only at a sub-simmer, 135-160°F.

The leftover sauce may be refrigerated but will not have the same texture upon reheating. Instead, upon reheating, use it as you would regular melted butter. You could also heat it to turn it into clarified butter by removing the milk solids.

I do not know about you, but I have some salmon in my freezer that is just calling out to me for it to be dressed in a beurre monté. What about you?