Cooking Tips · Ingredients

Bananas – is there anything to know?

Image by Duy Le Duc from Pixabay

If you were asked to name your top three or four favorite fruits, would bananas be on that list? They certainly would be on mine. Other than eating them as a snack, there is much more to know about bananas. In this Cooking Tip, we will explore all about the wonderful banana.

Americans have been importing bananas since 1870. An American businessman (Lorenzo Dow Baker) brought 160 bunches from Jamaica to the US. He subsequently started the Boston Fruit Company. This later merged with Tropical Trading & Transport Company and became United Fruit Company.

Although there are hundreds of varieties of bananas, we rarely see more than one or two in our stores.

Cavendish Banana

Image by Hans from Pixabay
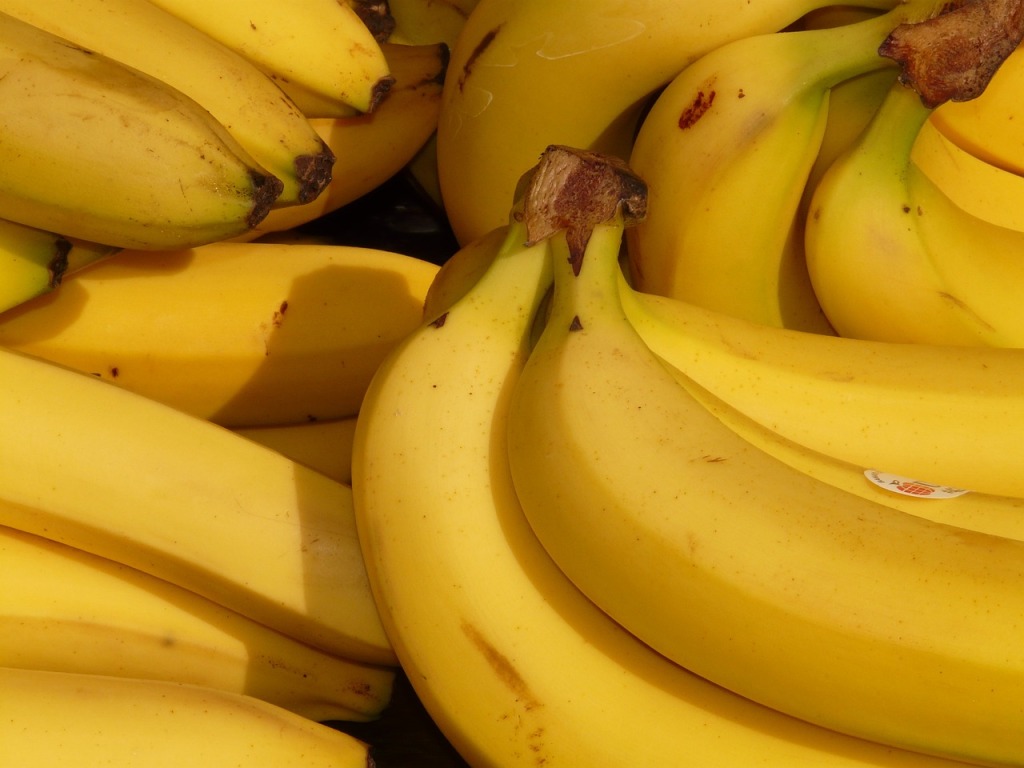
  • This is the typical banana that we see in the stores.
  • It represents 47% of all global production and 99% of bananas sold in the US.
  • It is easily recognized by its yellow peel and white flesh.
  • The flavor is slightly sweet and has a somewhat creamy texture.
  • The best uses for the Cavendish banana are eating out of hand and in desserts.

Plantain

  • If you see another variety, it will most commonly be the plantain, which is a relative of the banana.
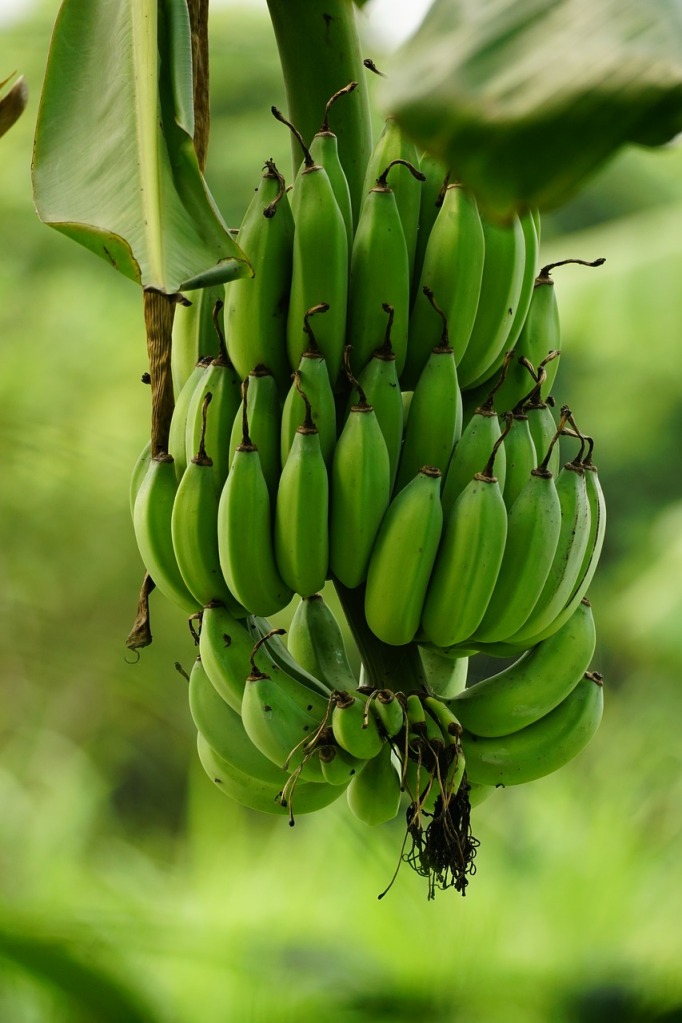
  • The color can be green, yellow or black. The latter is the color when it is fully ripe.
  • The flavor is mild, but due to its high starch and low sugar content, it is not nearly as sweet as the Cavendish.
  • Texture is firmer.
  • The best use is in savory dishes. Cook them as you would potatoes.
  • It is notoriously difficult to peel. One recommended method is to cut off both ends and slice tip to tip. Then, remove the peel under cold running water side-to-side.

Other varieties exist, although it is unlikely you will find them in the average supermarket. Names you might see are Red Bananas, Baby Bananas, Gros Michel Bananas, Nam Wah Bananas, Mysore Bananas, Pisang Raja Bananas, Lady Finger Bananas, Senorita Bananas, Blue Java Bananas, Manzano Bananas, Apple Bananas, and Lady’s Finger Bananas.

Ripening Process

A common topic around bananas is the ripening process – either speeding it up or slowing it down.

Speeding Ripening

Paper Bag

A typical piece of advice is to put your unripe banana in a paper bag for a few days. The thought is that the bag traps the ethylene produced by the fruit, which is what causes ripening. Some also say that putting another piece of ripe fruit (typically an apple) in the bag will release even more ethylene, making the ripening even faster. Not everyone agrees that this works as well as advertised, though. The critics do not feel it speeds ripening very much, but they do find it leads to more even ripening.

Warmer Temperatures

Placing your bananas in a warmer area, higher than 75°F, does speed ripening. Some will put them on top of the refrigerator for this purpose.

Oven Ripening

Because higher temperatures help with ripening, some will put the bananas in a low oven, about 250°F. The problem is that although they soften and darken in color, they do not get noticeably sweeter. Microwaving bananas leads to similar results.

Egg Yolk Ripening

If the bananas are destined for a cooked preparation, adding an egg yolk to them and letting them sit for about 30 minutes can speed up ripening. The theory is that the amylase in the egg yolk breaks down the starch into sugars. For more information, see this article by Stella Parks.

One of the primary uses for ripe bananas is banana bread. You might ask if you really need such ripe fruit for this purpose. Cooks’ Country tested this by making three loaves – one with green fruit, one with yellow and one with very ripe brown. The first difference they noticed is that mashing the bananas is much easier with brown bananas. They also found that the riper the banana, the more flavorful the bread. Banana bread made with green bananas tasted less sweet and more vegetal. The loaf was also taller, drier, and had a more open crumb. This was contrasted with the loaf made with ripe fruit. It was moist, dense, and had a compact crumb. The bananas in between had a good texture but less banana flavor. This all makes sense if you think of what happens as bananas ripen. Some of the starch is converted to sugar. This gives more sweetness and acts like a liquid in baked goods, leading to a moister and more tender bread.

Slowing ripening

Cooler temperatures

Just as warmer temperatures can speed ripening, cooler temperatures can slow ripening by reducing the production of ethylene and acids. For this to work, they should be stored below 65°F. Refrigeration certainly works, but it also causes the skin to turn dark.

Taping the stem end

Although there is debate on why this method works, it does slow ripening. You may occasionally even see this done in the stores.

Separation

Separating the bananas rather than leaving them in a bunch might slow ripening a bit.

Freezing bananas

  • Most of us have probably thrown bananas that were getting too ripe in the freezer, which is a perfectly acceptable method for preserving them. To do so, choose fully ripe bananas.
  • You may put them whole in a freezer container or slice them crosswise into rounds that are ½- to ¾-inch thick. Place the rounds in a single layer on a baking sheet. Freeze, uncovered, for an hour. After an hour, they start to stick to the sheet, so some like to slightly move them at this point and then return to the freezer for another hour. When solid, store in freezer containers.
  • Although you can leave the peel on, it is tough to remove once frozen. It may also decrease the quality of the frozen bananas.
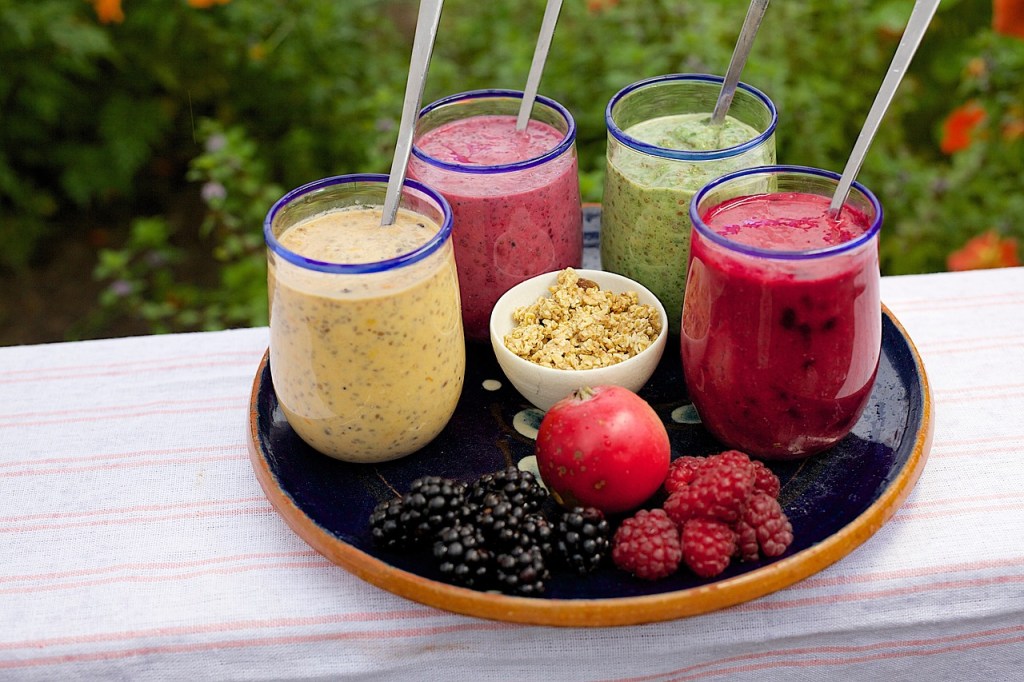
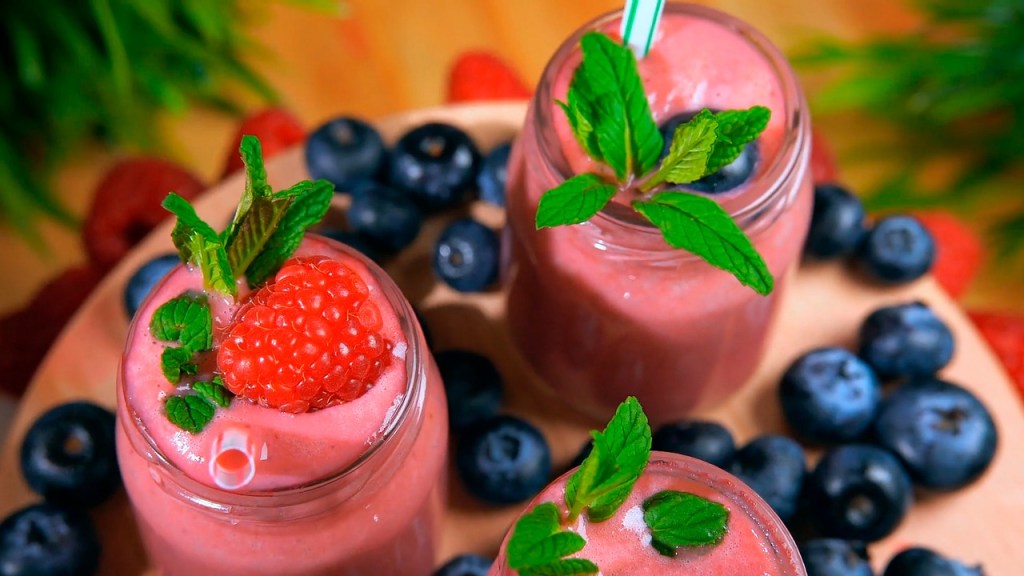
  • Frozen bananas are best used in smoothies, ice cream, pies, banana bread, and pancakes.

How do you like to use bananas? Is it just good ole banana bread? How about Bananas Foster, banana cake, cupcakes, pancakes or muffins? Or do you have a more unusual method of using bananas? For me, just eating them, particularly if they are chilled, is the way to go!

Cooking Tips · Techniques

Plating like a chef!

When you go out to a restaurant, and they present you with an artfully plated dish, your expectations that it will taste good go up. Those who know me know that making things look pretty is not a skill I possess. If I want a nice garnish or some other touch on the plates I am serving to guests, I call my husband, who is much better with things that require a bit of manual dexterity. This Cooking Tip on how to plate food is for those who want that wow factor when you serve your guests. I don’t think it will help people like me, but you never know!

Dishes

Most chefs will tell you successful plating starts with the plate/dish. There is a reason most restaurants serve food on white dishes. It is a plain background on which you can do your artistry. However, you do not have to feel constrained by this if your dish’s colors/patterns complement and do not distract from the food.

Other considerations besides the color are the size and shape of the dish. There is no one correct size; it should be large enough to hold the food without looking like there is too much empty space but not so small that it covers the entire plate. Successful plating involves a certain amount of negative space.

Some like to match the shape of the dish to the food, such as using a square plate with slices of lasagna. Others like to contrast shapes. Use what is most pleasing to the eye for your food.

Food placement

The classic style puts the main ingredient in the center of the dish, with the side dishes arranged around it. Others like to put that main ingredient just off-center.

Traditional plating involves placing the main part of the meal (typically the protein) at about 6:00, the traditional starch at about 11:00, and the side dish at 2:00. This works best when the sizes of these different items are balanced.

Others like to arrange the food in linear patterns, either vertically or horizontally. The food is placed in parallel or intersecting lines, and garnishes are added to break up the lines. Still another pattern is placing the food on the plate in arcs rather than straight lines.

Odd numbers of items, such as shrimp, scallops, or small bites are considered more attractive than even numbers.

You will undoubtedly have seen the practice of stacking food on the plate to add height. An example would be putting the starch on the bottom, the protein in the middle, and the veggies to top it off. The bottom layer could be your starch in a pureed form, mayo or a sauce. The middle layer could be your protein or a neat dollop of rice or noodles. If the protein is not in the middle layer, it will be in the top layer. Longer items, such as asparagus spears, also look great on top.

Another tip is to slice your chicken, steak or other protein before plating and then arrange it on the plate back into its whole shape but fanned out.

This all takes creativity and practice. Some chefs start by making a drawing of how they want the plate to look. This helps them visualize and then achieve just what they want.

Color

Try to avoid a monotone dish. If you are serving a lighter-colored protein, such as fish, surround it with darker-colored sides and vice versa.

Garnish

Sprinkling on herbs or cheese or even a lemon slice can add a pop of color and increase the visual appeal. When it comes to cheese, rather than grating, why not try making shavings and topping the food with those? Just a drizzle of olive oil or an interesting infused oil can be striking. You could even incorporate edible flowers.

Sauces

Sauces are not always necessary but are an excellent addition. I was taught in culinary school that the proper way to use a sauce is to put it on the plate first with the other items on top. Get creative with how you apply the sauce to the plate. This video has some interesting techniques for the application of sauces. If you are going to use a sauce, do not plate it until just before serving.

Texture

Just as you do not necessarily want all the food to be the same color, you also do not want all the textures to be similar. Adding chopped nuts, sesame seeds, or seaweed flakes adds a certain amount of interest to the mouthfeel.

Wipe the edges

This is just common sense. If some of the items are all over the edges of the plate, it will look messy. Take those few seconds to wipe it clean before putting the plate in front of your guest.

Helpful tools

If you are serious about raising your plating skills, consider investing in some helpful tools. Inexpensive squeeze bottles improve your control over where your sauce goes. Long tweezers allow you to place smaller items exactly where you want them without disturbing the other ingredients. Some chefs like to use food-grade paintbrushes. Ring molds help you achieve that neat, circular placement of the food. Small prep bowls can be used to mold your rice into a neat shape before placing it on the plate. A good set of kitchen tongs will aid you in shaping an attractive nest of pasta on the plate.

Even with my lack of creativity and poor manual dexterity, these tips could help me make my dishes not only taste great but look attractive and appealing. I am sure it would be the same for you. Experiment, have fun and don’t be too hard on yourself!

Cooking Tips · Ingredients

Onions – Is there a place for dried?

Your recipe calls for fresh onion, but when you go to your panty, you find none. You recall that you do have some sort of dried onion product in your spice rack. Can you use that? That is the subject of this Cooking Tip.

Similar to dried garlic products, dried onion products start with fresh onions that are dried and then ground/cut into different sizes. Similar to fresh onions, the flavor will vary depending on the variety of onion used.

When you add fresh onions, you add not only their flavor but also a textural element. Also, as the onions cook, they release water, adding moisture to your dish. Whereas the dried onion products can impart flavor, you will miss out on the texture and moisture.

We all know that cutting fresh onions releases a pungent odor and causes eye tearing. One advantage of dried products is that they do not cause eye discomfort, and the odor is much milder. Let’s look at some of those products.

Onion Powder

  • This is made from fresh onions that have been dehydrated and then finely ground.
  • It can add an onion taste in those dishes where you do not want the moisture or texture of fresh onions.
  • The powder dissolves more fully into a dish and distributes more evenly than fresh onion if added to a spice rub or a meatloaf.

Granulated Onion

  • Granulated onion results from drying the onions but grinding them less finely than is done with onion powder.
  • Depending on the size of the resulting granules, other names you might see are minced onion, chopped onion and onion flakes.
  • These larger-sized onion products are best used in dishes with sufficient moisture and time for the onions to rehydrate.
  • If your dish does not have significant liquid, some recommend that you soak the particles in warm water for five minutes before using.
  • Besides onion flavor, the larger-cut dried onion products could add a small amount of texture.

Granulated Roasted Onion

  • This product is similar to the others, but the onions are roasted before drying and ground.
  • Roasted onions will be less pungent and more sweet.

Onion Salt

  • Just as with garlic salt, this is a mixture of salt and onion, usually in a 3:1 ratio.
  • It imparts an onion flavor but also adds a significant amount of salt.
  • Whereas you can substitute the other dried onion products for onion salt, do not use onion salt instead of onion powder or granulated onion.

Similar to dried garlic products, onion products are not a substitute for fresh onions but are a separate product that will add onion flavor. They are best used as an ingredient in dishes such as onion dips or chili, soups, stews, and sauces.

For those who do want to try to substitute for fresh onion, below are some suggestions. As onions vary in size, these recommendations vary according to what size onion is called for in the recipe. If no size is specified, use the amounts listed for a medium onion. As recommendations differ from expert to expert, always start on the lower side and then increase to taste. Fresh onions are often sautéed before being used in your recipe. You do not need to do this with dried onion products.

1 small onion

  • Yields ¼ to ½ cup chopped fresh onion.
  • Substitute 1 teaspoon onion powder or 1-1½ tablespoons of granulated onion.

1 medium onion

  • Yields ½ to 1 cup chopped fresh onion.
  • Substitute 2-3 teaspoons of onion powder or 2 tablespoons of granulated onion.

1 Large onion

  • Yields 1 to 1½ cups chopped fresh onion.
  • Substitute 1-1½ tablespoons of onion powder or 3-4 tablespoons of granulated onion

If you desire, you can make your own dried onion products with this method.

  1. Peel onions.
  2. Chop finely.
  3. Spread in a single layer and dry either in a food dehydrator or in a 150°F oven.
  4. When they easily crumble, they are dry.
  5. Allow to cool and then grind in a spice grinder or mortar/pestle.

I do have a couple of dried onion products in my spice rack, although they are rarely used and only in certain applications. How do you like to use them?

Cooking Tips · Ingredients

Garlic Powder – Is it ever OK to use?

Garlic is probably one of the most used seasoning ingredients in our kitchens. I have written a prior Tip on fresh garlic and how it compares to the bottled variety. In this Cooking Tip, I want to discuss the dried and powdered garlic products you can find on the shelves of your supermarket.

Many culinary legends, including James Beard and Julia Child, despised these powdered versions of garlic. In an introduction to a recipe for Garlic Soup, James Beard states:

Is that true? Is there no place in our kitchens for these items? Let’s look at what these products are and if and how they might be used.

Garlic Powder

  • Garlic powder is made from fresh garlic bulbs that have been dried and then ground into a fine powder.
  • It is not as potent as fresh garlic but is suitable for when you want a milder garlic flavor dispersed throughout. Fresh garlic doesn’t stick as well and doesn’t spread as evenly as a powder, which makes the powdered version useful in a spice rub. It adds a warm flavor without the pungency of fresh garlic.
  • It should not be considered a replacement for fresh garlic but a separate garlic-flavored product.
  • Cooks Illustrated recommends hydrating garlic powder in an equal amount of water and then sauteing it in fat before adding to the dish.

Garlic Salt

  • As its name implies, this product combines garlic powder and table salt. It is generally made with three parts salt and one part garlic powder.
  • The garlic flavor is much milder than either fresh or garlic powder.
  • The primary consideration is the salt content. If you use this product, you must decrease the amount of other salt you add to the dish. This is also why, although you can use garlic powder in place of garlic salt, you should not do the reverse due to the salt content.

Granulated Garlic

Image by Enotovyj from Pixabay
  • Like garlic powder, this is made from fresh cloves that have been dehydrated and ground up. What makes it different is that it has not been ground as finely as garlic powder.
  • Because it is less likely to clump than garlic powder, it is better than garlic powder in various liquid dishes such as soups, stews, and salad dressings.
  • It is also better in longer cooking dishes as there is more time for the granules to hydrate.

Minced Garlic

  • This product is minced while fresh and then dehydrated and packaged.
  • The garlic pieces will be larger than granulated garlic.
  • Once again, it is better when cooked in a dish with enough liquid and time to rehydrate the granules.

Roasted Garlic

  • Besides the other products, some companies also offer a roasted variety.
  • It might be in the form of a powder or granulated dried garlic.
  • Roasting garlic tames the pungency of fresh garlic and adds a sweet note.

Cooks Country compared fresh garlic to dried garlic products in a Caesar salad and garlic bread. They found minimal differences in the salad, probably due to the other strong ingredients in the dish. There were more notable differences when used for garlic bread. Fresh garlic had the strongest flavor while the others were felt to be muted and artificial. Garlic salt was especially disliked. They concluded that if you want the garlic flavor to be predominant, go for fresh. If it is just a background flavor, you can use powdered garlic, just not garlic salt.

Favorites among taste testers varied.

  • America’s Test Kitchen liked Morton & Bassett.
  • The Kitchn preferred Trader Joe’s.

As mentioned above, none of these products are a great substitute for fresh garlic. However, here are some recommendations for those who do want to substitute when they do not have fresh garlic.

  • For one fresh clove, the recommendation for the amount of garlic powder to use varies from ⅛ teaspoon to ½ teaspoon.
  • Because of the larger sizes of granulated and minced garlic, you will want to use more of those products.
  • If you want to substitute granulated garlic for garlic powder, use double the amount called for.
  • Do not use garlic salt in any of these substitutions as it will not only provide less garlic flavor but could lead to an overly salty dish.

If you wish, you can make your own garlic powder. Here is the basic method.

  1. Separate the fresh cloves and remove the skins.
  2. Cut the cloves into thin slices and place them in a food dehydrator in a single layer.
  3. Alternatively, place the slices on a cookie sheet and put them in a 150°F oven.
  4. When the garlic is dry, you can crush it in your hands, and it will crumble.
  5. Allow the dried garlic to cool, and then grind it in a spice grinder or mortar/pestle.
  6. Store in an airtight container.

Do I have dried garlic powder in my spice rack? Yes, but I must admit I rarely use it. I do like it in a couple of recipes, but other than that, I do not reach for it. How about you?

Cooking Tips · Ingredients

Chorizo – Know which type to use

When I see a menu item or a recipe with Chorizo as one of the ingredients, I am all in. Chorizo is not monolithic, though. There are different types, and what those are is the subject of this Cooking Tip.

Chorizo originated in the Iberian peninsula (Spain and Portugal) and is usually made from pork. Initially, it wasn’t red, but when Europe discovered smoked paprika in the 16th century, it became a staple in chorizo.

There are different ways to categorize chorizo, but the main one is Mexican versus Spanish. Because they are quite different, we cooks need to know why.

Mexican

Image by Quidec Pacheco from Pixabay
  • Mexican chorizo is raw, ground pork (sometimes beef) seasoned with spices such as coriander, paprika, chili powder, chili peppers, dried herbs, and garlic.
  • It is sold in the fresh sausage section of the market, where you can find items such as breakfast sausage or brats.
  • It is often sold in links but can be found in bulk.
  • Since this chorizo is raw, it must be cooked before eating.

There are two categories.

  • Classic chorizo is made of pork or beef and contains, among other spices, chili and vinegar.
  • Chorizo Verde (green chorizo) contains chili (often green), tomato and green herbs such as cilantro and parsley. It may also contain tomatillos.

Spanish

Image by arturo larrazábal from Pixabay
  • Spanish chorizo is usually a cured sausage with a texture similar to salami.
  • It is made with cured or semi-cured chopped and smoked pork and seasoned predominantly with smoked Spanish paprika. Other ingredients include herbs, garlic and white wine.
  • It will be sold in casings that might be short or very long.
  • It will be found in the cured meats department.
  • If cured, it is not necessary to cook before eating. However, if semi-cured or fresh, it must be cooked before eating.
  • If cooking the cured type, it is best to remove the casing as it can become tough.
  • There are various ways to categorize Spanish chorizo.
    • Curing state
      • In the average US market, you will find it in a cured form.
      • In some specialty markets, you may find it semi-cured or raw.
    • Location/Shape
      • In Spain, every region has its own style. These will vary based on the ingredients and shape of the finished sausage.
      • Almost all of them will contain Spanish smoked paprika, which is what results in the red color. Other common ingredients are garlic and white wine, although some locales include black pepper, oregano, thyme, or nutmeg.
      • The shape can vary from rope-like to horseshoe-shaped, and they will also vary in length and diameter.

In the typical US supermarket, you will almost surely be able to find Mexican chorizo. You may or may not find the Spanish type. When you do, your choices will probably be limited to one variety or, at most, two. For the other types, you will need to check a specialty market or search out online sources. There are other chorizos but they, too, are typically described as a Spanish or Mexican type.

Portuguese chouriço

  • This is similar to Spanish but contains less paprika but abundant garlic and red wine.

Chaurice (Louisiana, Creole, Cajun cuisine)

  • Another Spanish-style chorizo but with different spices.
  • Typical spices include chile, cayenne, green onions, garlic, thyme, celery, parsley and bay leaves.

Colombian chorizo

  • This Mexican-style chorizo is less spicy and contains less paprika than many.
  • It also usually contains green onion, cilantro, garlic, and vinegar.

Argentine

  • As Italian flavors inspired this, it often includes herbs such as oregano and thyme.
  • It may also contain garlic, nutmeg and wine.

Filipino Chorizo de Cebu

  • This unique style of chorizo is spherical in shape.
  • It is a vibrant red color, caused by the inclusion of annatto. Another ingredient that results in its characteristic flavor is anise liqueur.

Goan chouriço

  • Another type of Portuguese chouriço that has Indian notes.
  • This sausage is hot and spicy with red chili, ginger, cloves, pepper, cumin, turmeric, cinnamon and vinegar.

How to use Chorizo

Mexican

  • Typical dishes that call for Mexican chorizo are tacos, tortas and scrambled eggs.
  • Cook’s Illustrated recommends using it as a substitute for taco seasoning. They add it to ground beef to give a spicy and complex flavor. Because of the high fat content of Mexican chorizo, they recommend using 90% lean ground beef.
  • A more unusual recommendation by them is making Chorizo Bolognese. They substitute Mexican chorizo for ground beef in a 1:1 ratio. They testify that this gives the flavor of a long-cooked Bolognese but in much less time.

Spanish

  • The cured variety is typically used for snacking or on a tapas plate.
  • One exciting way to prepare it is in the recipe for Chorizo Lollipops.
  • It may also be used in soups and stews.

Suppose you have a recipe that calls for chorizo but does not state what Image by tove erbs from Pixabaykind. Just take a closer look at the recipe. If the flavors are more Mexican, that is probably the type that should be used. Also, look at how it will be used. If the meat is to be cooked, go for Mexican. If you are chopping, slicing or serving raw, go for Spanish.

Are you a fan of chorizo? I prefer the Mexican style, but it can be very spicy at times. Different brands vary in spice level, so you need to find the one that works for you. If you want to throw a fun tapas party, Spanish-cured chorizo will be a wonderful addition.

Cooking Tips · Ingredients · Techniques

Roasted Red Peppers – Jarred or Homemade?

Image by Hans from Pixabay

Roasted red peppers are a delicious condiment and a crucial ingredient in many recipes. They are not hard to make, but what do you do if you don’t have any red peppers in your kitchen? Are jarred roasted red peppers a suitable alternative? That is the subject of this Cooking Tip.

Red peppers are a type of sweet pepper. They are wonderful raw or cooked in many different savory dishes. A favorite way of using them is roasting them. There are various ways of doing this in your kitchen.

Oven method

  • Preheat oven to 500°F.
  • Line a baking sheet with foil.
  • Wash the peppers and place them on the baking sheet.
    • Many people will cut them in half, remove the seeds and ribs, and then place them flat on the baking sheet.
    • Many others like to roast them whole as they feel you are less likely to get burned edges. They also find precut roasted peppers more difficult to peel.
  • If whole, rotate the peppers every 10 minutes.
  • Roast until charred on all sides and the skin looks wrinkled, 30-40 minutes.
  • Once charred, remove the baking sheet from the oven and allow the peppers to cool before peeling. Placing them in a covered bowl, plastic or paper bag, or even wrapping them in the cooking foil causes the peppers to steam, resulting in a softer texture. Many say it also makes them easier to peel.
  • Leaving them uncovered to cool will give you a firmer texture.
  • When cool, remove the stem and seeds, peel them, and use them in your dish as directed.

Grill pan or dry cast iron skillet

  • Preheat the pan until very hot.
  • Place the peppers on the pan and cook, turning as they char.
  • Finish as in the oven method.

Directly over a gas flame

  • You may also roast the peppers using the flame of your gas cooktop.
  • Using tongs, hold the pepper directly over the flame, turning until all sides are charred.
  • Finish as in the oven method.

Broiler

  • Cut the peppers to lie flat, removing the stem, seeds and ribs.
  • Heat the broiler with the rack 2½ to 3½ inches from the broiler element.
  • Line a baking sheet with foil and lie the peppers on the sheet pan.
  • Broil until the skin is charred but the flesh is still firm, about 8-10 minutes, rotating the pan halfway through.
  • Finish as in the oven method.

Grill

  • You may also roast them on a grill, which is the method that will result in the most robust smoky flavor.

Jarred peppers are already roasted until they are charred and then peeled. They are shelf-stable until open. Are they a suitable alternative to homemade ones? Most chefs would say yes in certain preparations.

Make them yourself if you want to put them in salads, on a pizza, or on an antipasti plate. However, if you will be pureeing them into a soup or a sauce, the jarred variety will work fine. Just be sure that you like the taste of them and that you check for any ingredients that might have been added to the jarred peppers.

Supermarkets carry various brands in my area. Here are the ingredient lists for these brands. Note that some contain sugar, and one even contains vinegar.

Mt Olive

  • Roasted red bell peppers, water, salt, sugar, citric acid

Mezzetta

  • Peppers, water, sea salt, citric acid

Delallo

  • Red bell peppers, water, salt, brown sugar, citric acid, calcium chloride

Safeway’s Signature Select

  • Roasted red peppers, water, salt, citric acid, calcium chloride

Walmart’s Great Value

  • Roasted red peppers, water, salt, citric acid, calcium chloride

Trader Joe’s Roasted Red Peppers

  • Red peppers, water, sea salt, red wine vinegar

I looked for taste tests on jarred roasted red peppers. There were only a handful and they disagreed on which brand was best. Another problem with taste tests is that they often taste different brands, making it hard to compare results.

America’s Test Kitchen tasted them plain and in roasted red pepper soup. For plain, the tasters preferred firm, smoky and sweet peppers and those that were packed in a brine of only salt and water. Bottles that contained other ingredients such as vinegar, garlic and olive oil were felt to have an interesting flavor, but they also thought that the vinegar masked the red pepper flavor. In soup, the texture was not important, but tasters still preferred sweet and smoky ones. Those packed in vinegar gave a sour note to the soup. Their two preferred brands were Dunbars and Cento. Further down on their rating was Divina. They did not recommend Mt Olive or Mediterranean, among other brands.

Another taste test showed that Divina came out on top. Looking at the brands America’s Test Kitchen also tasted, they did not like Cento. You will note that this was one of the two preferred brands in the testing by America’s Test Kitchen.

Because there are not many taste tests and the above two are inconsistent, I recommend that you just do your own taste test and find one you like.

Whether you make your own roasted red peppers or buy jarred ones, what do you do with them? Here are a few ideas.

  • Red pepper sauce – puree with or without additional seasonings. Use on pasta or meat.
  • Romesco sauce: Pulse in a food processor with olive oil, sherry vinegar, toasted almonds, garlic, salt and pepper. Serve with raw veggies or crackers.
  • Make a soup.
  • Use on an antipasti platter.
  • Add to salads.
  • Use as a pizza topping.
  • Make a delicious twist on hummus.
  • Make a red pepper pesto.
  • Use in a quiche or scrambled eggs.
  • Throw in a summer veggie tart.

There is also a difference in cost between making your own and buying the jarred variety. Currently, in my area, one fresh pepper costs $1.59. The jarred ones vary from $2.15 for a 12 oz jar to $4.49 for a 16 oz jar. The first is $0.18 an ounce and the latter $0.28 an ounce. My fresh red pepper weighed 8 ounces. Not accounting for the weight of the peel, seeds and ribs, that price came to about $0.20 an ounce. Of course, with the fresh ones, there is also the cost of the foil, the power to run the oven as well as your time. Considering all of this, we can say that there is not a huge difference in cost between making your own and buying the jarred ones.

Roasted red peppers will last in the refrigerator for a week or two. For longer, freeze them for up to 3 months. I have a bottle in my refrigerator right now that I want to use up. I will be making a pasta sauce. One choice uses red peppers, parmesan cheese, green chili and cilantro. The other one uses peppers, garlic and feta cheese. Which sounds better? What about you? What will you make with your roasted red peppers?

Cooking Tips · Ingredients

Garden Herbs – Culinary, Medicinal or Both?

I love to read historical fiction. One aspect that has always fascinated me is when the characters turn to herbs for medical treatment. Of course, they did not have the medical miracles in terms of drugs, equipment and other therapies that we have today. I sometimes think that modern medicine has pushed herbs so far to the side that people are not aware of some of their medicinal qualities. That is the subject of this Cooking Tip.

Image by gate74 from Pixabay

I have written about the culinary use of fresh herbs and provided more detailed tips on some specific herbs. Those tips were all about using these herbs in the kitchen.

This discussion will only touch on a few of the most common herbs. There are infinitely more out there that I do not include. This post is also not intended to be medical advice, only a general discussion. It’s crucial to exercise particular caution, especially with pregnant women, those with serious illnesses, children and anyone on prescription medication. Your safety is paramount, so please consult your medical professional before instituting any herbal remedies.

This blog post does not provide a comprehensive guide on how to use these herbs. They can be prepared in various forms, such as tea, infused oils, vinegars, tinctures, salves, lotions, creams, ointments, and poultices. For detailed instructions, I recommend referring to publications by trained herbalists. Additionally, this discussion focuses on mild health concerns. For more serious ailments, it’s best to consult your physician.

We all know herbs are delicious and do wonders in our kitchen. But why do some think there is a place for herbs outside of the culinary world? The answer lies in their long-standing history. Herbs have been used in a medicinal way for health and wellness for thousands of years. Also, there is scientific research on many herbs, although much more needs to be done.

In general, herbs are said to be helpful in a variety of ways. They provide significant amounts of vitamins, minerals and antioxidants. Some herbs are felt to strengthen certain bodily systems, such as the digestive and immune systems. They can possess antibacterial, antiviral, antifungal and antioxidant properties. Some herbs are sedating, while others are stimulating.

You might say that may be true, but that was before all the advancements of modern medicine. Why would I want to use them now? I like the approach of one herbalist who stated that rather than thinking of herbs as a substitute for a prescription drug or therapy, consider them a complement to that treatment. Let’s take a look at some of these herbs in alphabetical order.

Basil

  • Basil has antibacterial qualities and contains vitamins A, C, calcium, and iron.
  • Basil essential oil is used in aromatherapy to treat mild depression and ease overworked muscles. It should only be applied externally and should always be diluted before applying to the skin. Basil essential oil should never be used internally.
  • Basil infusions may help with dyspepsia, gas, bloating and nausea. Some say just chewing on a leaf may ease indigestion or gas.
  • Basil tea is thought to reduce symptoms associated with a cold or flu and be a pain reliever.
  • Making a poultice of crushed leaves can treat insect bites and skin irritation.

Bay

  • An infusion made with bay leaves may help to stimulate appetite and settle one’s stomach.
  • The infusion may also be applied to the scalp to relieve dandruff.
  • The essential oil can be used during a massage to relieve sprains and joint pains.
  • Add a decoction to bath water to tone skin and relieve aches.

Bee Balm

  • This herb is also known as horse mint, Oswego tea and wild bergamot.
  • As a soak, it may be helpful for athletes’ foot and nail fungus.
  • It has some antimicrobial and anti-inflammatory properties and may ease respiratory symptoms from the cold and flu.
  • It is also suggested for indigestion and nausea.

Borage

  • A Roman author and philosopher who lived AD 23-79 claimed it worked as an antidepressant. Experts today feel it can calm anxiety and mild nervous disorders.
  • It can be used to treat eczema, premenstrual symptoms, and fever.
  • It has expectorant qualities and, thus, can help alleviate cough.
  • Its anti-inflammatory properties aid in treating bug bites, bee stings, bruises, and rashes.

Calendula

  • During the Civil war, this herb was used as an antiseptic and to stop bleeding and speed the healing of wounds.
  • It can relieve the itching from bug bites and possibly help with painful skin conditions caused by radiation treatment. It is felt to have skin-healing properties.

Catnip/Catmint

  • As a mild sedative, this herb may help with sleep and reduce anxiety.
  • It is also said to ease stomach cramping, promote digestion and stop diarrhea.
  • Poultices may reduce inflammation and swelling.

Chamomile

  • Known to contain antioxidants as well as possessing anti-inflammatory and antispasmodic effects.
  • A chamomile mouthwash is used to treat mouth ulcerations and oral pain.
  • It has skin-healing qualities, helping with conditions like chicken pox, eczema, and psoriasis. In these cases, it is usually added to a bath or lotion.
  • Chamomile tea is considered a mild sedative that can aid in treating insomnia.

Chives

  • Although this herb is not considered medicinal, it contains large amounts of vitamins A & C and healthful minerals.
  • It could be a mild aid to digestion and help with sore throats.

Dandelion

  • We may think of this as a weed, but it is known to have antibacterial and immune-boosting qualities.
  • It may help build bone strength due to high amounts of certain minerals.
  • It may also help to fight urinary tract infections.

Echinacea

  • We have all seen reports of how this herb can help us fight off colds or flu and reduce the severity of symptoms.
  • It also possesses anti-itch and anti-inflammatory qualities.

Garlic

  • Garlic is thought to help the viruses that cause colds and flu as well as being an expectorant.
  • In addition, it may have antibacterial and antifungal effects.
  • A garlic-containing hair rinse can ease dandruff. The recommendation is to apply at night and rinse out in the morning to remove the odor.

Ginger

  • The most known medicinal quality of ginger is as an anti-nausea agent. It is often recommended for travel sickness.
  • Besides nausea, it may have pain relief qualities. A compress made with hot ginger tea is said to be helpful for painful joints.
  • A compress of cool tea may ease minor burns and rashes.

Lavender

  • We have all probably seen lavender-containing sleep sachets and bath oils. That is due to its anti-anxiety, muscle relaxing and sedative properties.
  • It is thought to help alleviate nervousness, mild depression and insomnia.
  • It also possesses pain-relieving properties and is used as a headache treatment.

Lemon Balm

  • This is another aromatic herb that helps calm nerves, improve mood and aid sleep. It is felt to be one of the most effective herbs in reducing mild depression.
  • As a pain reliever, it can reduce menstrual cramps and headaches.
  • As for gastrointestinal effects, it may increase appetite and aid indigestion.
  • Just as with other aromatic herbs, it is used in aromatherapy to promote relaxation and rejuvenation.

Mint

  • It was used in medieval times to treat bad breath, dandruff, and other ailments.
  • Possesses natural antibiotic properties.
  • Aids in eradicating bad breath.
  • It is said to help alleviate nausea, indigestion, and gas. It is also thought to have an anti-spasmodic effect, helping with cramps.
  • The menthol content can help with sore throat and acts as a decongestant. Putting mint essential oil in a pan of hot water and inhaling the steam may help relieve congestion.
  • It has a mild sedative effect, making it helpful with mild anxiety and nervousness.

Oregano

  • This herb is considered an infection fighter due to its antiseptic and anti-inflammatory properties, as well as its significant antioxidant levels.
  • Tea made from the leaves and flowers may help coughs, colds, flu, indigestion, menstrual and muscular pain.
  • The leaves can also be used as a hot compress for skin conditions and joint pain.

Parsley

  • Good source of iron, calcium, vitamins A & C and possesses antimicrobial properties.
  • Applied topically, it could help reduce facial dark spots and soothe chapped skin, bug bites, and bruises.
  • It may give gastrointestinal support and alleviate nausea, vomiting, indigestion and gas.
  • It is said to promote estrogen secretion, leading to reduced menstrual pain.
  • Chewing on the leaves can sweeten the breath.

Tarragon

  • Medicinal uses of this herb are limited, but it is felt to improve digestive health.
  • It is rich in minerals such as manganese, iron, potassium and beneficial carotenoids.
  • In Chinese medicine, it is recommended to reduce inflammation.
  • The French will make a tarragon tea to reduce insomnia.

Thyme

  • It has antibacterial qualities.
  • The essential oil has been used for muscle aches and skin irritations.
  • When combined with honey, it could be effective for treating coughs and sore throats.

These are just a few herbs that may have some medicinal value. Whether or not they do and their efficacy level is certainly deserving of more scientific research. We should also be reaching for them to use in our kitchens. They may do more than just add flavor and interest to our dishes.

Cooking Tips · Ingredients

Foie Gras – Delicacy or Cruel?

Image by takedahrs from Pixabay

If you read much about French cooking, you will encounter the classic delicacy of foie gras. Besides being decadent and elegant, it is also controversial and polarizing. This cooking tip will explain what foie gras is and why there is this controversy. The first part of the discussion will define foie gras and its different categories. The controversy about foie gras will follow that.

Foie gras is the fattened liver of a duck or goose, but more commonly, a duck. It is produced by gavage, described as the force-feeding of ducks or geese through a tube inserted into their mouths and down the esophagus. This increased food intake leads to an elevated fat content and a distinctive flavor that is described as rich and buttery. The process is said to date from 2500 BC.

Foie gras is typically served as an appetizer or as a bread topping. Fruit flavors work very well with foie gras, particularly plums, grapes, and apples. Therefore, it might be served with bread and a fruit chutney.

There are different ways to categorize foie gras; they can be confusing and somewhat inconsistent from source to source. I will try to simplify it for you.

Foie gras entire (whole foie gras) refers to a whole liver made from one or two lobes. It may be raw or cooked with minimal seasoning, allowing the natural, rich flavors of the liver to dominate.

Foie gras is used for pieces of foie gras, not entire lobes, pressed together and seasoned.

Bloc de foie gras means reconstituted foie gras and refers to a cooked, formed block of which 98% or more is foie gras. One source likened the difference between this and “whole” foie gras to ground beef and a steak. Industrially produced Bloc de Foie Gras is actually a pâté made from minced foie gras and seasoning.

There are a few other products that contain foie gras plus other ingredients.

Pâté de foie gras: this must contain at least 50% foie gras. The liver is mixed with other meats, seasonings, and often some form of alcohol such as spirits or wine. The result is a spreadable, richly flavored paste that can be used on toast, crackers, or other dishes.

Parfait de foie gras: a parfait of foie gras is required to contain a minimum of 75% foie gras.

Mousse de foie gras must contain 50% or more foie gras. It has a creamy and airy texture due to being whipped either with just air or sometimes with dairy. Besides the lighter texture, the intense flavor is diminished somewhat.

Livers are also graded for quality.

Grade A livers are the best quality and are the largest at over a pound. They are firm, smooth, sweet smelling, consistent in color, with no blemishes. This is the type that a chef will prepare simply – seared, sautéed or in a terrine. It is also the most expensive.

Grade B foie gras will be smaller (under a pound) and somewhat softer in texture. They may have some minor surface defects and blood spots with more prominent veins. Although it has excellent flavor, chefs use Grade B in items such as pâté, mousse and terrines, where the blood content will dissolve with cooking.

Grade C is less prevalent than the other two and is generally not available on the retail market. It is often used to flavor and thicken sauces, although it can also be used in mousses and pâtés.

Now, let’s turn to a discussion of the ethics of foie gras production. According to Chowhound, the anti-foie gras movements started appearing in the 21st century, and the first country-wide ban (India) was in 2014. Since then, a few other European countries have followed suit with some level of ban. As you might expect, France is not one of those countries. Outside of Europe, bans are less common but are said to exist in Turkey, Australia, Israel, and Argentina.

Even in countries with bans, most still allow the importation of foie gras. India is one where even that is prohibited.

Different US cities and states have attempted to ban it, but these actions are usually challenged in court and are not always upheld. California has had more success in banning foie gras. In 2004, a ban on both sale and production was imposed. A court case forced the state to allow sales of out-of-state foie gras although the production is still banned. You will not see it in restaurants, as residents are still barred from ordering out-of-state foie gras and reselling it.

Why do some people and organizations seek bans? The following reasons are given.

  • The living environment for the birds is overcrowded and in cages.
  • The birds are force-fed more than they would naturally eat, causing their livers to grow multiple times their normal size.
  • The feeding method causes esophageal inflammation.
  • There is significant stress from the capture and insertion of the feeding tube.

Those who disagree with the bans give the following arguments.

  • Ducks’ throats are designed for swallowing rocks and eating whole fish, including fins, so the tube insertion is not traumatic.
  • The duck’s crop is made for stretching to hold food and stretching to several times its original volume.
  • Ducks lack a gag reflex.
  • Ducks have two pathways – one for breathing and another for eating.
  • There are good farms that use very humane methods. Some say all the US-based foie gras producers fall into this category. It is argued that one should not ban a product based on bad farms. There were three leading US foie gras producers. The ban forced a California one (Sonoma Artisan Foie) out of business. The two remaining ones are both in New York State.
  • Looking at Europe, there is the European Federation of Foie Gras.
    • Their objectives (taken verbatim from their website) are:
      • To promote foie gras, a thousand-year-old cultural and gastronomic tradition, and the profession of foie gras producer.
      • To develop common reflexions and proposals at European level on the various topics of interest to the sector.
      • To make European policy makers aware of the foie gras sector and, in particular, of its production methods.
      • To establish a continuous exchange of experiences and know-how among member countries for a constant improvement of practices.
    • The production method
      • There are two stages to foie gras production. You can read more on this page, but here is a summary.
      • The rearing stage—Birds are said to spend 90% of their lives outdoors during this stage.
      • The fattening stage—This amounts to 10% of the animal’s lifetime. They choose only healthy adult ducks or geese, and they are fed twice every 24 hours for about 12 days for ducks and 16 days for geese. According to Hudson Valley, the feeding time is only for a few seconds each time.
      • They note the “particular anatomical characteristics (possible alignment of the beak and neck thanks to the absence of cartilaginous glottis, the elasticity of the walls of the esophagus) which allow them to swallow large prey such as fish or frogs and predispose them to the fattening phase during the production of foie gras.”


The purpose of this Cooking Tip is not to take a side in this debate. It is to give you the information so you can decide if you wish to try this French delicacy and, if so, to provide you with the knowledge to know what to purchase.

Cooking Tips · Ingredients · Techniques

Smoothies – Friend or Foe?

Smoothies have never been a part of my daily routine. I suspect, though, that many of you do make smoothies regularly. They are one of those items that do not require a recipe. Instead, some general principles will help you make whatever smoothie you want. That, along with a discussion on the healthfulness of smoothies, are the subjects of this Cooking Tip.

Smoothies are thick, creamy beverages made by pureeing together fruits and vegetables with liquid and, at times, add-ins such as nuts and seeds. All smoothies start with two essential ingredients: a base and a liquid.

Popular ingredients include the following.

  • Fruits such as berries, bananas, apples, peaches, mango, avocado, pear, grapes and pineapple.
  • Vegetables might be kale, spinach, arugula, romaine, bok choy, Swiss chard, collards, wheatgrass, microgreens, cucumber, beetroot, cauliflower, or carrots.
  • Nuts and seeds could be in the form of nut butter, or items such as chia seeds, and flax meal.
  • The liquid can be as simple as water but might also be fruit juice, vegetable juice, milk, non-dairy milk, coconut water/milk, iced tea, or even cold brew coffee.
  • Dairy items such as cottage cheese or yogurt are common.
  • Sweeteners might include maple syrup, raw sugar, honey, pitted dates, simple syrup, fruit juice concentrates, stevia, ice cream, or sorbet.
  • Some people like to add nutritional and herbal supplements such as spirulina, bee pollen, matcha powder, protein powder, and powdered vitamin or mineral supplements.

There are different categories determined by the basic ingredients.

Image by Raul Florinto from Pixabay
  • Fruit smoothies usually consist of one or more types of fruit blended with fruit juice, water, milk, yogurt, or ice cream.
  • Green smoothies usually contain fruit for sweetness, but they also include leafy green vegetables in a larger proportion.
  • Protein smoothies usually consist of one fruit or vegetable, a liquid, and a significant protein source, such as Greek yogurt, cottage cheese, silken tofu, or protein powder.

Smoothies are popular because they are seen as healthy. They can be very healthy, but they also have some drawbacks.

Here are some positives about smoothies.

  • They usually contain a significant amount of healthy nutrients.
  • They help you to eat more fruits and veggies if you do not eat them in the whole form.
  • They are convenient and portable for those on the go.

Here are some of the cautions.

  • Sugar—The major problem with smoothies is that they often contain a significant amount of added sugar. This is especially true of commercially prepared smoothies, as opposed to homemade versions.
  • Calories – depending on the ingredients and the smoothie size, some can contain over 1000 calories, not exactly a low-calorie snack. The suggested serving size of a smoothie is 5 ounces, far less than most people consume.
  • Fiber—Although smoothies can contain a significant amount of fiber if you make them from whole foods, they still will not contain the same amount of fiber as if you were eating the whole foods without blending them.
  • Satiety—Although smoothies may be satisfying in flavor, they may be less so in satiety. It is typical for those drinking smoothies to become hungry again soon afterward, particularly if the smoothie lacks protein or fiber.

To make a healthier, more filling, and pleasant-tasting smoothie, follow this advice.

  • Choose whole fruit, not juice.
  • Add leafy greens. Research has shown that cooking the greens increases their mineral and antioxidant content. Therefore, steam or blanch them, puree them and then freeze them in ice cube trays. Once frozen, store them in a freezer bag.
  • Try to sweeten only with the natural fruit without adding any other sweeteners.
  • Increase the fiber content by adding oats, oat bran, psyllium husks, or chia seeds.
  • Include healthy fats by adding ground flax, chia seeds or flax oil. Alternatively, add nut butter or avocado.
  • Add protein in the form of yogurt or even a protein powder.
  • Blend the ingredients in stages. Most recommend blending the leafy greens and liquid together first, then adding the fruits and blending again.
  • Some will use ice to increase the thickness, but you may also use frozen fruit instead of ice.
  • Some like to make their smoothies using a 60/40 ratio. That is 60% fruits and 40% leafy greens. For example, 2 cups leafy greens, 2 cups liquid, and 3 cups ripe fruit.
  • Homemade smoothies are generally much healthier than ones you purchase in stores or cafes. You can control the amount of sugar in them and amp up the healthy ingredients. The most nutritious smoothies utilize whole foods, contain little or no added sugar, and include a balanced amount of carbohydrates, fiber, protein, and healthy fats.

As the weather is warming up, many people turn to smoothies. Just be aware of what you are drinking and, even if it is a healthful smoothie, it is only one part of a healthy diet that should rely more on whole foods rather than just smoothies.

Cooking Tips · Ingredients · Techniques

Hidden Gluten – Do you know where to find it?

Image by CatsWithGlasses from Pixabay

I do not have a gluten sensitivity. Nor do I cook for anyone who needs to avoid gluten. I was recently teaching a class where one of the recipes we were using called for chili powder. The only one I had contained flour. That might be surprising to those who pay no attention to gluten. Some call these “hidden” sources of gluten. I decided to write this Cooking Tip on those unexpected gluten sources. I hope it is helpful for those of you who may need to cook for others who need a gluten-free diet.

Gluten is a family of proteins naturally found in certain grains, such as wheat, barley, and rye. It gives bread its great chew and elasticity. Too much gluten can make baked goods tough; too little can mean a lack of structure. That is all most of us think about when we consider gluten. However, if you have celiac disease or even a gluten sensitivity, it can seriously impact your health.

We all know not to offer bread, pastries, or pasta to someone who needs to avoid gluten. However, gluten can be hiding in many other places of which we should be aware. This is not an exhausting list by any means. It does highlight some of the more common places where you wouldn’t expect to find gluten, but it can certainly be there.

Seasonings

As I mentioned above, gluten may be hiding in your seasonings. If it is a single spice or herb, it is most likely gluten-free. You have to be cautious when it comes to blends. If you are a regular reader of these Cooking Tips, you know I am a big proponent of making your own spice/herb blends rather than buying pre-made ones. See this Tip for more information. Besides the reasons given in that Tip, add this one – you can avoid putting gluten in these blends.

The main reason that wheat starch is put in some seasoning mixes is that it acts as an anti-caking and anti-clumping agent. Common examples of spice blends are curry powder, chili powder and Italian seasoning, although there are many more.

This is why you should pay attention to ingredient labels, which are required to list any gluten-containing ingredient. My favorite spice source is Savory Spice. They state in their website’s FAQ section that most of their spices/seasonings contain no gluten. They also list those details on the product pages.

One of the largest spice companies, McCormick’s, has this statement on its website, followed by a list of 13 different potential allergens.

We are aware of allergies and sensitivities and will always declare the[se] … ingredients on our label in the ingredient statement – they will never be hidden under the notations of “spices” or “natural flavors.”

If you buy other brands, be sure to check their product information as well as the product labels. Be wary of spices sold in bulk bins, as cross-contamination can easily occur with scoops or other items.

One comforting thought comes from celiac expert Shelley Case, RD. She writes the following on BeyondCeliac.org.

“A single serving of a ground spice is typically quite small (about 0.5 grams). So, if a spice had 160 ppm of gluten and an individual ate 0.5 grams of this spice in a meal, the amount of gluten consumed would be 0.08 milligrams (mg). Studies have found that a threshold level of less than 10 mg of gluten per day is safe for most individuals with celiac disease.”

Soy Sauce

Wheat is used in the traditional method of making soy sauce. This Tip talks more about that process. To avoid gluten but have a product with a similar taste, many people choose Tamari. That is the liquid byproduct formed during miso-making. It is thicker and richer than soy sauce and is made just with fermented soybeans but little or no wheat. Because of that, it is touted as a gluten-free soy sauce. However, not all of the brands are totally free of wheat, so you need to check the label.

Salad Dressings & Vinaigrettes

Some may use malt vinegar (another source of gluten), soy sauce or even flour. As always, check the label or, even better, make your own.

Processed deli meats

Some may contain gluten-containing ingredients, which are used as thickeners. Even if they do not, be wary of cross-contamination by the deli workers.

Oats

Many feel oats are a safe gluten-free food. However, there is some concern about cross-contamination when oats are grown in fields next to wheat fields. To be certain, only buy oats that are certified gluten-free.

Potato Chips/French Fries

Although potatoes do not contain gluten, seasonings often applied to them may contain malt vinegar and wheat starch. There is also the chance of cross-contamination if they are fried in the same oil as gluten-containing foods.

Marinades & Sauces

Many store-bought products in these categories contain malt vinegar, soy sauce or flour. Even sauces (homemade or in the restaurant) served with meat or veggies are thickened with a roux, which is generally made from butter and flour but can be made with gluten-free alternatives.

Sausages

Sometimes, sausages contain a binder made of flour-based ingredients.

Cooking Spray

Most are fine, but some brands can contain flour. Baking sprays are different and are purposely formulated with flour.

You need to become a label-reading expert. However, the words used will not always be flour or wheat. Here are just a few words that could signify gluten unless it states gluten-free.

  • Starch
  • Modified food starch
  • Hydrolyzed vegetable protein
  • Hydrolyzed plant protein
  • Textured vegetable protein
  • Dextrin
  • Maltodextrin
  • Glucose syrup
  • Caramel
  • Malt flavoring
  • Malt extract
  • Malt vinegar
  • Brown rice syrup

There are also apps to help you know if a food is gluten-free. One is Fig. You set it up by indicating what foods you want to avoid. Its search function will tell you which foods will be appropriate for you and in which stores you can find them. You can also scan the barcode to see if the ingredients match your dietary needs. The starter version is free. I have not tried this app, but it has good reviews. Another is Spokin, although it is only for Apple devices.

Many websites can be very helpful for people trying to avoid gluten and those of you who cook for them. Here are just a few.

You may not need this information the majority of the time you take to the kitchen. But, for those times you do, I hope you find this helpful.